How to Reconcile Bank Accounts
Automatic Reconciliation
ChurchTrac can reconcile an account for you. With the account's Auto-reconcile switch on, ChurchTrac reconciles the account each time you finish reviewing new transactions, once your register matches the bank's balance.
Automatic reconciliation works with uploaded PDF statements, OFX and QFX files, and Bank Link.
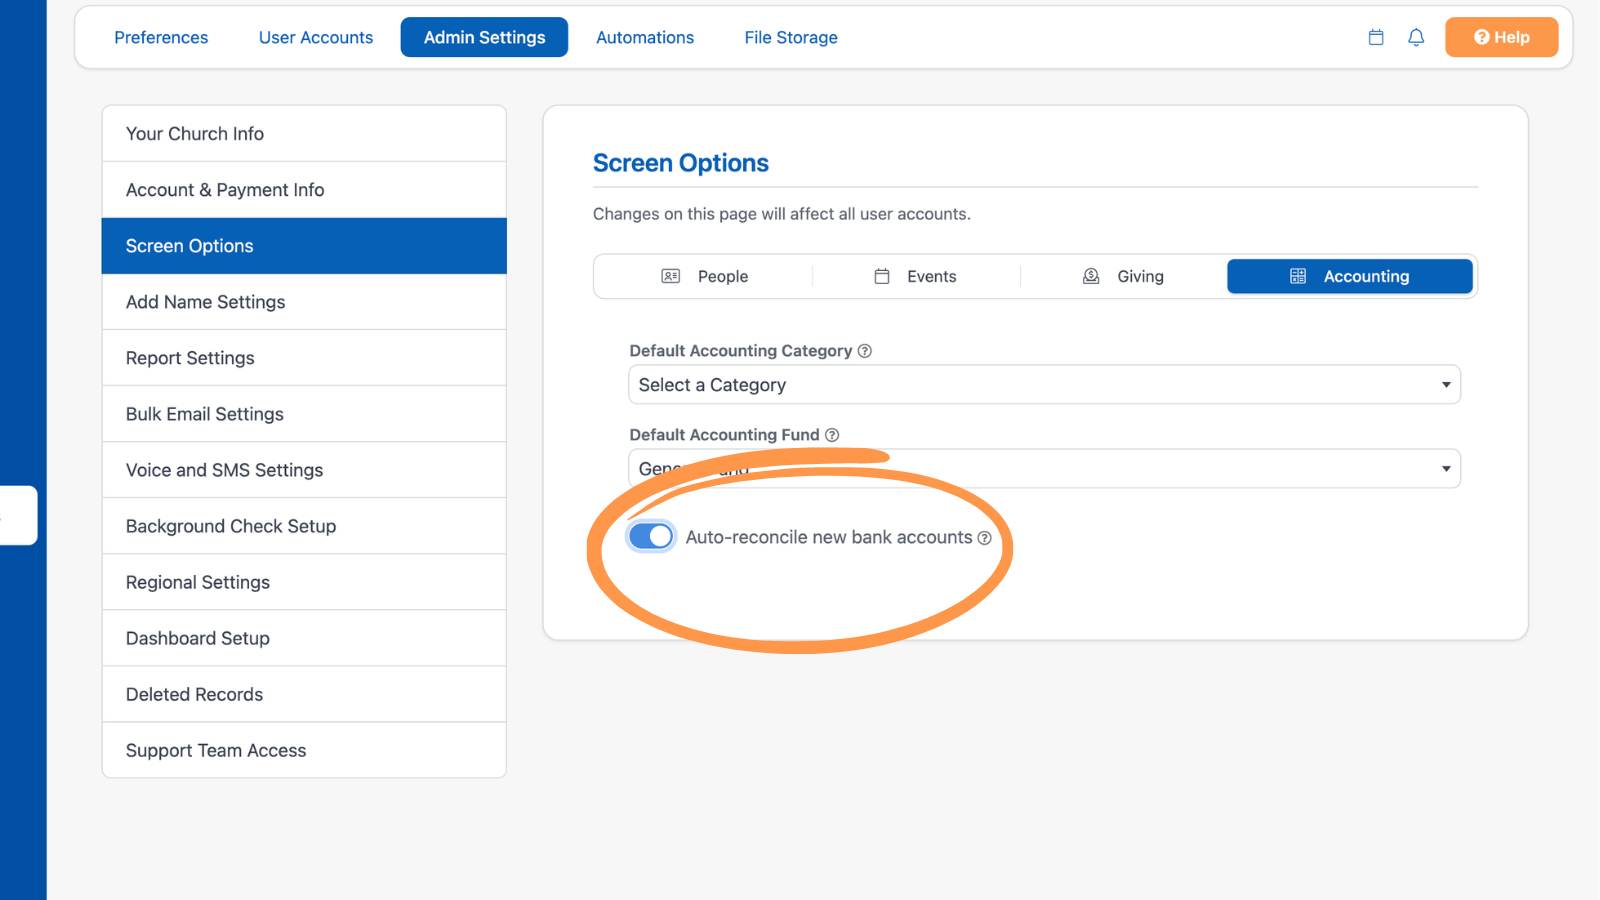
To turn it on: Go to Settings -> Admin Settings -> Screen Options -> Accounting -> Enable Auto Reconcile New Accounts.
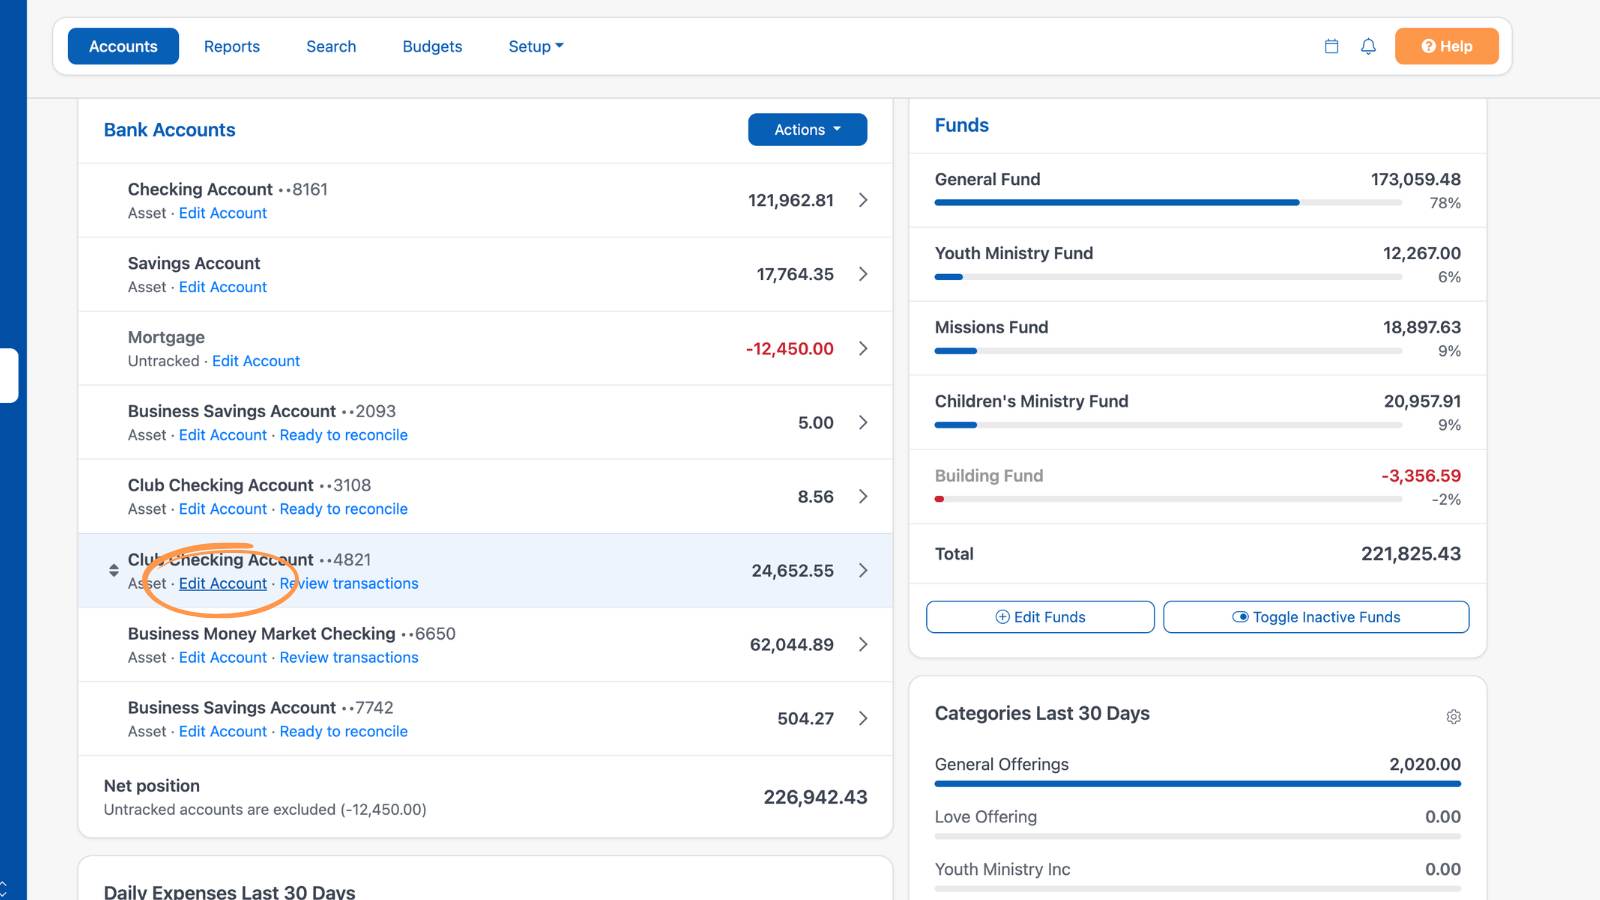
OR select Edit Account.
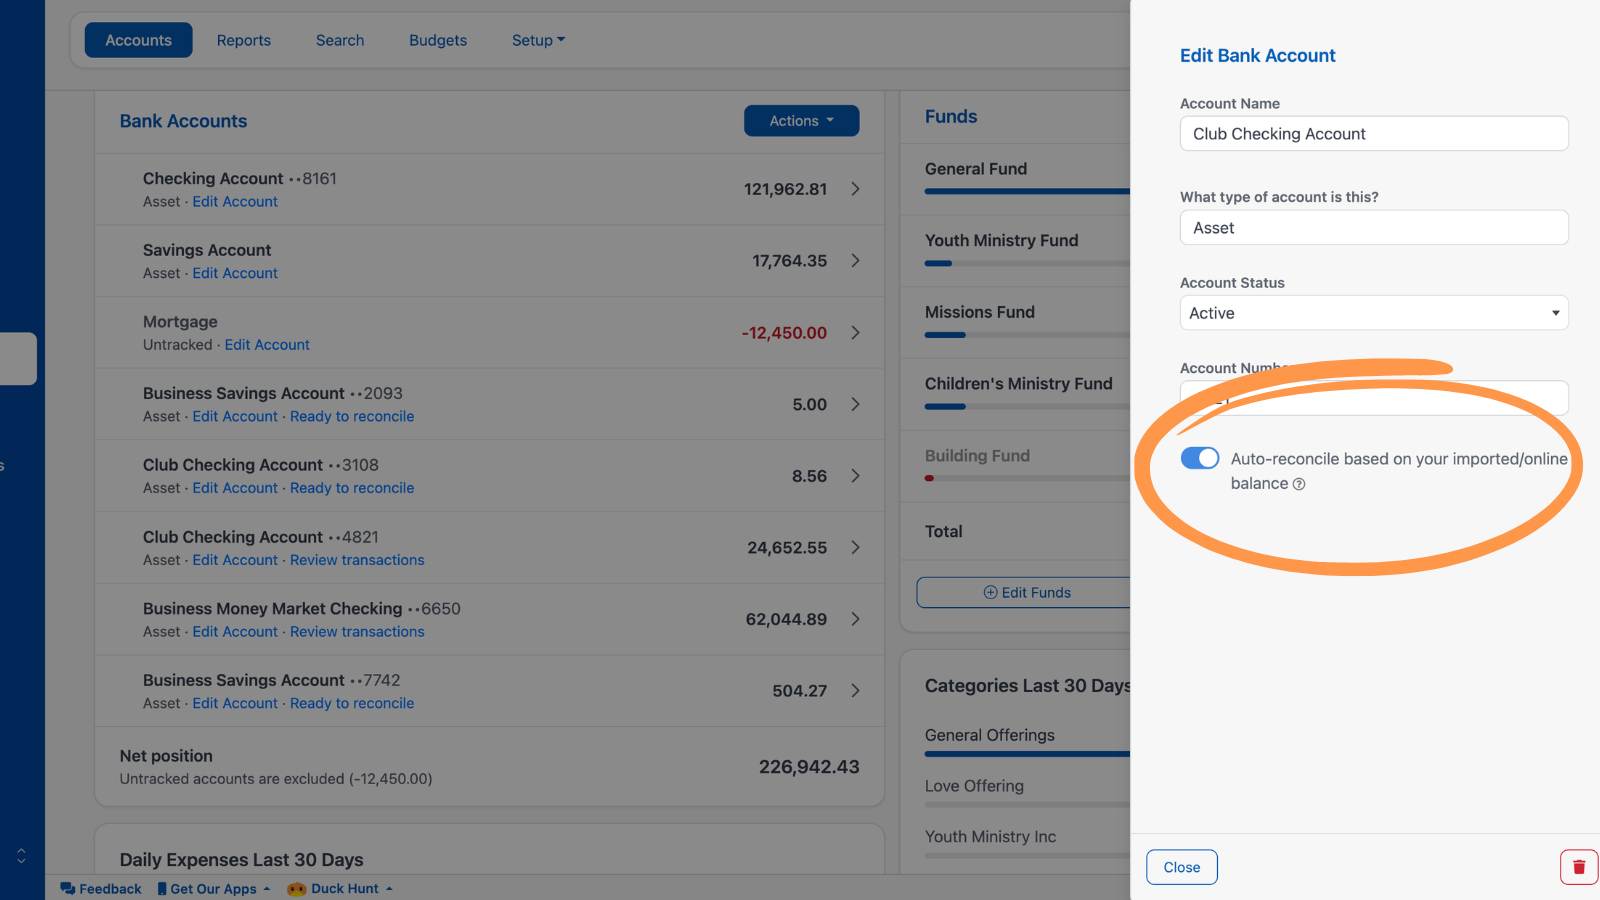
Then enable Auto-reconcile for each account. (It's off by default.)
If the account didn't reconcile, your register doesn't match the bank's balance yet. This usually means a transaction was skipped during review, an entry is missing, or the beginning balance is off. Use the manual steps below to find the difference.
Reconciling Manually
Reconciling works much like balancing your checkbook.
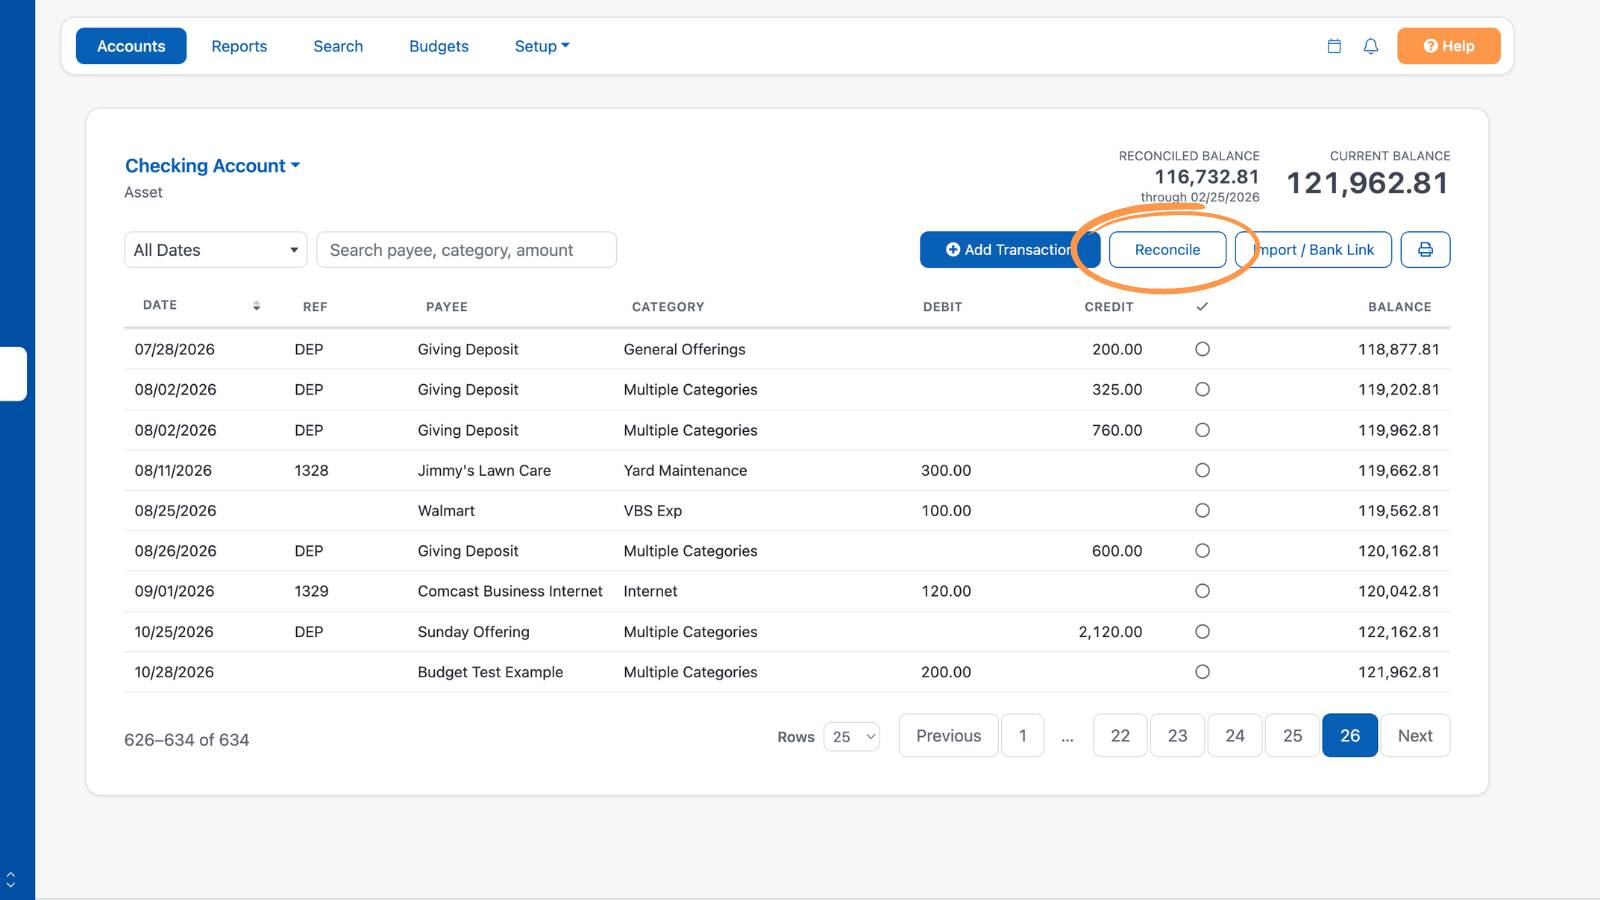
Step 1: Open the account's register and select the Reconcile button.
Pro Tip: After you add the transactions from an uploaded statement, the register shows which month was added (for example, "January added") with a Reconcile link next to it, and the Accounting dashboard shows "Ready to reconcile" for that account. Select either link to start reconciling.
Step 2: The Statement Opening Balance fills in automatically. It is the ending balance of your most recent reconciliation, or your beginning balance if this is your first reconciliation.
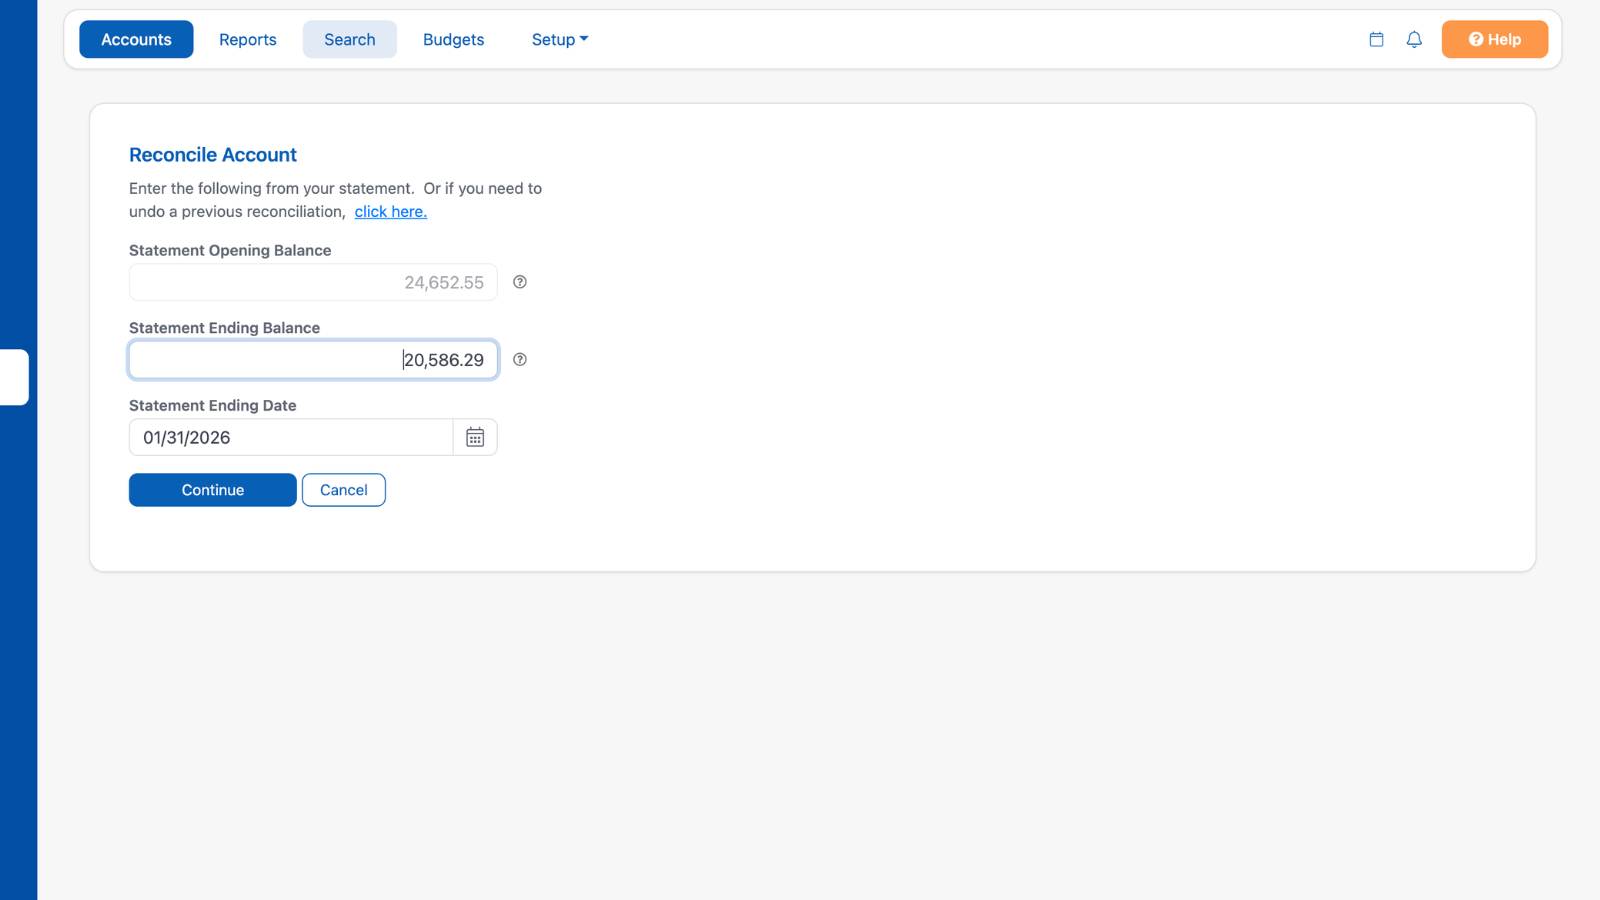
Enter the Statement Ending Balance and Statement Ending Date as they appear on your bank statement, then select Continue. If you started from an uploaded statement, these may already be filled in. Check them against your statement before continuing.
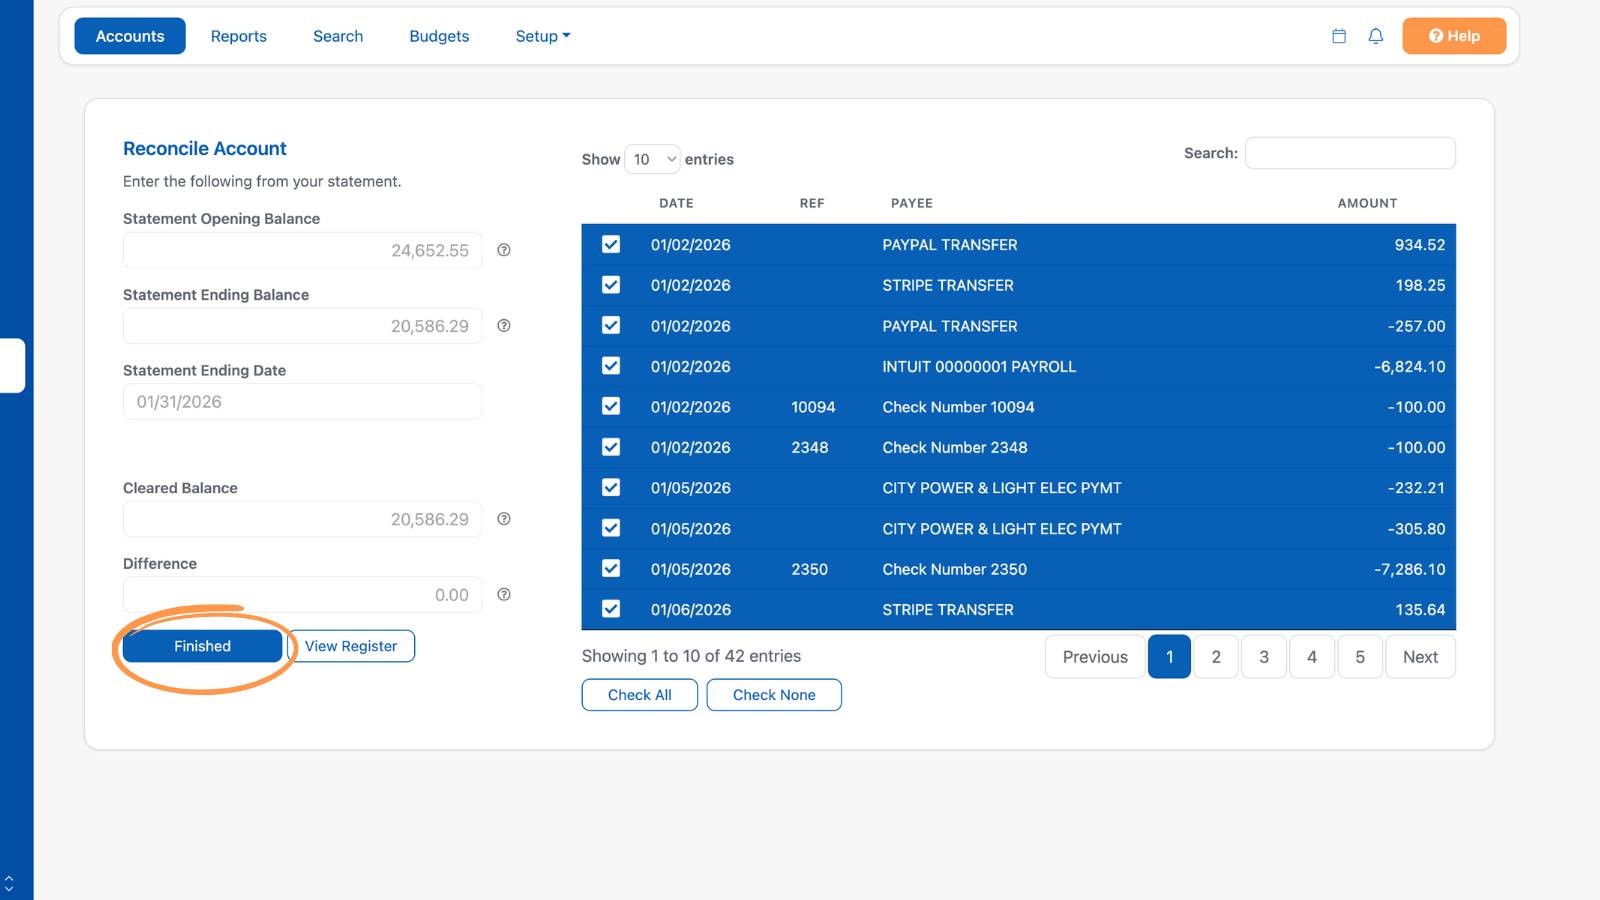
Step 3: Check off each transaction that appears on your bank statement. Use Check All or Check None to select or clear every transaction at once.
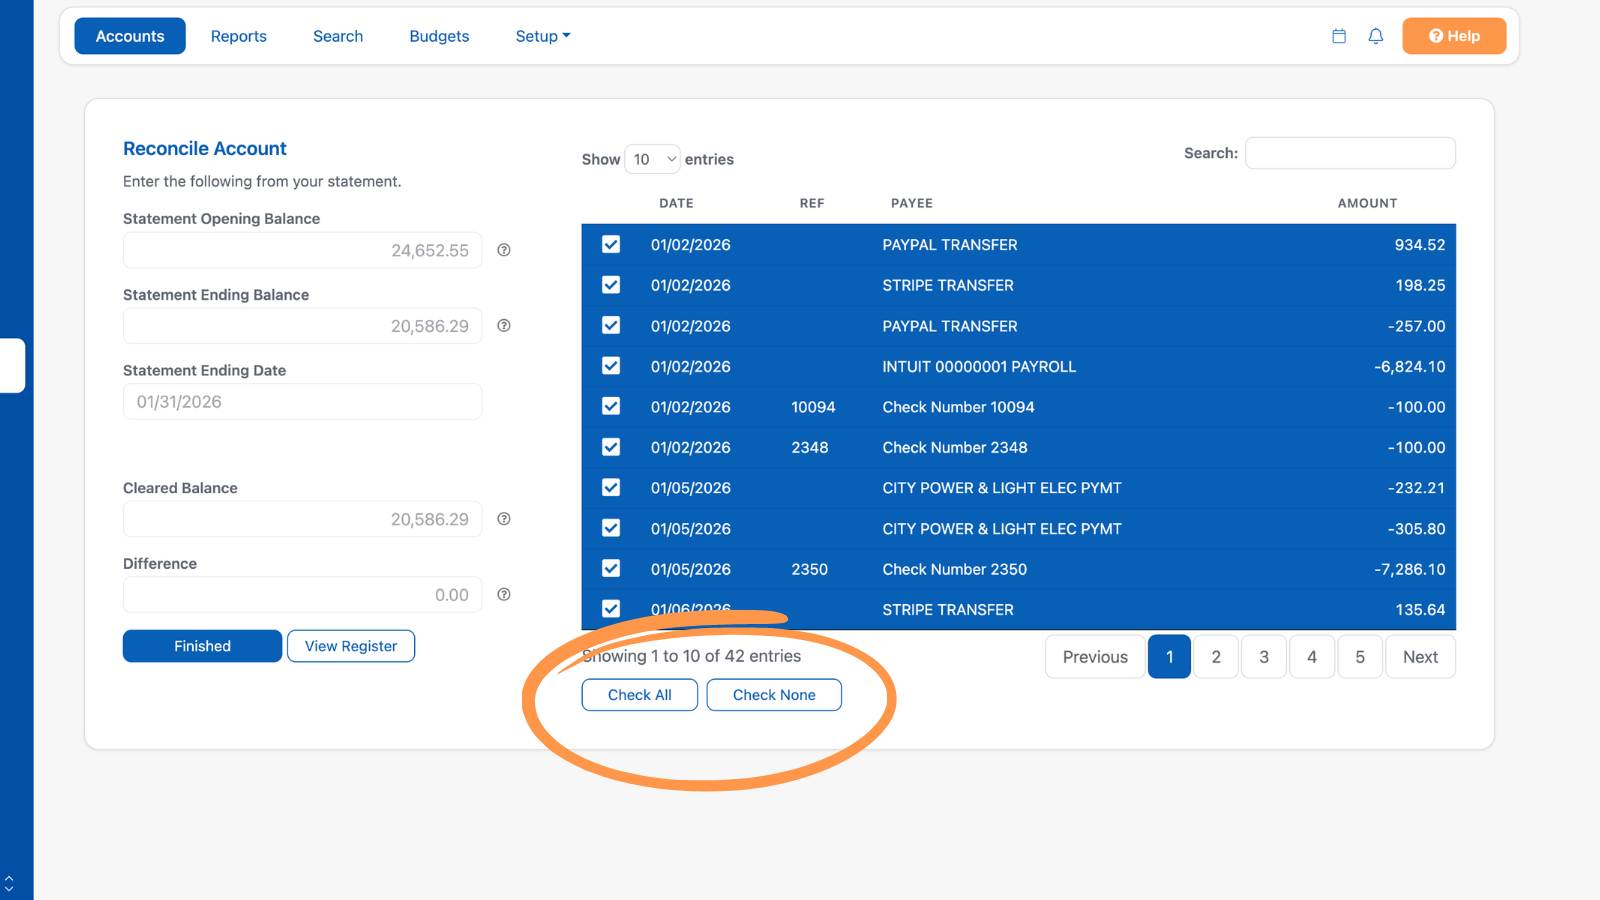
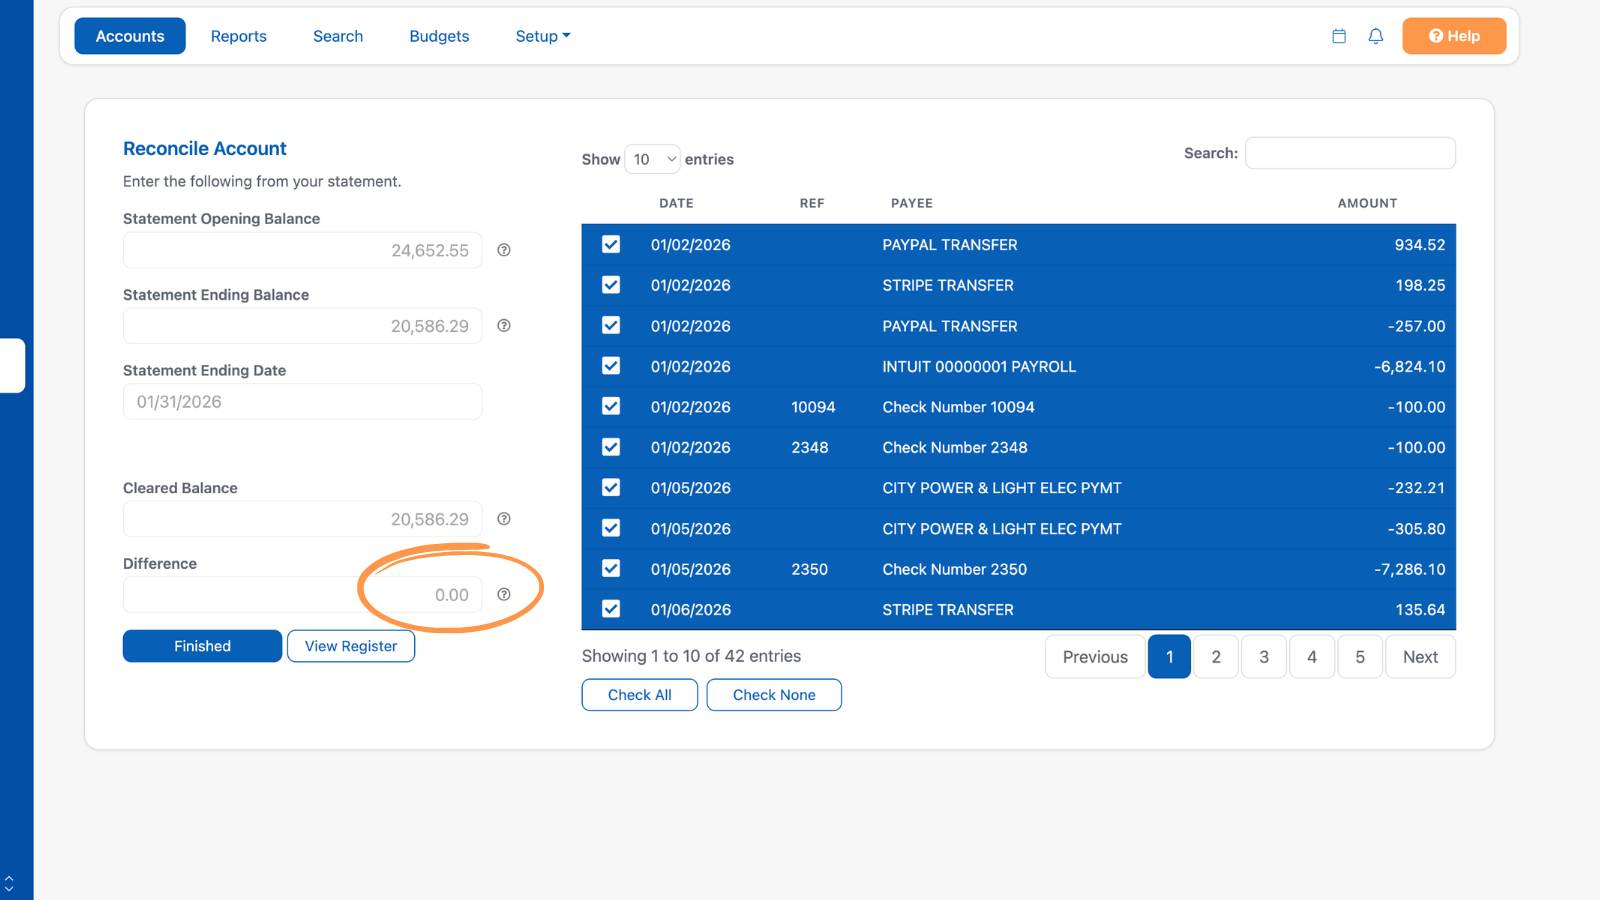
When you've checked each transaction, the Cleared Balance should equal your Statement Ending Balance, and the Difference should be 0.00.
If a transaction is missing, select View Register to go back to the account register and add it.
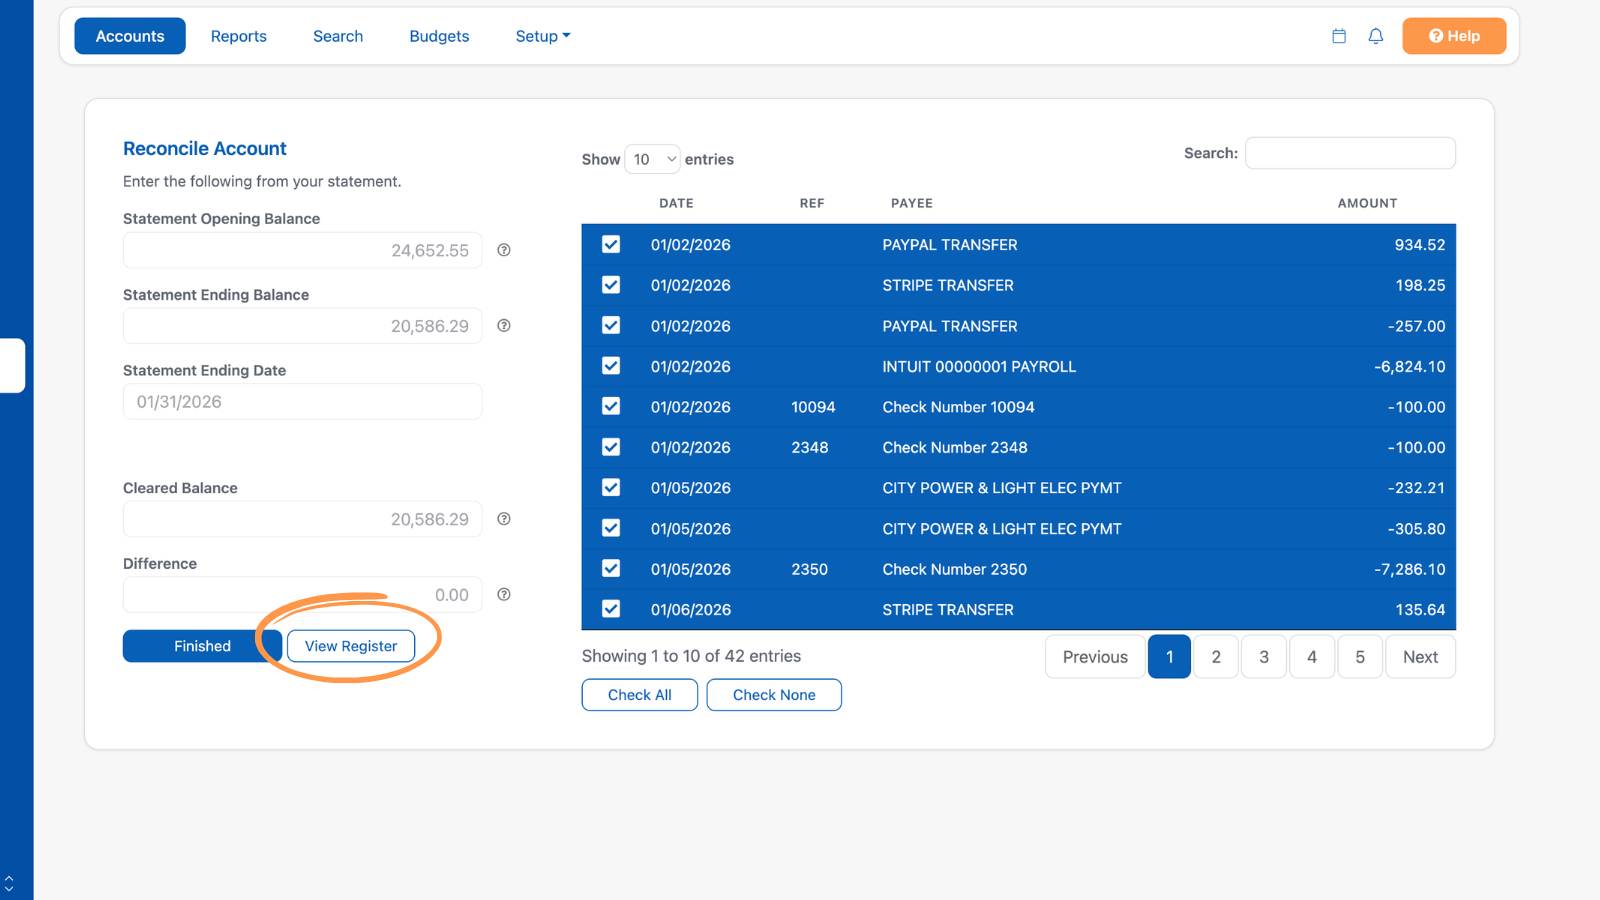
Then select Reconcile again to pick up where you left off. The new transaction will appear in the list.
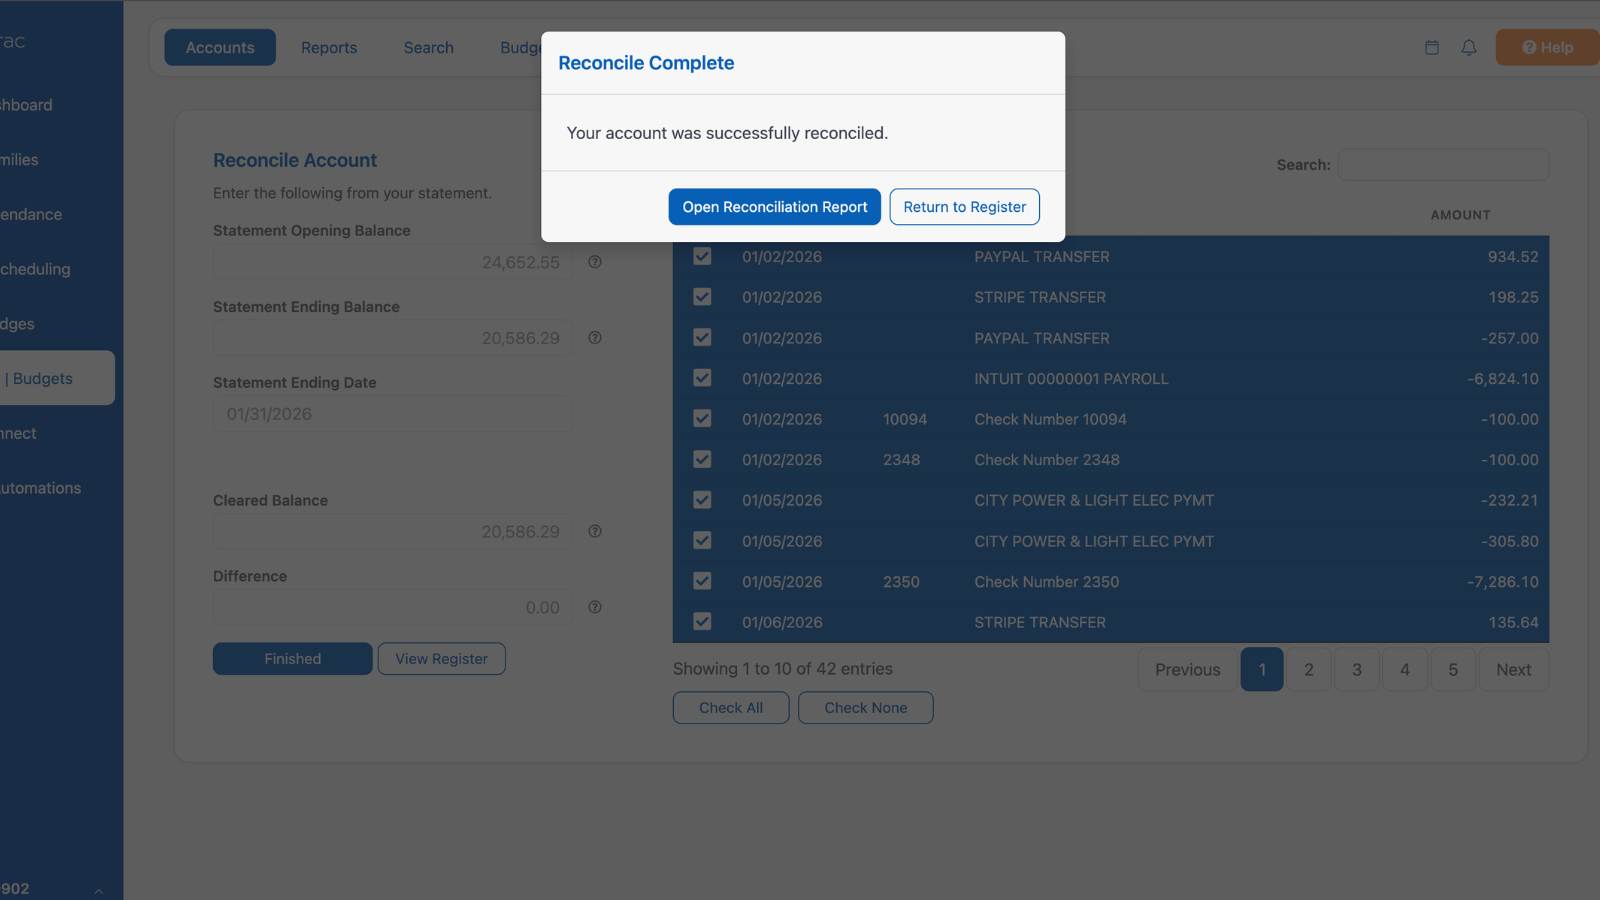
Step 4: When the Difference is 0.00, select Finished. The Reconcile Complete window confirms your account was successfully reconciled.
Select Open Reconciliation Report to view or print a record of this reconciliation, or Return to Register to go back to the account register.
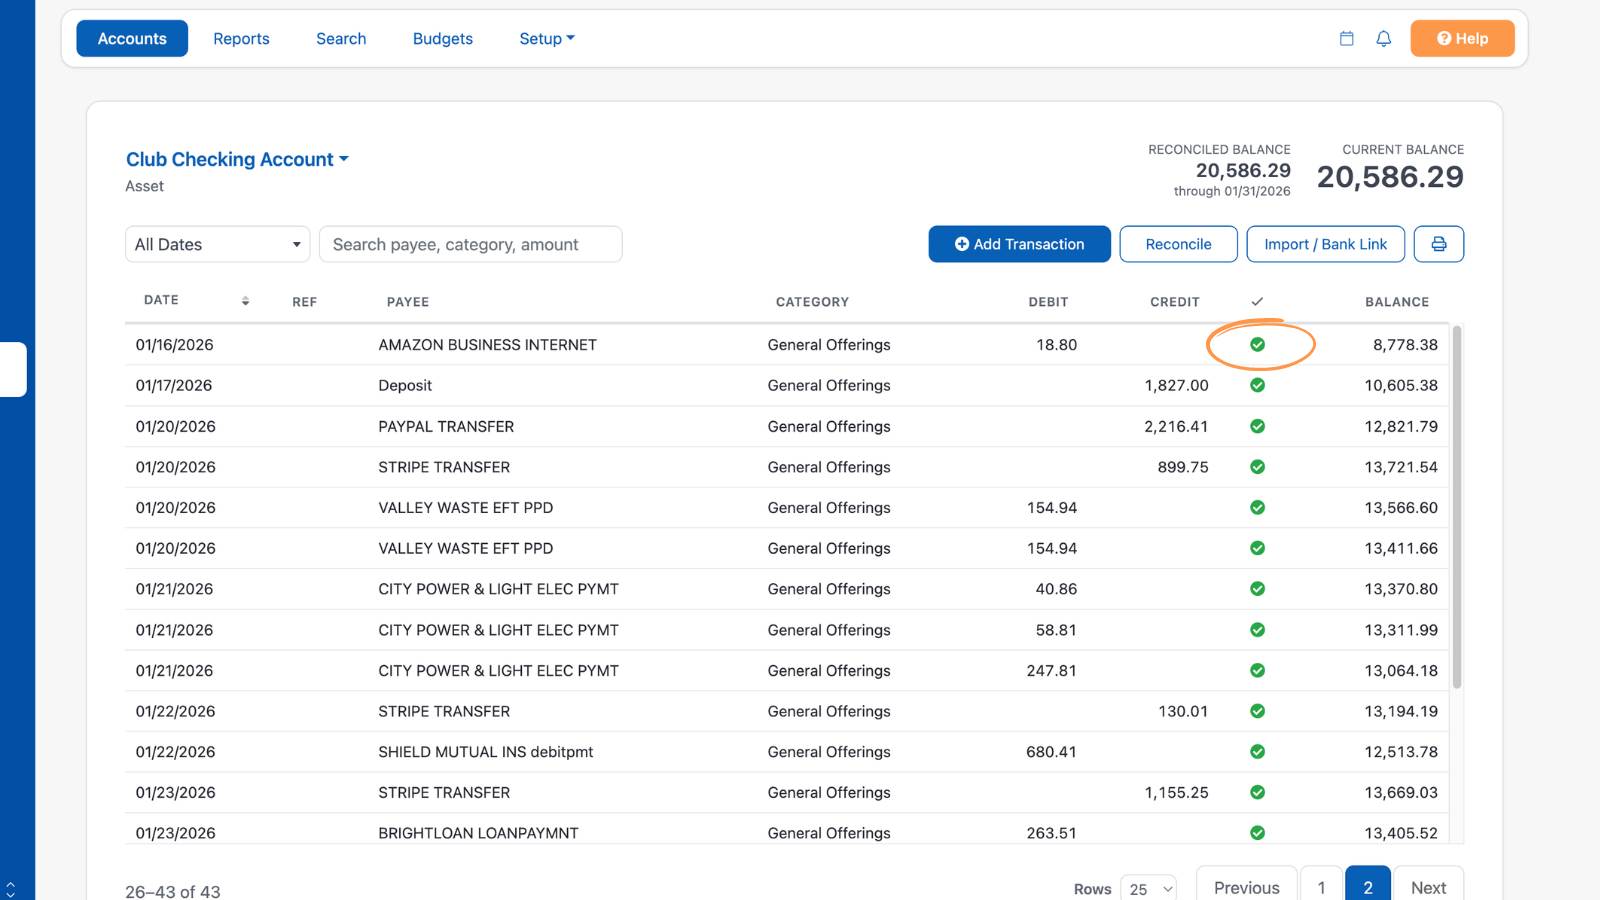
Each reconciled transaction now shows a green check mark in the register's check mark column.
Undo Reconciliation
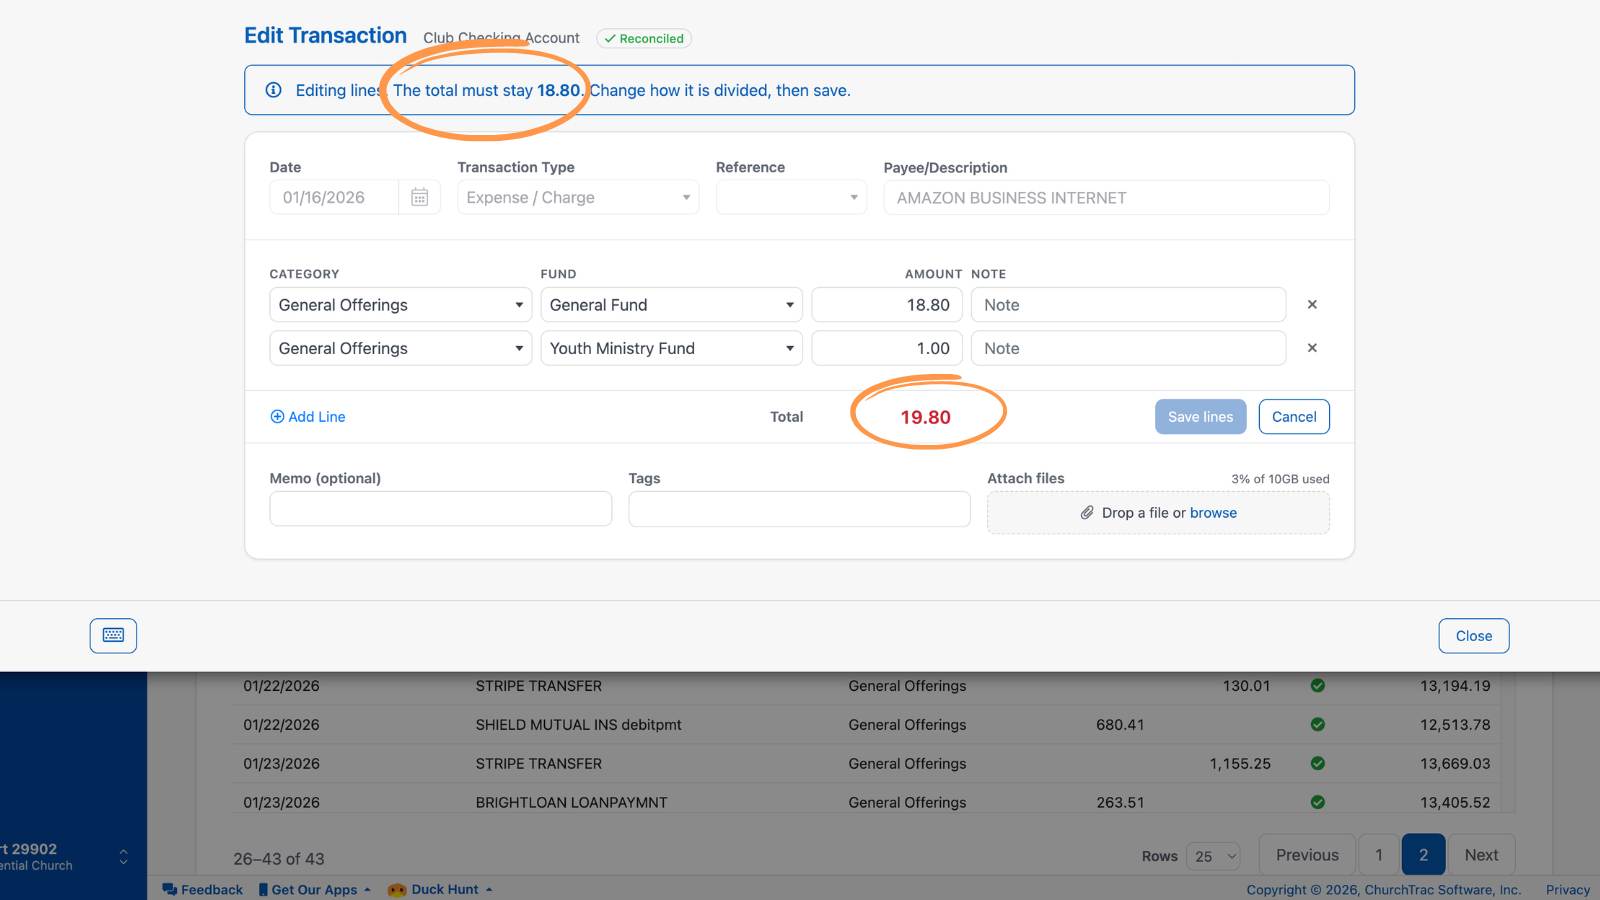
Pro Tip: You can change the category or fund on a reconciled transaction without undoing the reconciliation. Select the transaction in the register to open it. Change the Category or Fund on any line, or select Add Line to split the amount across more categories or funds. The lines must still add up to the original total. Select Save lines when you're done.
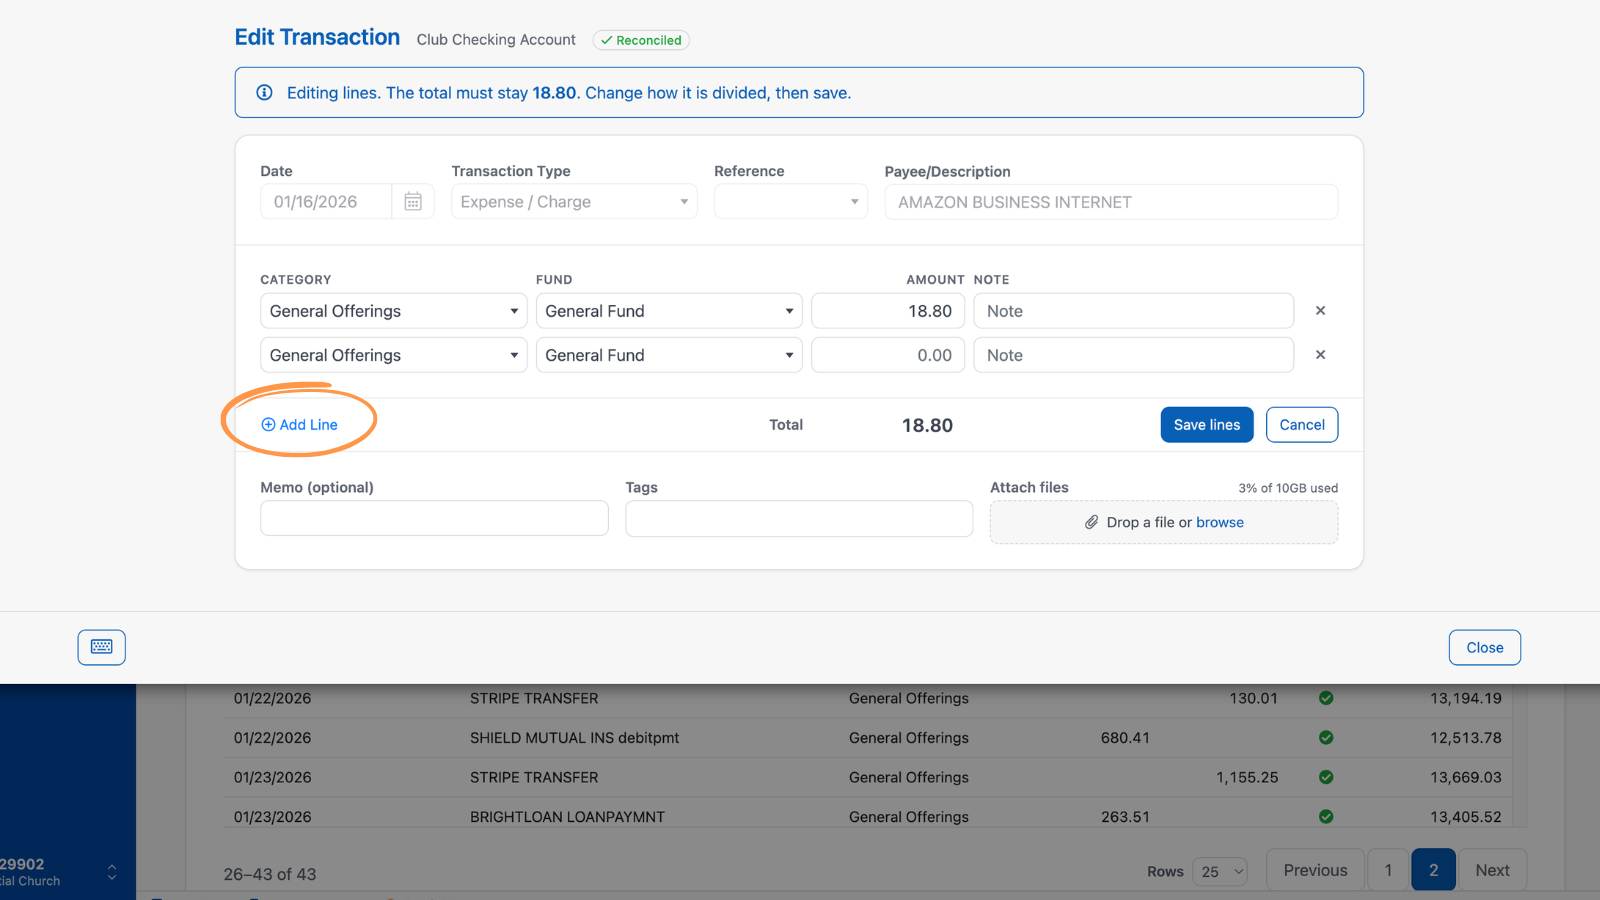
The date, transaction type, reference, payee, and total can't be changed on a reconciled transaction. To change those, undo the reconciliation first.
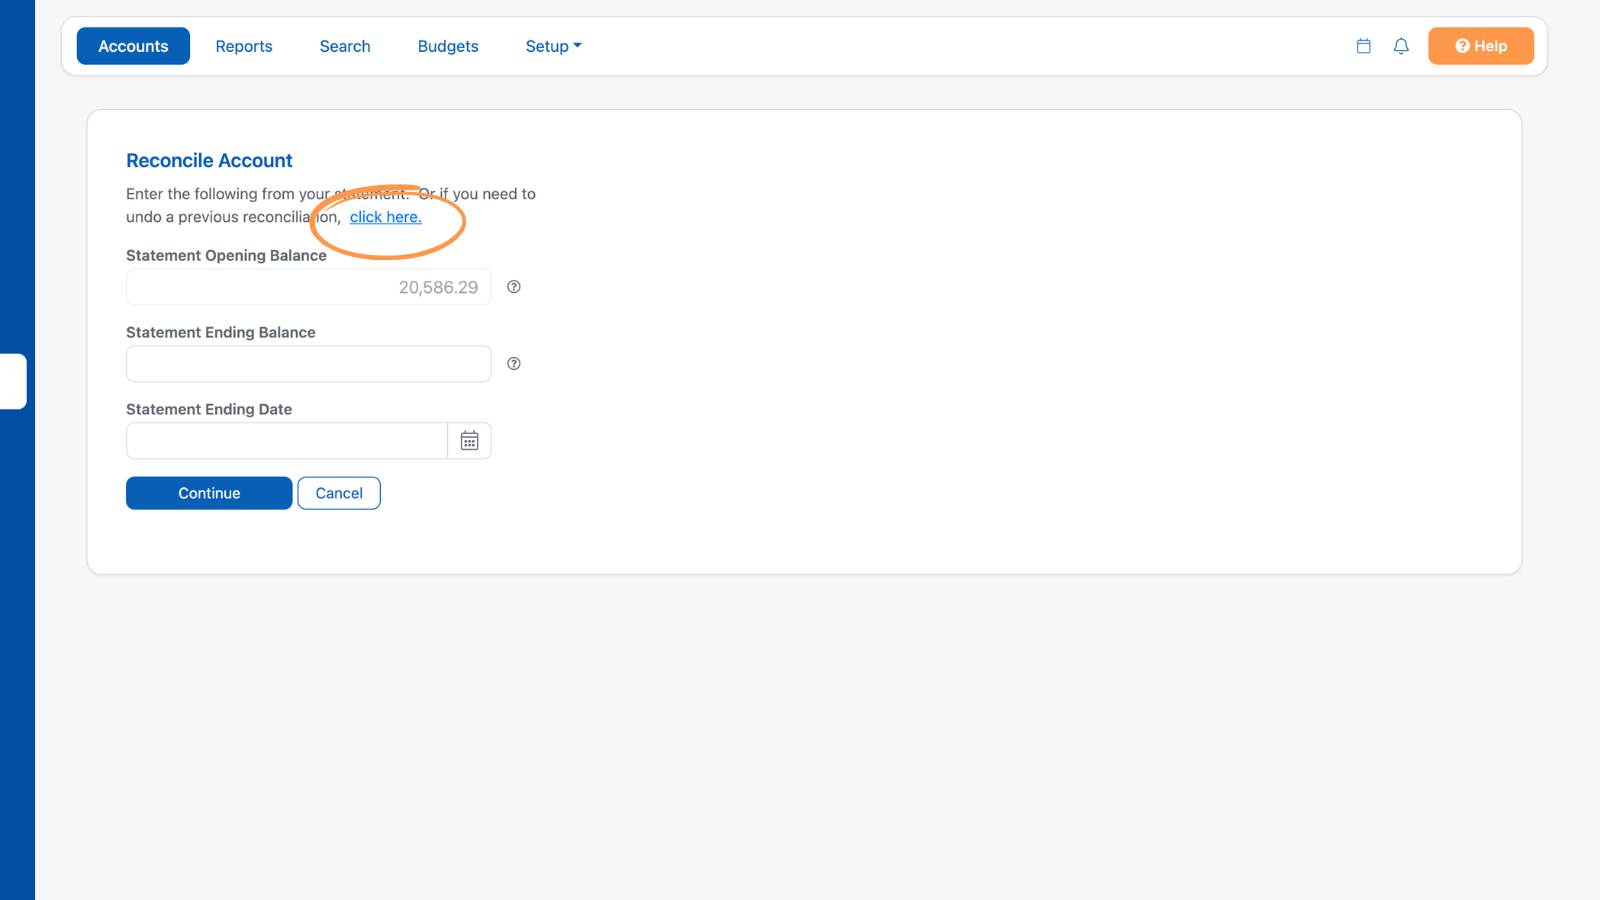
To undo reconciliation, open the account's register and select Reconcile. Then select "click here" just above the Opening Statement Balance field.
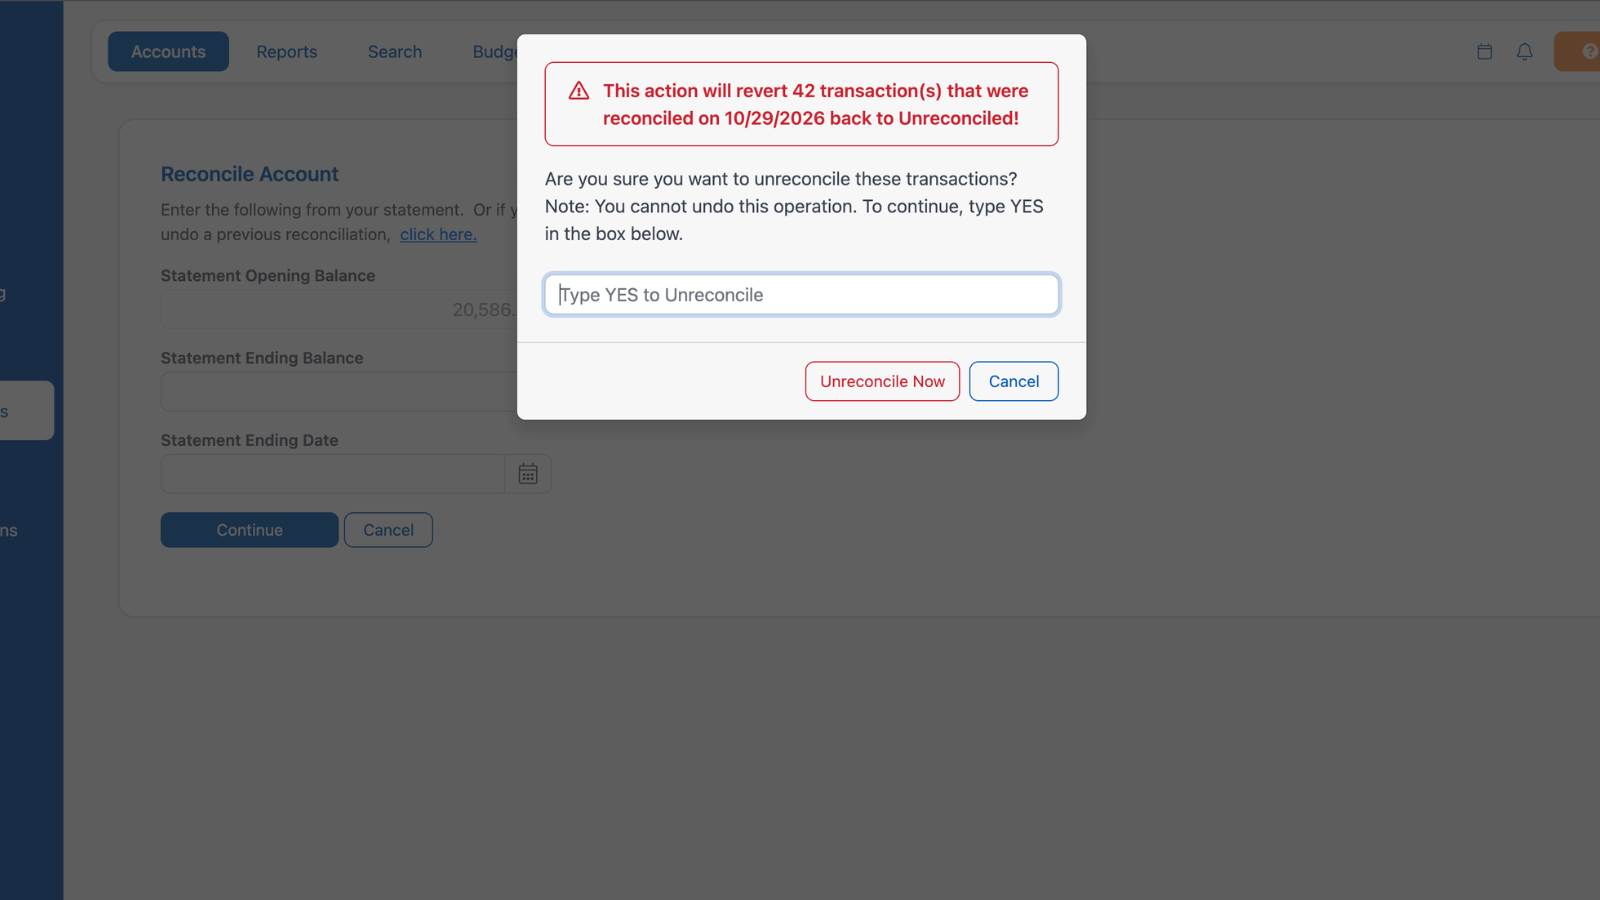
You will then be presented with the option to revert your transactions that were previously reconciled back to unreconciled.
Once you have made the changes to your transaction, you can re-reconcile the batch.
Pro Tips
The Statement Opening Balance is the calculated total of transactions in that bank account that have already been reconciled. It cannot be manually edited. If it does not match your bank statement, then your should check to make sure your accounting has been set up properly. Learn more about getting started with Accounting ›
Beginning balance issues during reconciliation are often caused by missing outstanding checks. If a check was written before your start date but cleared afterward, be sure it was entered using the date the check was written so your balances reconcile correctly.
When reconciling your bank account, make the process easier by using the search tool. After starting the reconciliation process, first uncheck all transactions. Then, manually enter the exact amount (including commas) from your monthly debit or credit bank statement into the search box. This filters the list, helping you quickly find and check off the matching transaction. As a result, the Difference will update in real-time as you review transactions.
This approach is especially helpful if you have a long list of transactions and want to avoid scrolling through each one.