Enabling Kiosk Mode
The Check-In Kiosk can be set up on PCs, Macs, and iPads. Below is how to set it up for each one.
Kiosk Setup for PC
If you are using a PC to do family check-in, we recommend using Chrome in Kiosk Mode for the best experience.
Kiosk Mode in Chrome allows you to display a web page without clutter. It removes the address bar and any toolbars so only the page content is visible to the user. We recommend using both kiosk and kiosk-printing modes with Chrome for all unmanned check-in stations on a PC.
Below are instructions to set up Kiosk Mode with your Chrome browser:
Step 1: Create Shortcut
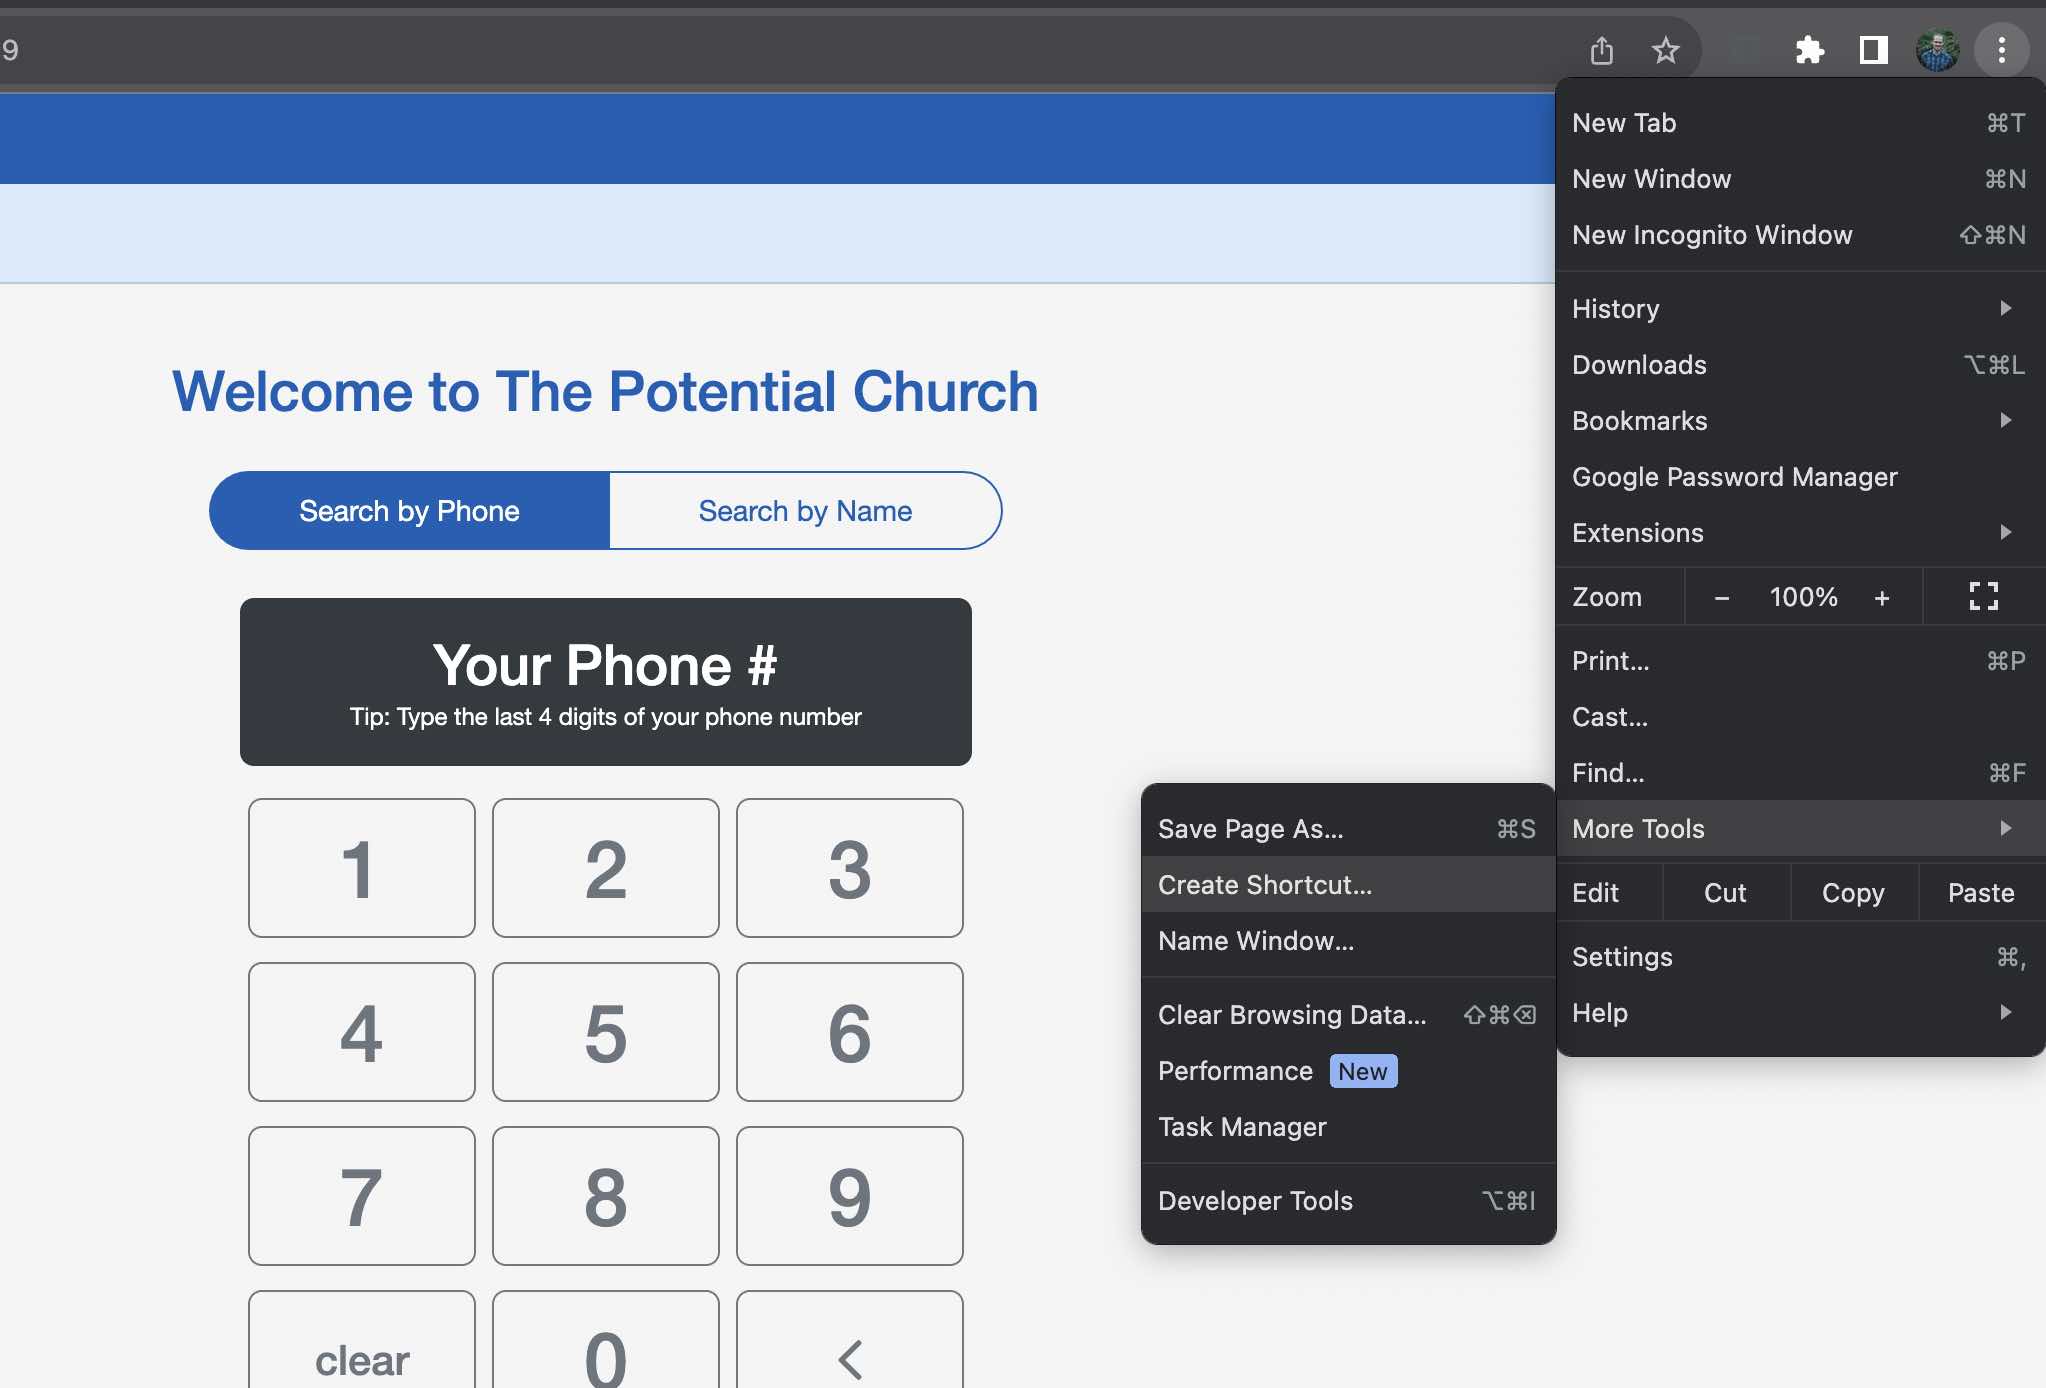
From the settings button in the top right of Google Chrome Browser, select "More tools" and then select "Create shortcut." Give your shortcut a name and check the box for "Open as window."
Step 2: Shortcut Properties
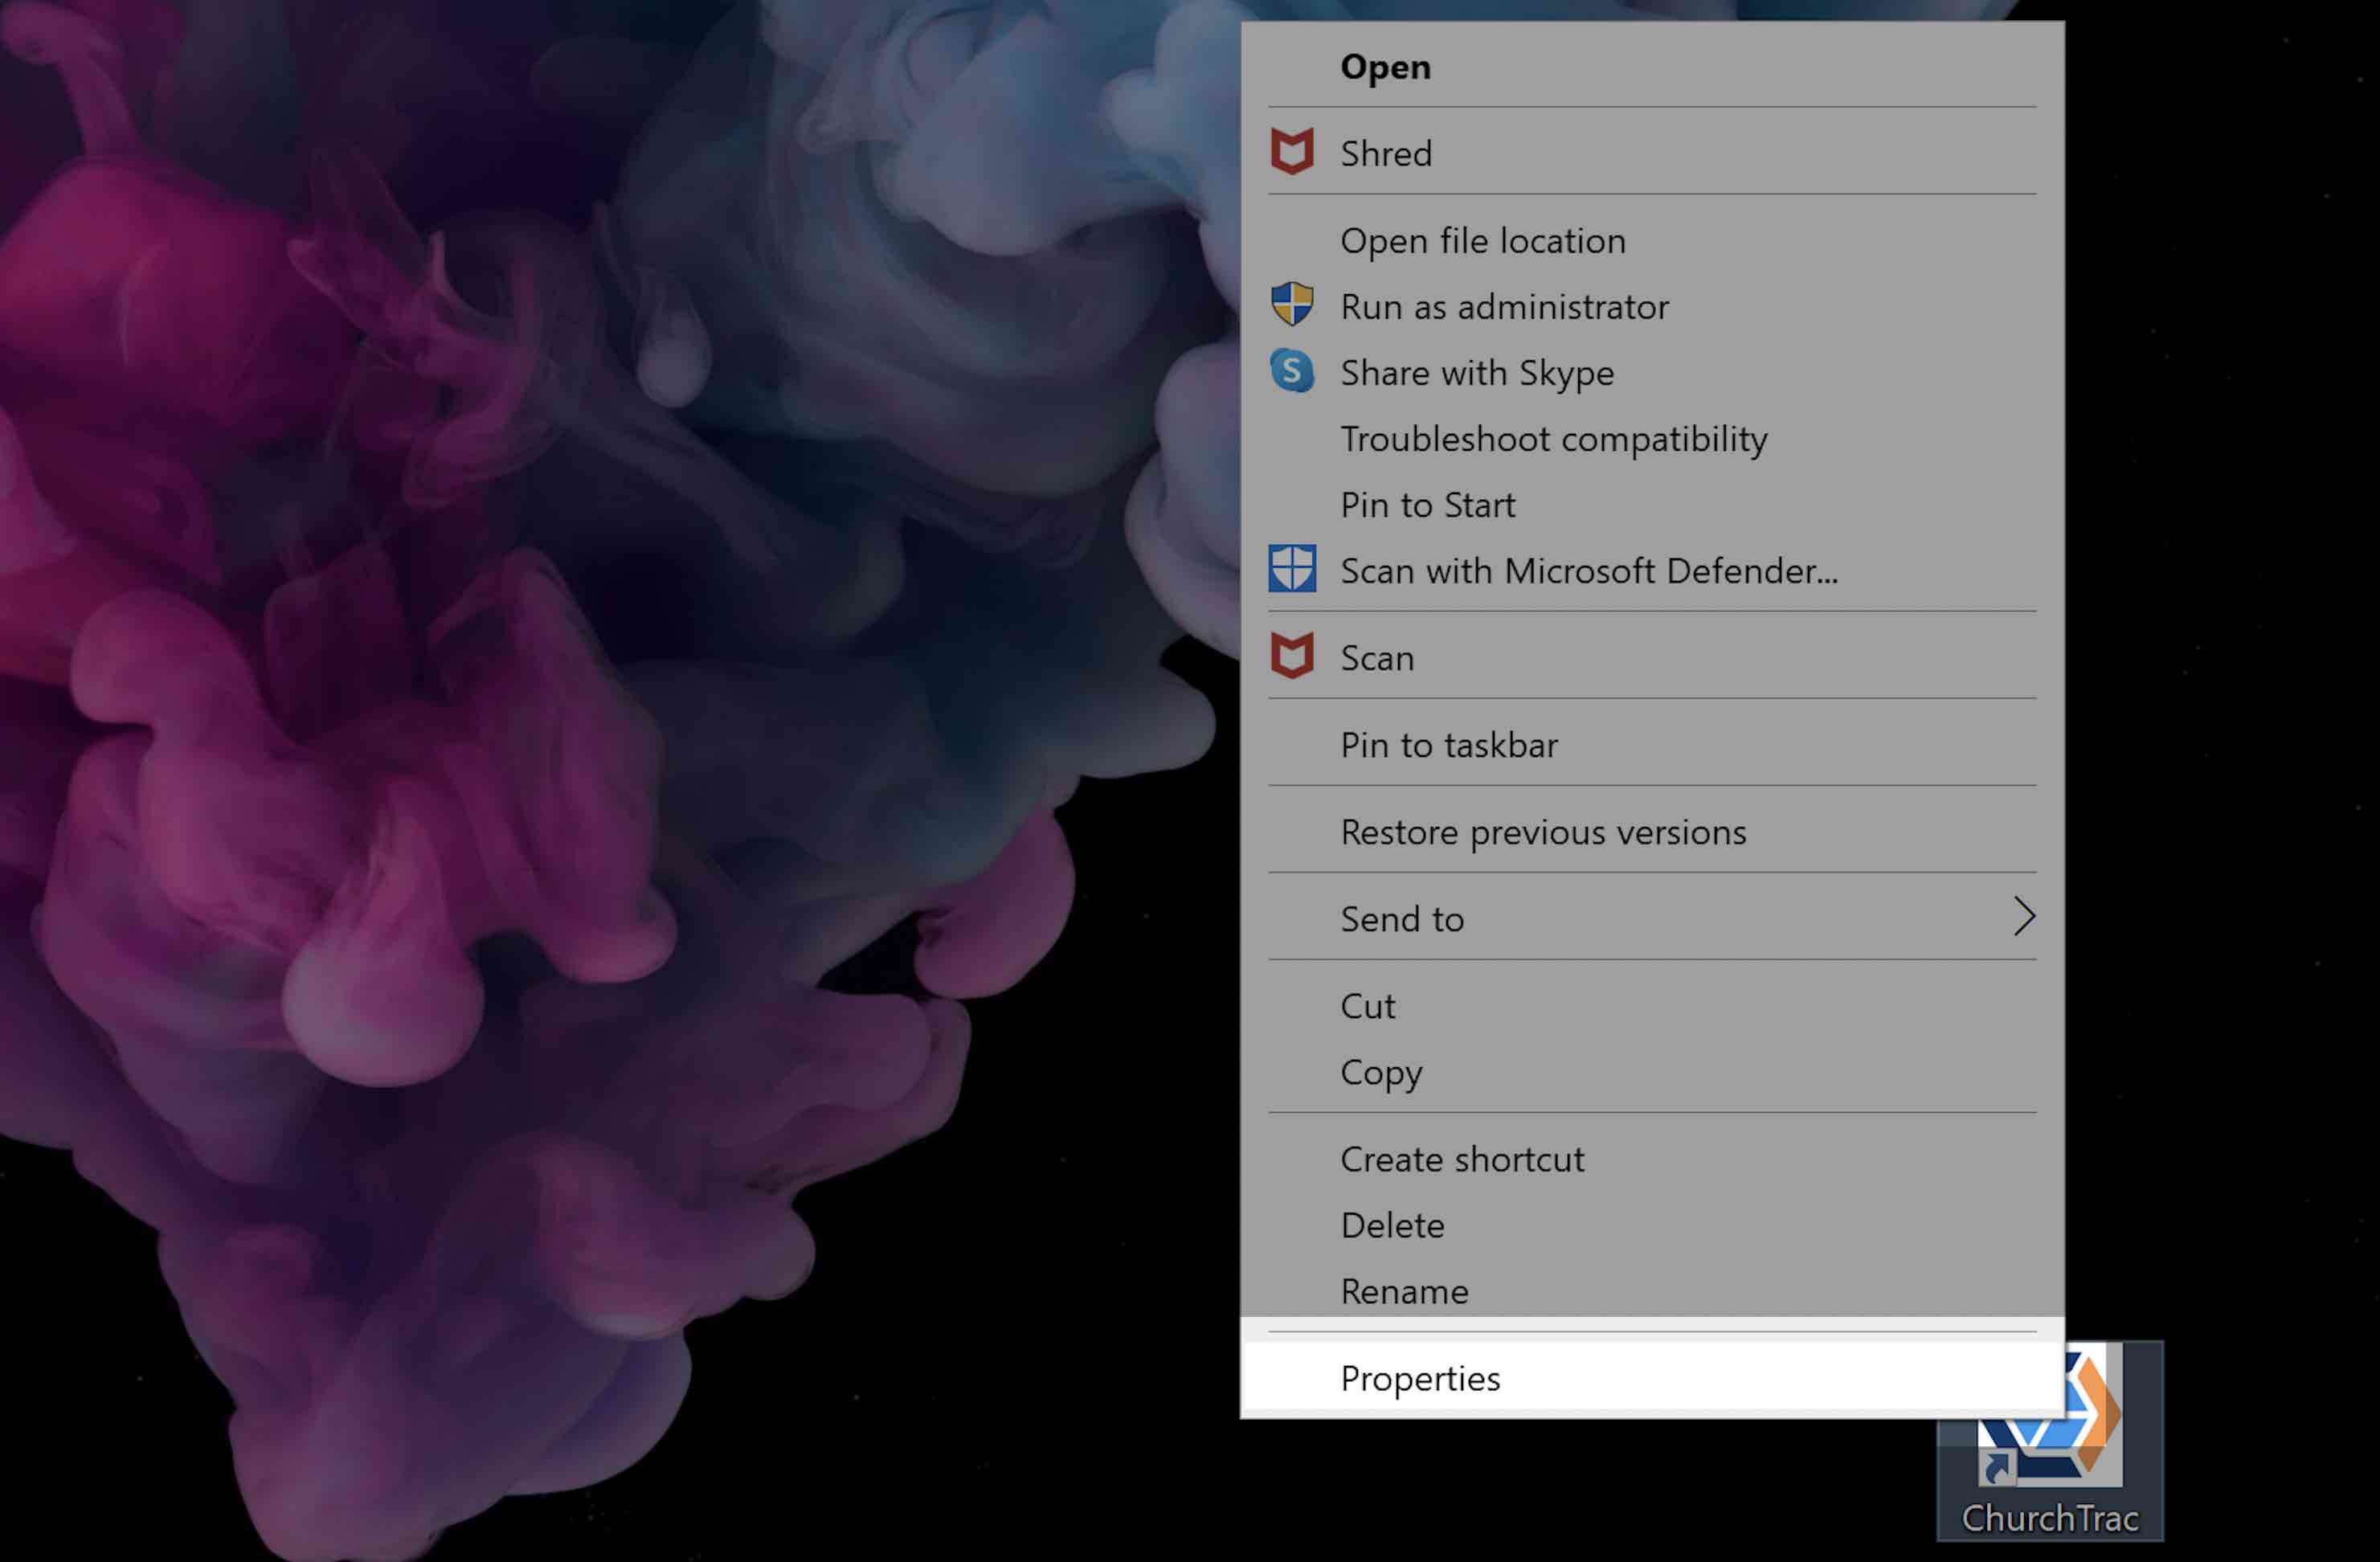
Your shortcut will appear on your desktop. Right-click the shortcut and select "Properties".
Step 3: Edit Target
In the properties, navigate to the Target section. At the end of the target string, paste the following: --kiosk --kiosk-printing
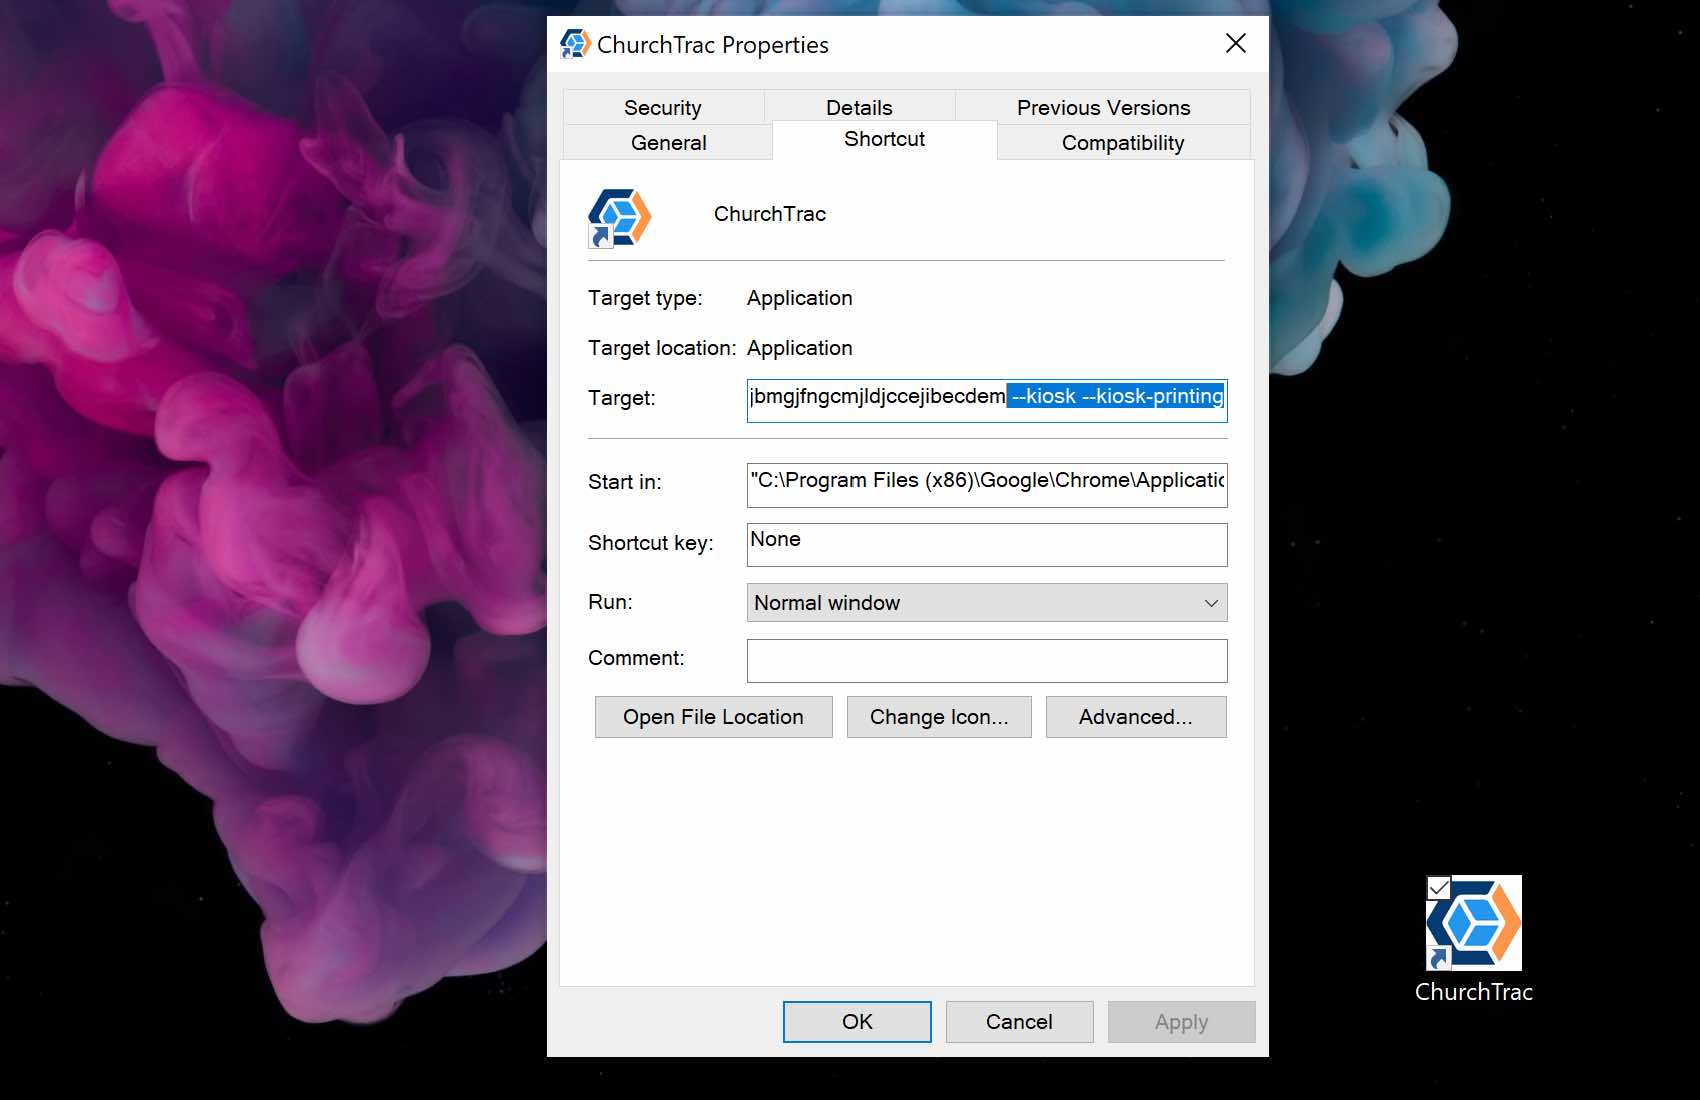
Select the "Apply" button after updating the target section. Once applied, you can double-click the shortcut to launch ChurchTrac in Kiosk Mode.
Kiosk Setup for Mac
If you use a Mac to manage the family check-in process, we recommend using Firefox with Silent/Background Printing for best results.
Step 1: Access Preferences
Type the phrase about:config in Firefox’s address bar and select Enter.

On the following screen, click "Accept the Risk and Continue".

Step 2: Change Preferences
In the following screen, enter the phrase print.always_print_silent. This preference is off by default, so the status will display "false".
Click the toggle button to the far right of the screen. This will change the status to "true".

You're all done! Return to the check-in screen and print a test label.
Kiosk Setup for IPad
If you are using an iPad to do family check-in, we recommend using our Check-In app in Kiosk Mode (Guided Access) for the best experience.
Guided Access turns your iPad into a kiosk mode, keeping the check-in app open and preventing accidental switching to other apps on the iPad. This ensures a smooth and focused check-in process for parents and volunteers.
Below are instructions to set up Kiosk Mode on your iPad:
Step 1: Set Up Guided Access
1. Go to Settings > Accessibility > Guided Access, and enable "Guided Access."
2. Adjust any of the following:
- Passcode Settings: Select "Set Guided Access Passcode", then enter a passcode. You can also turn on Face ID (on an iPad with Face ID) or Touch ID (on other iPad models) as a way to end a Guided Access session.
- Time Limits: Play a sound or speak the time remaining before a Guided Access session ends.
- Accessibility Shortcut: Allow the use of Accessibility Shortcut during Guided Access sessions.
- Display Auto-Lock: Set how long it takes iPad to automatically lock during a Guided Access session.

Step 2: Start a Guided Access Session
1. Open the ChurchTrac Check-In app.
2. To turn on Guided Access, do one of the following:
- Siri: Say something like: “Turn on Guided Access.”
- Use Control Center if you’ve added Guided Access there.
- Use the Accessibility Shortcut.
3. Circle any areas of the screen you want to disable. Drag the mask into position or use the handles to adjust its size.
4. Select "Options," then turn on or off any of the following:
- Top Button
- Volume Buttons
- Motion (to prevent iPad from switching from portrait to landscape or from responding to other motions)
- Software Keyboards
- Touch
- Time Limit
5. Select "Start" to begin your session.
Step 3: End a Guided Access Session
Depending on the passcode options you chose when you set up Guided Access, do any of the following:
Use the passcode: Triple-click the top button (on an iPad with Face ID) or Home button (on other iPad models), then enter the Guided Access passcode. If you didn’t set a Guided Access passcode, enter your iPad passcode.
Use Face ID or Touch ID: If you turned on the Face ID or Touch ID option in Guided Access Passcode Settings, double-click the top button or Home button, then unlock your iPad with Face ID or Touch ID (depending on your iPad model).