Managing Church Connect Users
Church Connect allows members to create an account and securely sign in to their church's website or mobile app. Once signed in, members can access additional features such as online giving, their giving history, the member directory, and other member-only resources.
This guide explains how to create Church Connect accounts, match new users to your People database, and manage Connect user settings.
- Creating a Connect Account
- Matching Registrants
- Manage Individual Connect Users
- Connect Users Report
Login Security & Location Restrictions
To help protect your church from spam and fraudulent accounts, Church Connect only allows new user registrations from within your country. We also block sign-ups that appear to be using a VPN. These safeguards help prevent scammers from creating accounts while pretending to be local to your church.
If you have missionaries, supporters, or other legitimate users who live outside your country, you can still give them access by sending them a Church Connect invitation.
To send an invitation:
- Open the person's profile from the People screen
- Click Edit
- Select Send Connect Invite
You can also send invitations from the Connect Setup -> Connect Users / Settings tab -> Add/Invite.
Note: The person must have an email address saved in their profile before the Send Connect Invite option will appear.
Creating a Connect Account
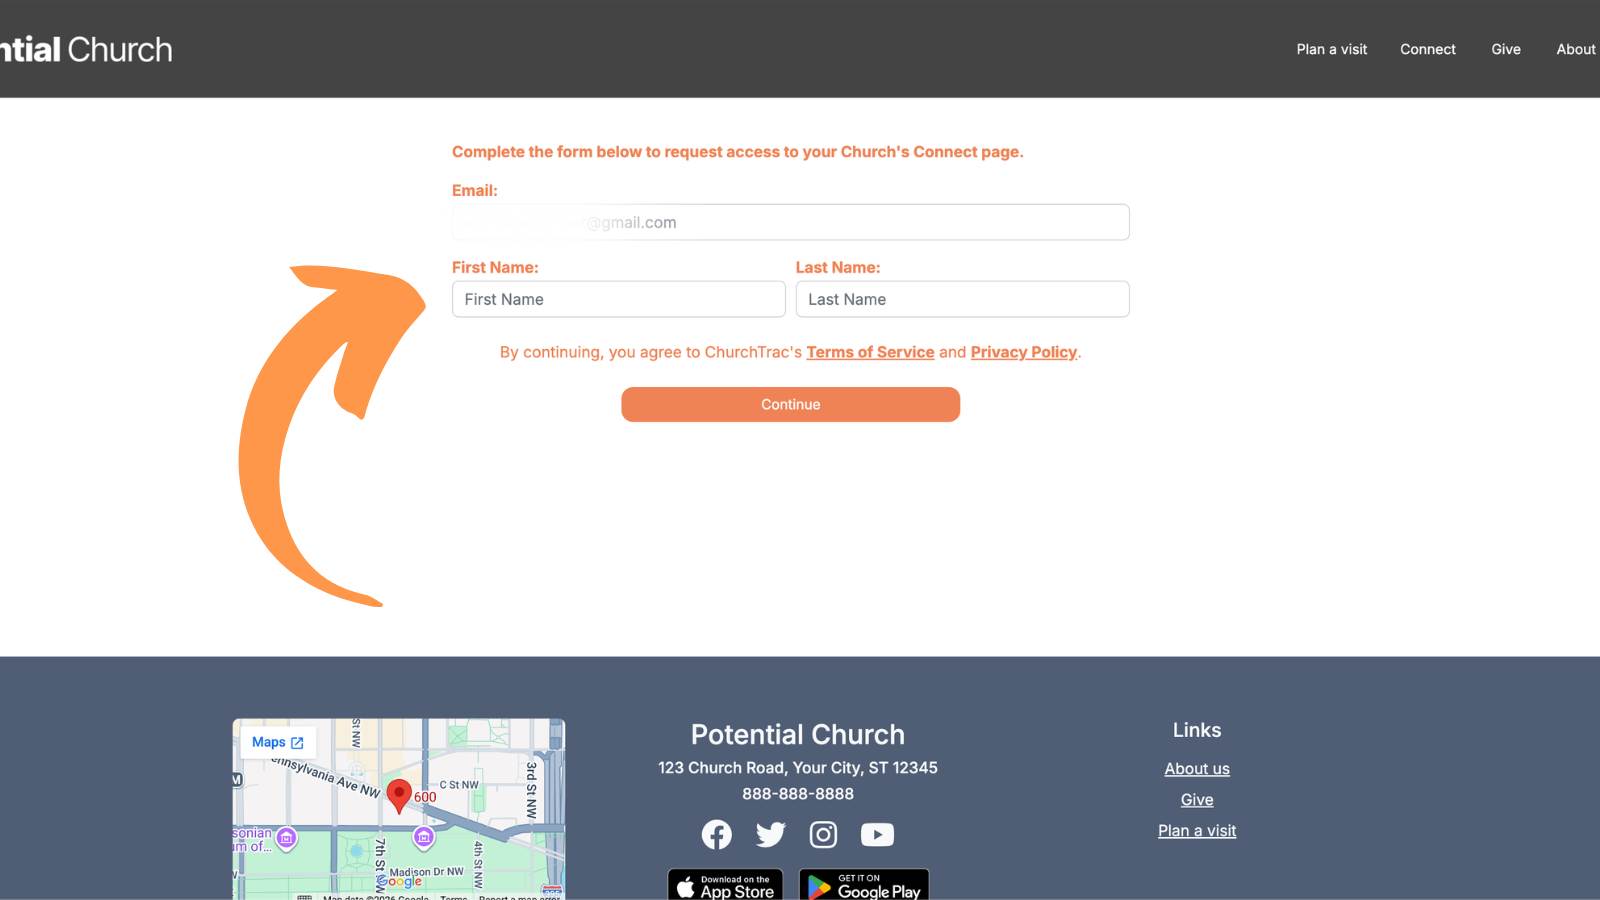
When someone visits your Church Connect website or mobile app and clicks "Sign in," they'll have the option to create a Church Connect account.
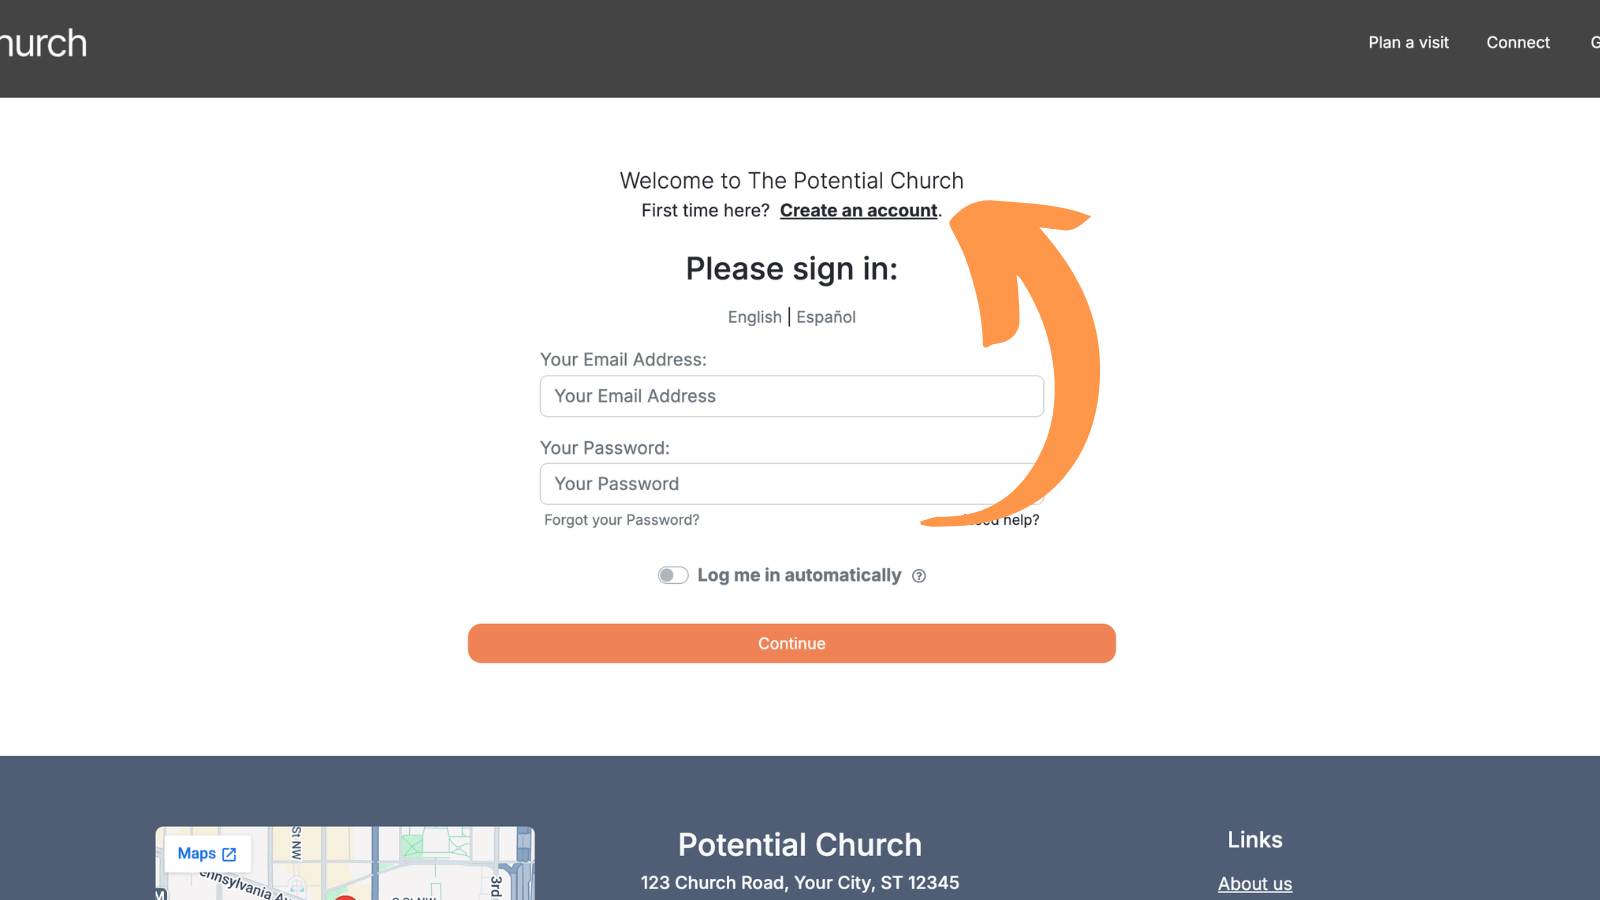
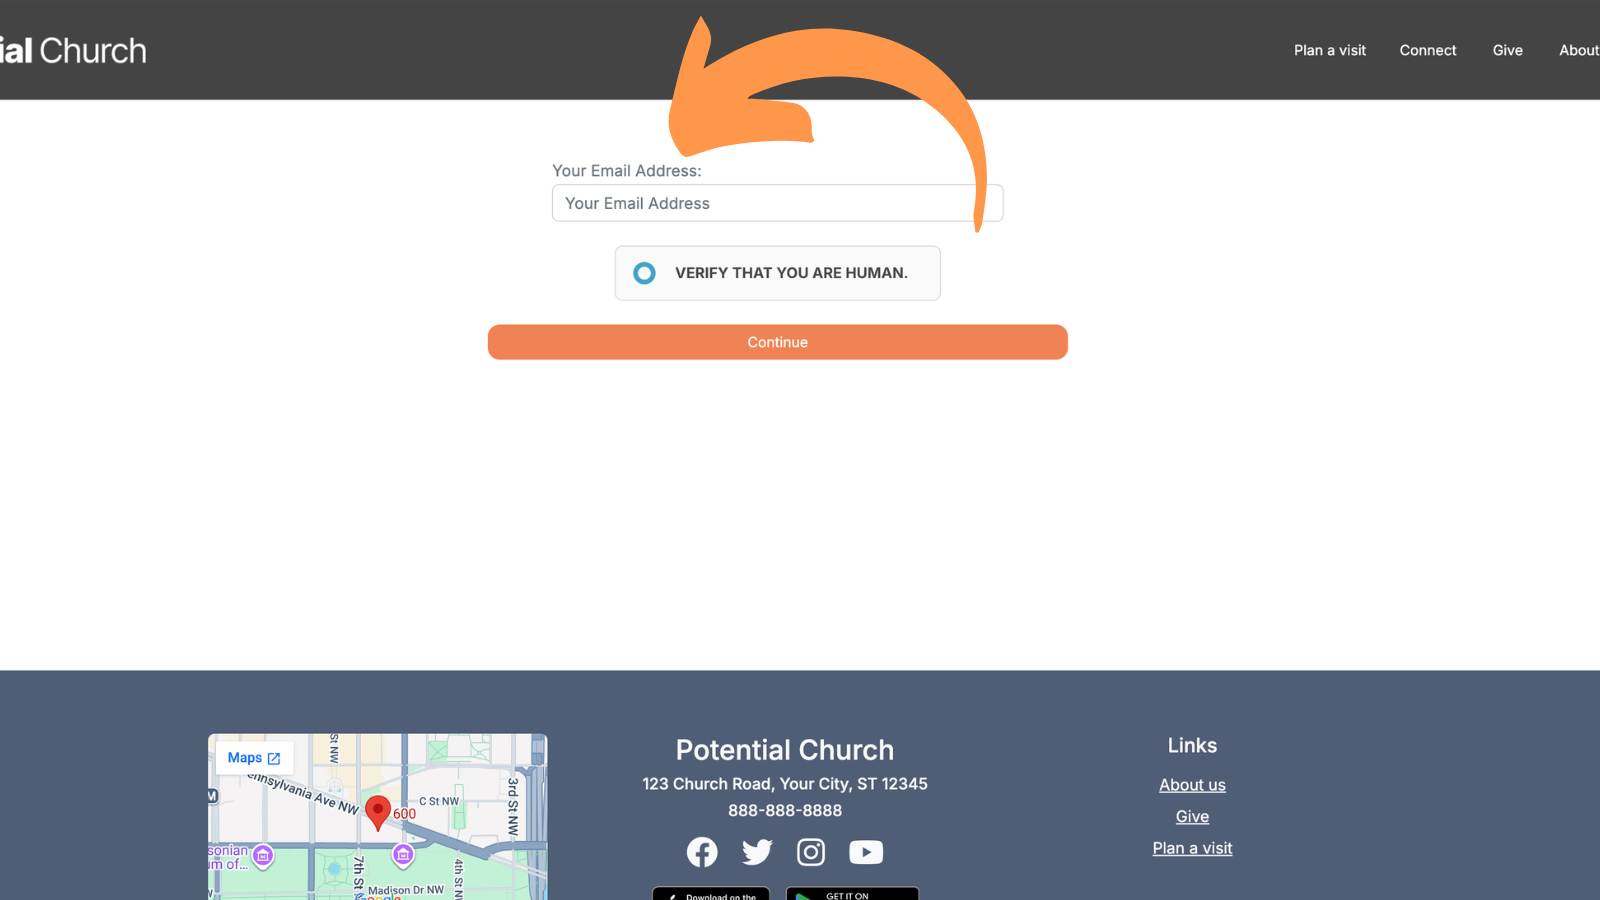
If the email address they enter already exists in your People database, ChurchTrac will send them a verification code and automatically match their account. Once verified, they'll immediately have access to the features you've enabled.
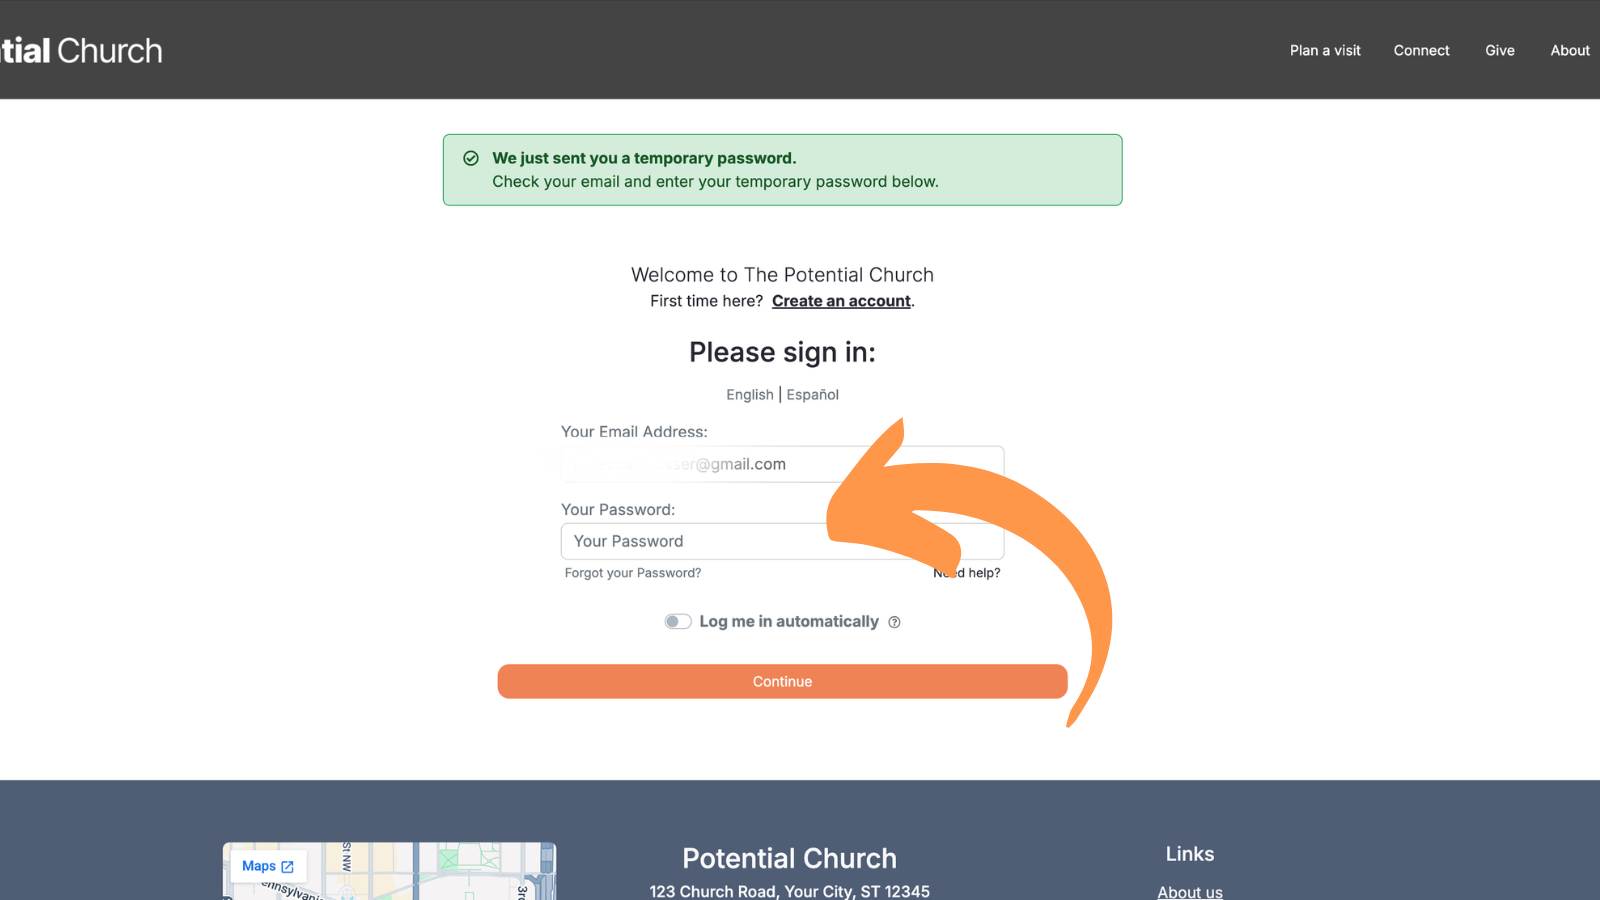
If the email address doesn't match an existing profile, they'll be prompted to enter a temporary password and then register by providing their basic contact information.
Matching Registrants
If a new registrant's email address doesn't match anyone in your People database, they'll need to be matched before they can access member features.
You can match new users from either:
- People (using the registration alert)
- Church Connect Screen -> Connect Setup tab → Connect Users & Settings
For example, when there's an unmatched registrant, the People screen will prompt you with an alert, like this:

Selecting this alert will display a dialog with all the registrants that must be matched.
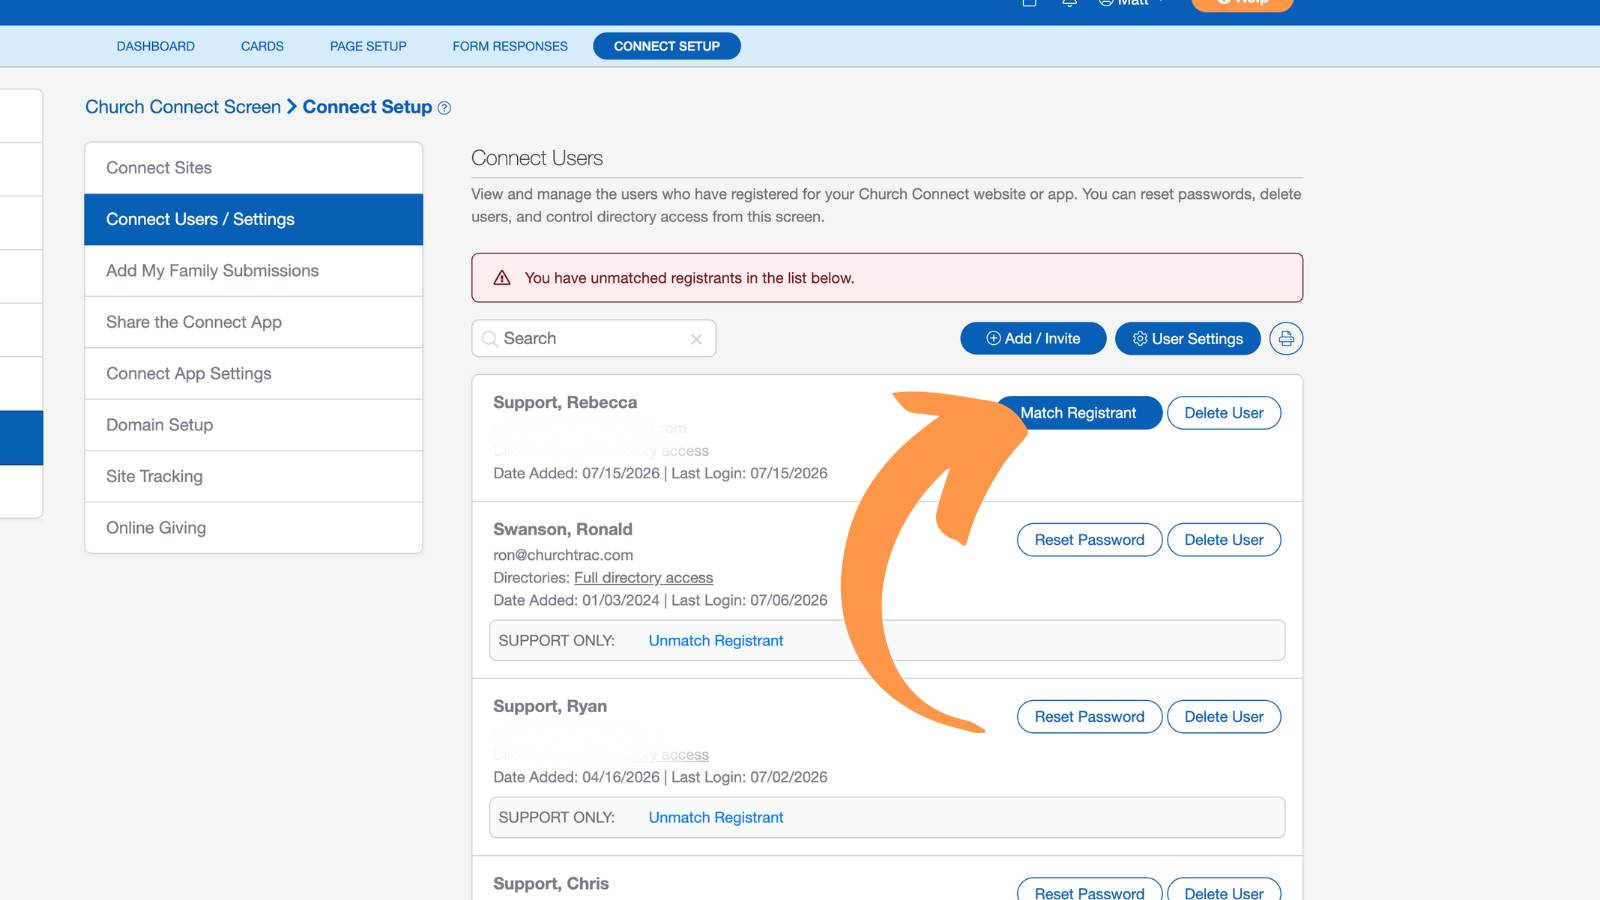
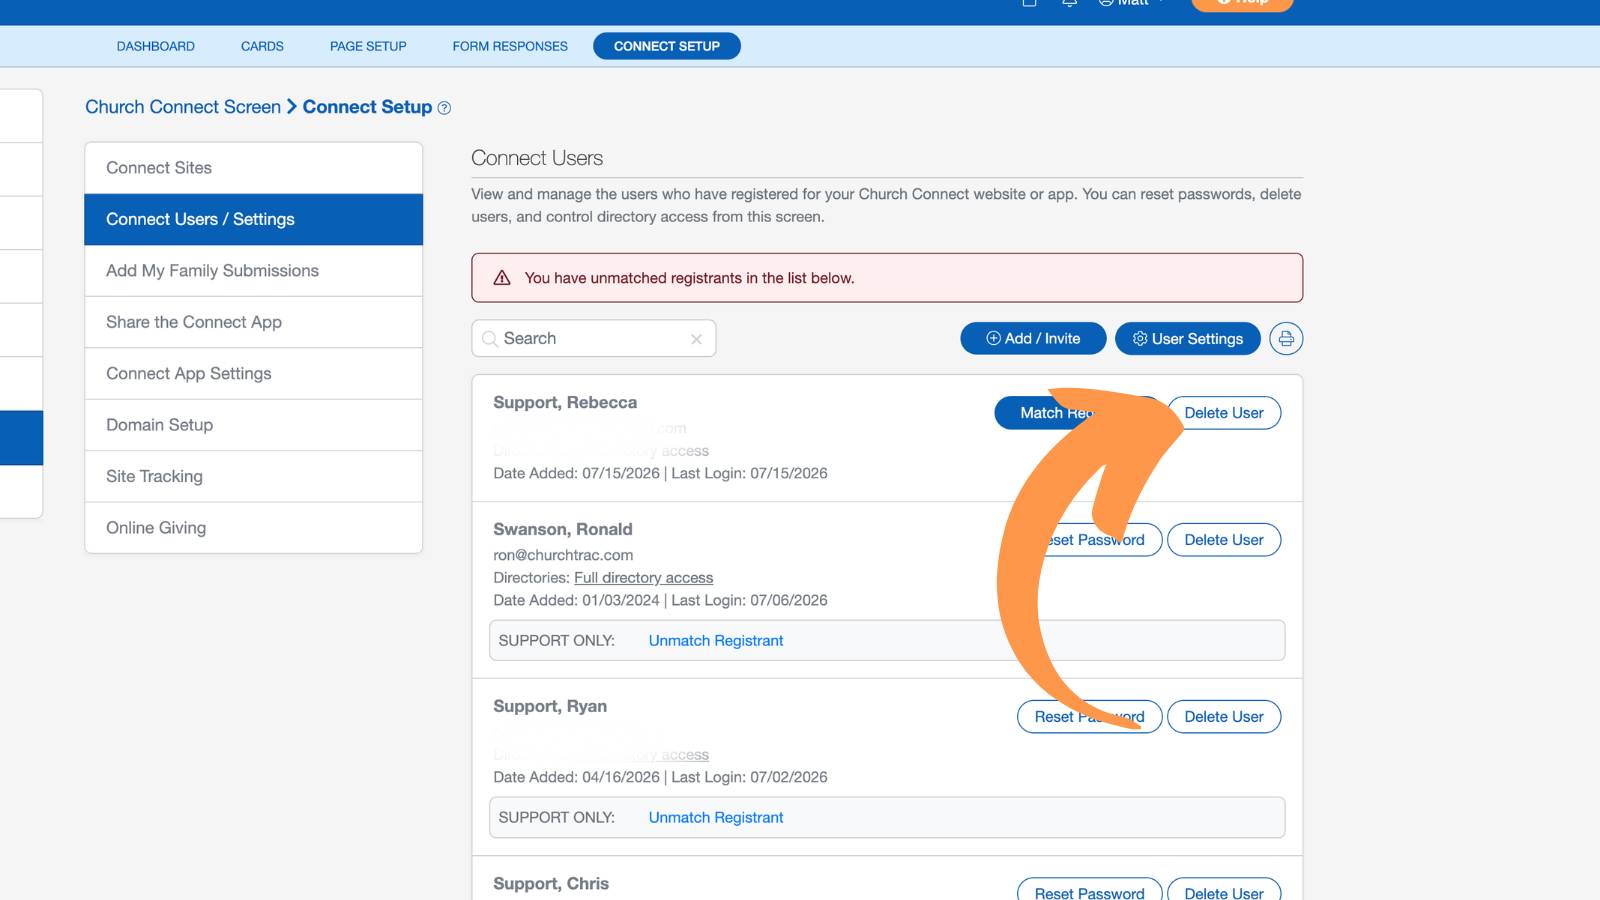
If the registrant matches someone already in your database, simply select Match to a Name and search their name below.
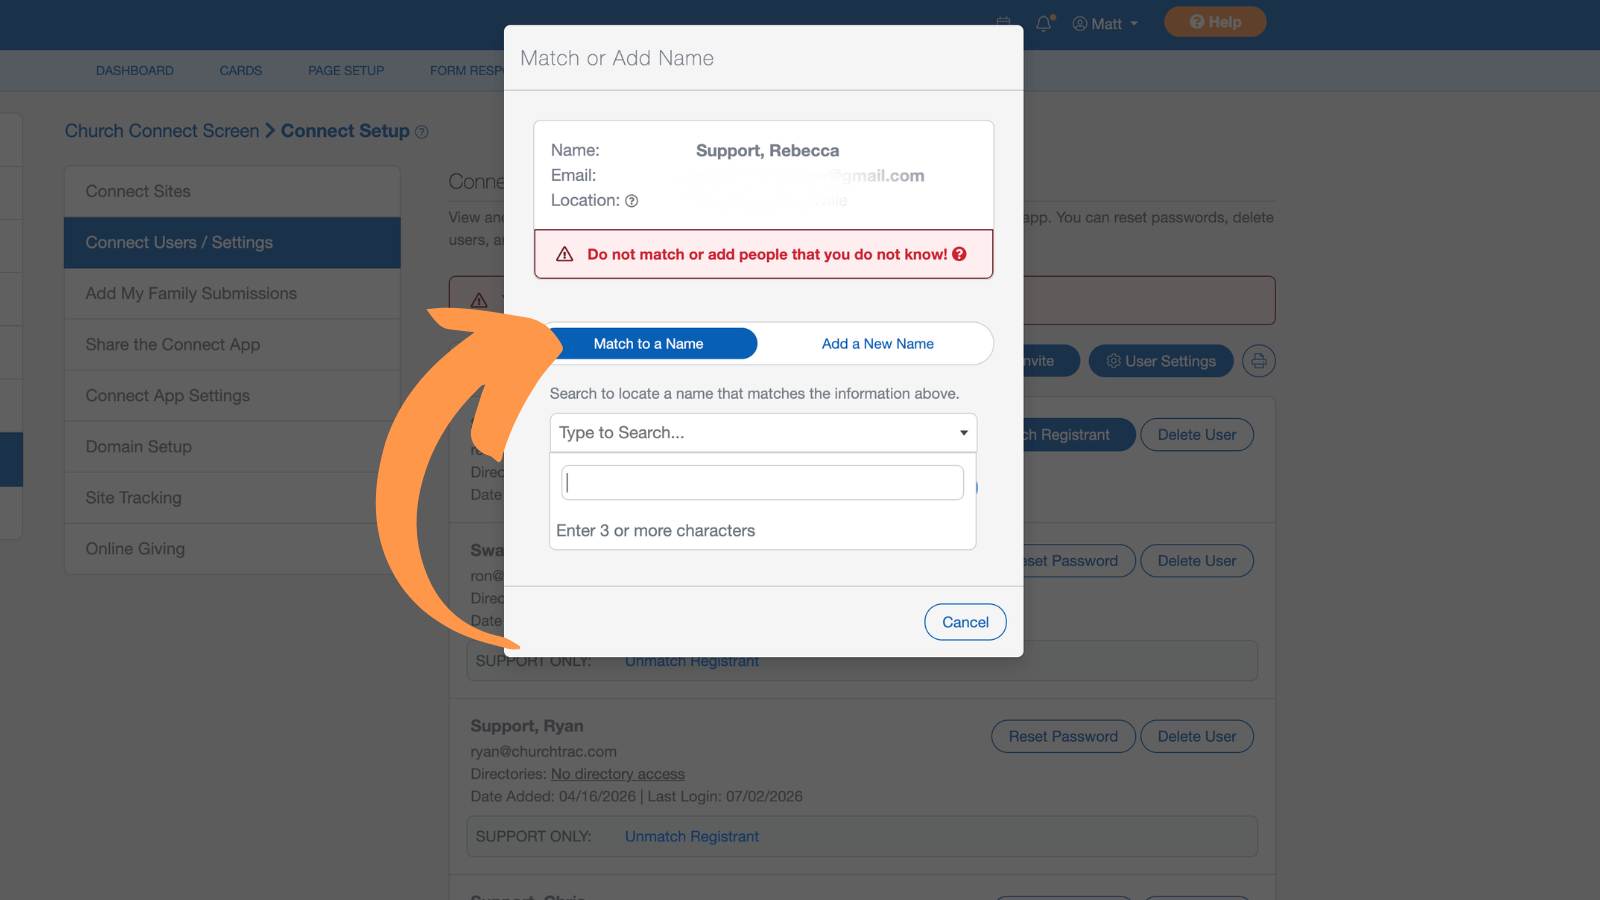
If they're new to your church, create a new person record by selecting "Add a New Name."
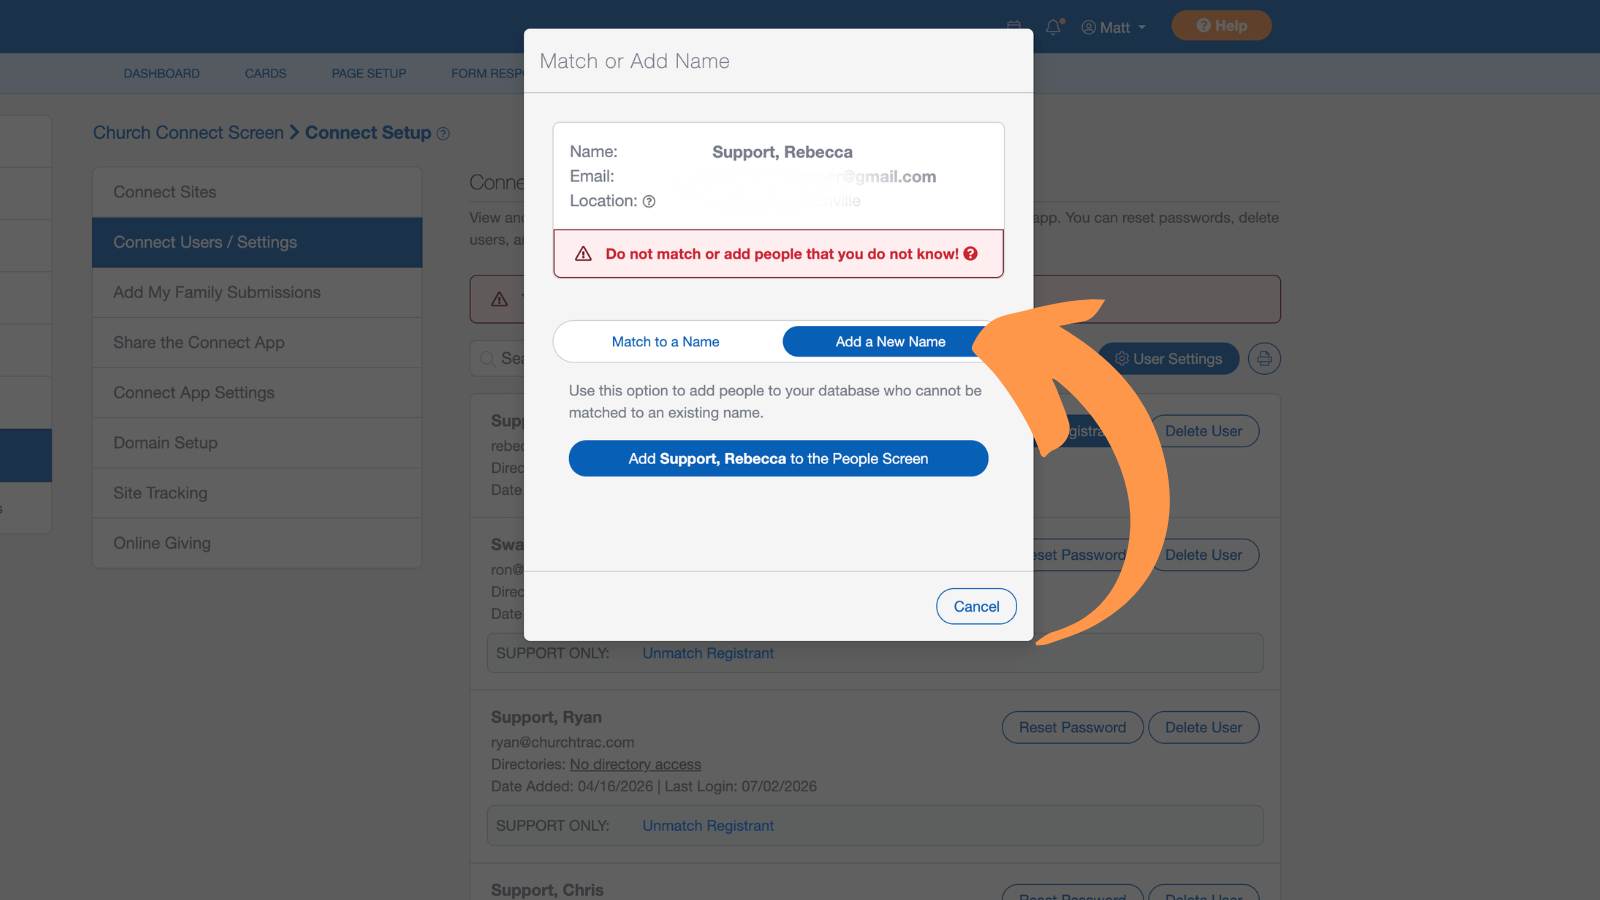
After you manually match the registrant or create a new People screen profile for the registrant, they will be able to view and edit their profile and view their own giving history.
Manage Individual Connect Users
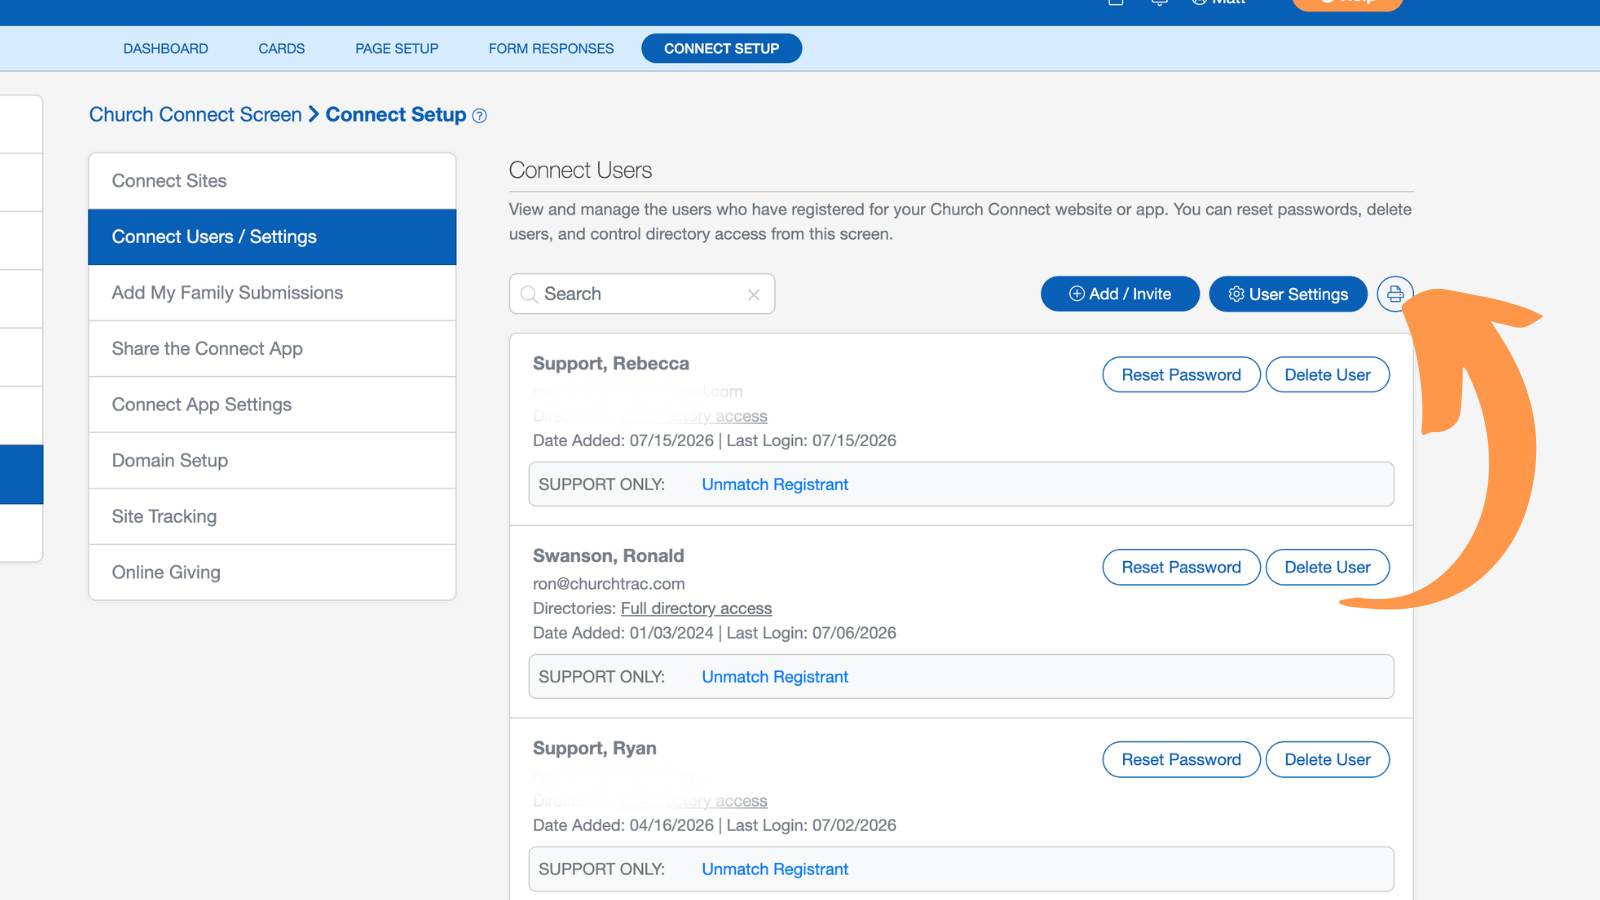
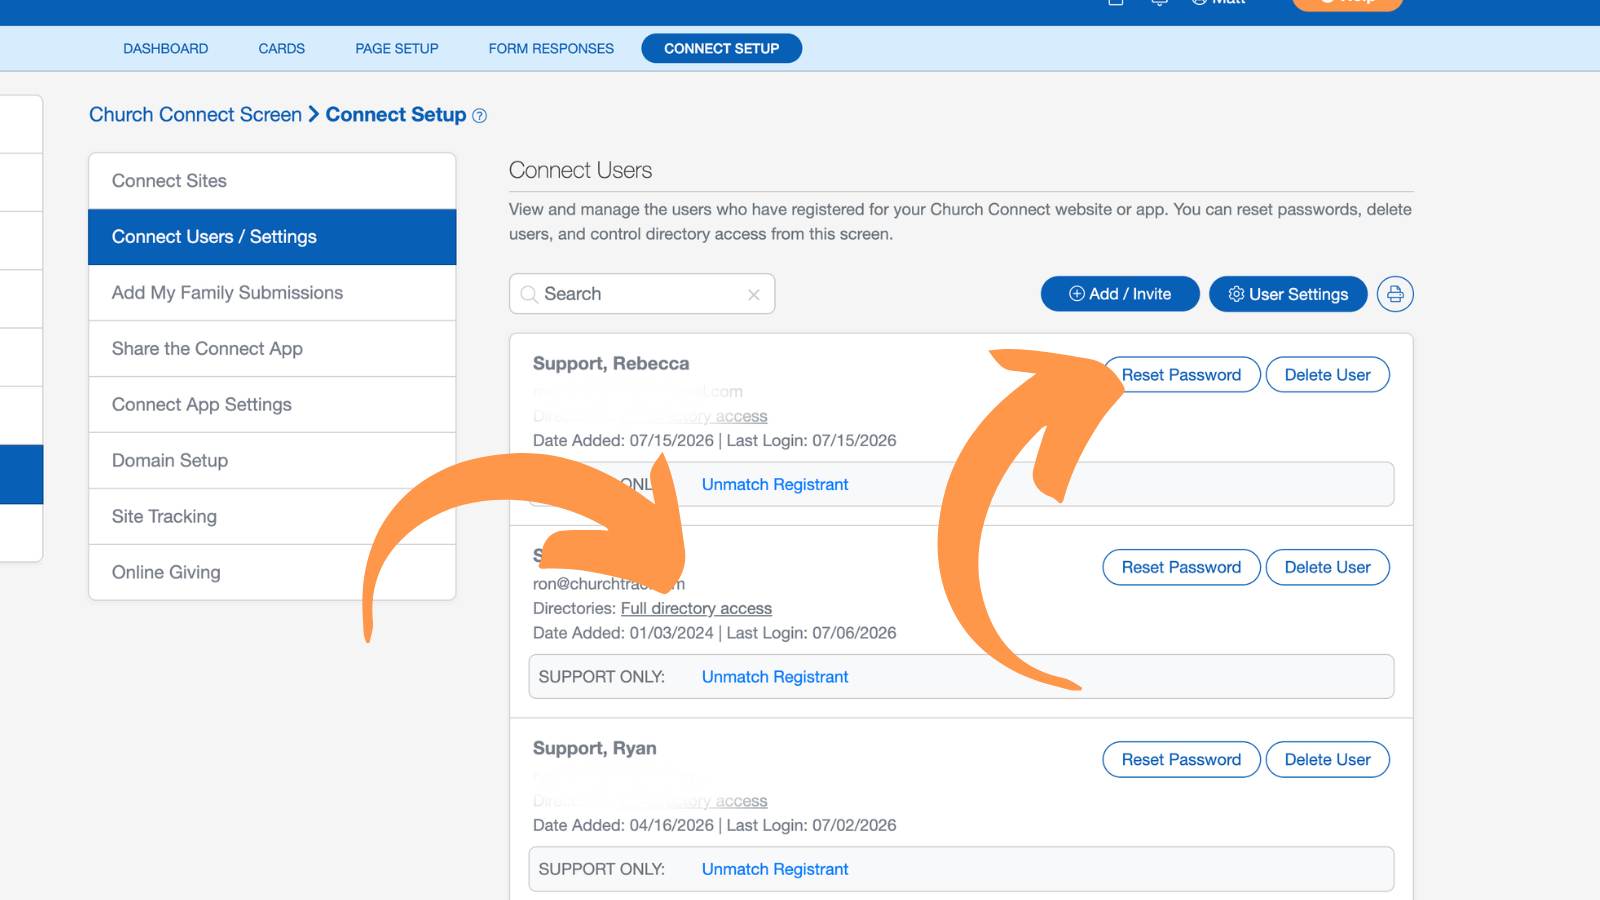
From here, you can manage individual Church Connect accounts.
Navigate to:
Connect Setup → Connect Users & Settings
This tab gives you quick access to manage each user’s permissions and activity.
- Grant or revoke access to the Online Directory
- View when a user’s account was created and their last login
- Reset a user’s password if needed
Customize Connect Users / Settings
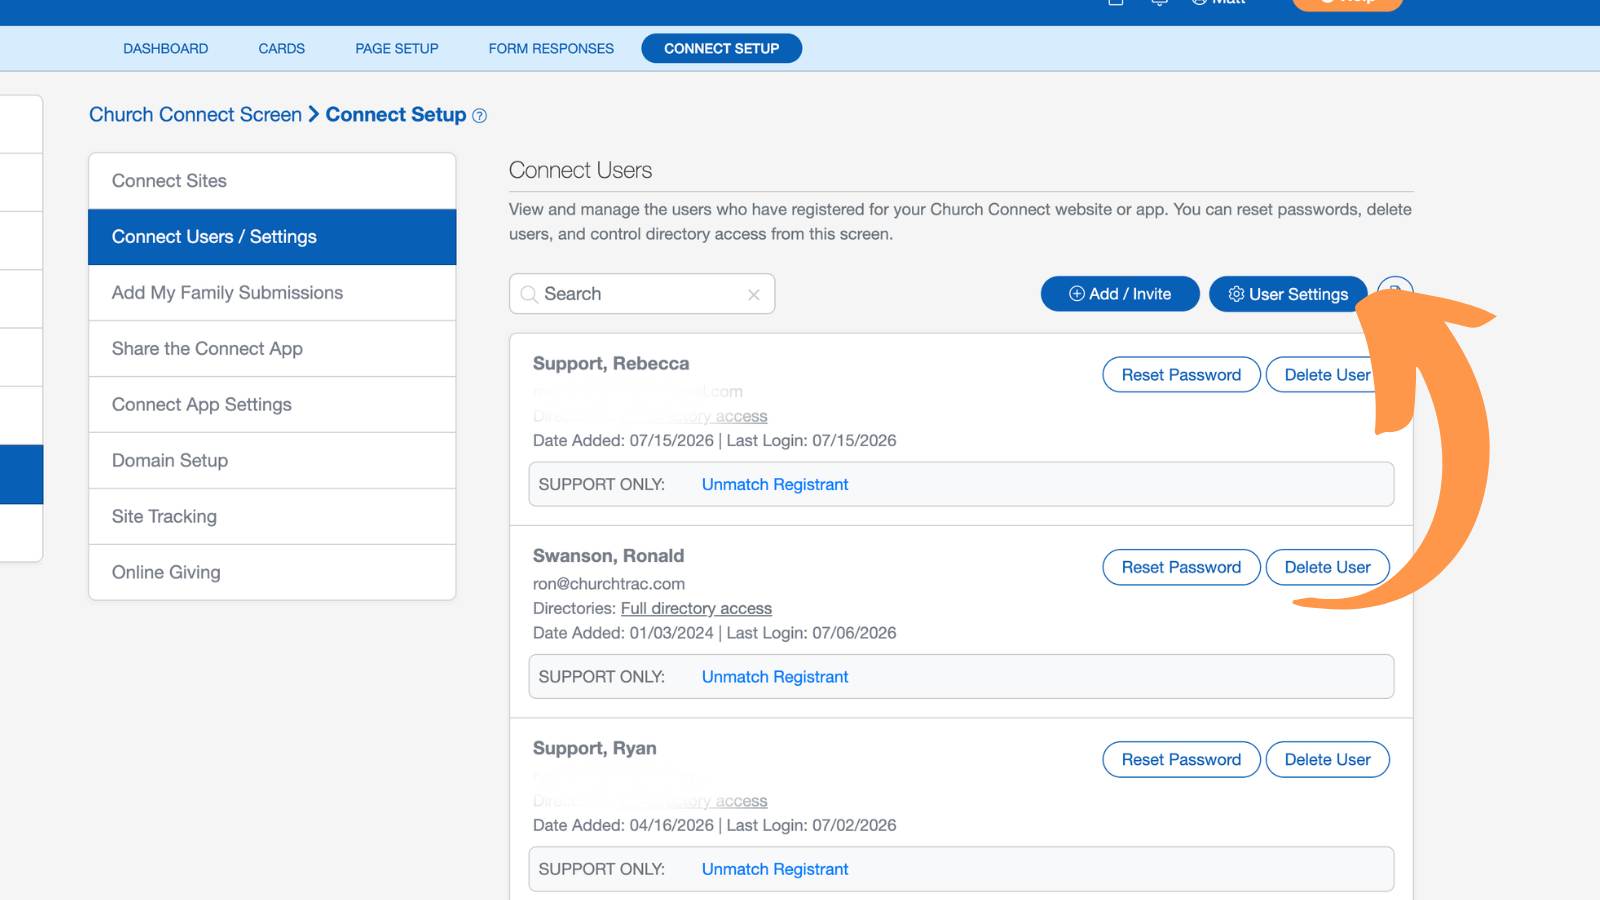
The Connect Users / Settings section also allows you to customize how Church Connect accounts work for your entire church.
In User Settings, you can configure options such as:
- Allow users to upload or delete their profile photos
- Enable access to view upcoming published events
- Allow donors to view their giving history
- Enable the Online Directory (only for users who opt in to share their information)
- Require identity verification for added security (users must enter a code sent to them)
- Allow users to view and share family photos
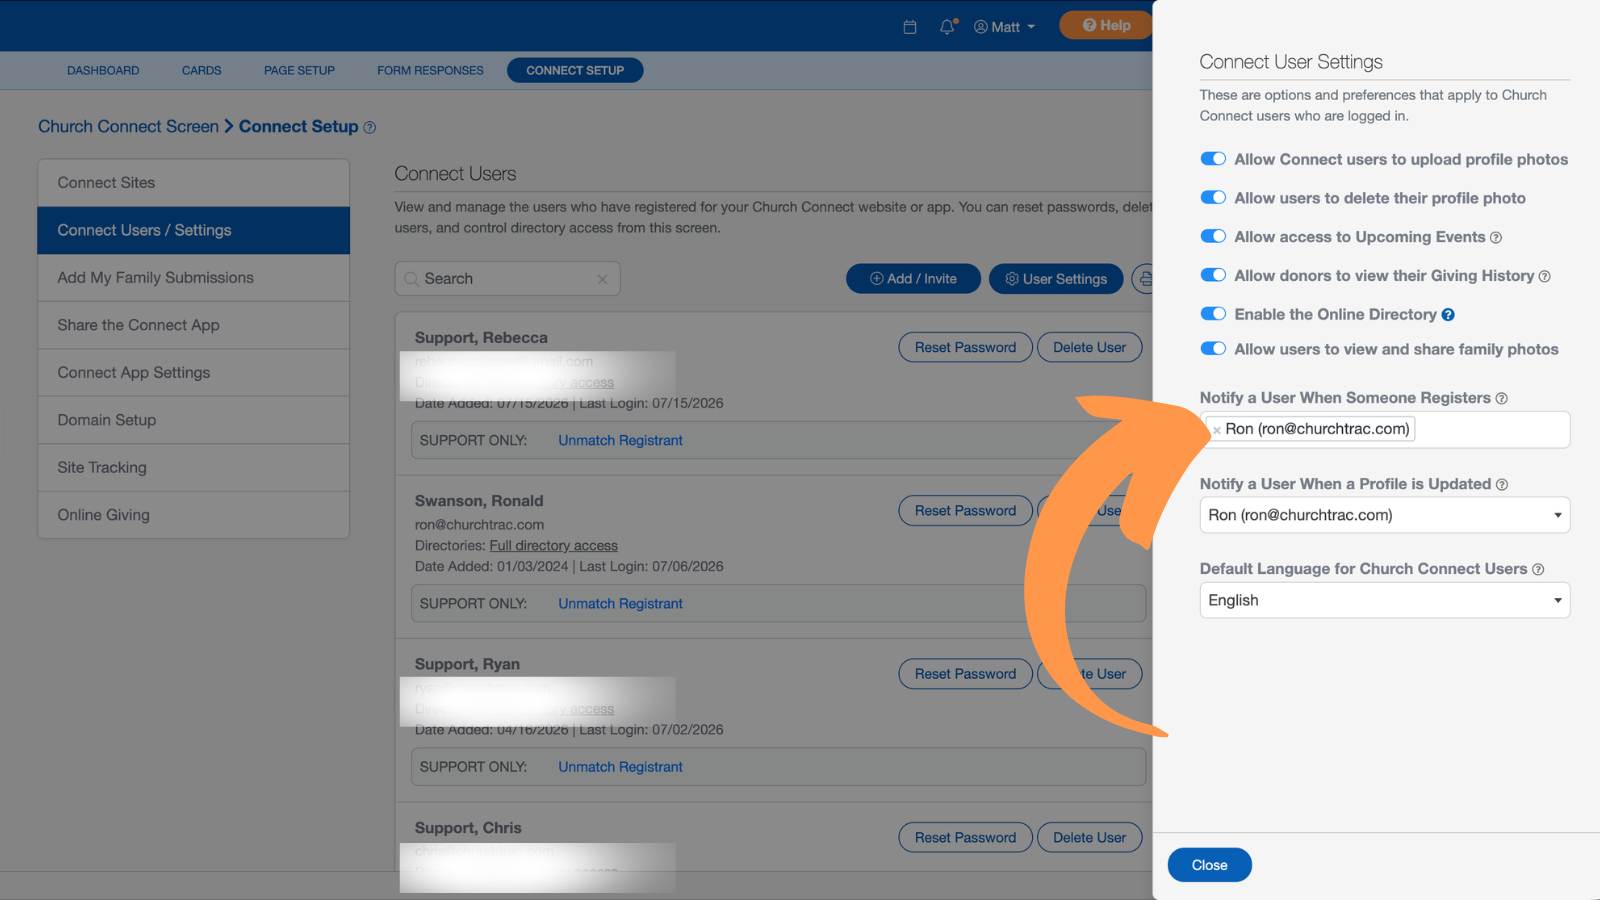
Notify a User When a Profile Changes
You can also:
- Set notification preferences for when a user registers or updates their profile
- Update the default language for Connect users
Watch our Pro Tip video on how to notify a user when a profile is updated.
Connect Users Report
In the Connect Setup tab -> Connect Users / Settings section, select the printer icon in the top right corner to generate a Connect Users report. You can filter this report based on dates: All Dates, Last Logged In, or Date Added.