Assigning Tags to People
After creating your Tags, you will want to make sure that each person in your church database is tagged with any Tags that apply. There are two ways to Tag your people:
Add Tag(s) To One Person
Select the person's name on the People Screen and select that person's Tags tab. This will list every tag to which the person is currently assigned. Select the Add Tags button and begin selecting the Tag(s) that apply to this individual.
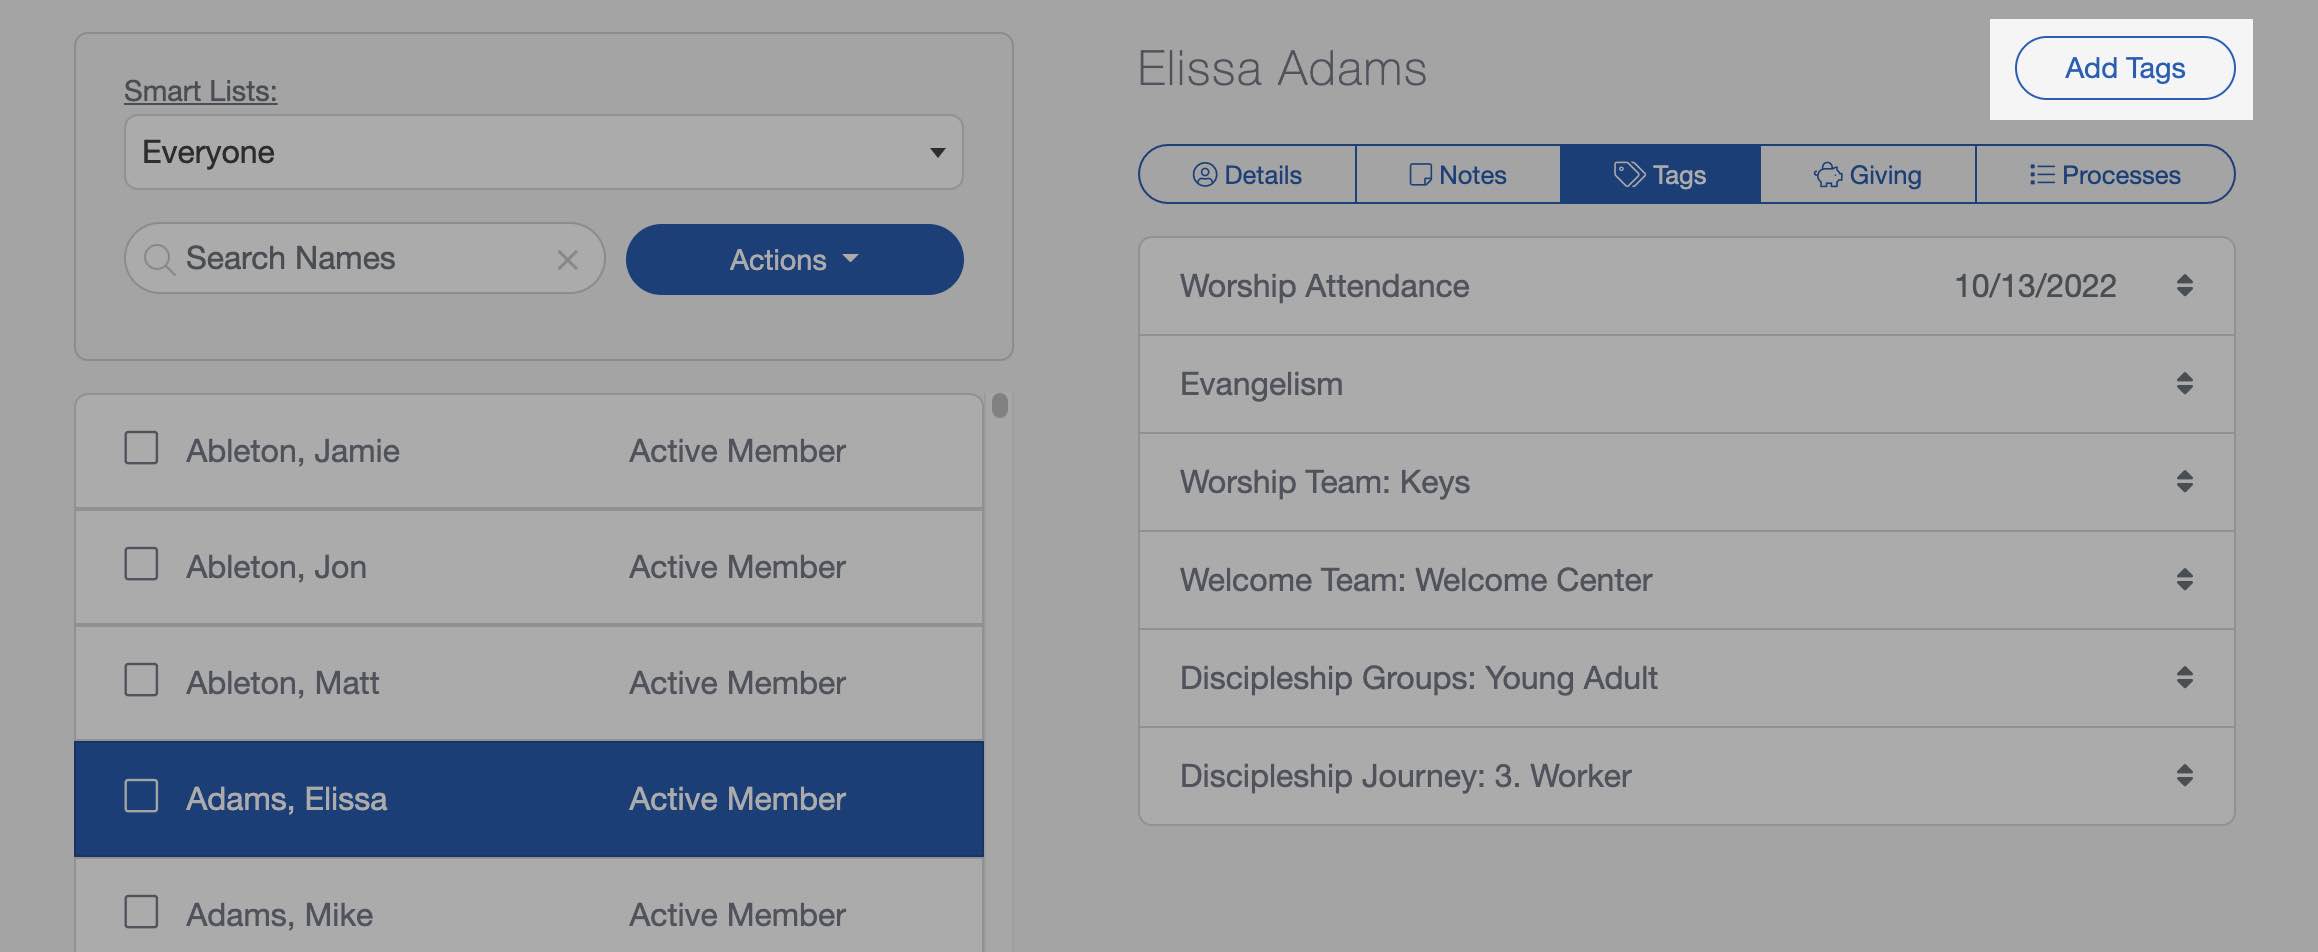
After selecting the Tag(s) that apply to the individual, select "Done" at the bottom of your display. The Tags tab will refresh to show all the tags that have been added. You can drag and drop these tags into any order you wish.
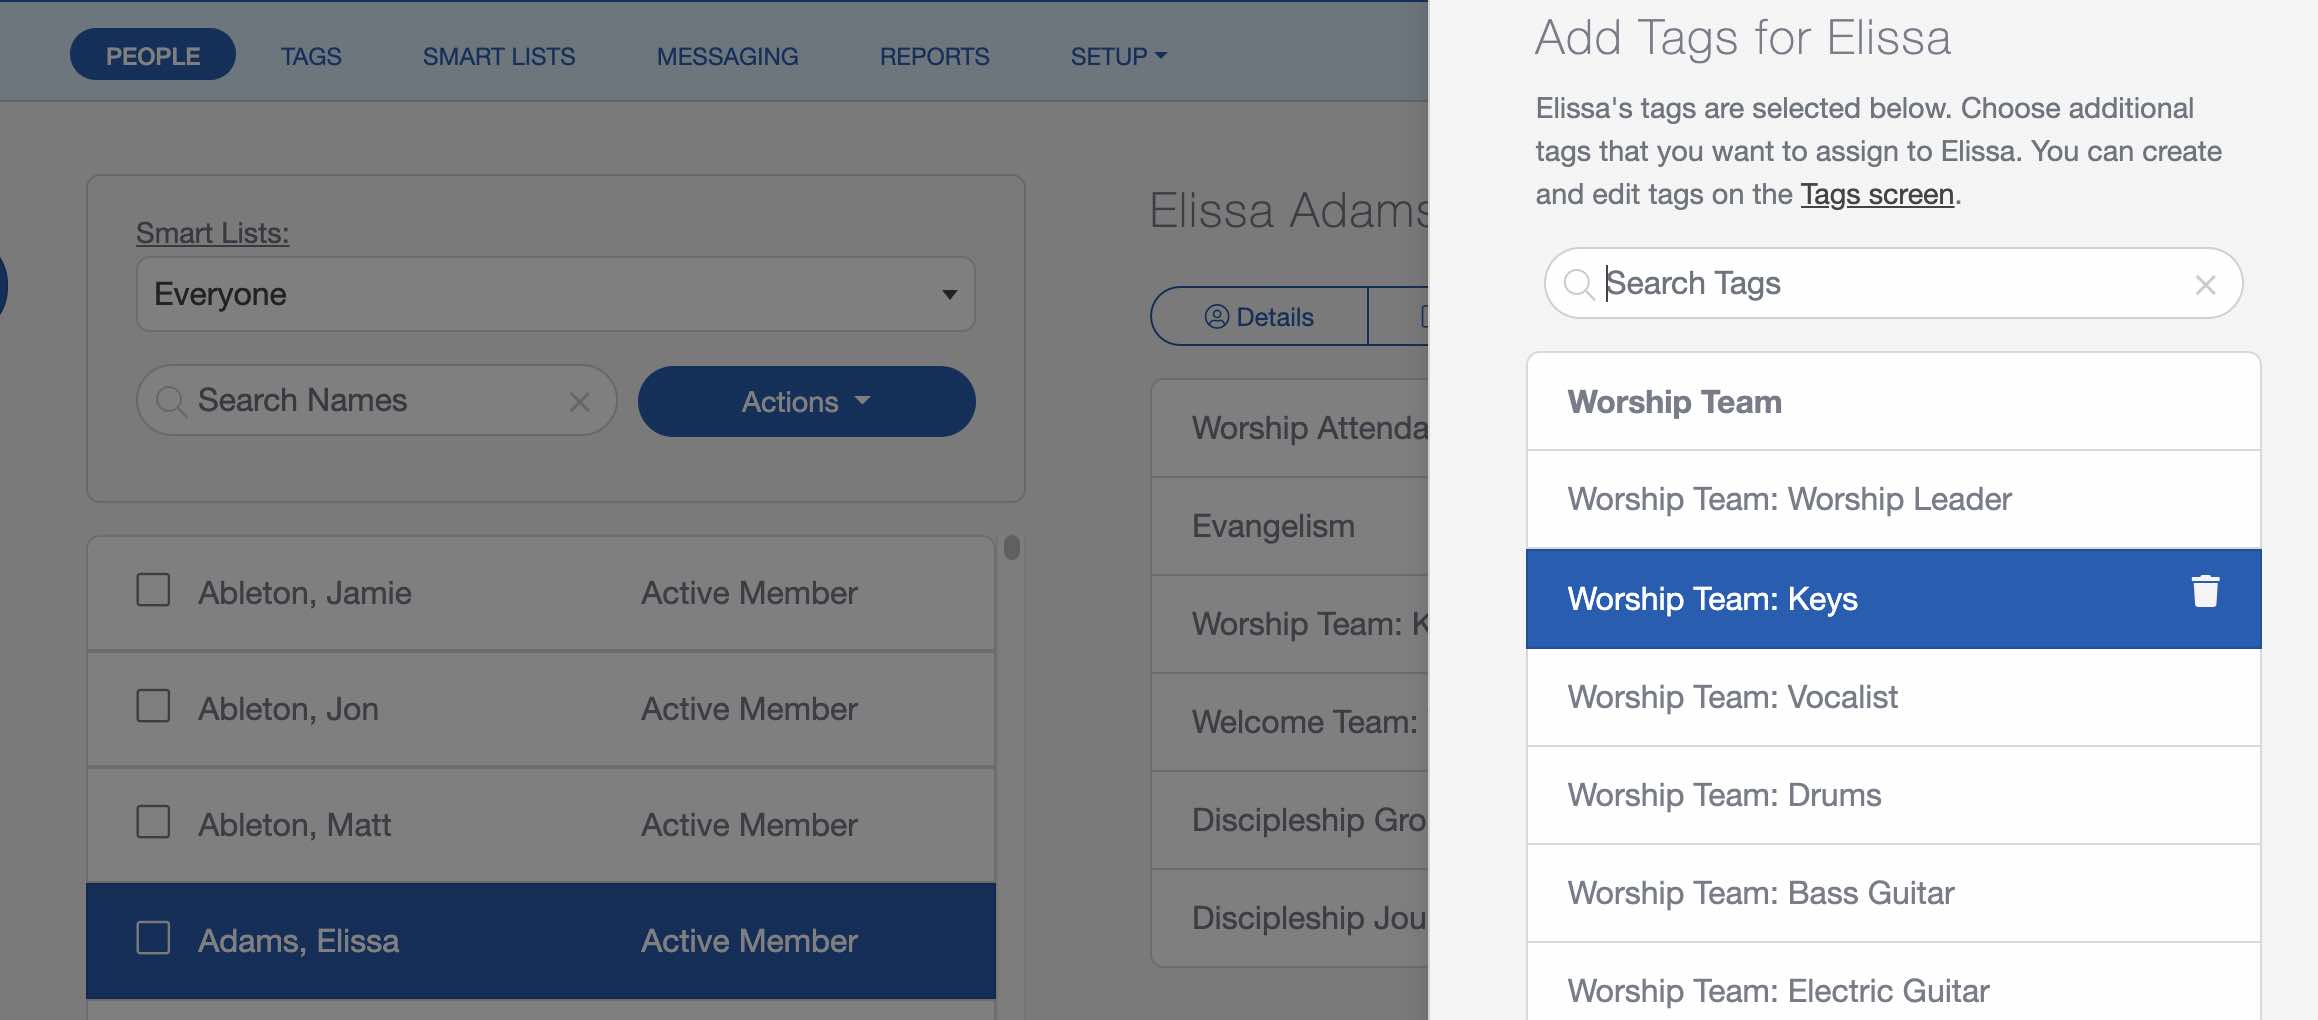
You can add a short note to each Tag assignment if needed. Select one of the person's listed Tags and type a note. You can also delete a tagged assignment from here if needed.

Add A Tag To Multiple People
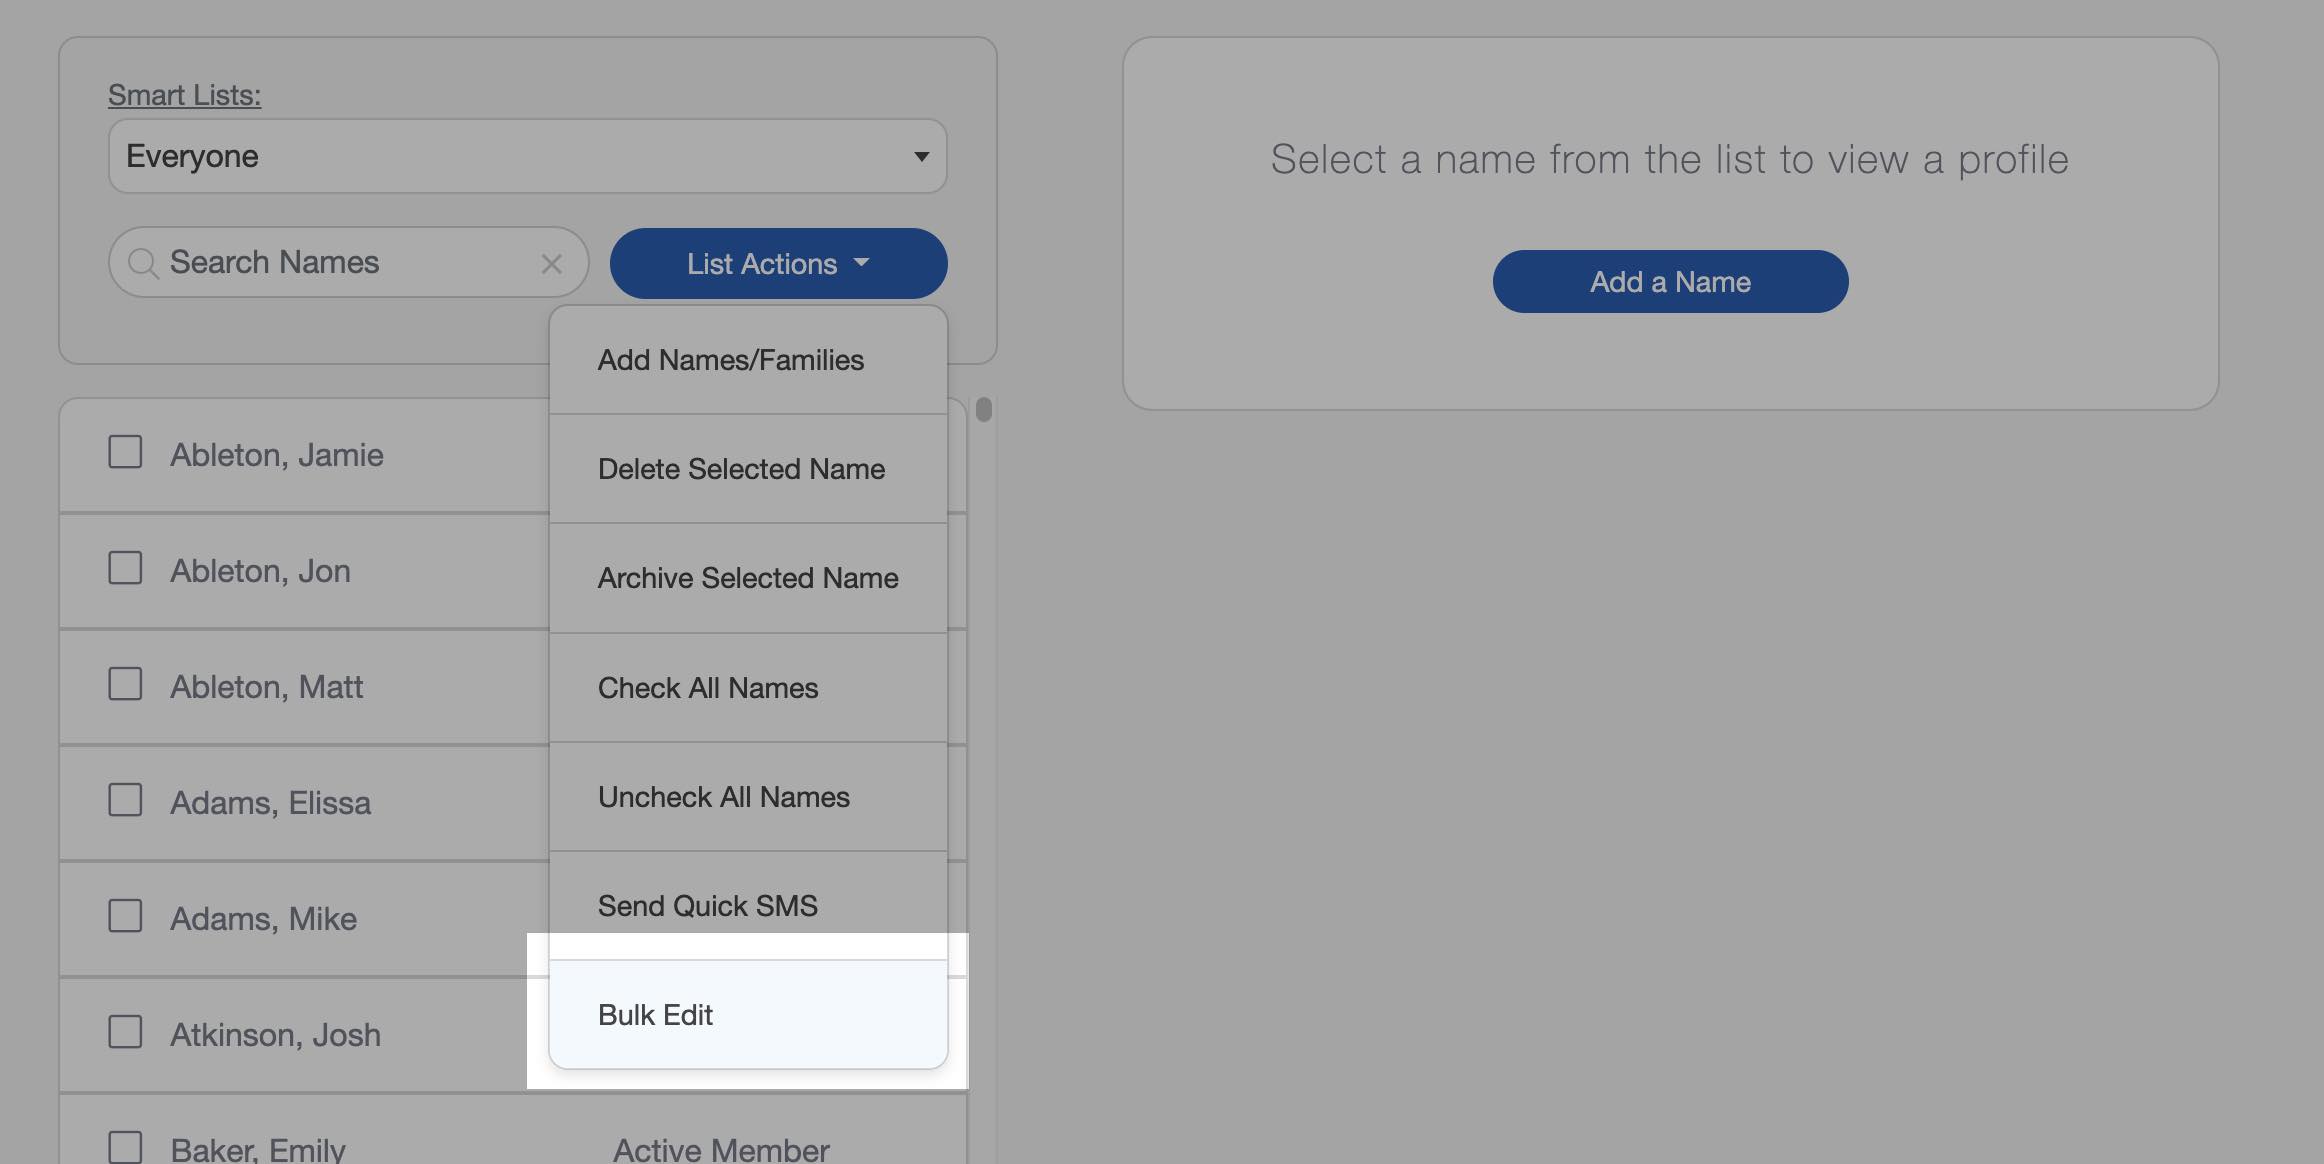
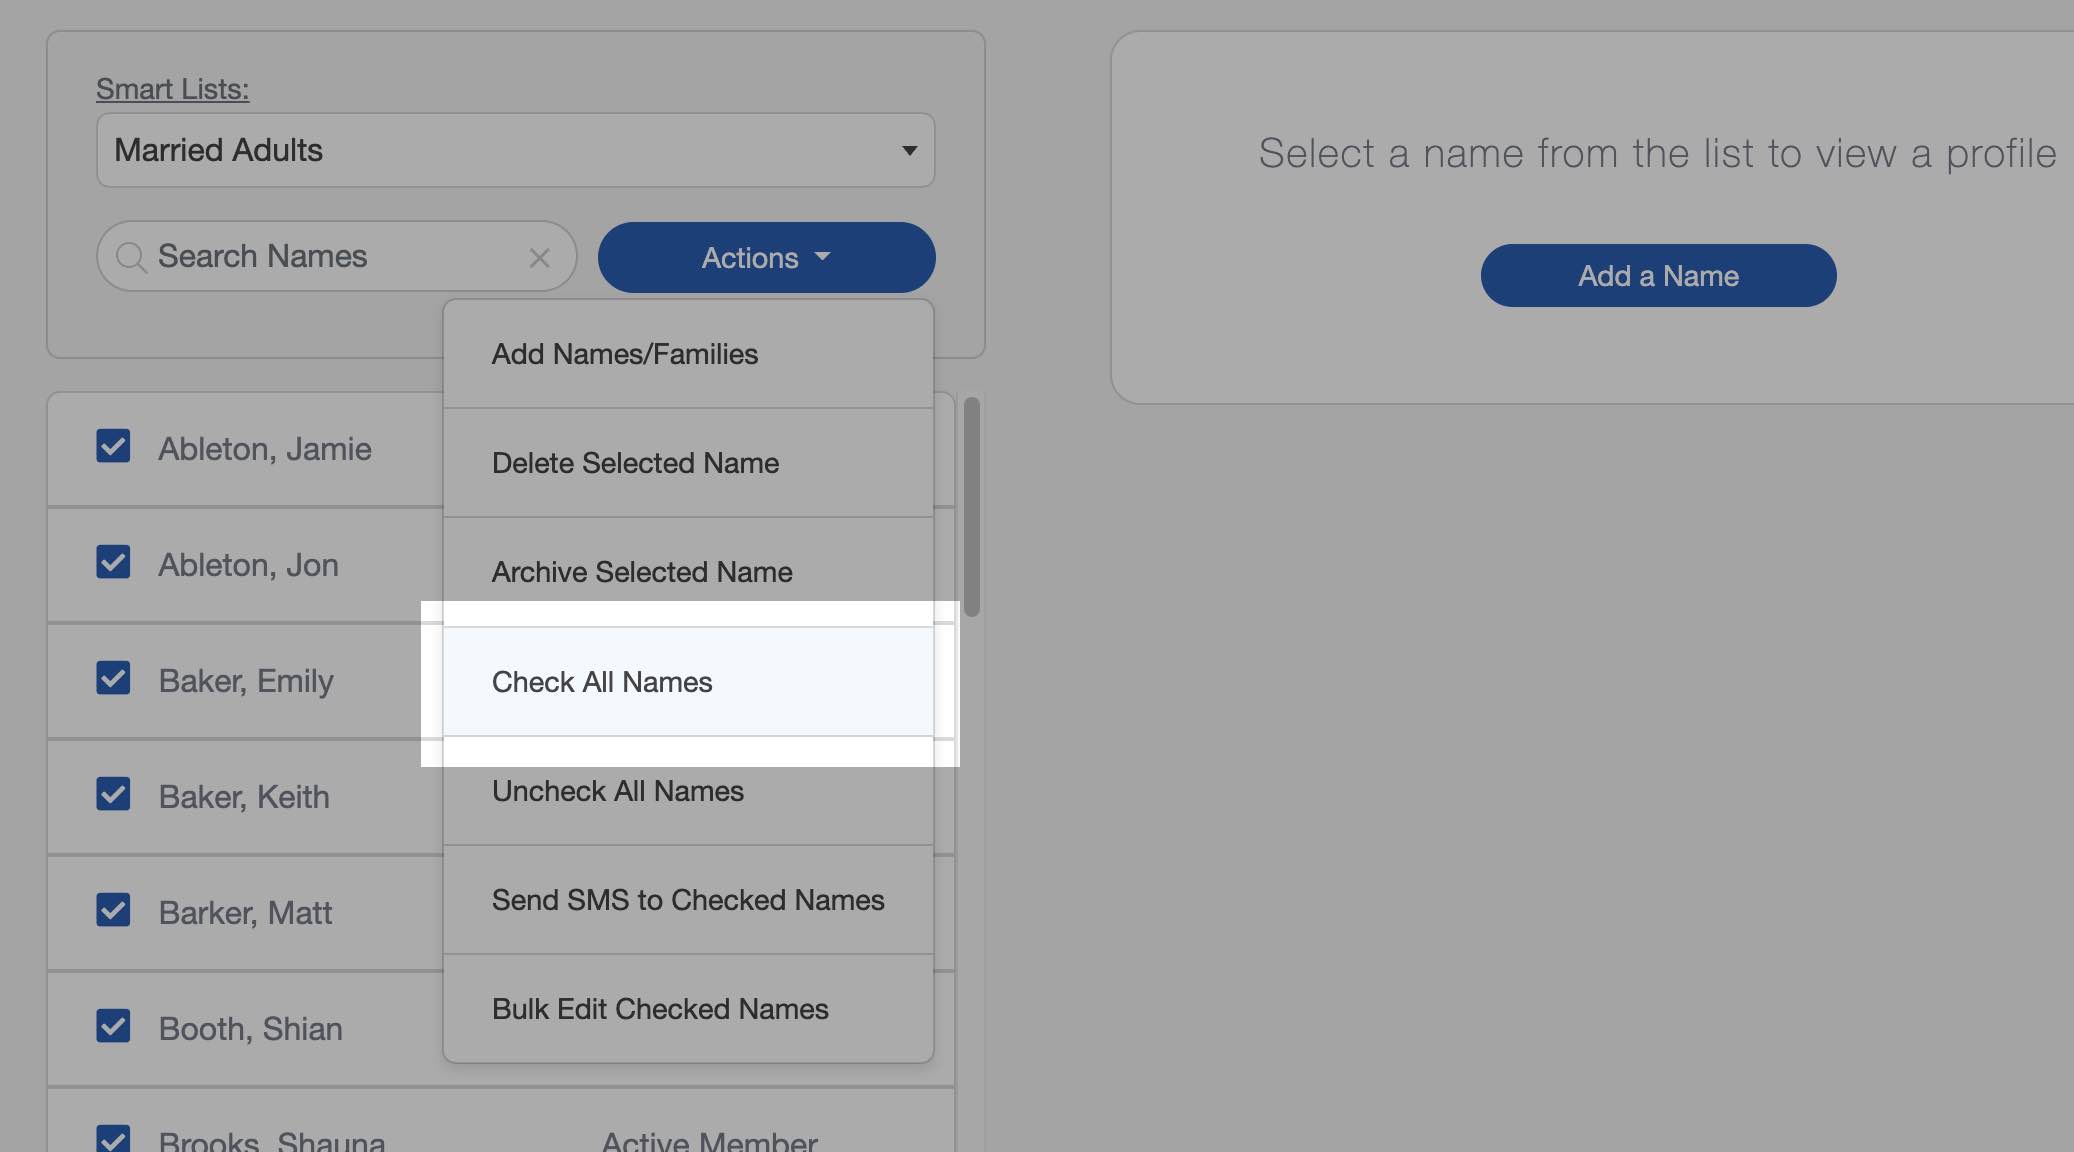
This option involves using the bulk edit feature to quickly add multiple names to a tag. To begin, open the People Screen and start checking the box next to the people who need to have a certain tag applied. Once all the names are checked, click the "Actions" button and select "Bulk Edit".
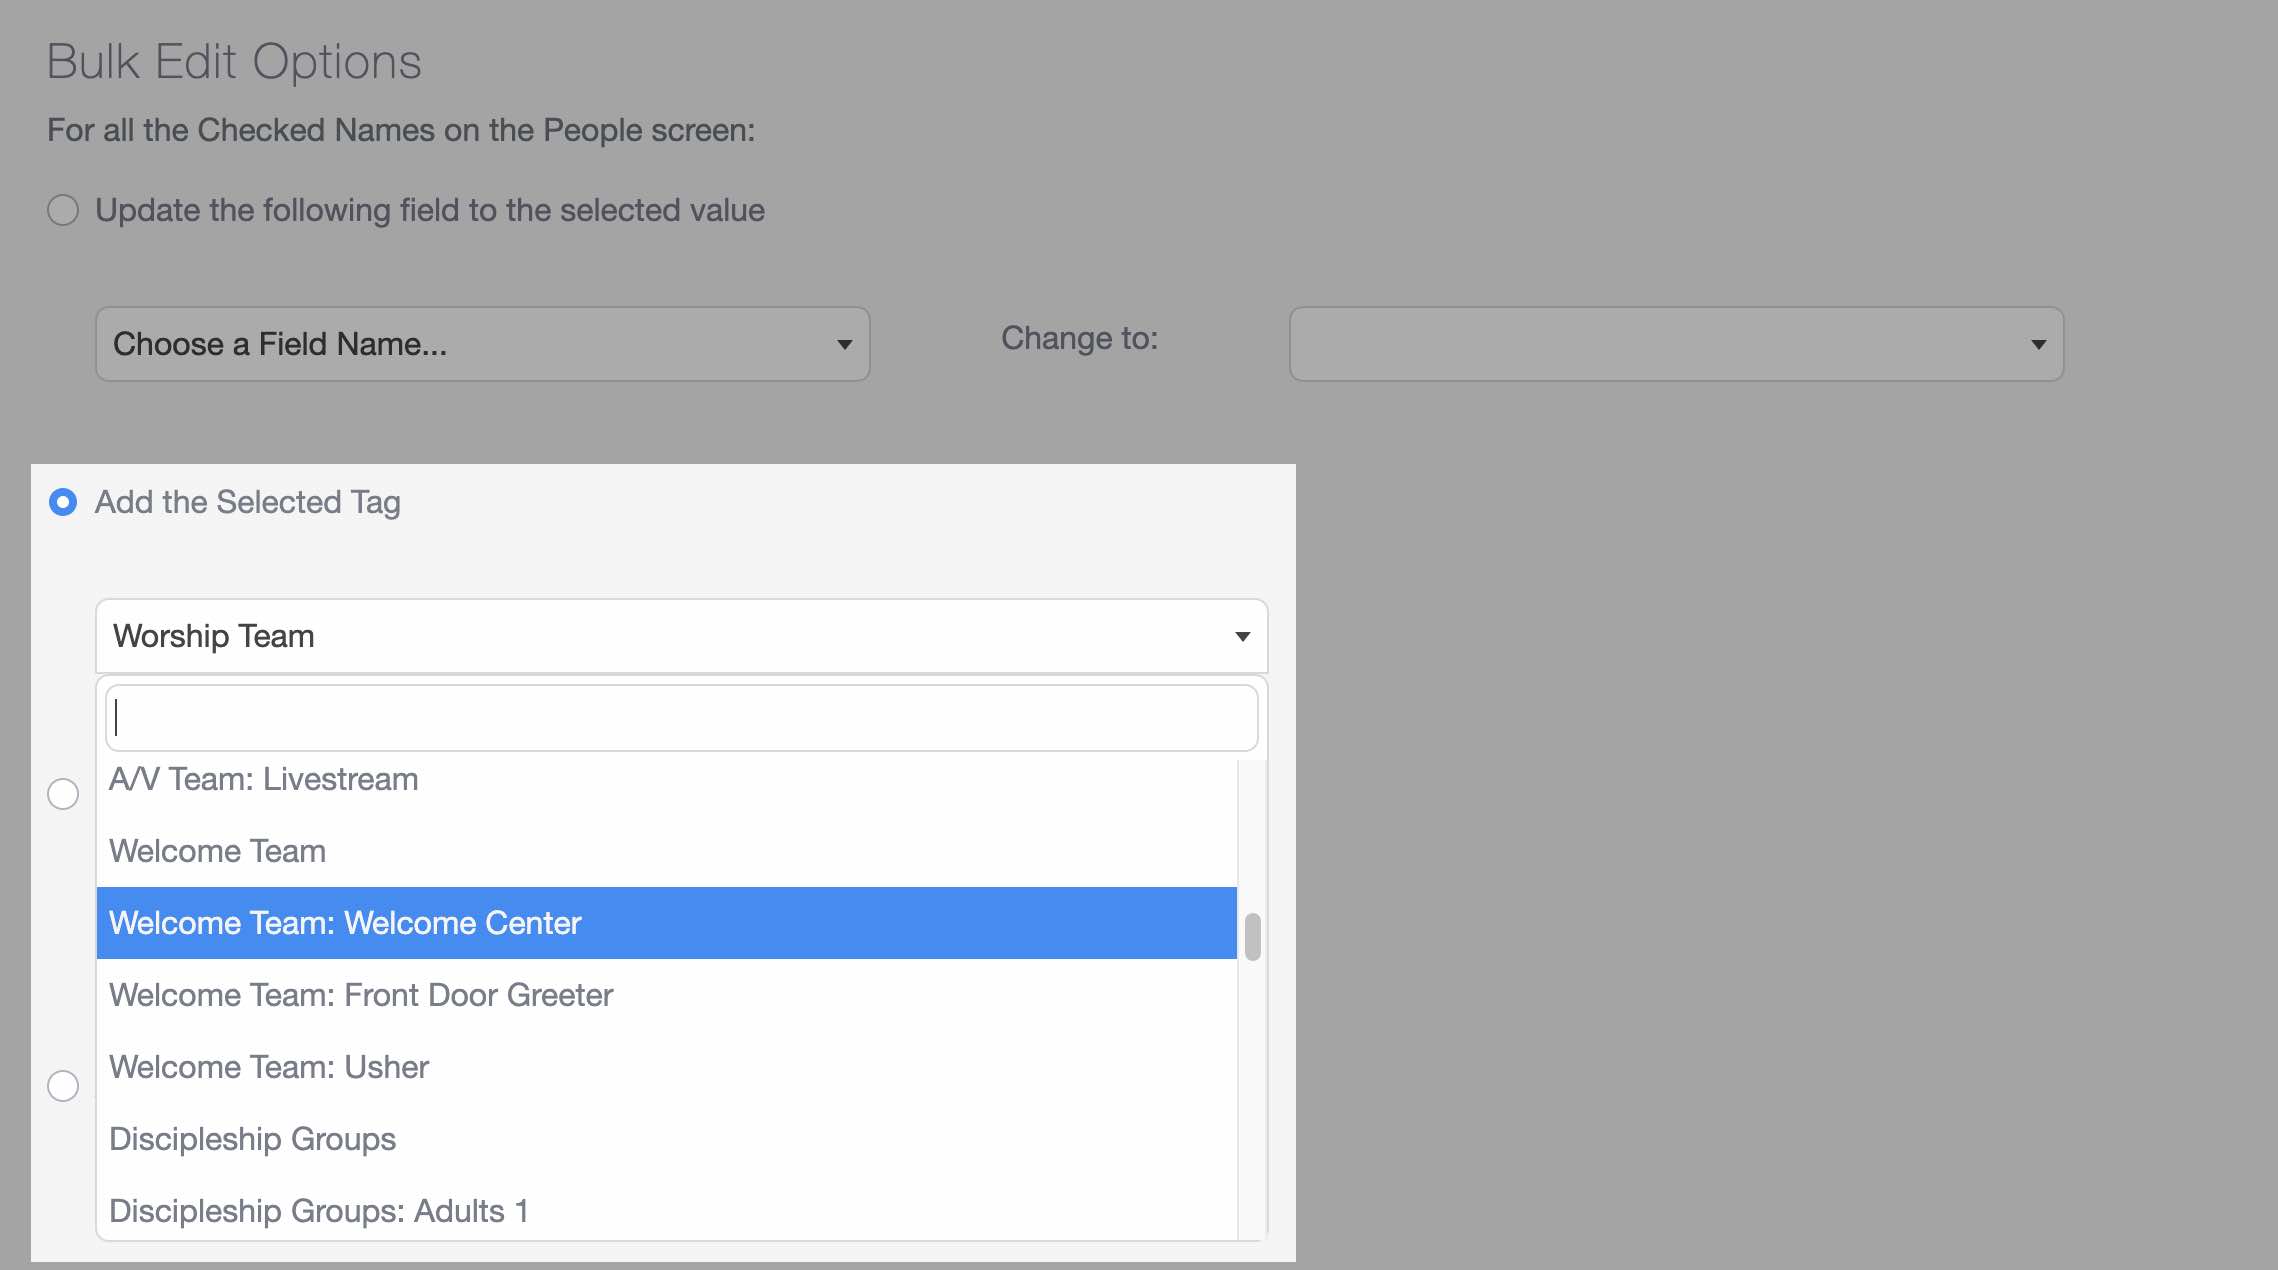
Repeat this process as needed until everyone has been assigned to the appropriate tags.
If you use the church attendance or check-in features, you can also add people to a Tag from those screens as well. Typically, however, you'll want to use the People Screen for assigning and managing tags.