Getting Started with Registrations
With Registrations, you can create events and give your people the opportunity to register or sign up for them. These could include Youth Camps, VBS, Festivals, Potlucks, conferences, classes, and other ministry events your church hosts.
You can manage registrations directly from events on your Calendar or from the Registrations tab on the Events screen.
- Enabling Registrations
- Who Can Register for Events
- Choosing a Registration Method
- Attendee Types & Cost
- Form Questions
- Sharing Registrations
- Managing Registrations
Enabling Registrations
Registrations are connected to events in your calendar. To enable registrations, you’ll first need to create a new event or open an existing one.
You can do this in two ways:
- Create or select an event directly from your Calendar tab
- Create or manage an event from the Registrations tab on the Events screen
If you’re starting from your Calendar:
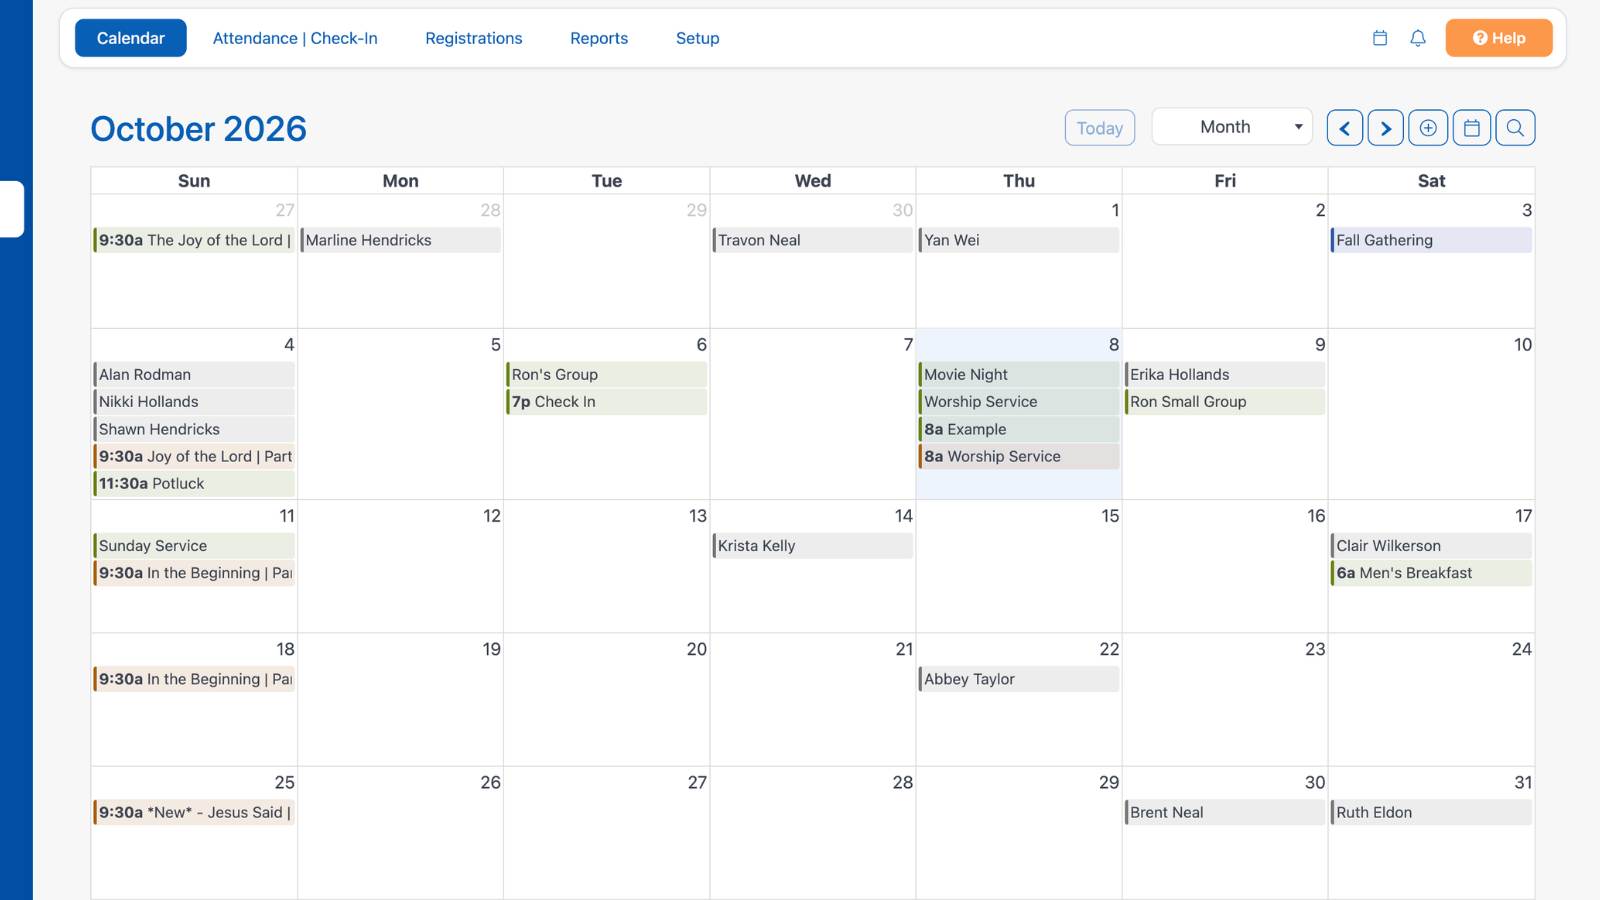
First, select the event.
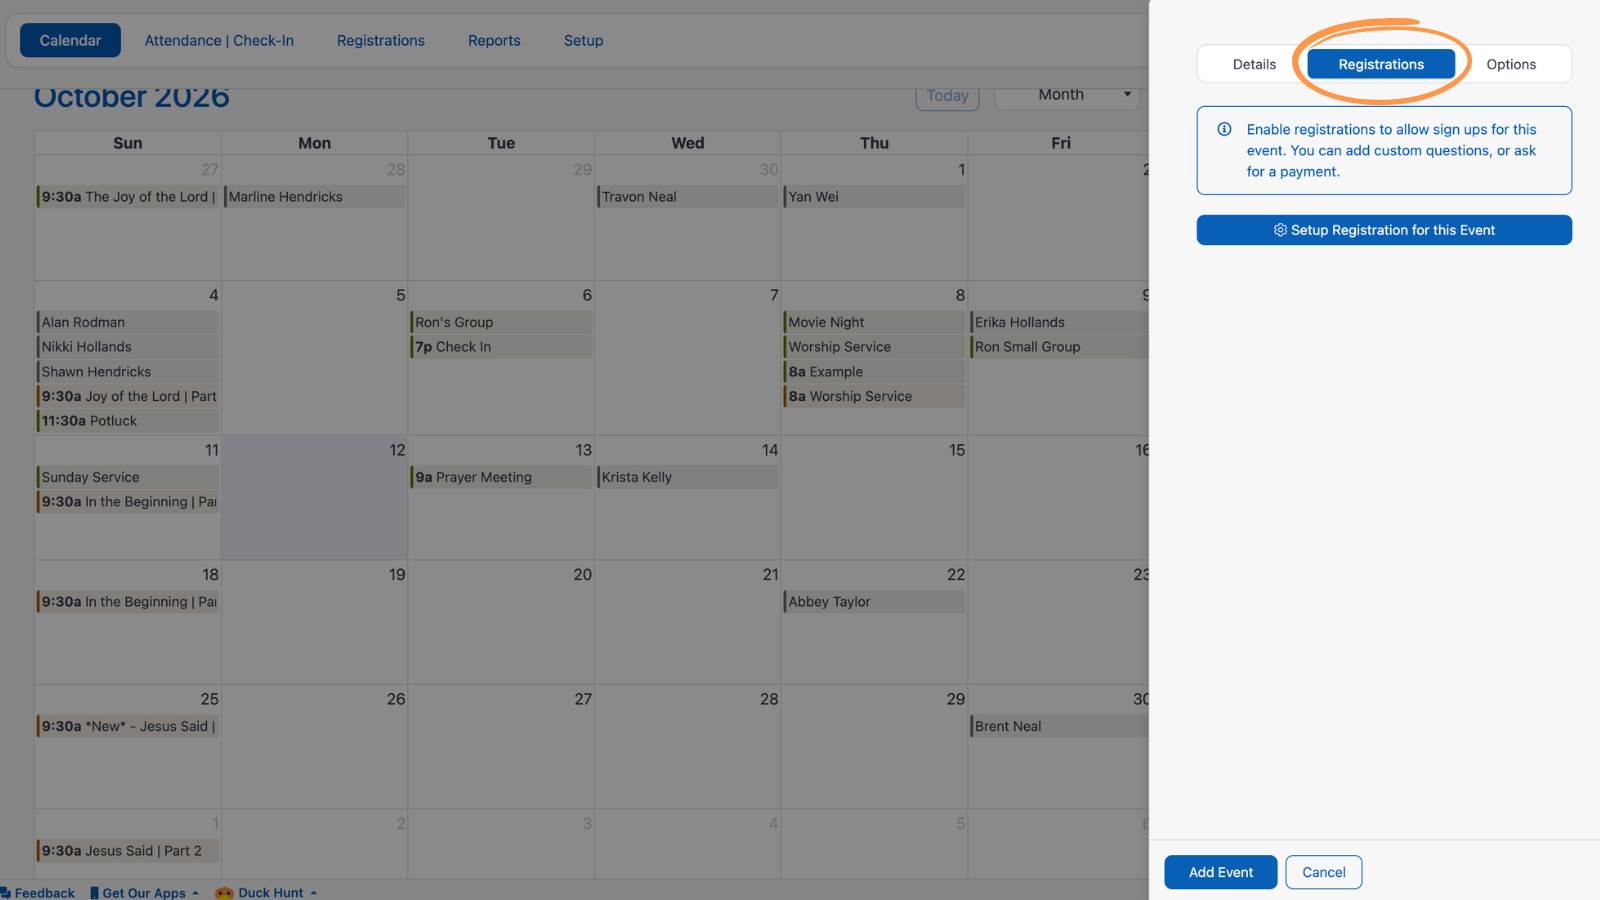
Then, click the Registrations tab.
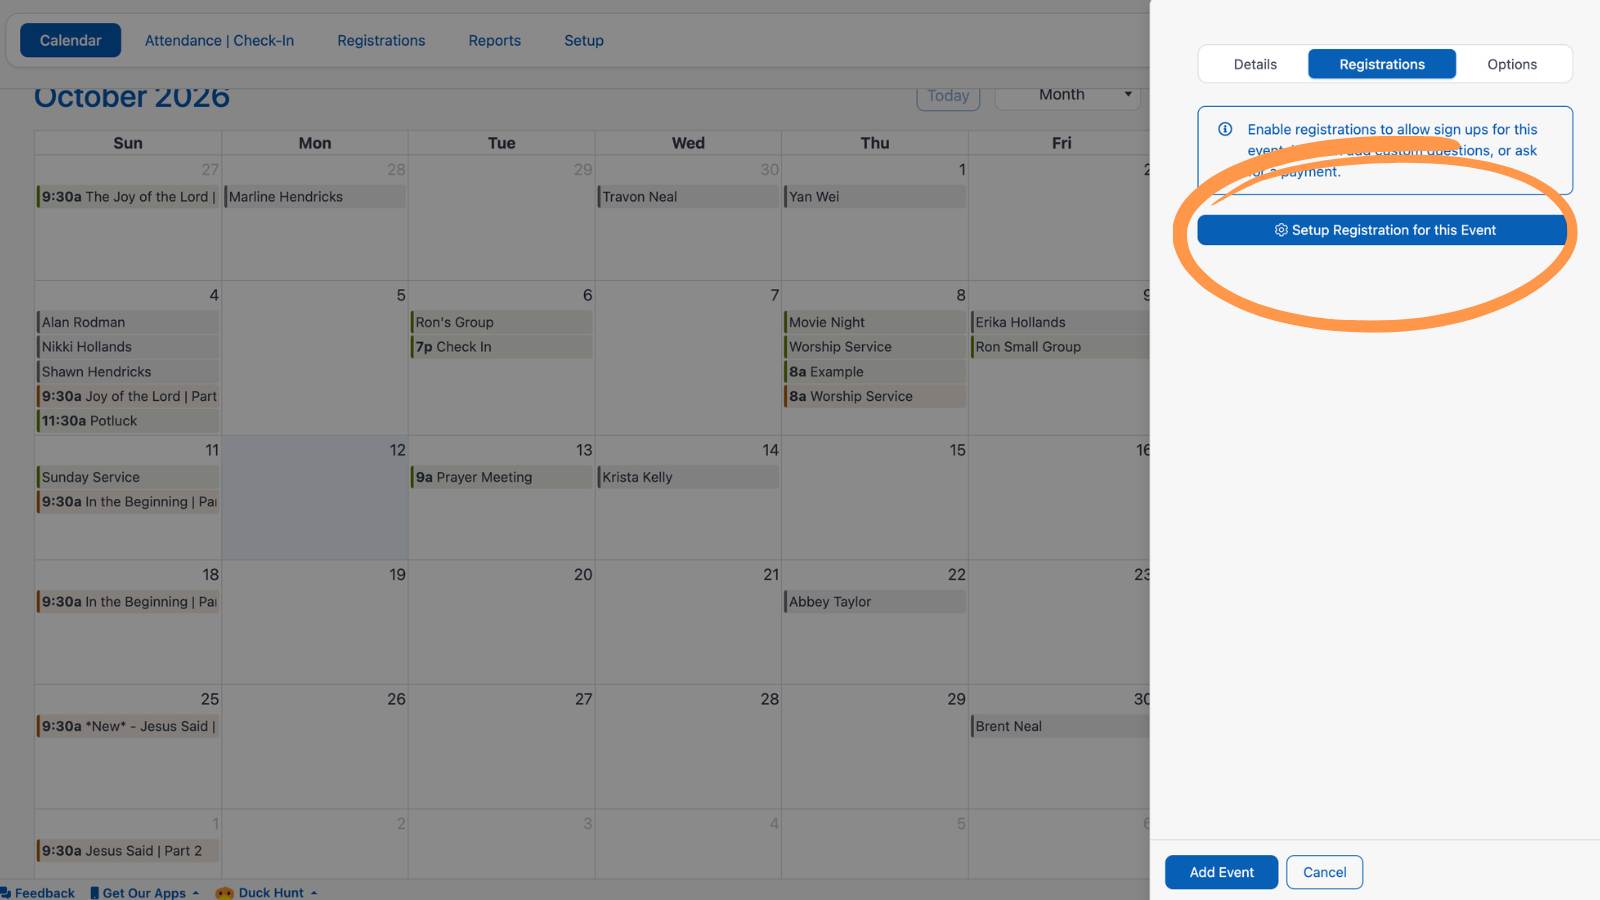
Choose “Set Up Registrations for this Event.”
If you’re starting from the Registrations page:
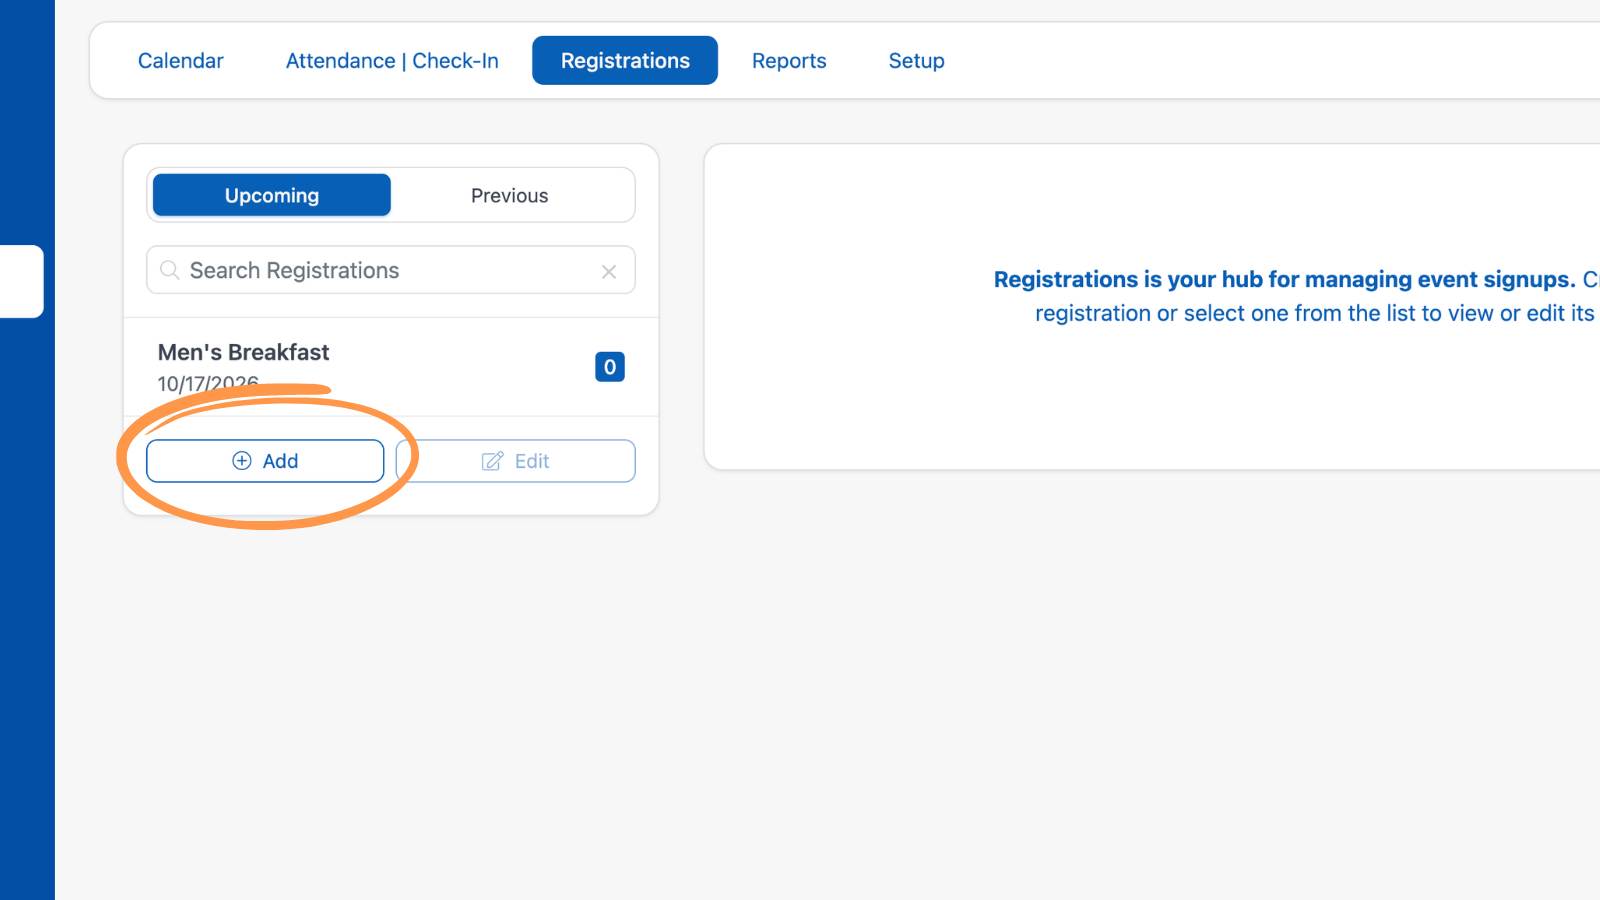
First, select "Add" to create a new event.
Then, click the Registrations tab.
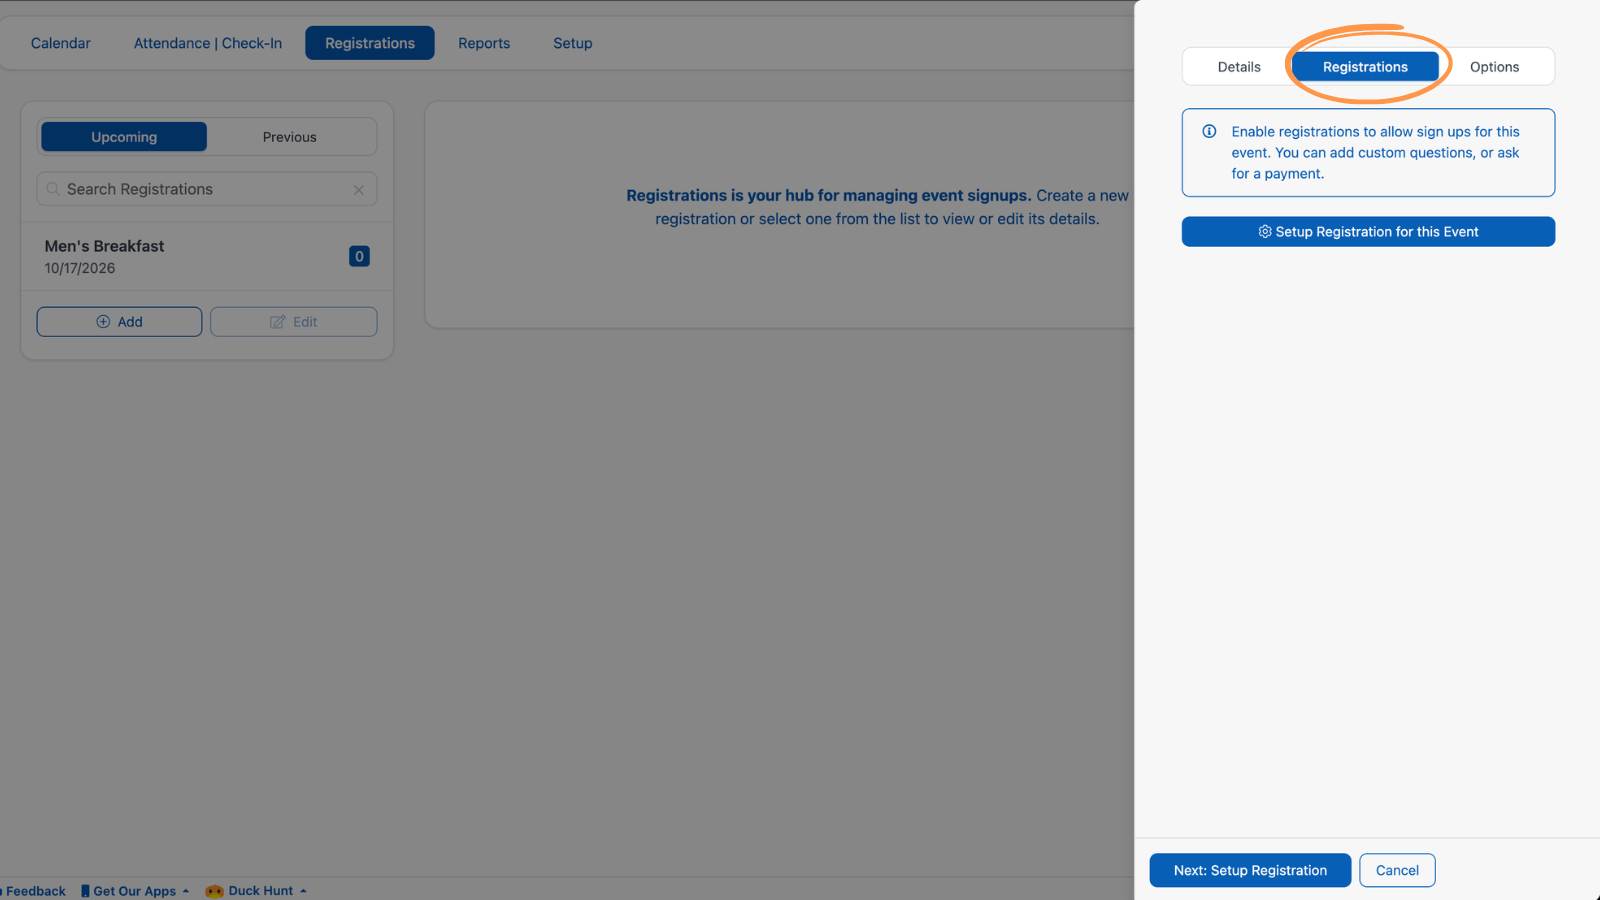
Then choose "Set Up Registration for this Event."
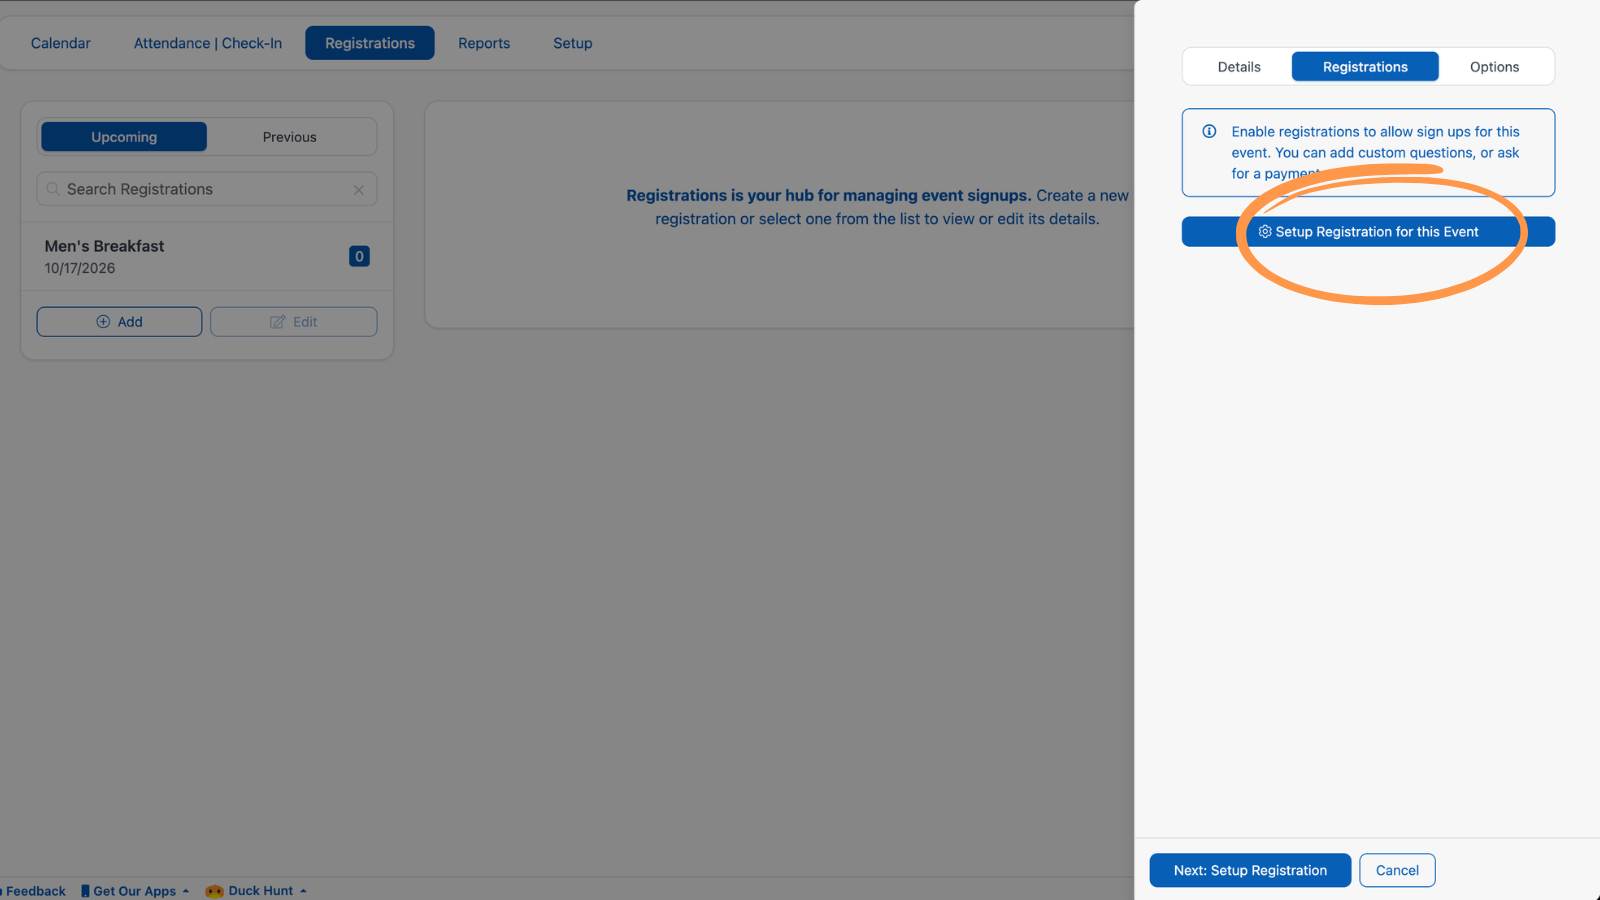
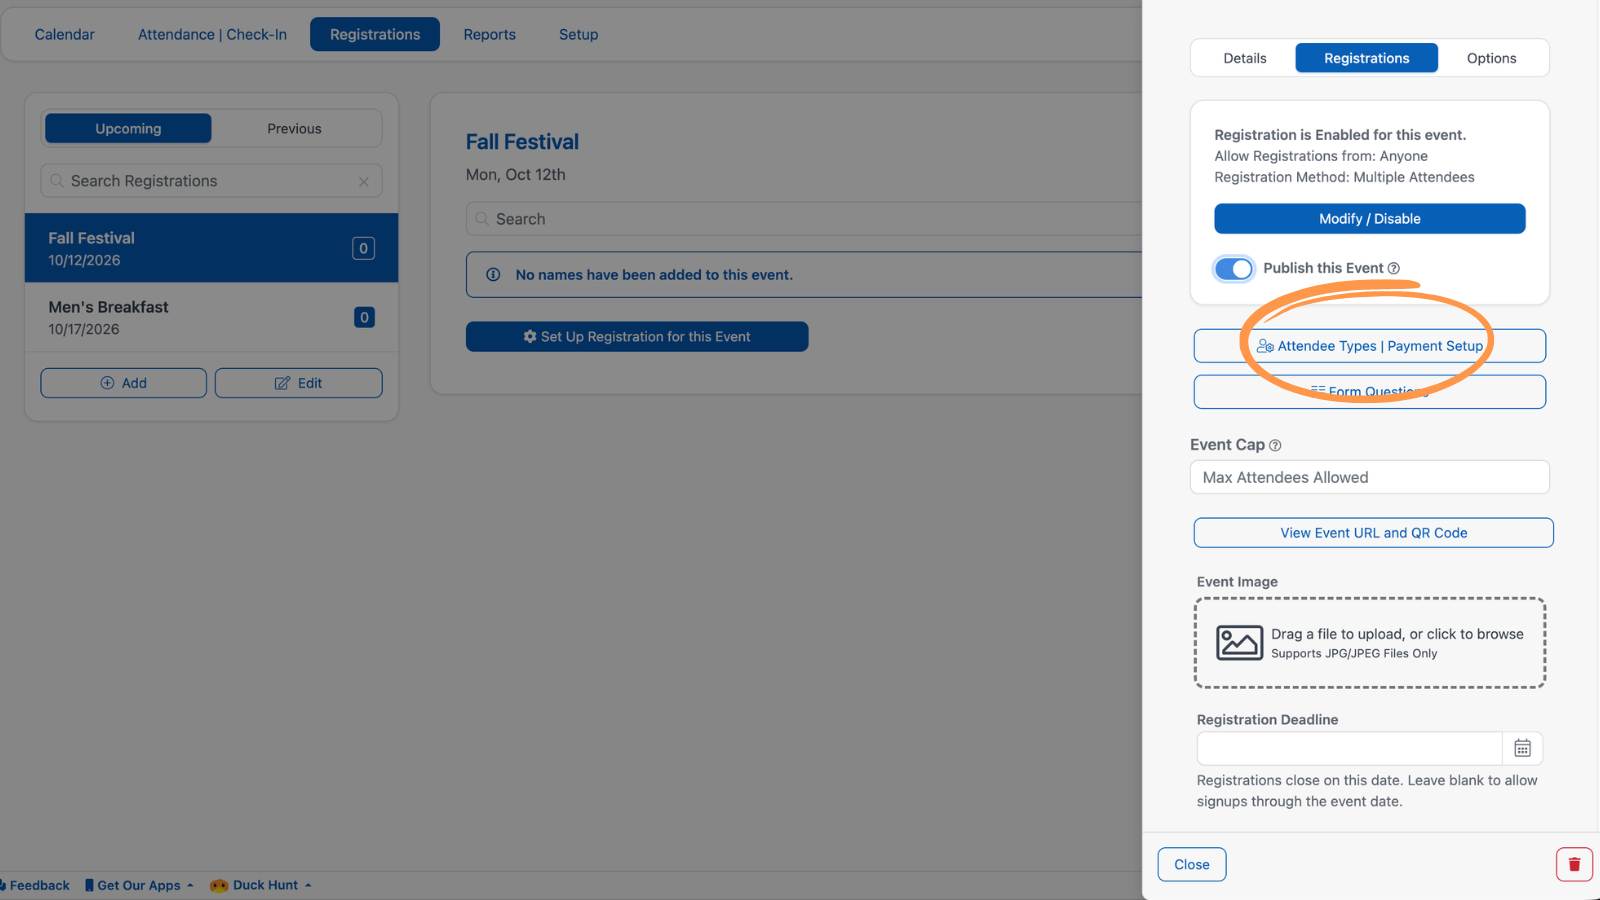
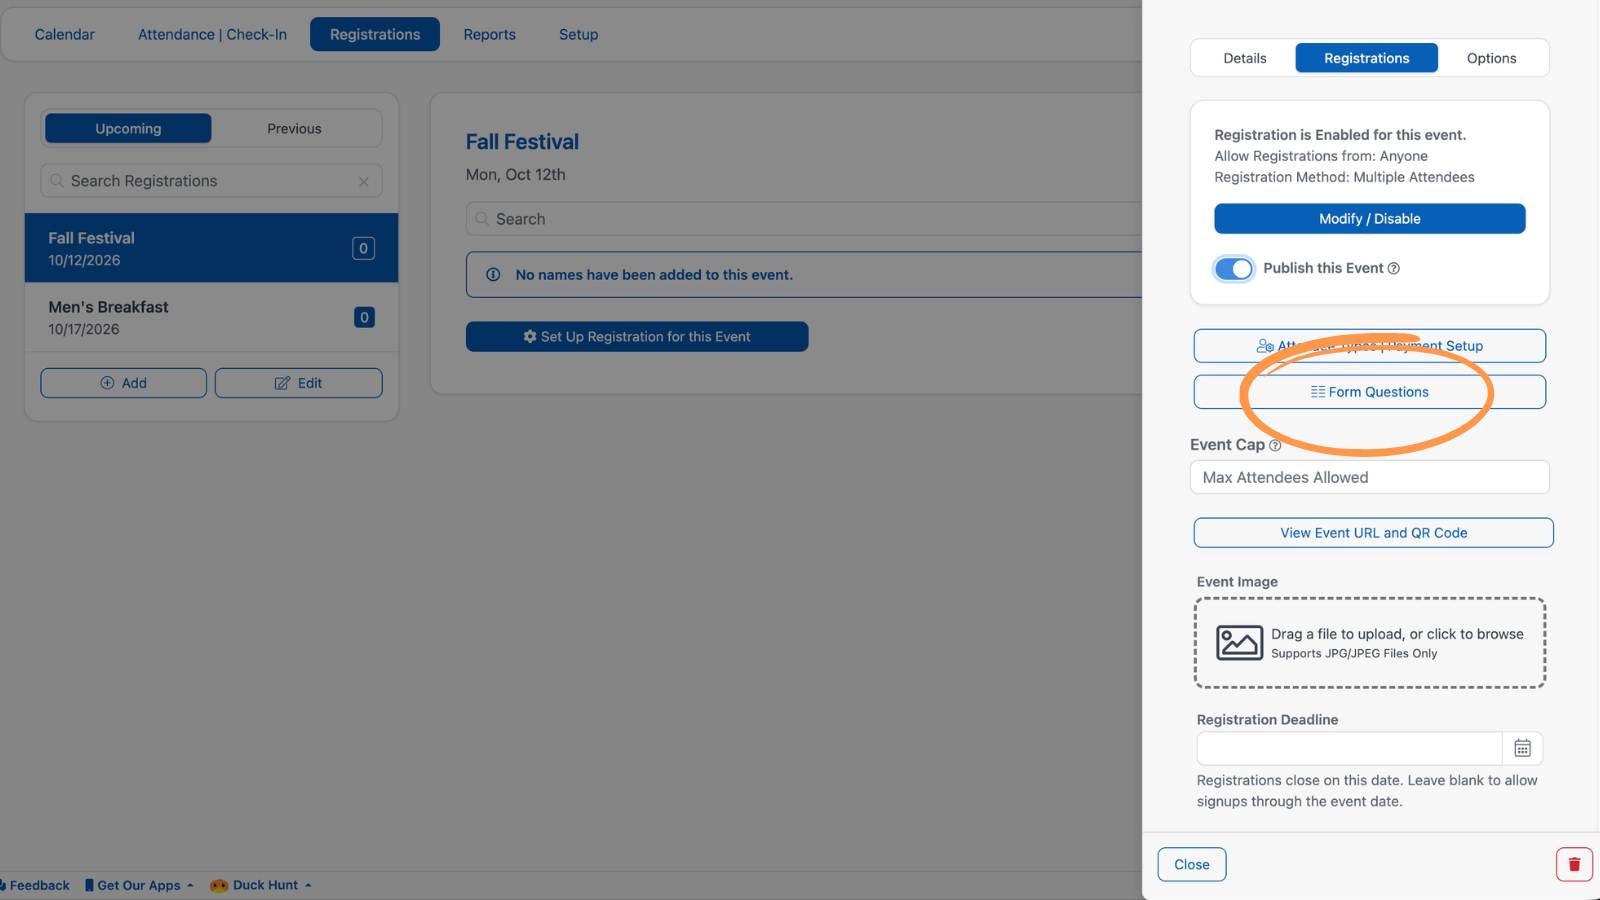
Within the slide-out menu, you can modify the registration (configure who can register/choose a registration method) or customize the registration further (add attendee types or collect form information).
Who Can Register for Events
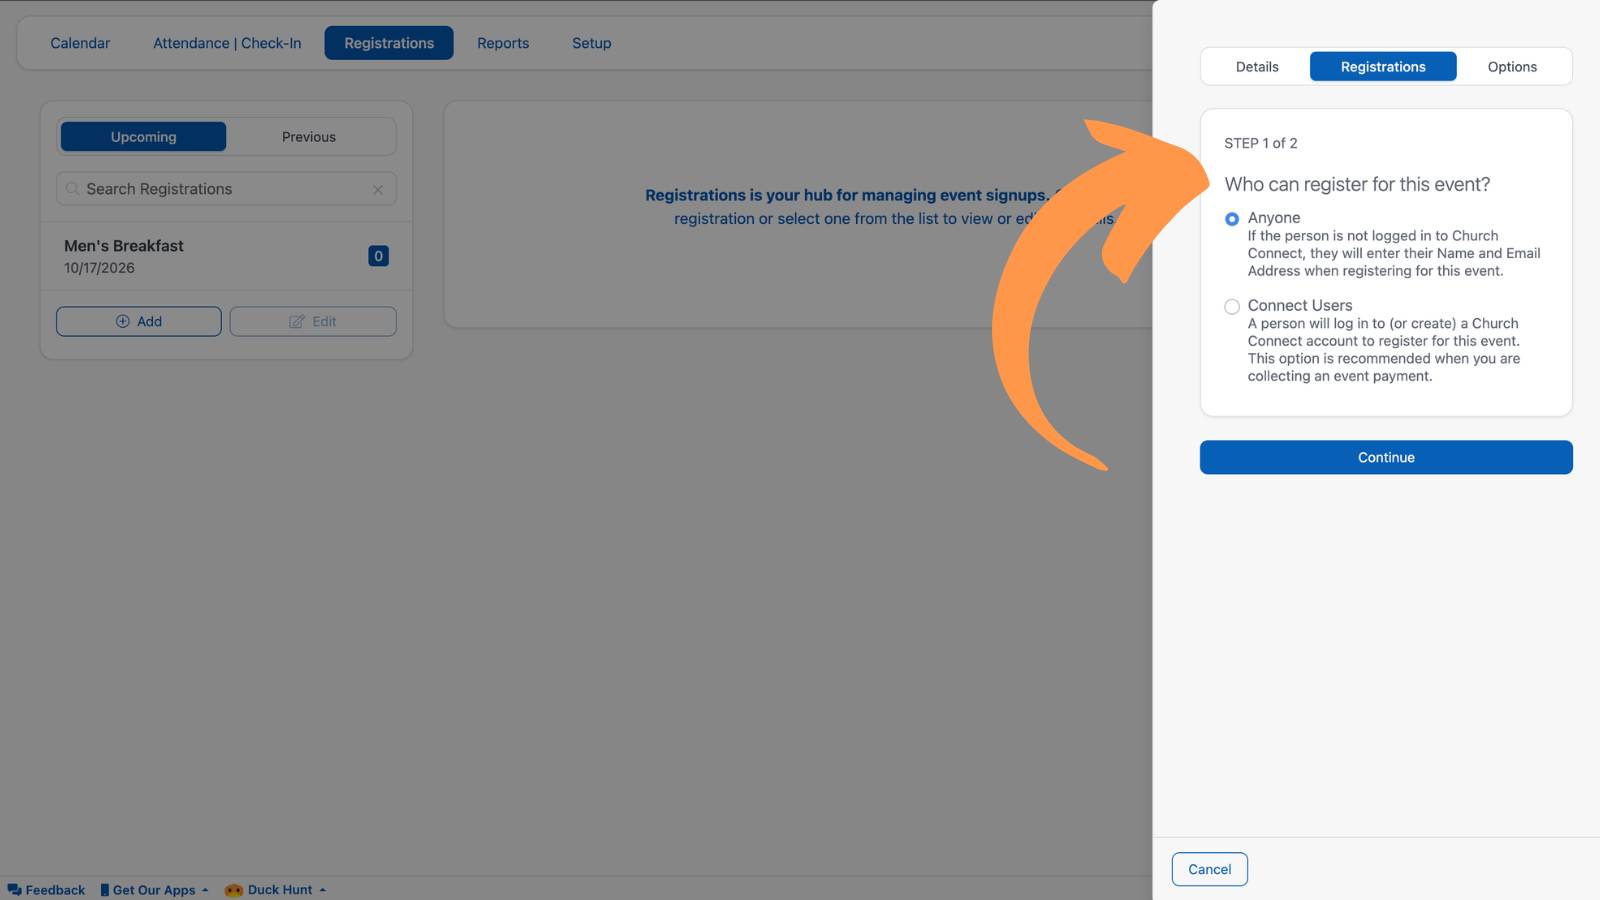
ChurchTrac gives you the option to enable registrations for Anyone or limit them to Connect Members. Learn more about Who Can Register for Events ›
-
Enable Registration for Anyone
This allows anyone to register, even if they don’t have an account in Church Connect or are not members of your organization. We will automatically add fields to the registration form asking for the person’s name and email address.
-
Enable Registration for Connect Users
This restricts who can register for an event to only those with an account on your Church Connect app. If a member of your church or organization wants to register, they will first have to create an account in Church Connect and be logged in to that account as they proceed to register.
Choosing a Registration Method
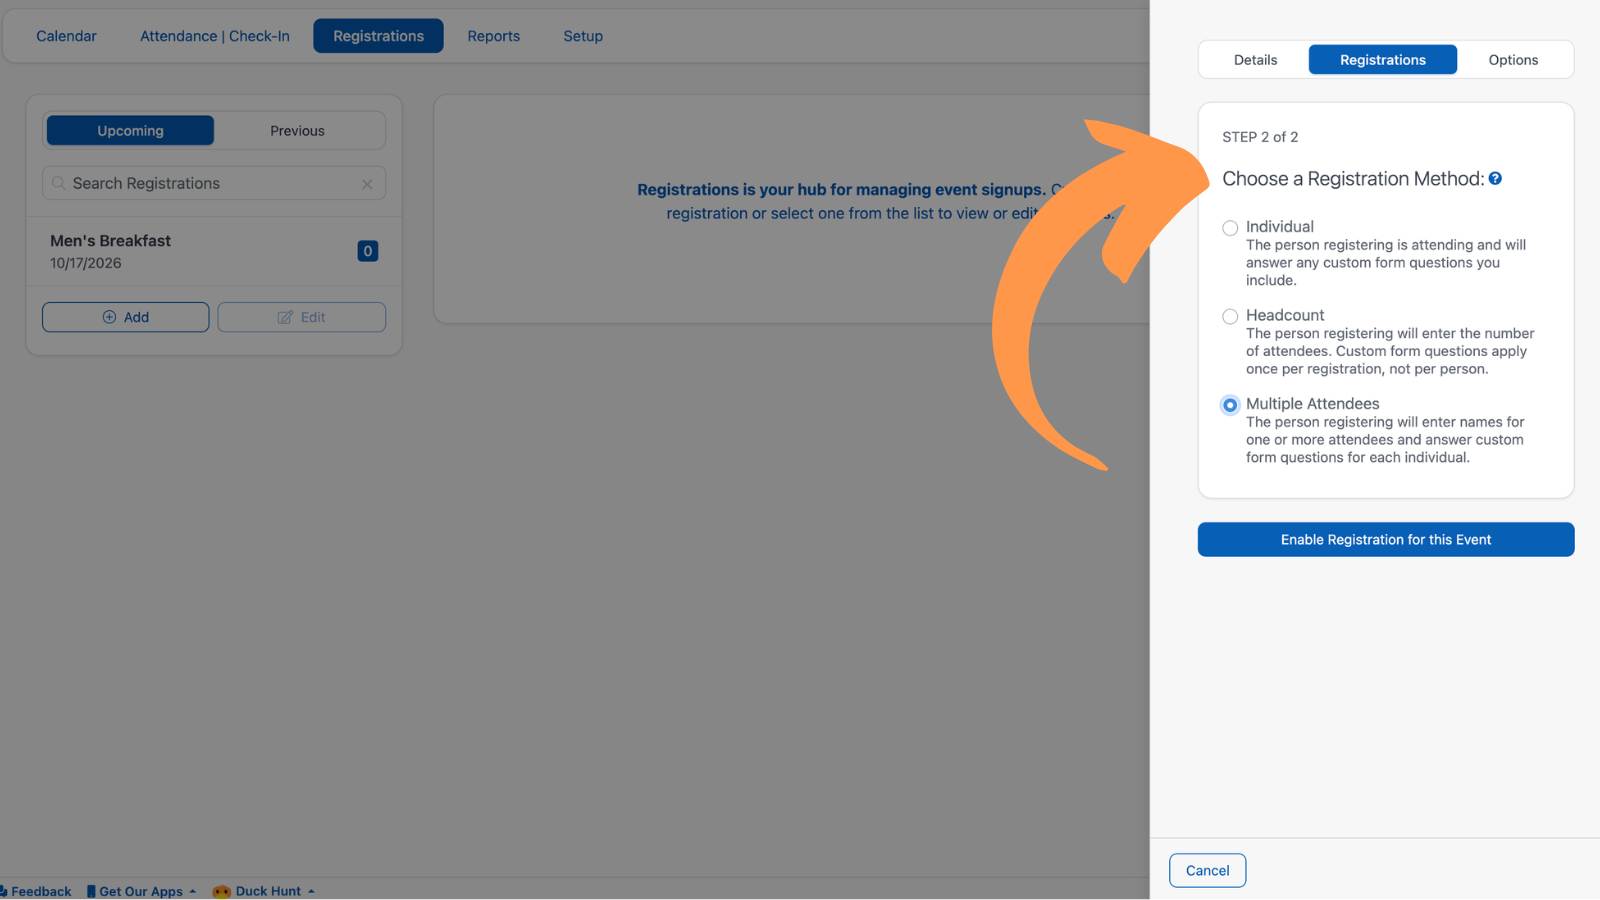
Choose a registration method based on how you want to track attendees at your event. Each one allows you to collect different information from your registrants.
An Individual Registration collects info on just the person registering, a Headcount Registration collects a total number of people attending, and the Multiple Attendees Registration collects additional info on each attendee. Learn more about Creating New Registrations ›
Attendee Types & Cost
You can specify different types of attendees for an event and also designate the costs associated with those attendees. For example, let's say you're hosting a mid-week dinner. In this case, we have an Adult and Child Attendee Type with different costs for each. Learn More about Attendee Types and Cost ›
Form Questions
Depending on the event, you may need to ask for additional information from your registrants. You can create your own fields, import from a previous event, or choose from pre-built fields to help save you time. Learn More about Form Questions ›
Sharing Registrations
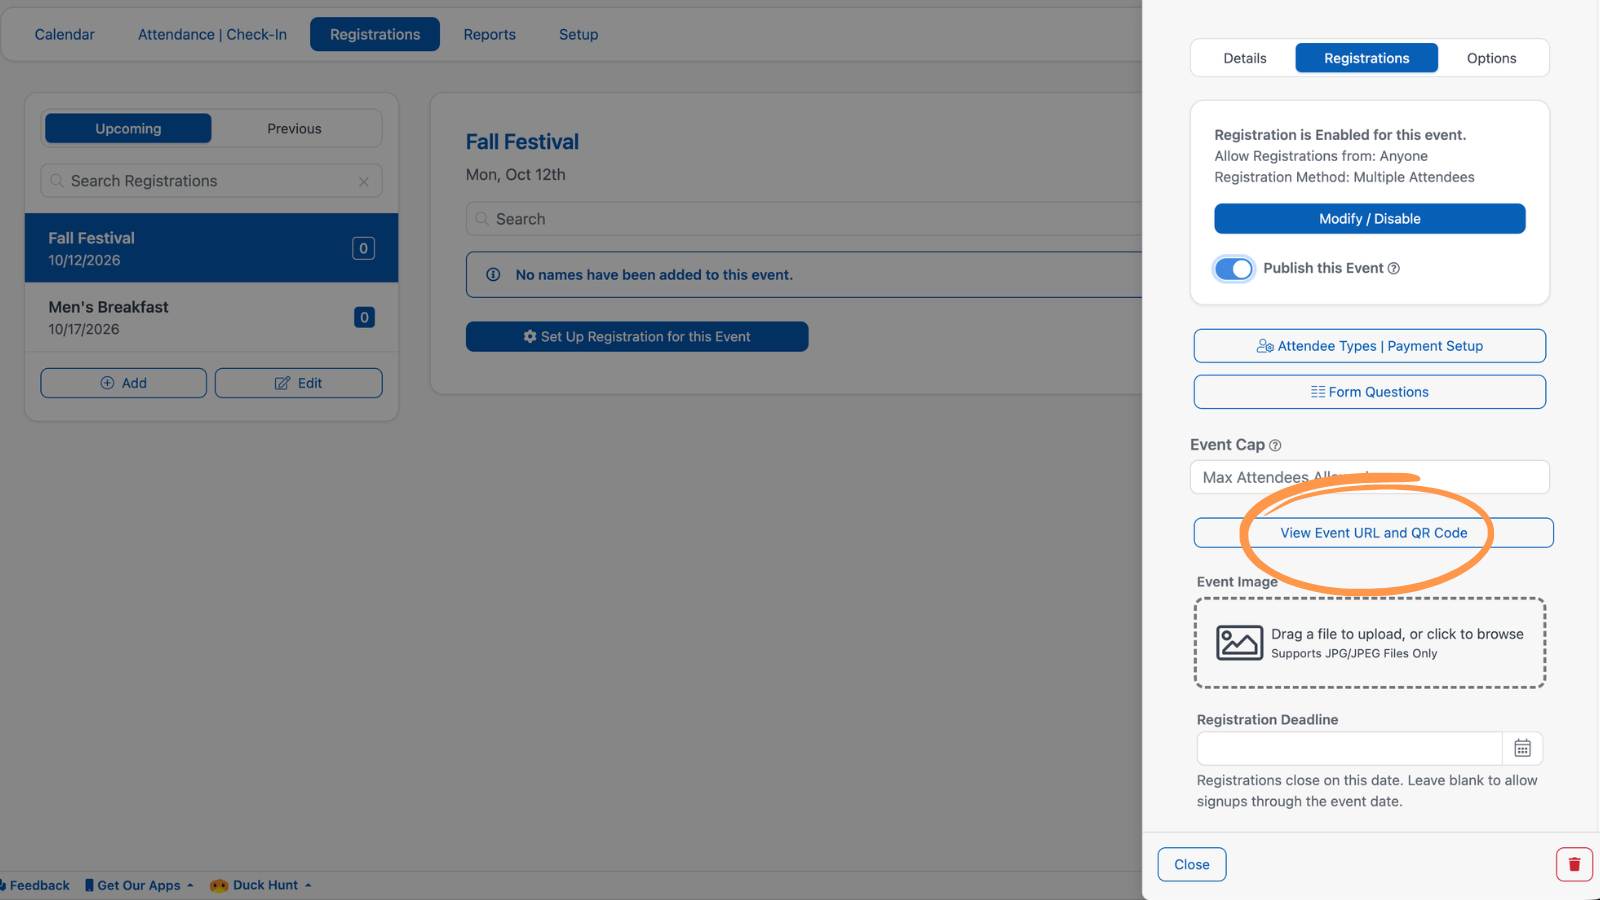
Once you've created an Event Registration, you can share the event on your church website, social media, church app, and more.
Managing Registrations
You can manage registrations in two ways:
- From an event on your Calendar
- From the Registrations tab on the Events screen
To view registrants for a specific event, open the event and select “View Registrants” from the event settings flyout menu, or select the event from the Registrations tab.
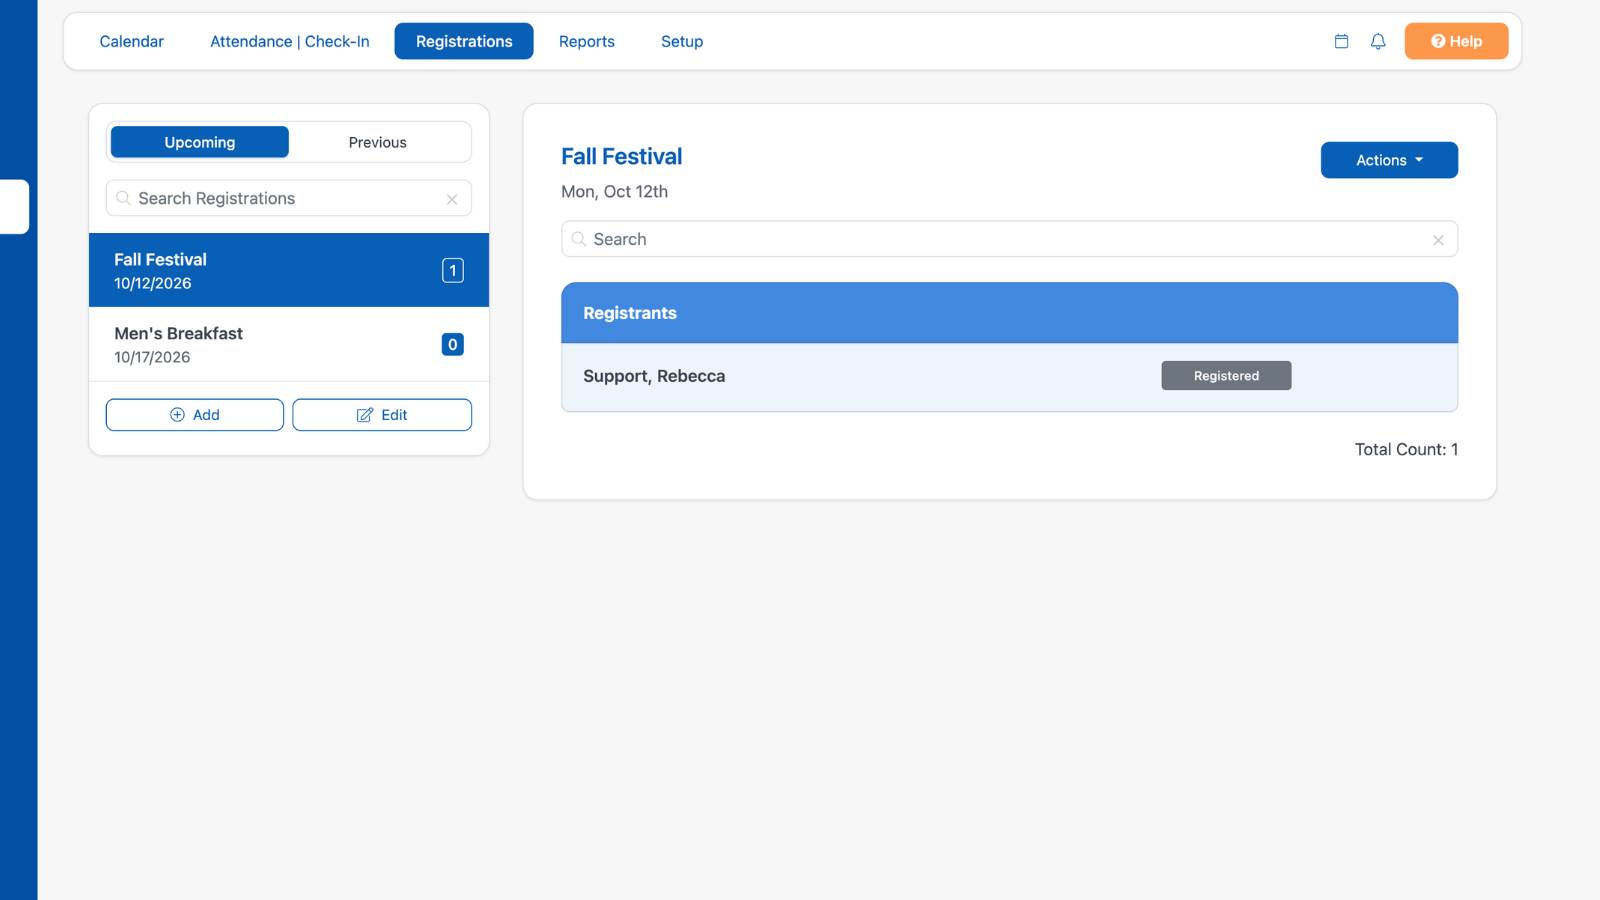
From the Actions menu on the Registrations page, you can also:
- Manage Event/Registration Setup
- View your Event URL and QR Code
- Add Names to the Event
- Send Email to Registrants
- Print an Event Registration Report
- Export the Event Report
- Show names on the People Screen
- Refresh the List
- Show Unfinished Registrations
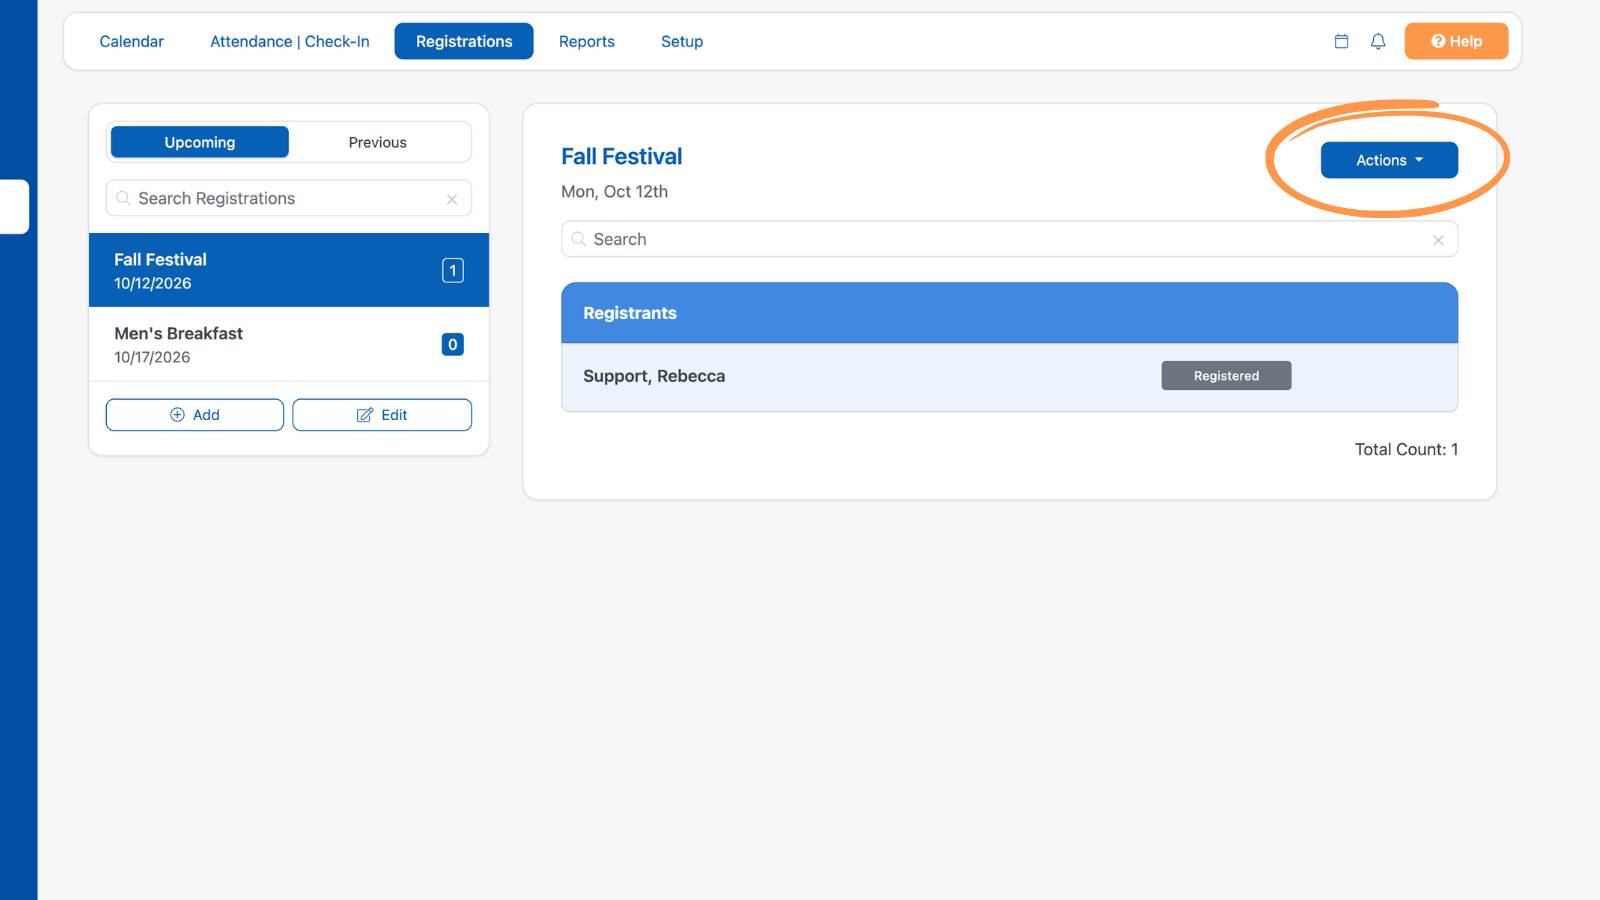
Matching New Registrations
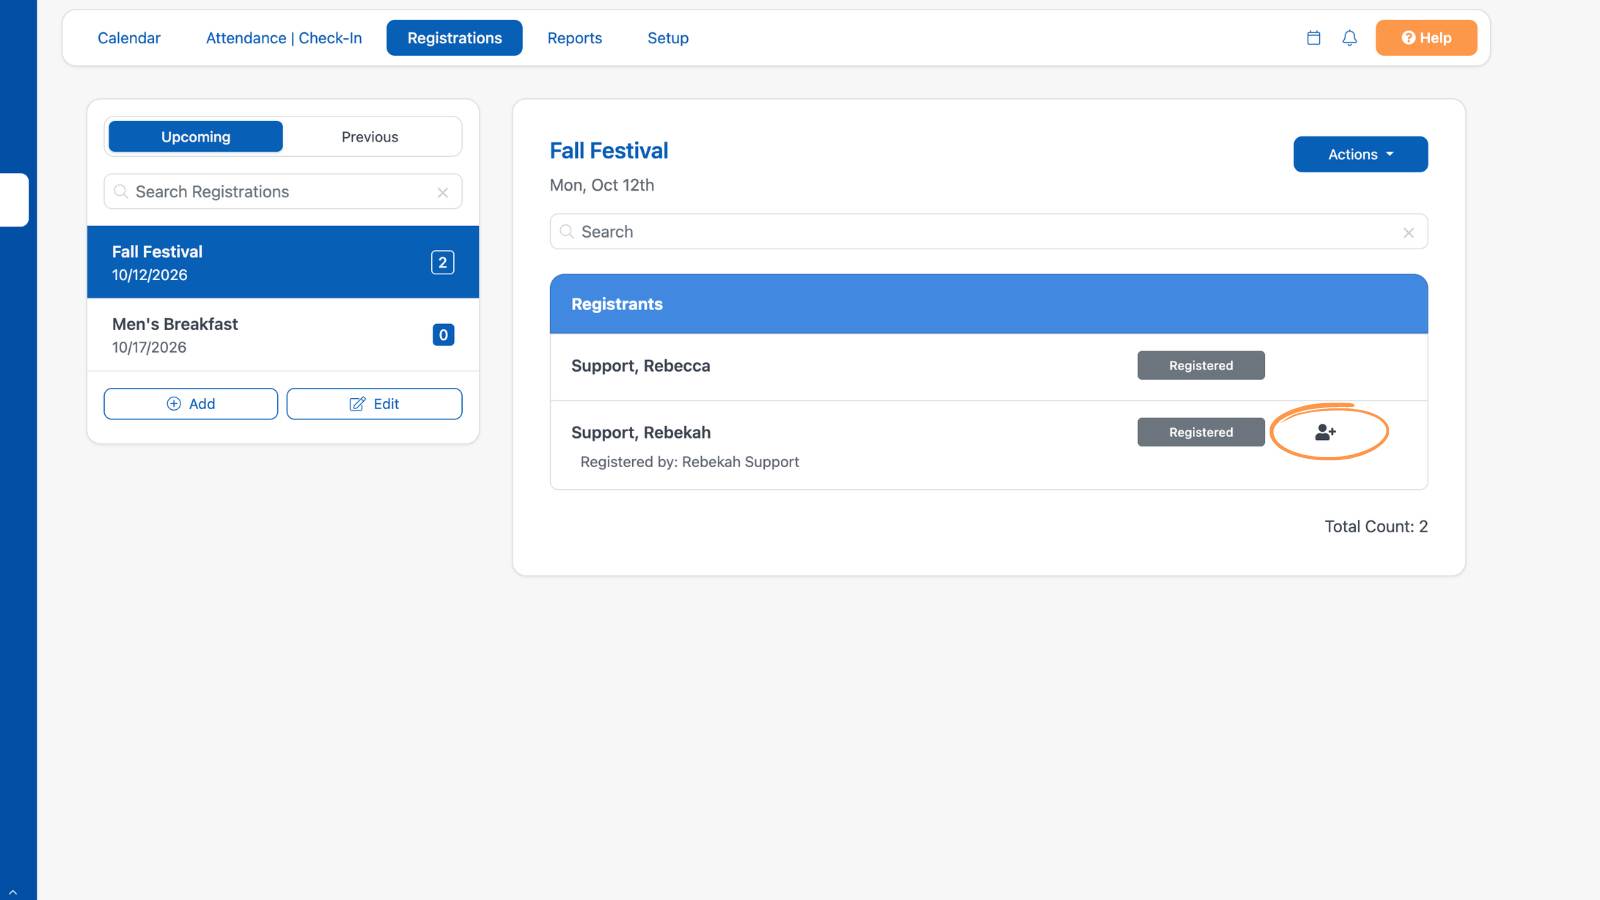
If the person registering isn’t already in your database, you can select the "Add Name" icon to create a new profile. Or, if they already exist in your database, simply match them to their existing profile.
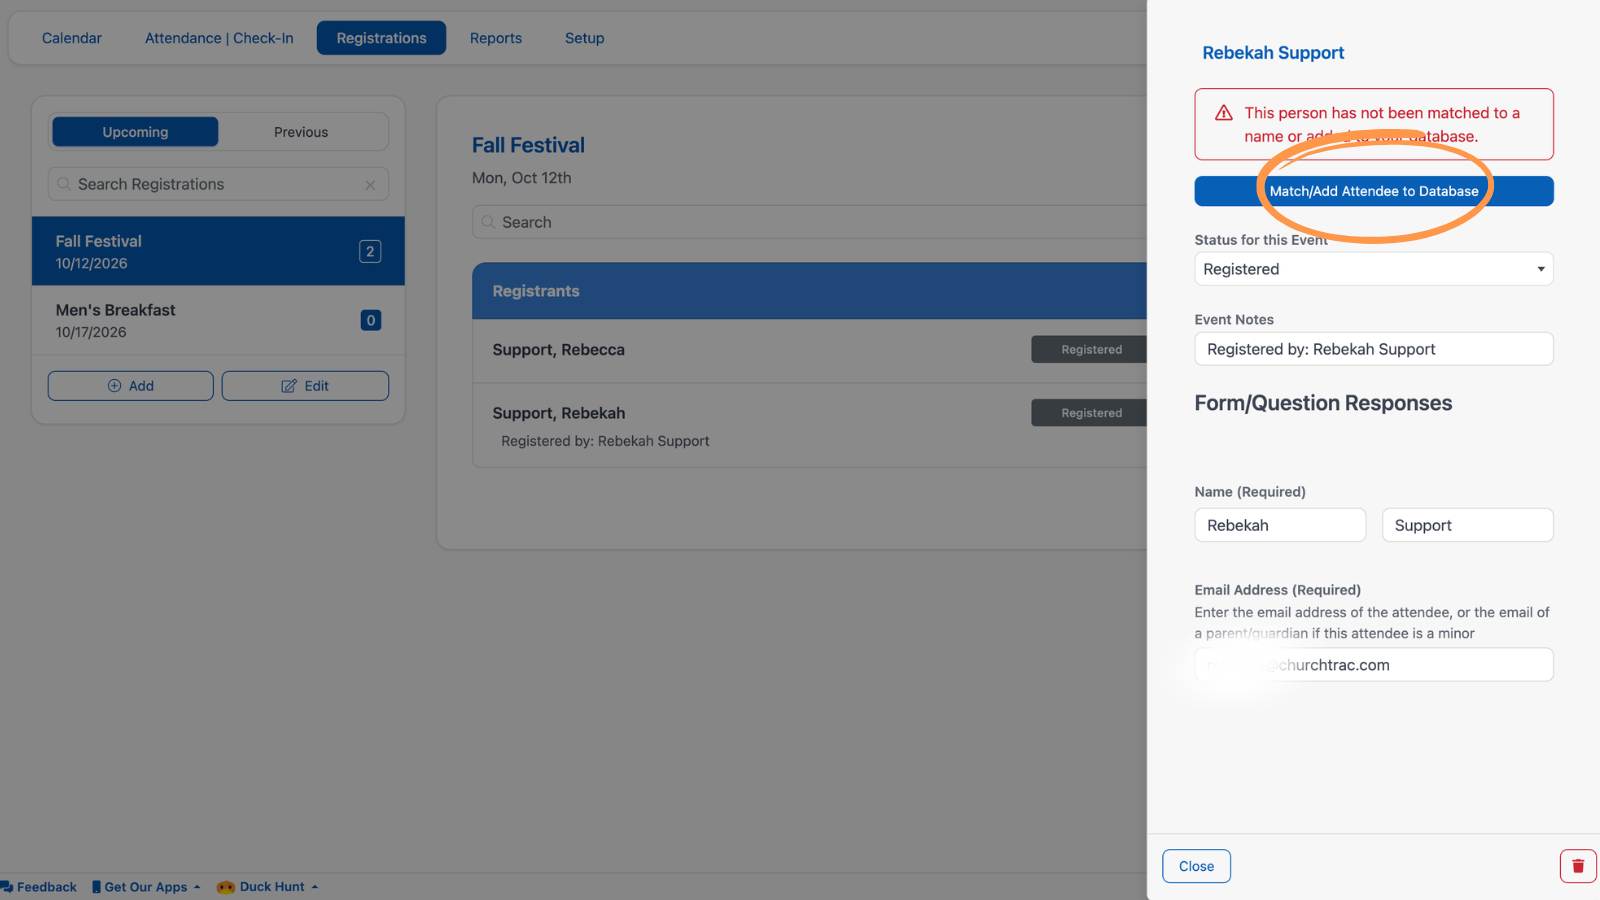
After selecting the icon, choose the "Match/Add Attendee to Database" button.
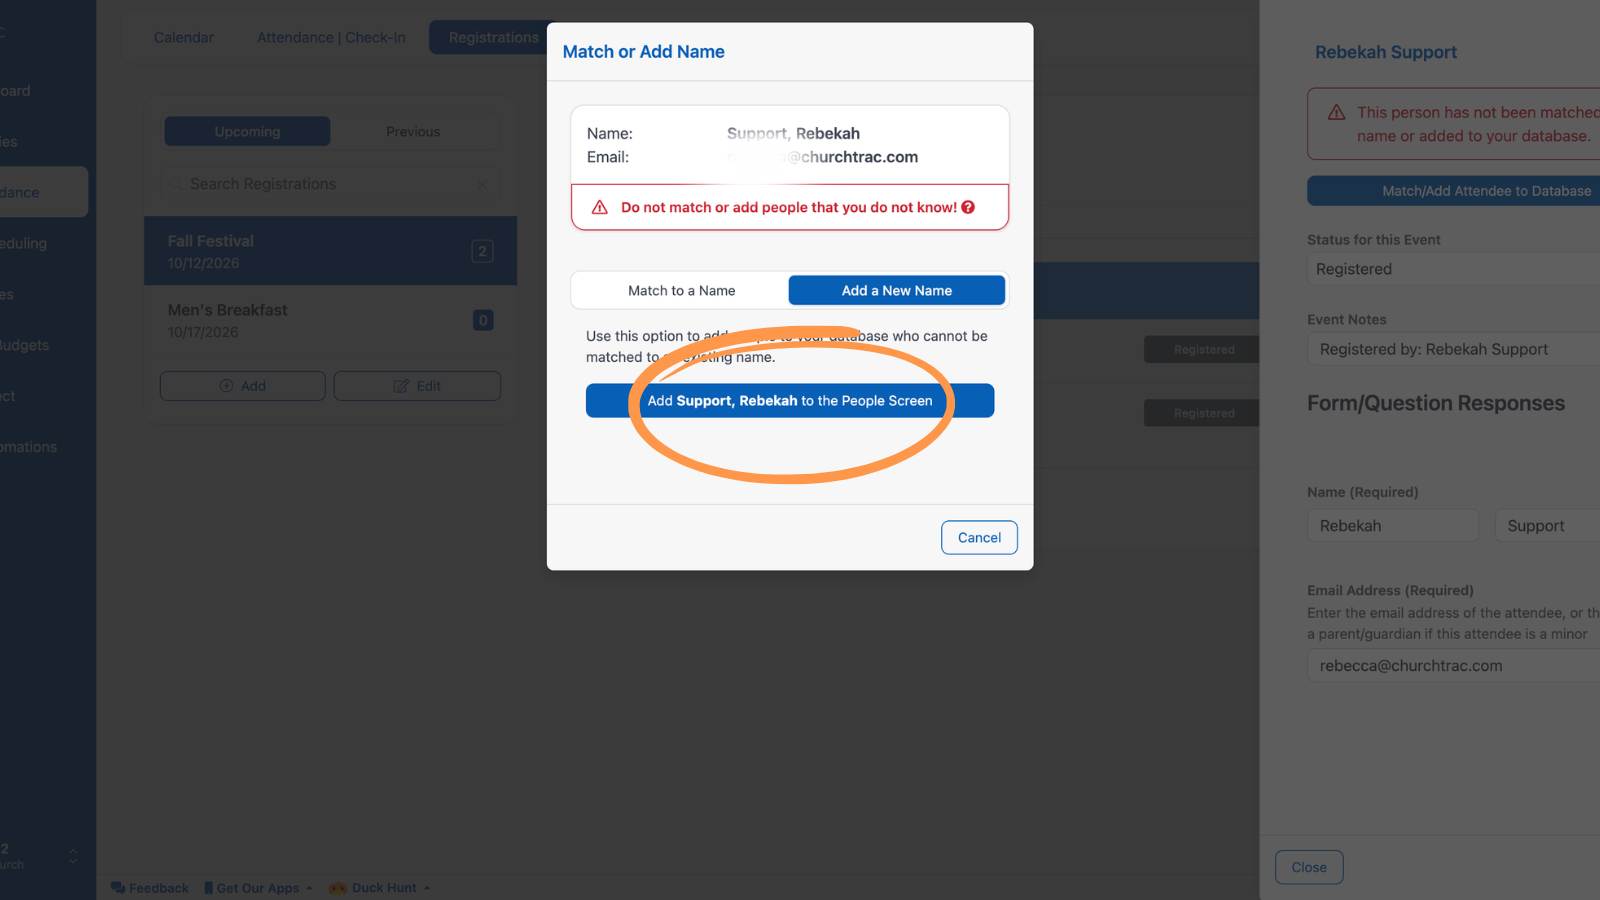
From there, you can either select "Match to a Name" to link the registration to an existing person in your database, or choose "Add a New Name" to create a new profile.
Watch the Following Up with Church Event Registrations Pro Tip video to learn what you can do to manage registrations at your church.