Pledge Campaigns
ChurchTrac simplifies your fundraising with the ability to create pledge campaigns and track donations with pledge overview reports or individual pledge statements.
Creating a New Pledge Campaign
Below are the steps to create a pledge campaign:
Step 1: Create a Giving Category
Before creating a new Pledge Campaign, set up a Giving Category to use for pledges. You can create this category in the Giving Screen by selecting the "Categories" tab from the Giving Screen top toolbar.

With the Start/End Dates, you can use the same pledge category for multiple campaigns. For example, create a single category called “Pledge Campaign” and set different start and end dates for each new campaign.

Step 2: Setting up the Campaign
Select the "Add" option and name your campaign.

Next, choose the Giving Category you created for pledge campaigns. All contributions entered on the Giving Screen using that category will be applied to your campaign. Then set the Campaign Start and End Dates, which define the donation period for the campaign.

Step 3: Adding a Pledge Commitment
Pledges are linked to an Individual, and not per Family. Select the name of the pledger from the selection box and enter the annual amount they have pledged. If they pledged to give monthly, multiply that amount by 12 and enter that annual amount. If weekly multiply by 52.

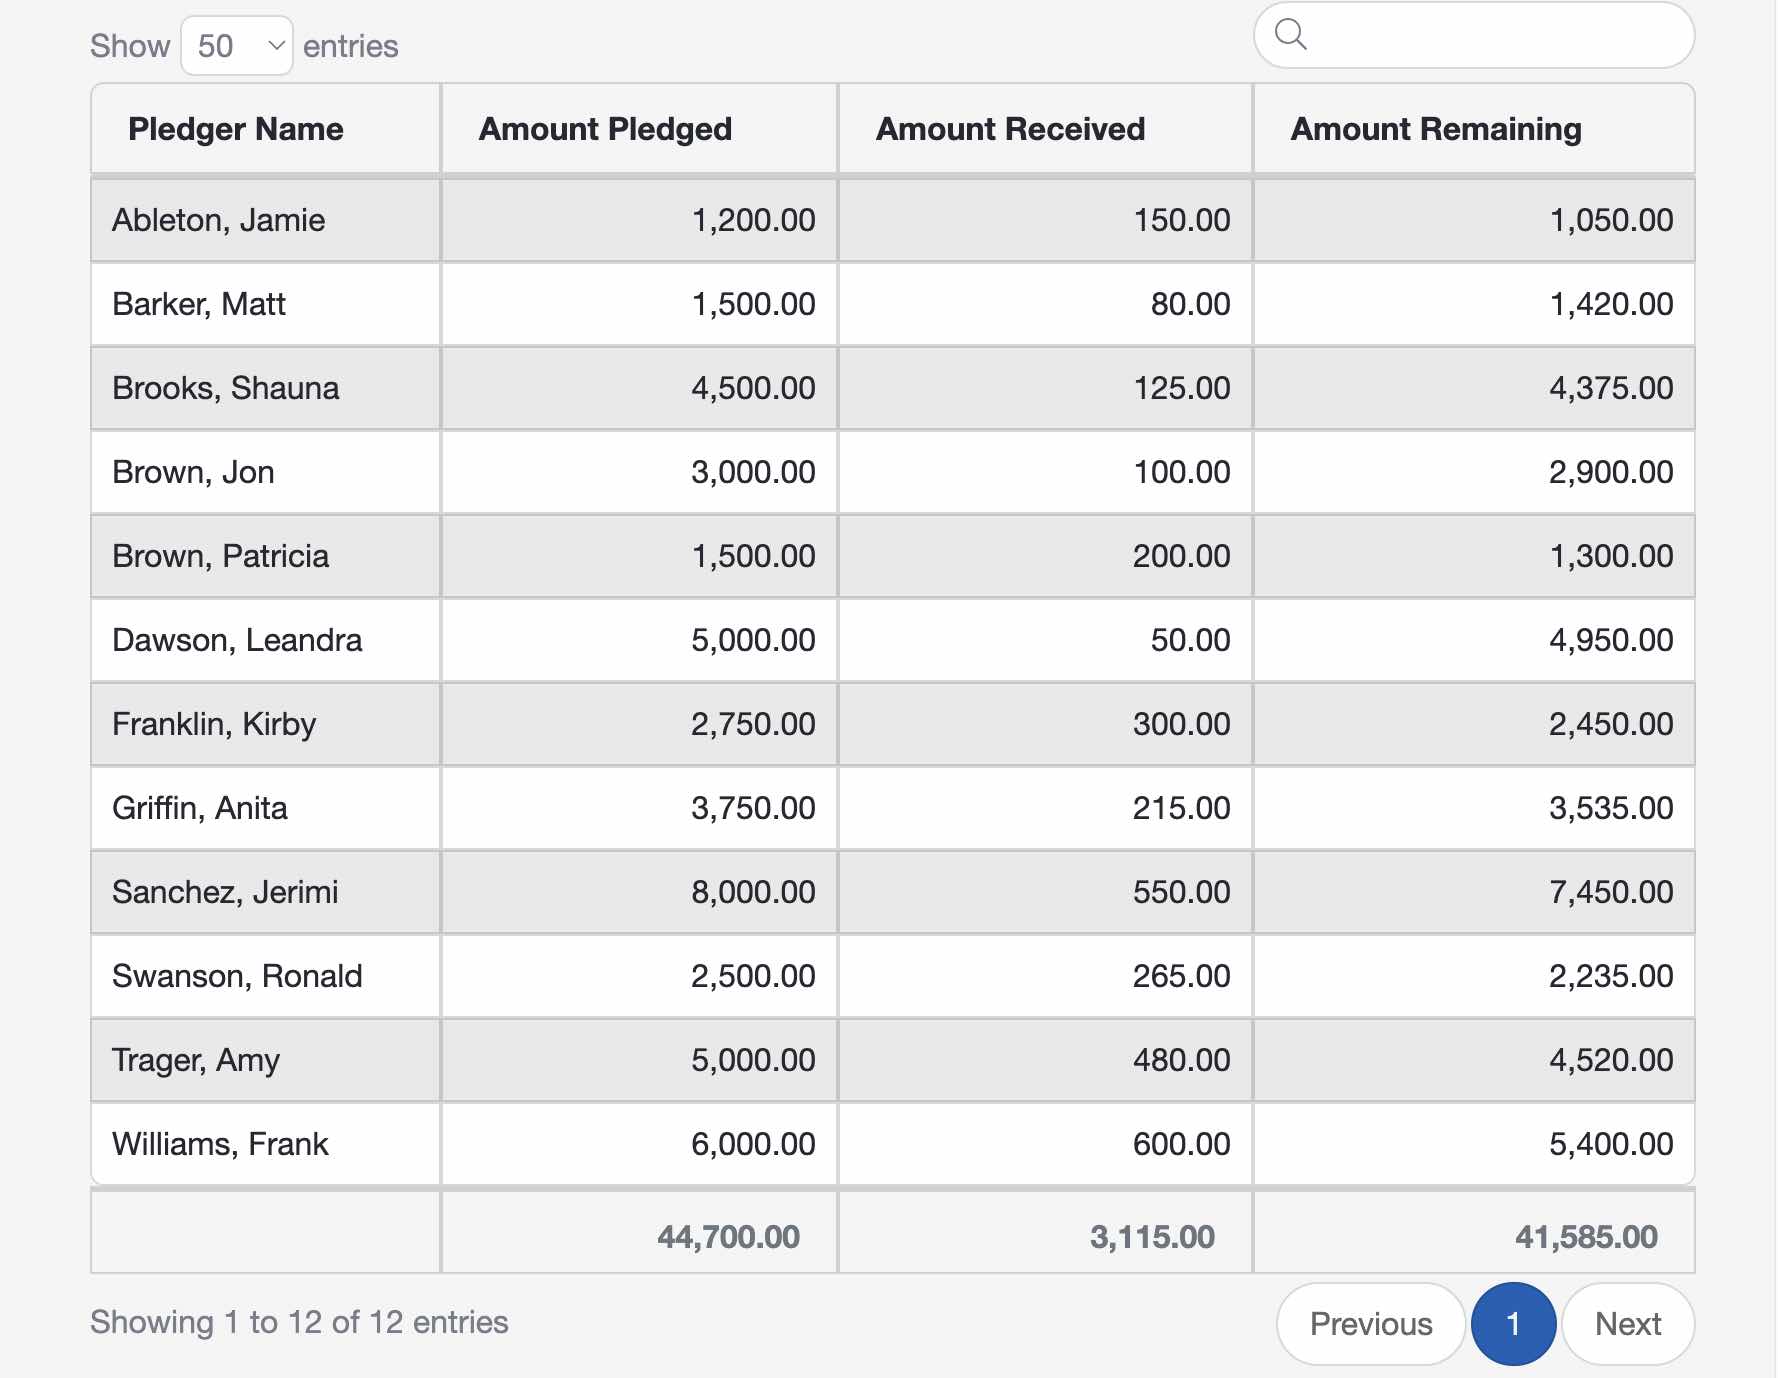
As you add names and amounts, they appear in a ledger below. This is where you track the amount received to date (as entered on the Giving Screen), and the amount remaining. It also shows the running totals for the entire campaign.

Using a Pledge Campaign
In the "Contributions" tab, start a giving batch and select the "Add Contributions" button. Then enter the pledger's name and the amount they just donated. In the "Category" dropdown menu, select the category you assigned to the pledge campaign.

That donation will appear in that donor's line of the ledger in the Pledge campaign.

Editing a Pledge Campaign
To edit an existing pledge campaign, select the Pledge from the selection box and make changes.
