Importing Transactions in Accounting
You can import your bank transactions from an OFX (Money), QFX (Quicken), QIF, or QBO (QuickBooks) file provided by your bank or financial institution. These imported transactions can then be quickly added to your account register without having to manually add them yourself. See our Bank Sync article if you prefer to sync transactions.
How to Import Transactions
We made importing transactions quick and simple. Follow the below steps to complete the process.
Step 1
To import transactions, you need your electronic financial statement. Log in to your bank or credit card company's website and download one of the supported file types for a date range you wish to import. ChurchTrac accepts OFX (Money), QFX (Quicken), QIF, or QBO (QuickBooks) files.
We recommend keeping the date range short, as it takes longer for the application to process the import if the file contains several months of transactions.
Step 2
Log into your ChurchTrac account and navigate to the Accounting screen. On the Accounting dashboard, select the name of the account you wish to import.

If you have not already, be sure to edit your bank account to include the entire bank account number.

This field must match the account number on the files you wish to import.

In the account register, select the "Import/Sync" button on the bottom toolbar of the register.

Step 3
If this is the first time you are doing an import, the "Transactions to Review" screen will be blank. To upload your church bank statement, select the "Actions" button in the top-right corner of the screen.

In the Actions dropdown menu, select the first option titled "Upload OFX/QFX File."

Next, drag and drop the downloaded file onto the import drop zone (or select the drop zone to browse for the file on your computer).

After the file has been uploaded, a list of transactions contained in that file will be displayed.

You will need to review and possibly update transactions with the proper category, fund, and payee information before adding the transaction to your records. Import Rules are recommended. The software will also learn over time what categories and funds you typically use for transactions and assign them accordingly.
Verify Transactions
With the transactions imported, it is time to review them before adding them to your account register.
ChurchTrac will automatically assign a category to each transaction. You will need to review the category before adding the transaction to confirm that it matches your records.
Review each transaction
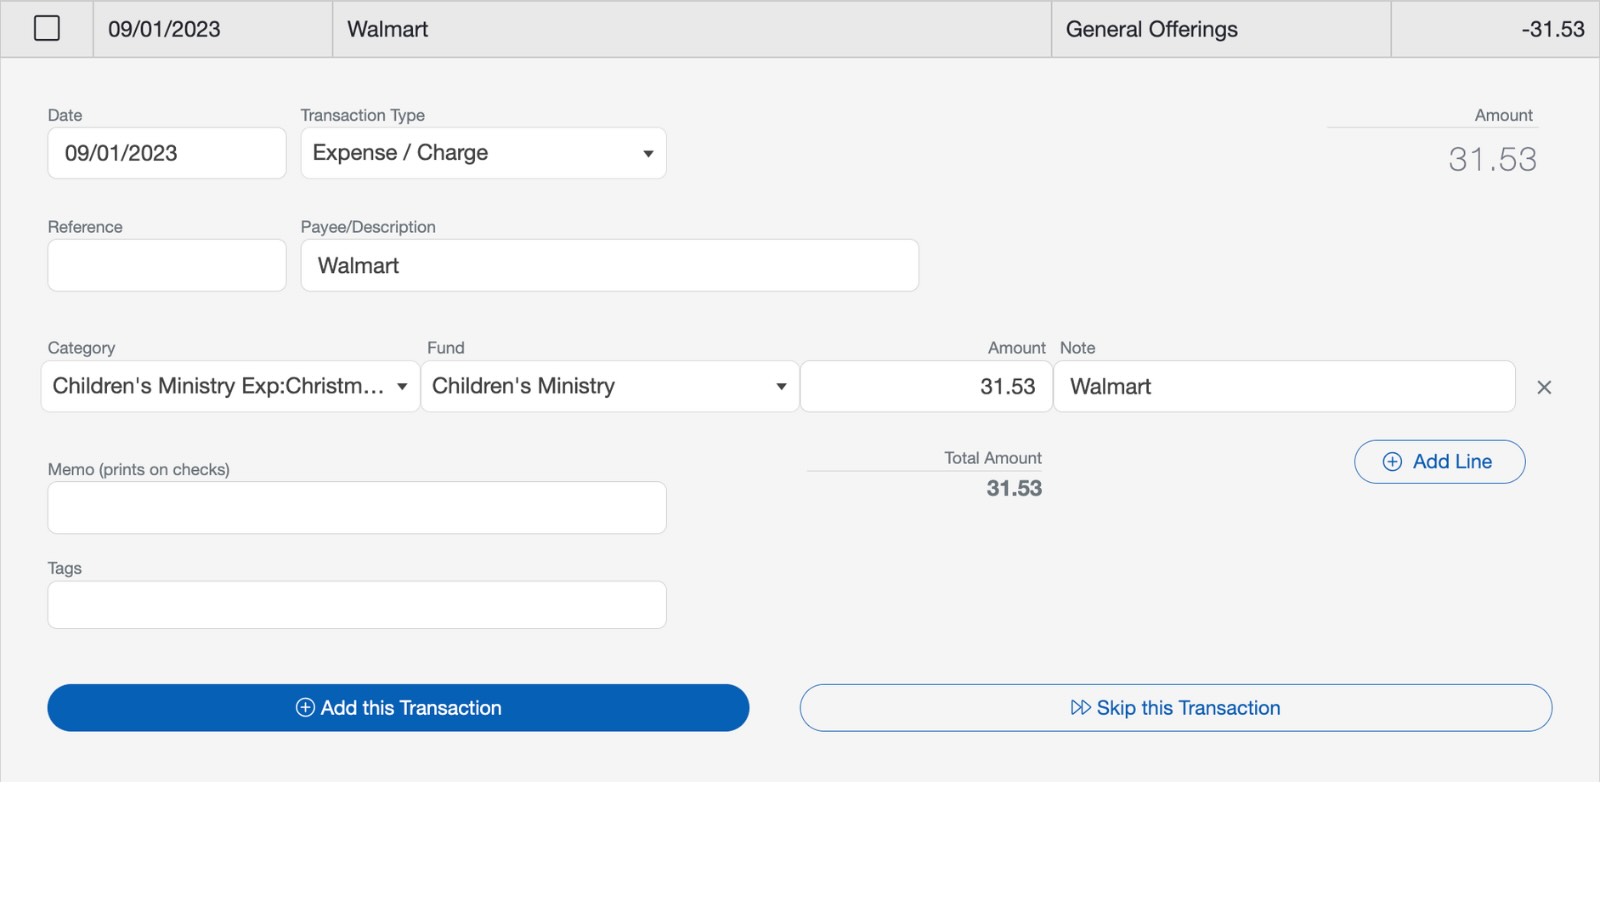
Select the transactions in the list, one at a time, and update the information associated with each transaction (as needed). The date, payee, Category, Fund, and amount will automatically appear.
You can edit the details of this transaction so that it matches your records. You can also split the transaction up across multiple Categories and Funds by clicking the "Add Line" button.
You can then choose to either add this transaction or skip it.
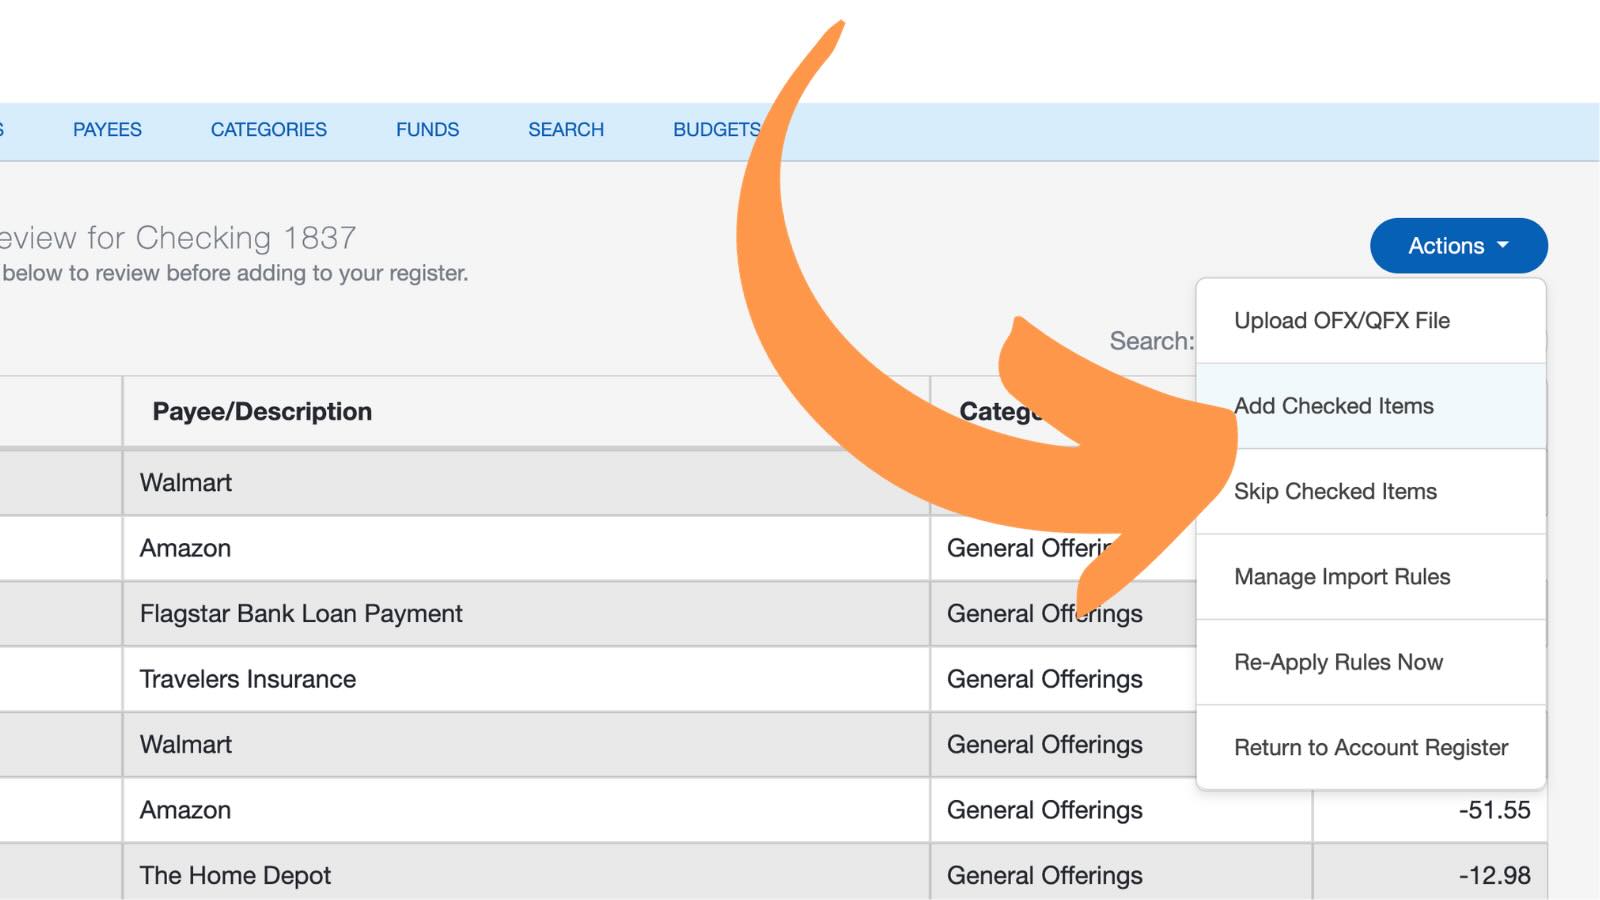
Bulk add/skip transactions
Instead of verifying transactions one at a time, you can Add or Skip several transactions at once. This will save you time if you know the transaction information is correct.
To do this, check off each transaction you want to add or skip at once. Then select the "Actions" button and select "Add Checked Items" or "Skip Checked Items," then select "OK" in the following window.
Pro Tips
If the transaction type is an account transfer, you will need to manually select Transaction Type: "Account Transfer".
The total amount for each of the entries MUST equal the amount of the imported transaction or the transaction will not import.
Comma Separated Value (CSV) or PDF formats are not supported for transaction imports.
You can create Import Rules to automate the work of managing your imported transactions.