Creating Liability Accounts
With ChurchTrac, you can track assets such as checking and savings accounts, as well as liabilities such as a credit card, loan, or other debt. This article uses a credit card as an example.
Creating Your Liability Account
There are two ways to create a liability account in ChurchTrac: upload a PDF statement, or create the account manually.
Upload a PDF Statement
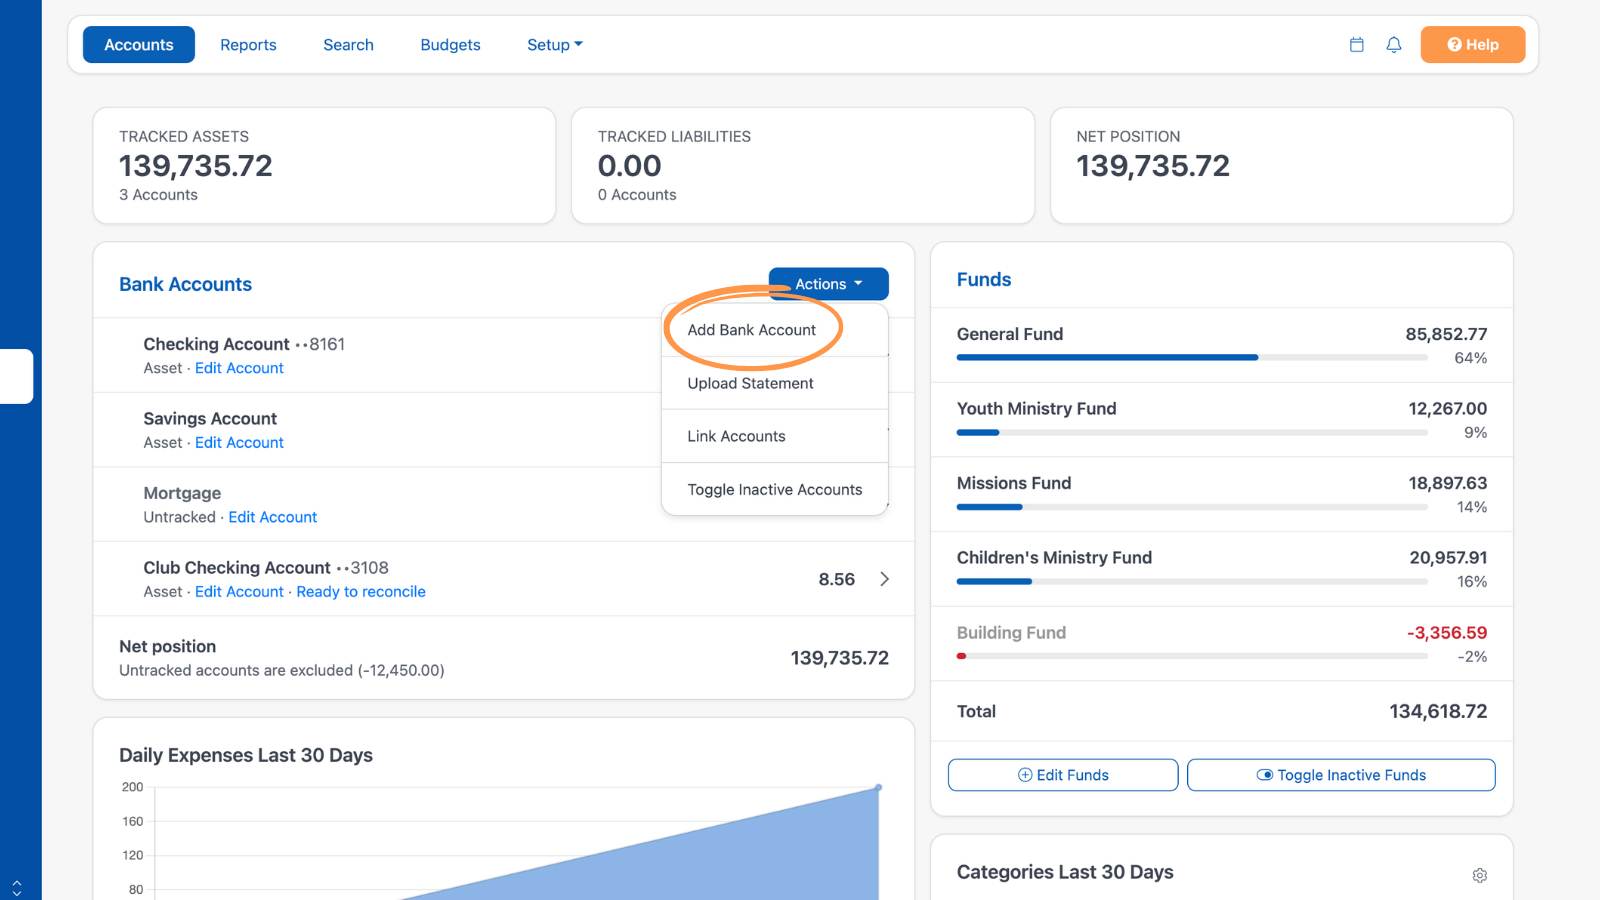
On the Accounting dashboard, select Actions, then Add Bank Account.
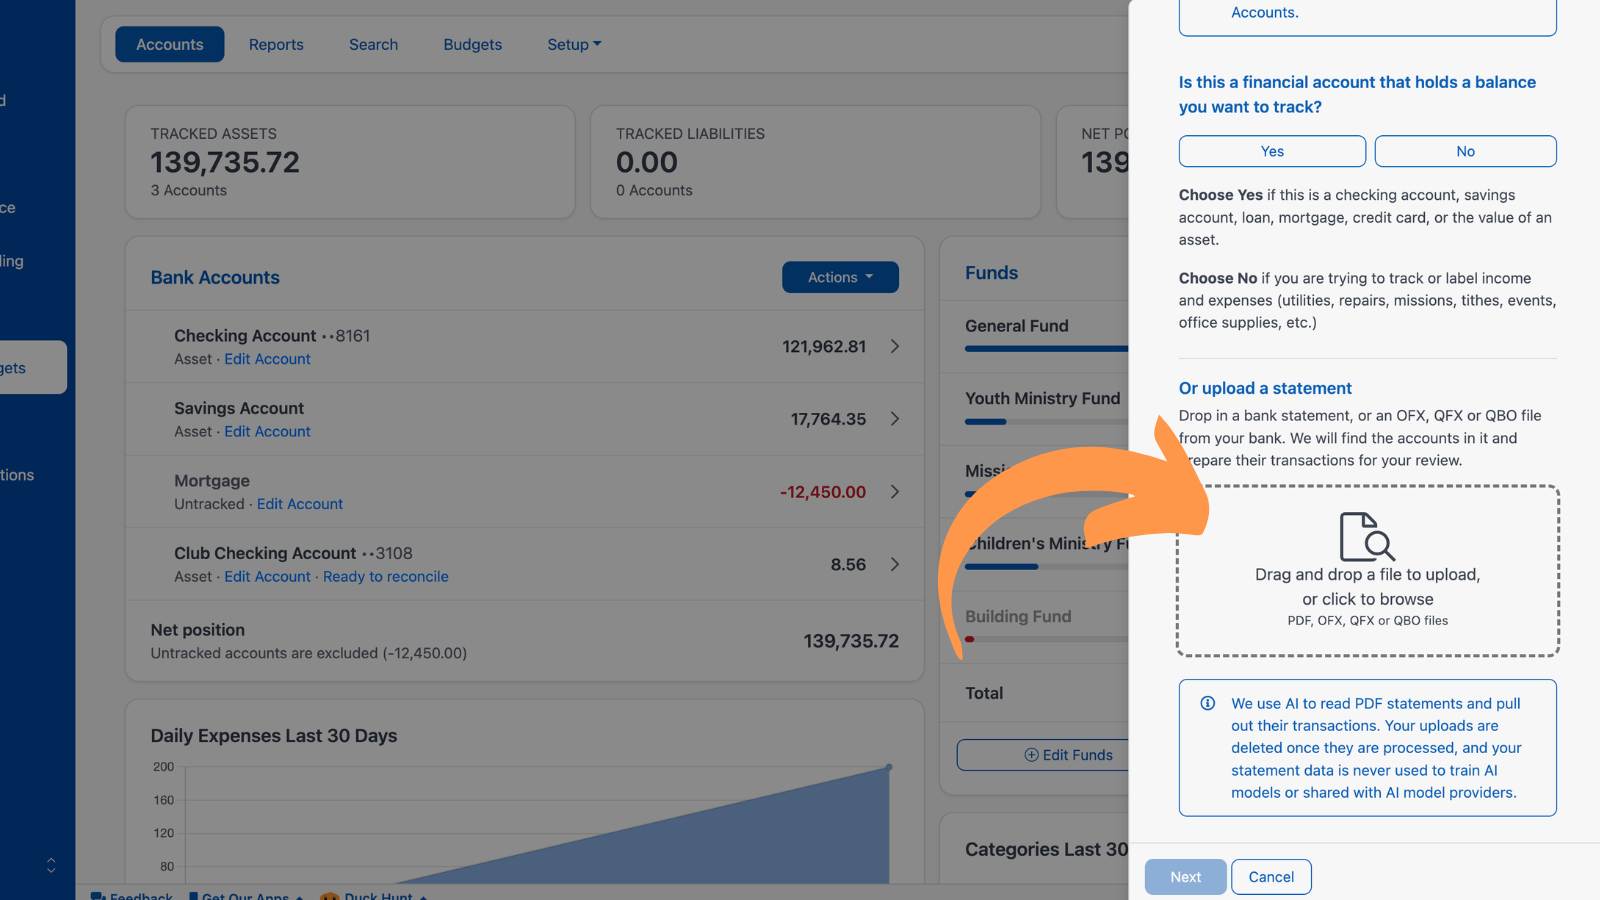
Scroll down to "Or upload a statement" and drop in a PDF statement or an OFX, QFX, or QBO file. ChurchTrac will find the account and prepare its transactions for your review.
Note: PDF statements require our most current plan. Learn more about Importing Transactions ›
Manually Creating an Account
To create the account manually, follow the steps below.
Step 1: On the Accounting dashboard, select Actions, then Add Bank Account.
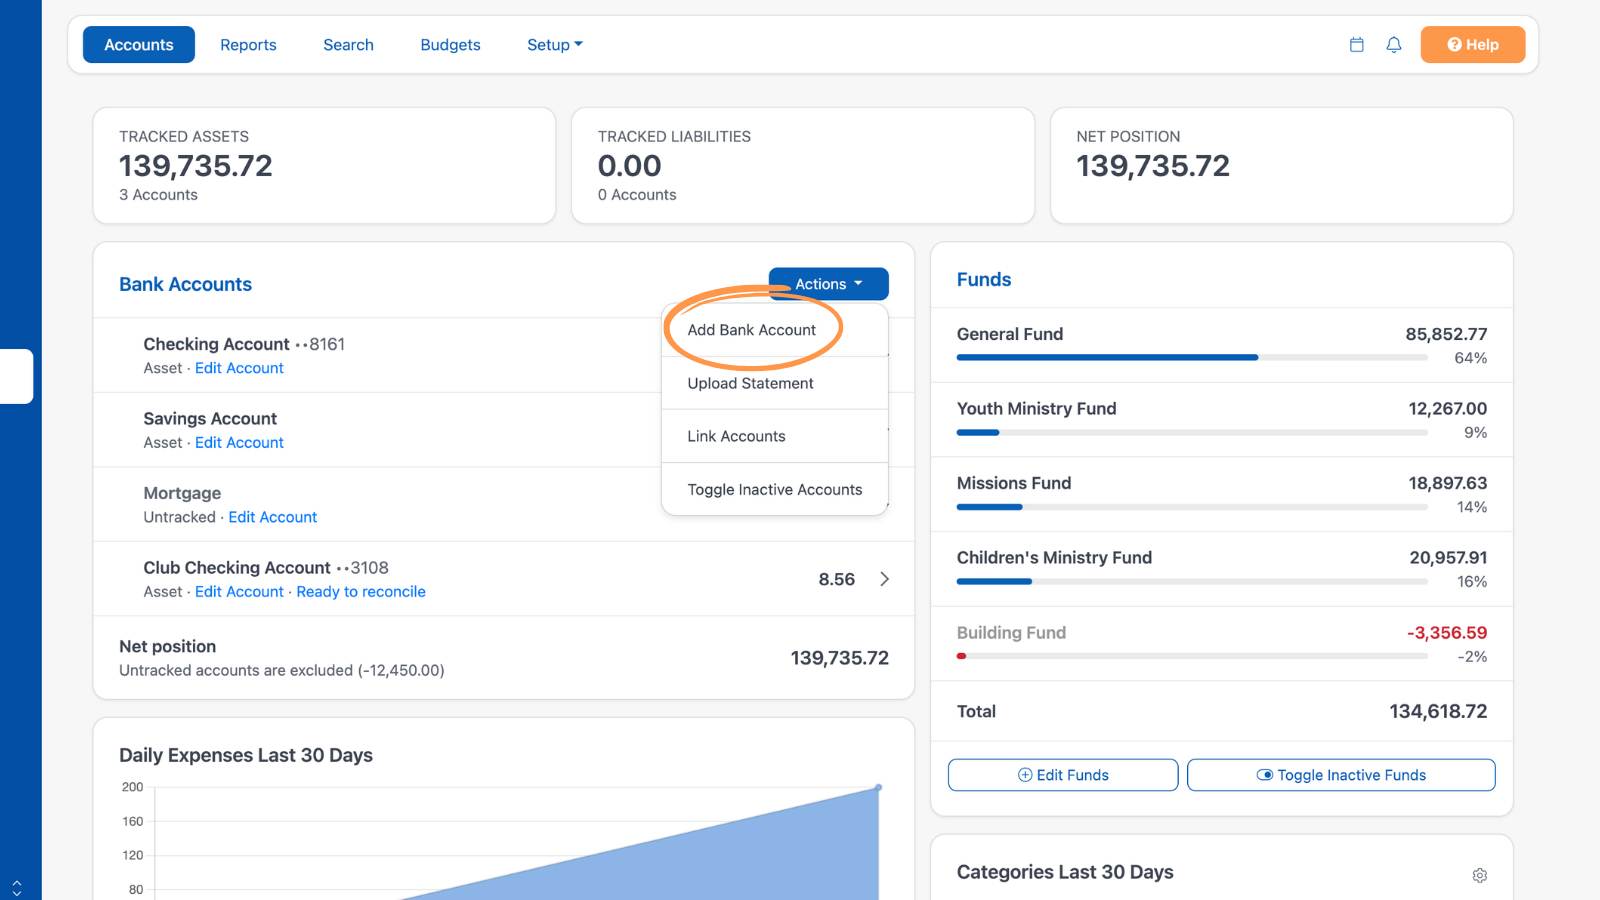
Step 2: When asked "Is this a financial account that holds a balance you want to track?", choose Yes, then select Next.
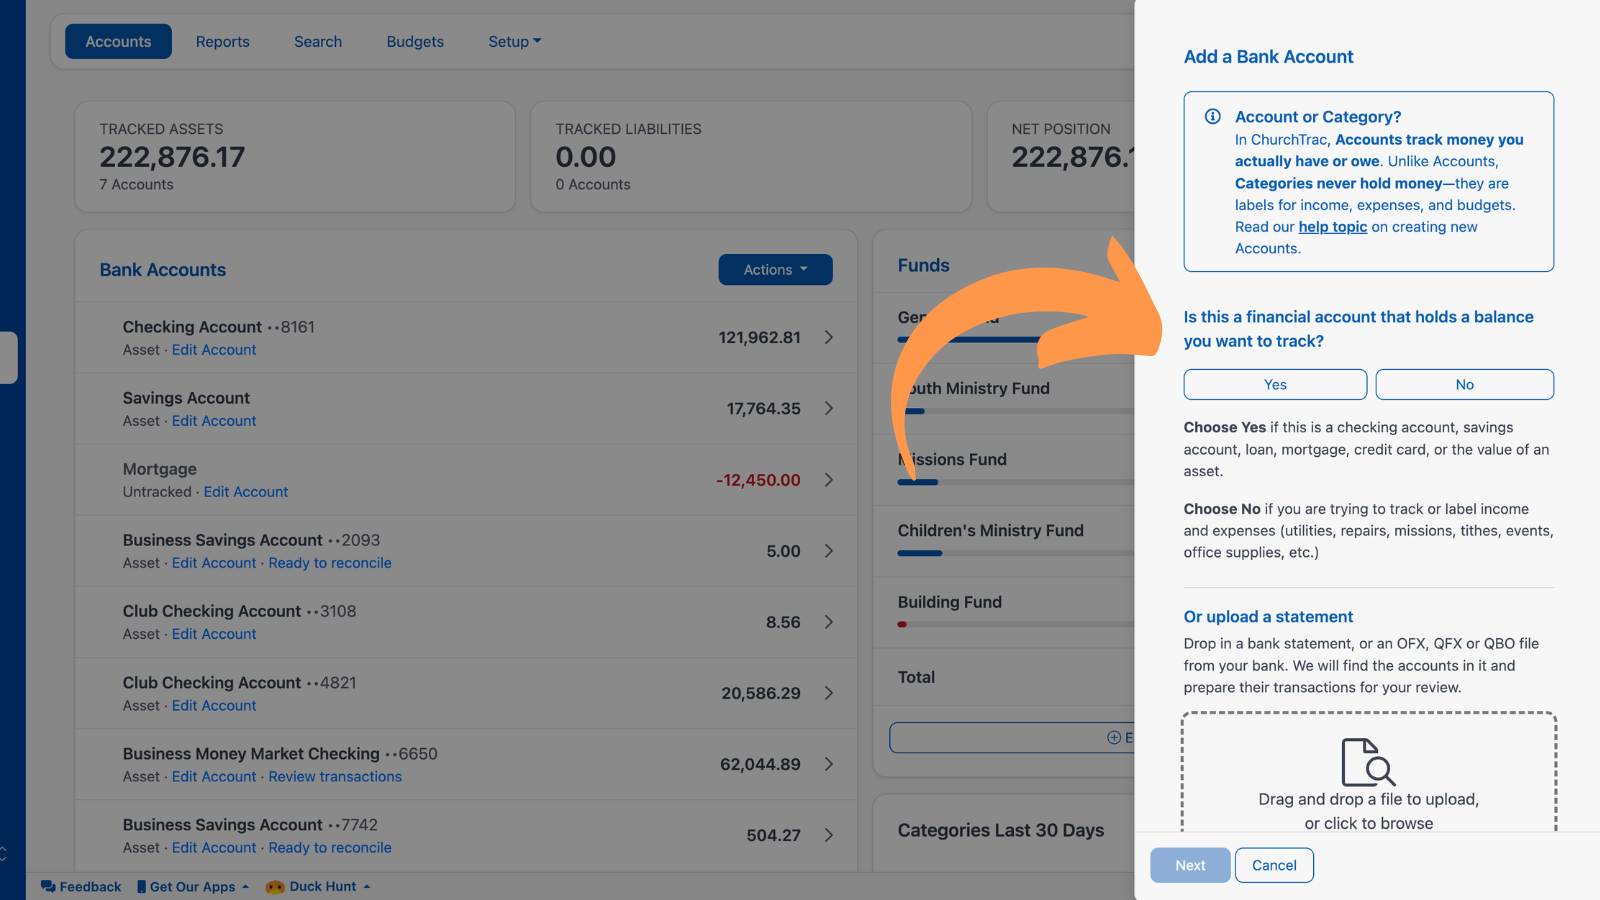
Step 3: Under "Type a descriptive name for the account," enter a name such as "Church Visa." Under "What type of account is this?", choose Liability, then select Next.
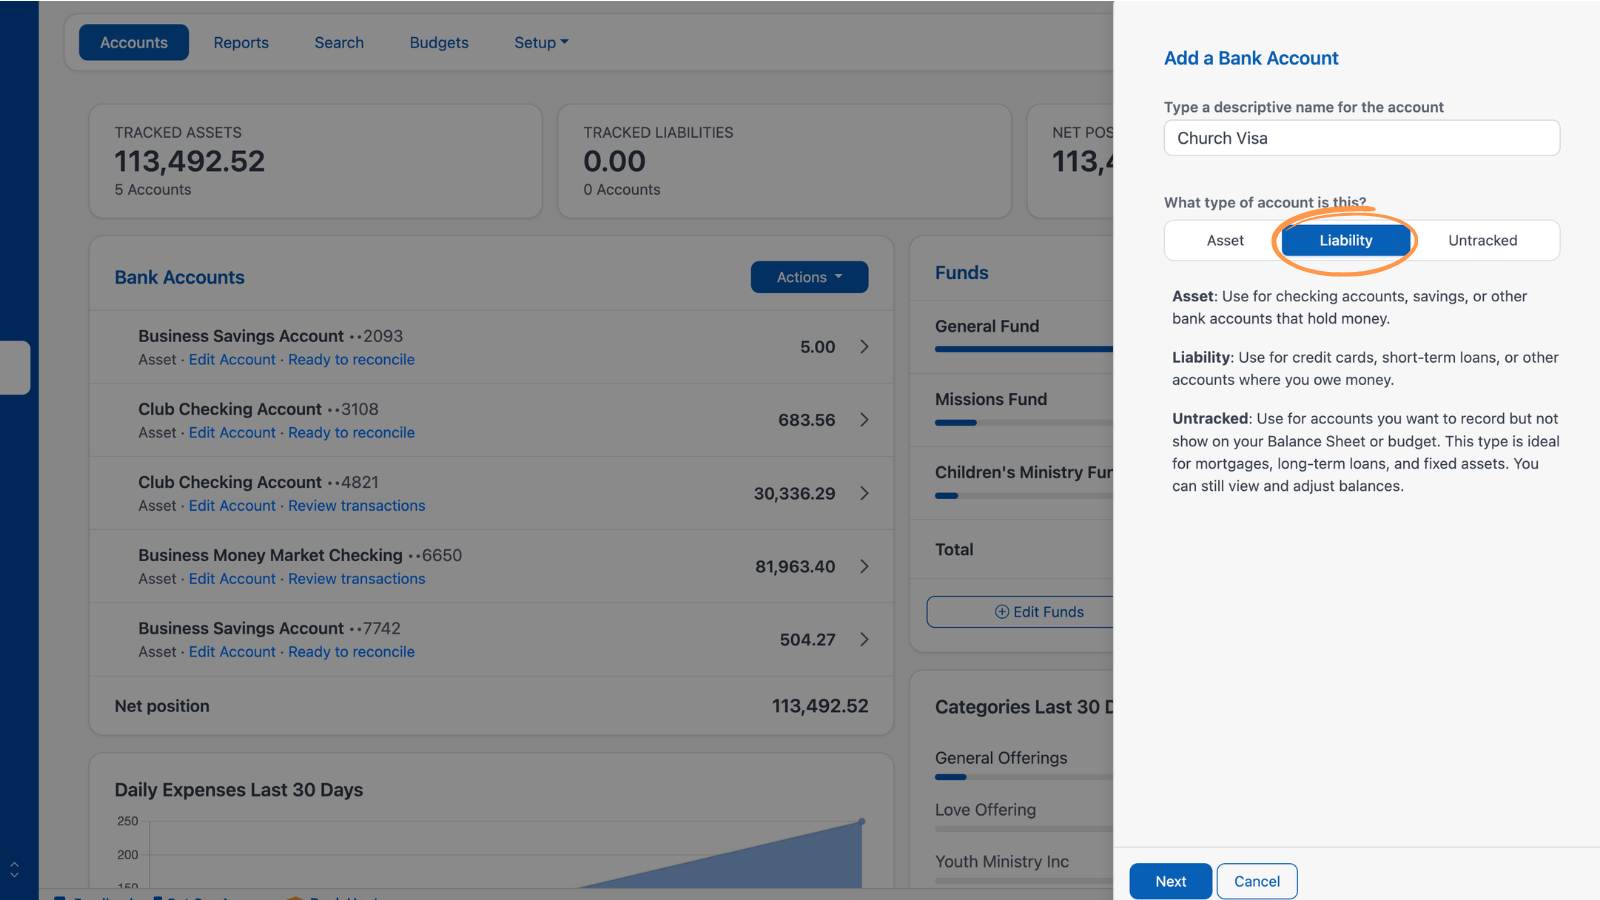
Liability is for credit cards, short-term loans, or other accounts where you owe money. For mortgages and long-term loans, choose Untracked instead. Learn more about Tracking Mortgage Payments and Balance ›
Step 4: Enter your beginning date and beginning balance from your credit card statement:
- Beginning date: the statement's closing date.
- Beginning balance: the balance owed on that closing date.
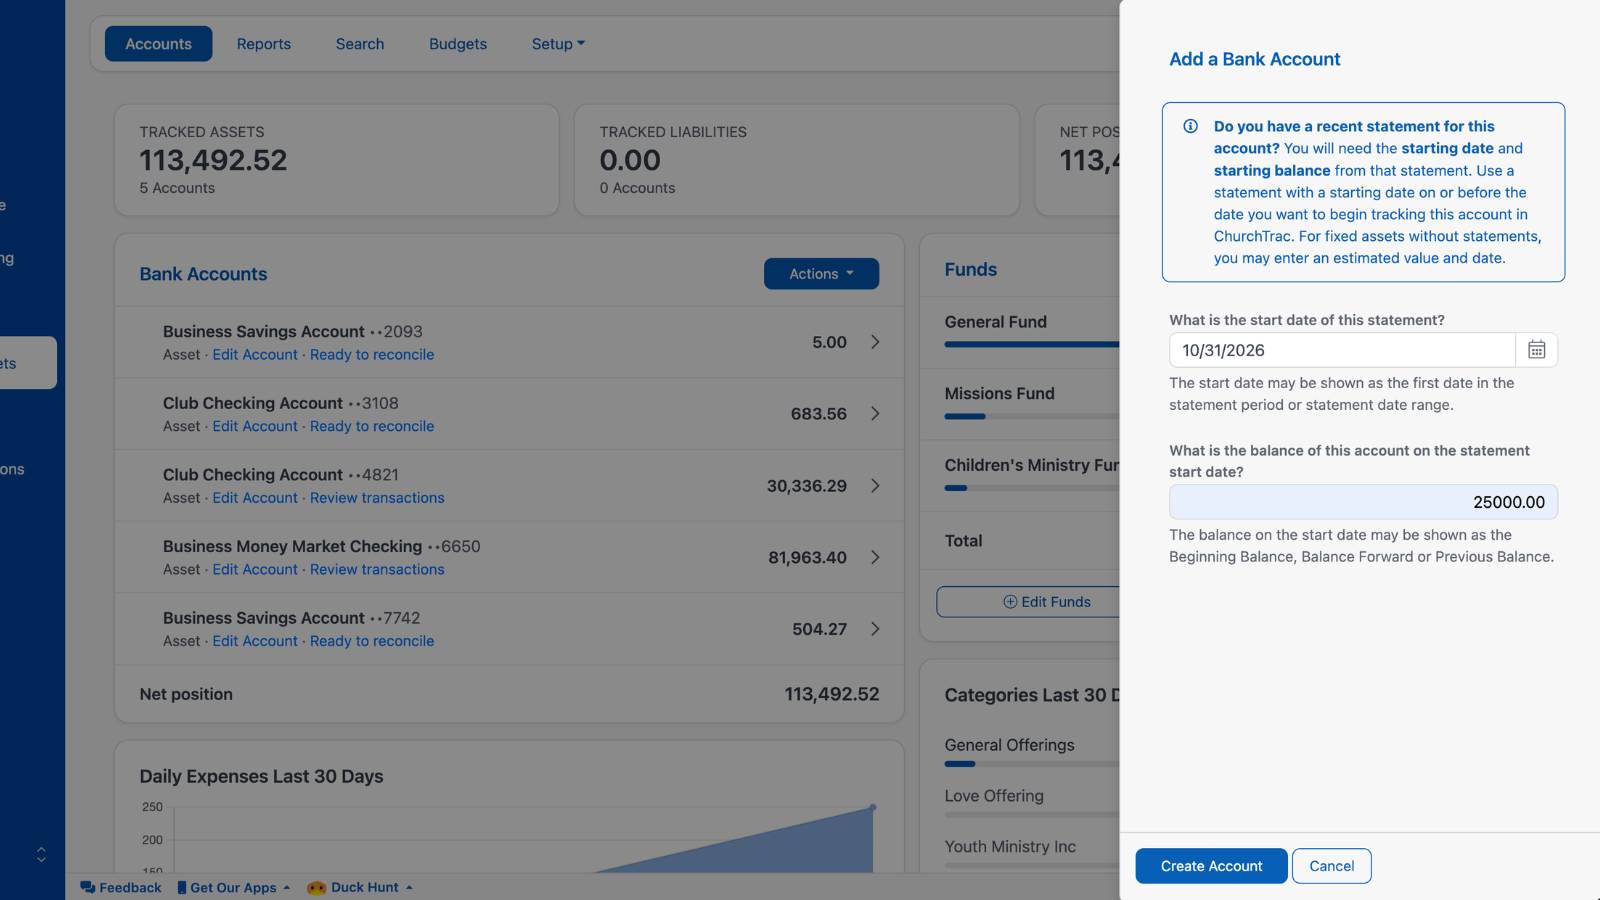
Pro Tip: Enter the balance as a positive number. ChurchTrac automatically shows liability balances as negative.
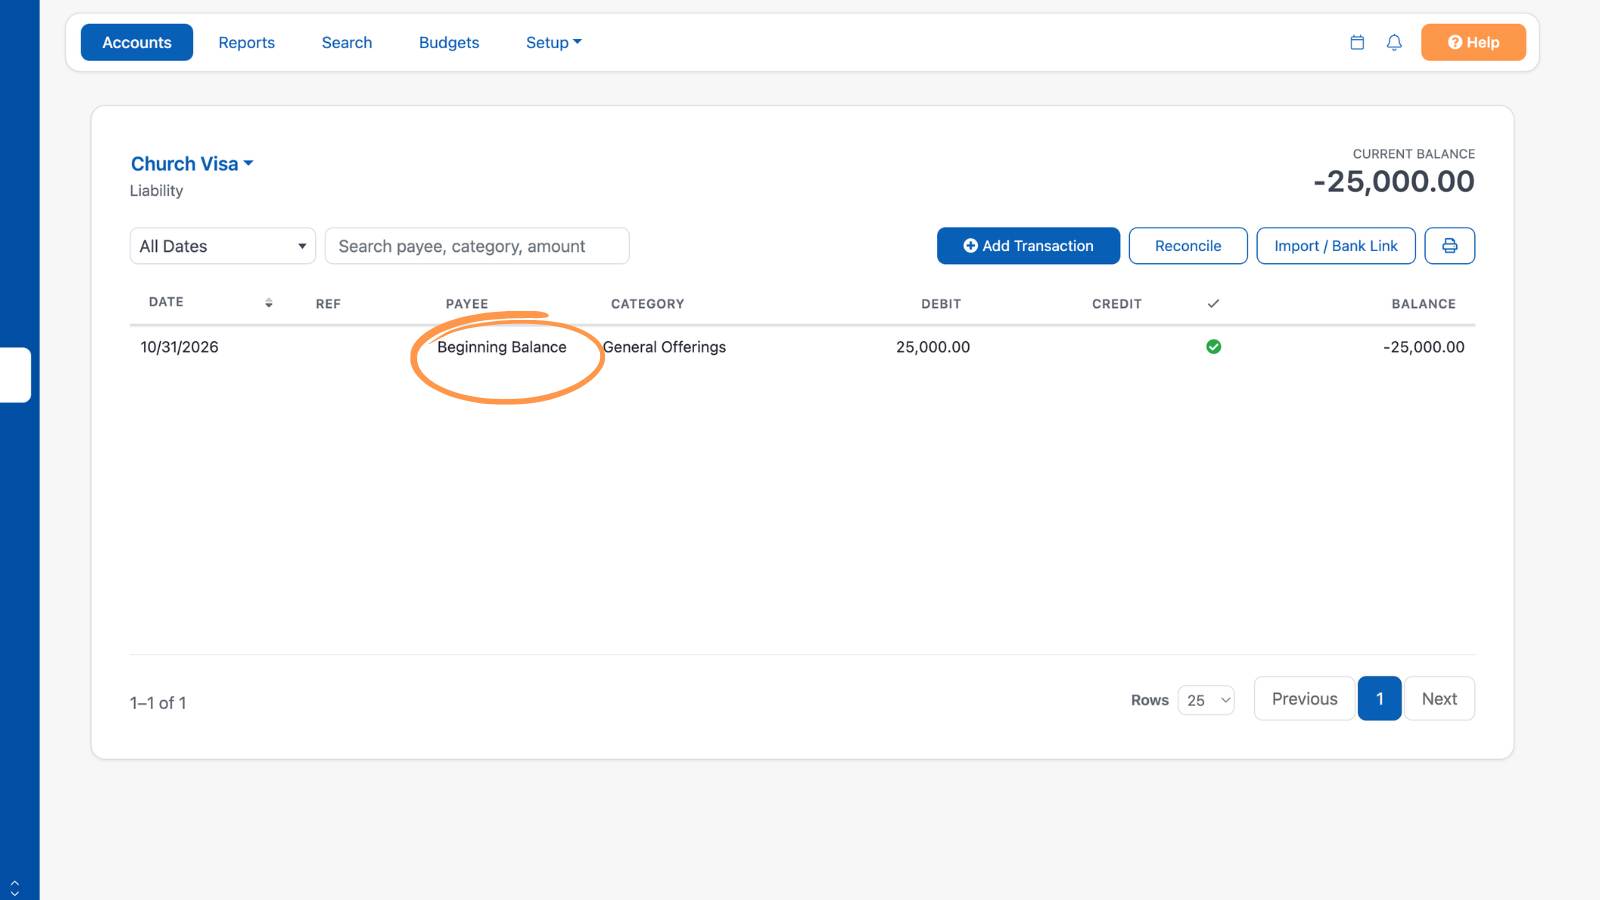
Step 5: Select Create Account. Once the account is created, open its register and select the beginning balance transaction. This transaction represents the total owed on the card as of your closing date.
Step 6: To show what makes up that balance, change the Category and Fund on the first line, and select Add Line for each additional expense from your statement. The lines must add up to the beginning balance shown on your statement.
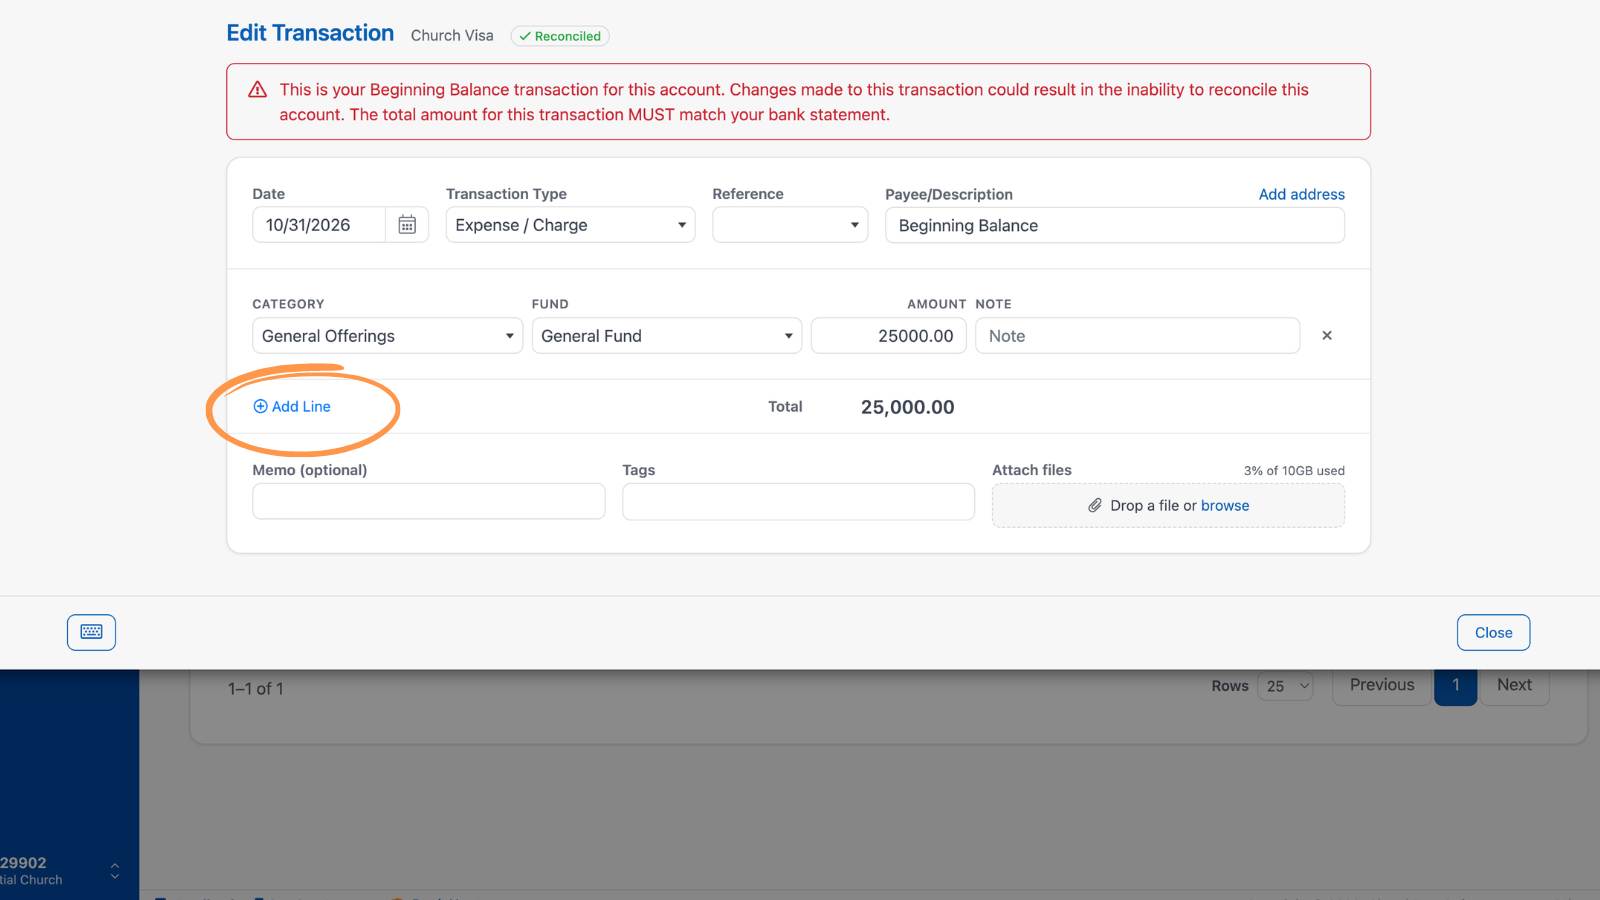
Select Save lines when you're done.
Recording Credit Card Transactions
Once you've created the account, there are three ways to record credit card transactions: uploading your statement, using Bank Link, or entering them manually.
Option 1: Upload Your Statement (recommended)
Each month, upload your credit card statement (PDF, OFX, QFX, or QBO) to the account. You'll review each transaction, choose its Category and Fund, and add it to the register. Learn more about Importing Transactions ›
Option 2: Use Bank Link
Connect your credit card with Bank Link to bring in new transactions without downloading a statement. You'll review and add them the same way. Learn more about Bank Link ›
Option 3: Enter Transactions Manually
- Open the credit card account's register and select Add Transaction.
- Set the Date and choose Expense / Charge as the Transaction Type.
- Enter a Reference if you'd like, and select or enter the Payee/Description.
- Choose the Category and Fund, and enter the Amount. To split a purchase across several expense categories, select Add Line for each item on the receipt.
- 5. Select Save.
These categories show up as Expense Categories in your Budget.
If all credit card expenses are for general operations, assign them to the General Fund. Assign designated expenses to the matching designated Funds.
Making Credit Card Payments
To record a credit card payment, use an Account-to-Account Transfer.
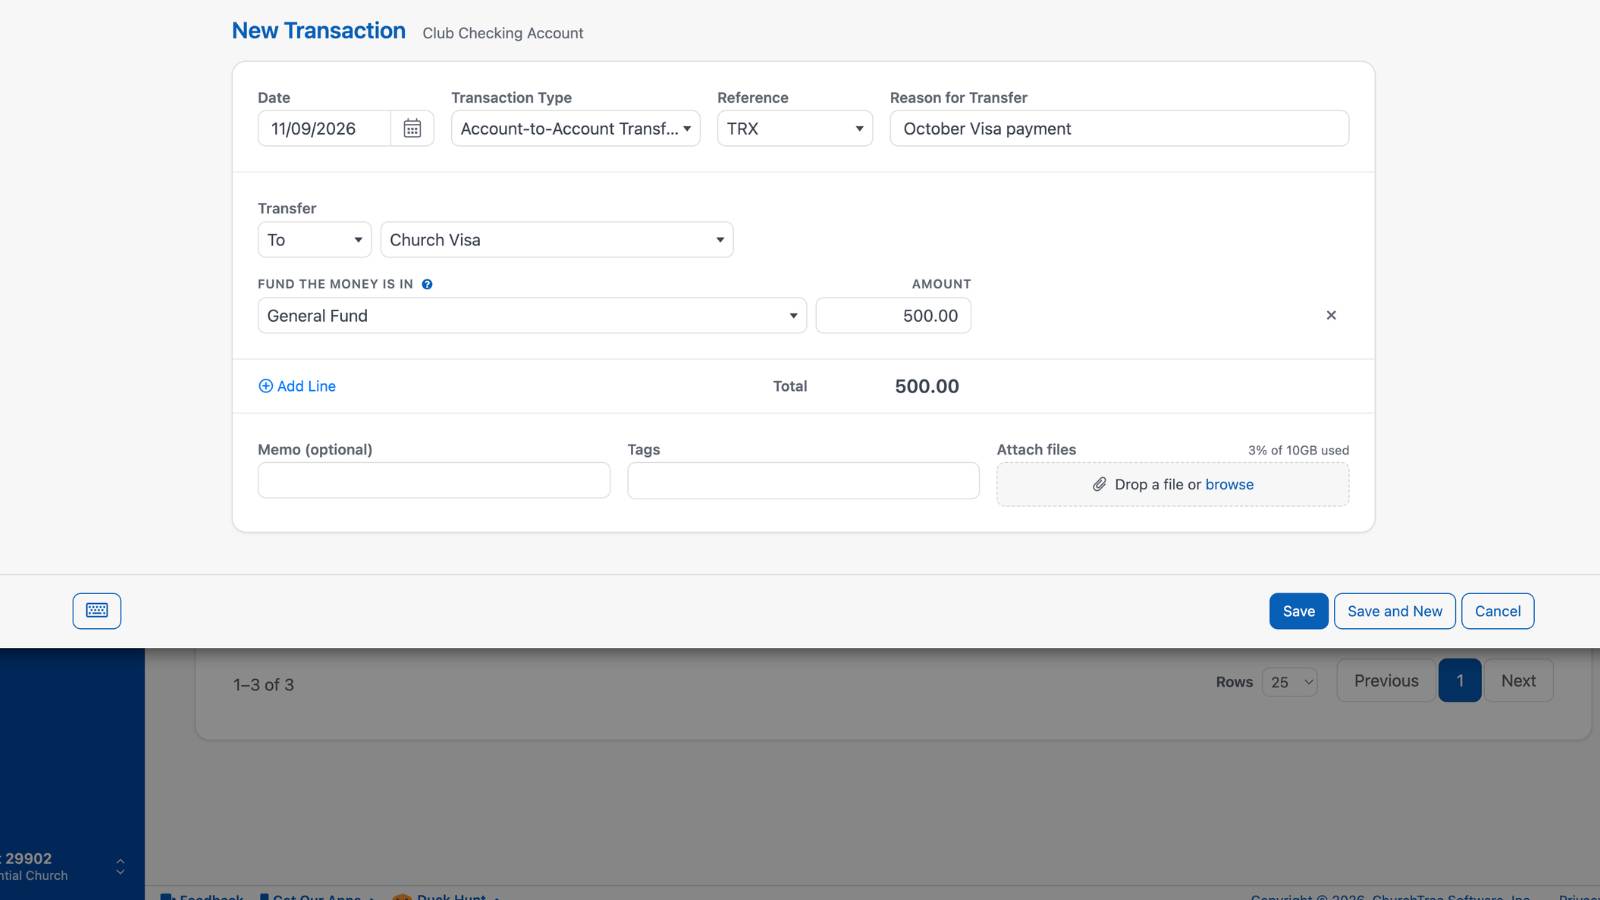
- Open your checking account's register and select Add Transaction.
- Choose Account-to-Account Transfer as the Transaction Type.
- Enter a Reason for Transfer, such as "October Visa payment."
- Under Transfer, choose To and select your credit card account.
- Under Fund the money is in, choose the Fund and enter the Amount.
- Select Save.
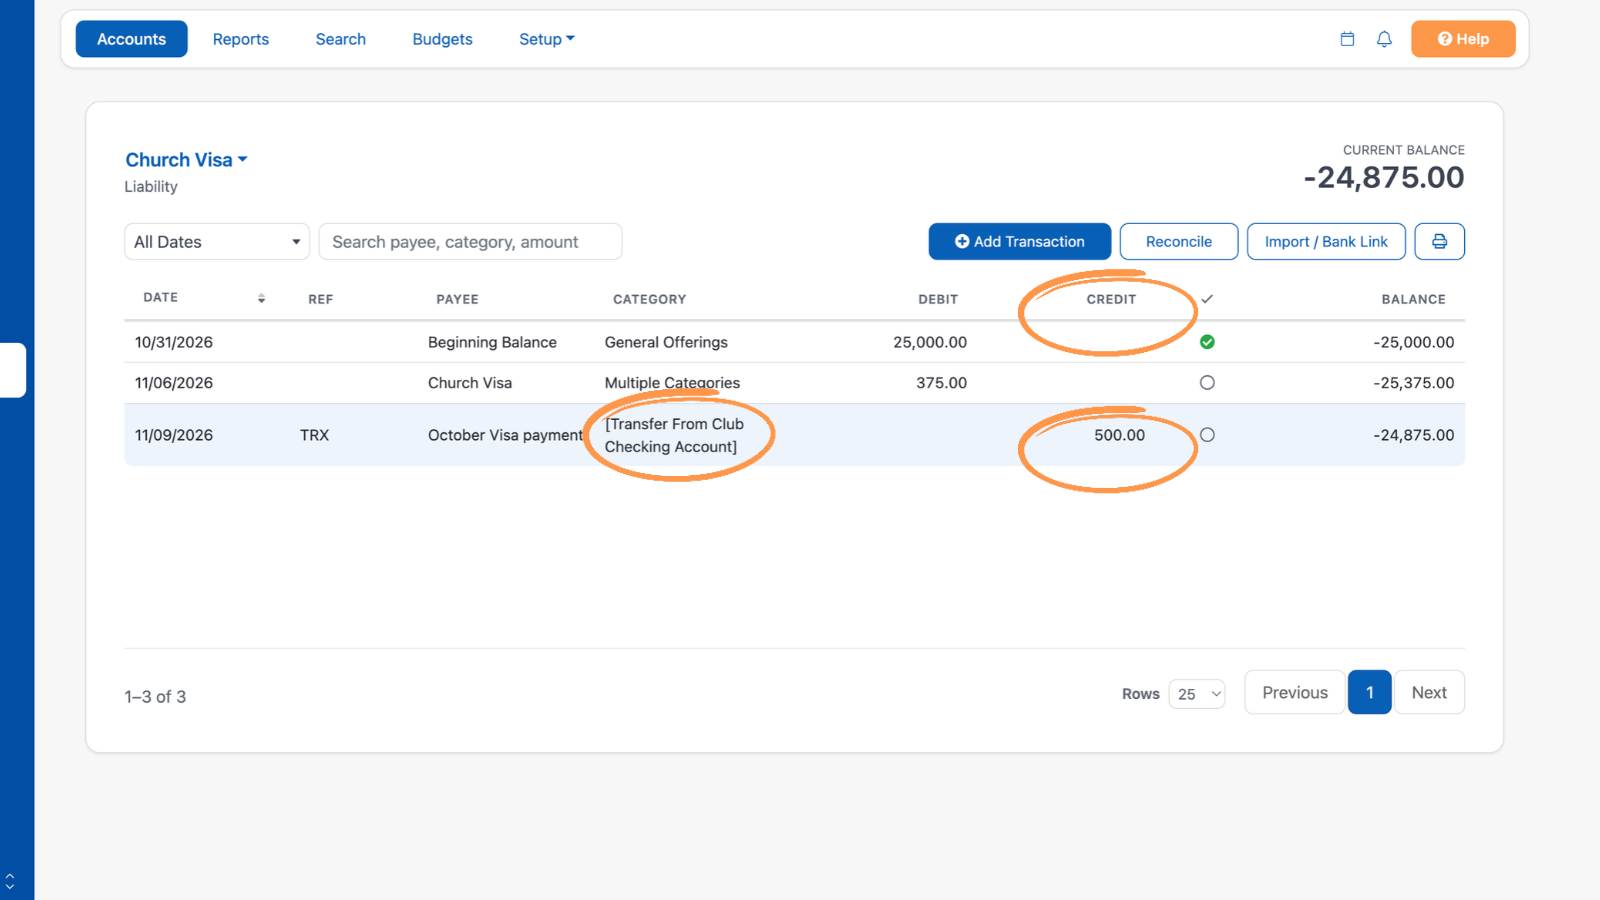
ChurchTrac records the payment as a reduction to your checking balance and a reduction to your credit card balance.
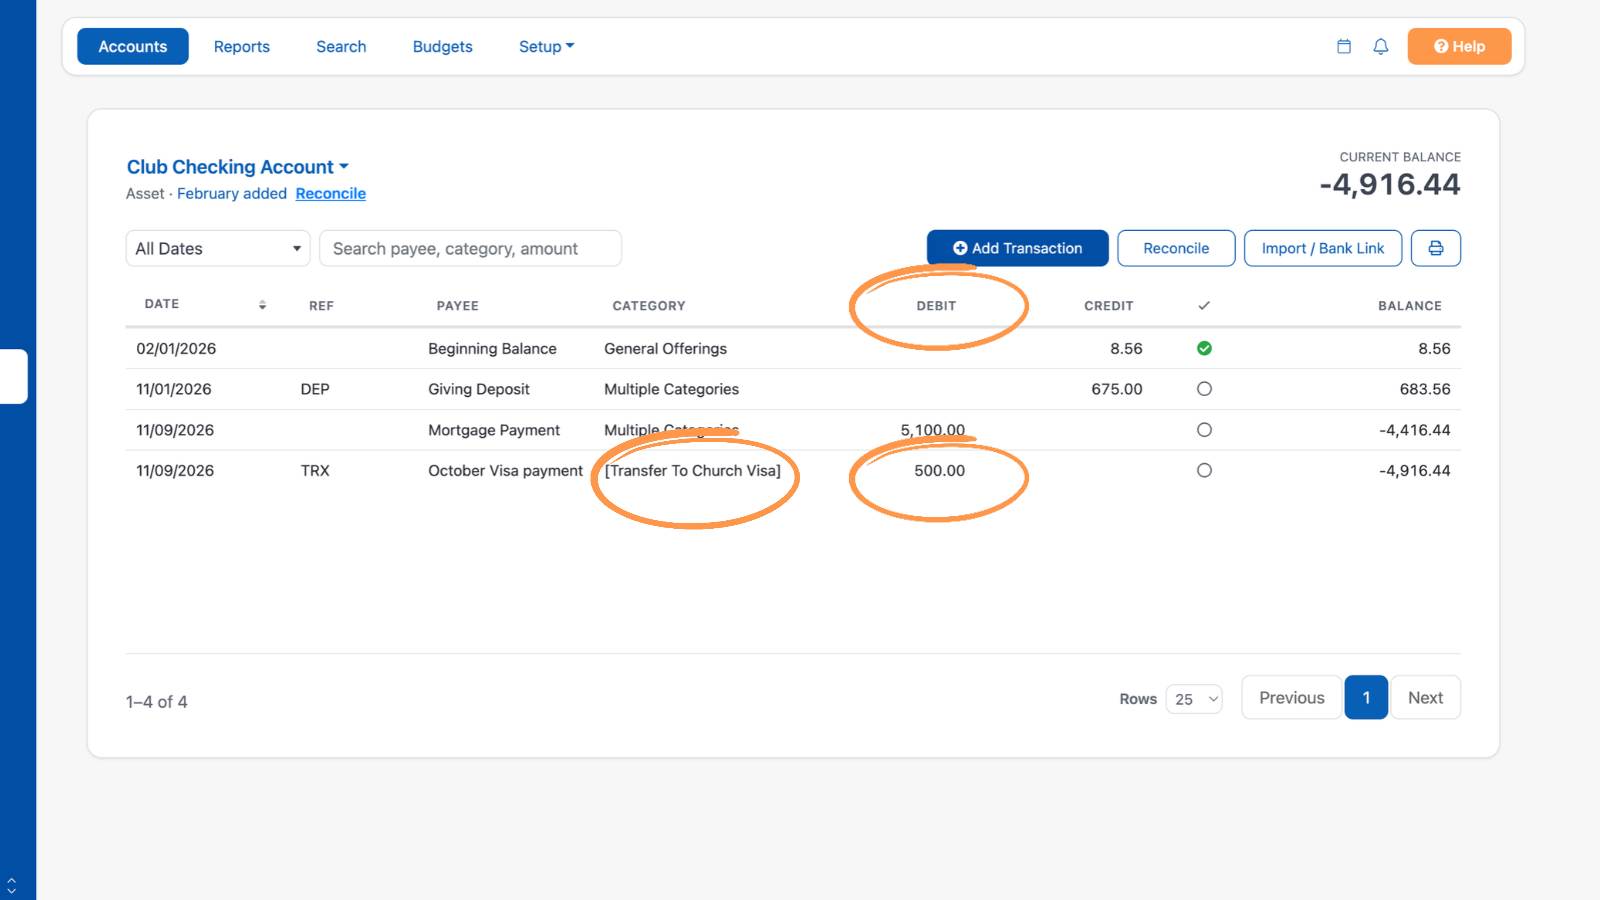
In accounting terms, it debits the credit card account and credits the checking account, reducing the amount owed on the card.
Paying Across Multiple Funds
If your credit card expenses were assigned to more than one Fund, select Add Line to split the payment across those same Funds. For example, if $800 of charges went to the General Fund and $200 to the Youth Ministry Fund, add a line for each. Applying the payment to the same Funds as the original expenses keeps your Fund balances correct.
You can also start the payment from the credit card's register. Under Transfer, choose From and select your checking account.
Reviewing Your Credit Card Activity
To review your credit card activity, first run the Balance Sheet to see the total credit card balance.
Then run a Search for the same ending date or month, with the Account set to your credit card, to see the individual charges. This makes it easy to compare the balance to the spending behind it, and to make sure each payment is applied to the right Funds.
Reconcile your credit card account each month against your statement, just like a bank account. If you upload statements or use Bank Link, you can turn on Auto Reconcile for the account. Learn more about reconciling ›
If you have a rolling balance or need additional assistance, reach out to our support team for help!