Check-In Settings
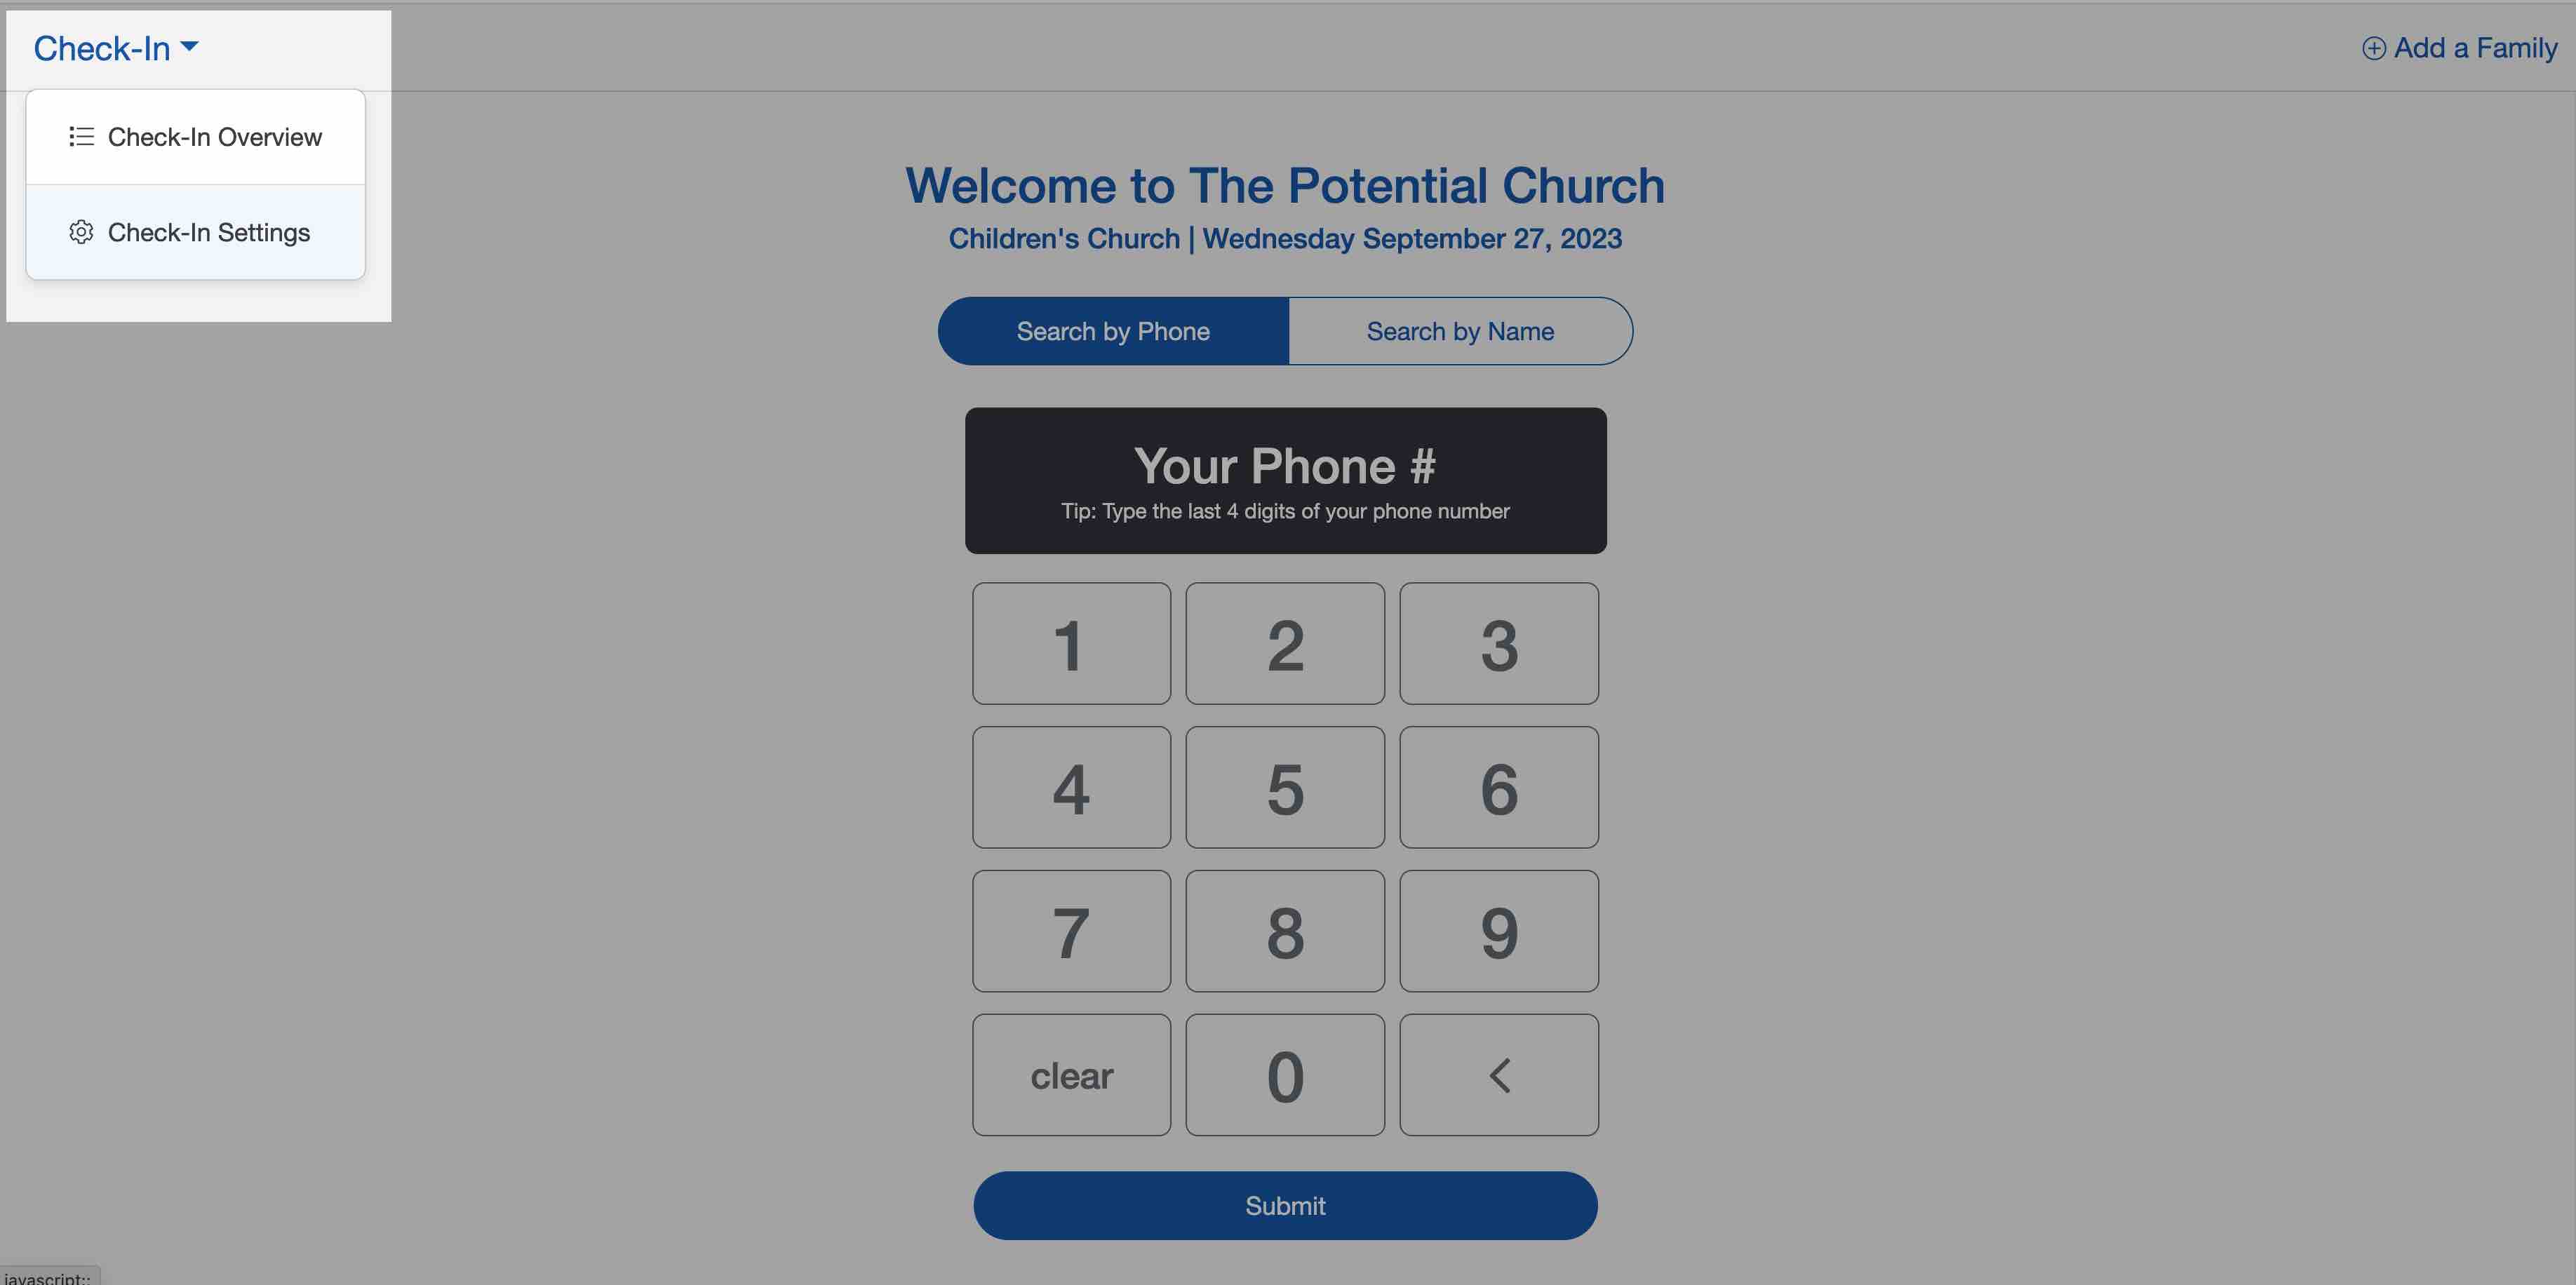
There are several options and settings that can be adjusted for your church check-in process in Check-In Settings. The Check-In settings option is located in the top-left corner of the check-in window.
The Check-In Settings Menu
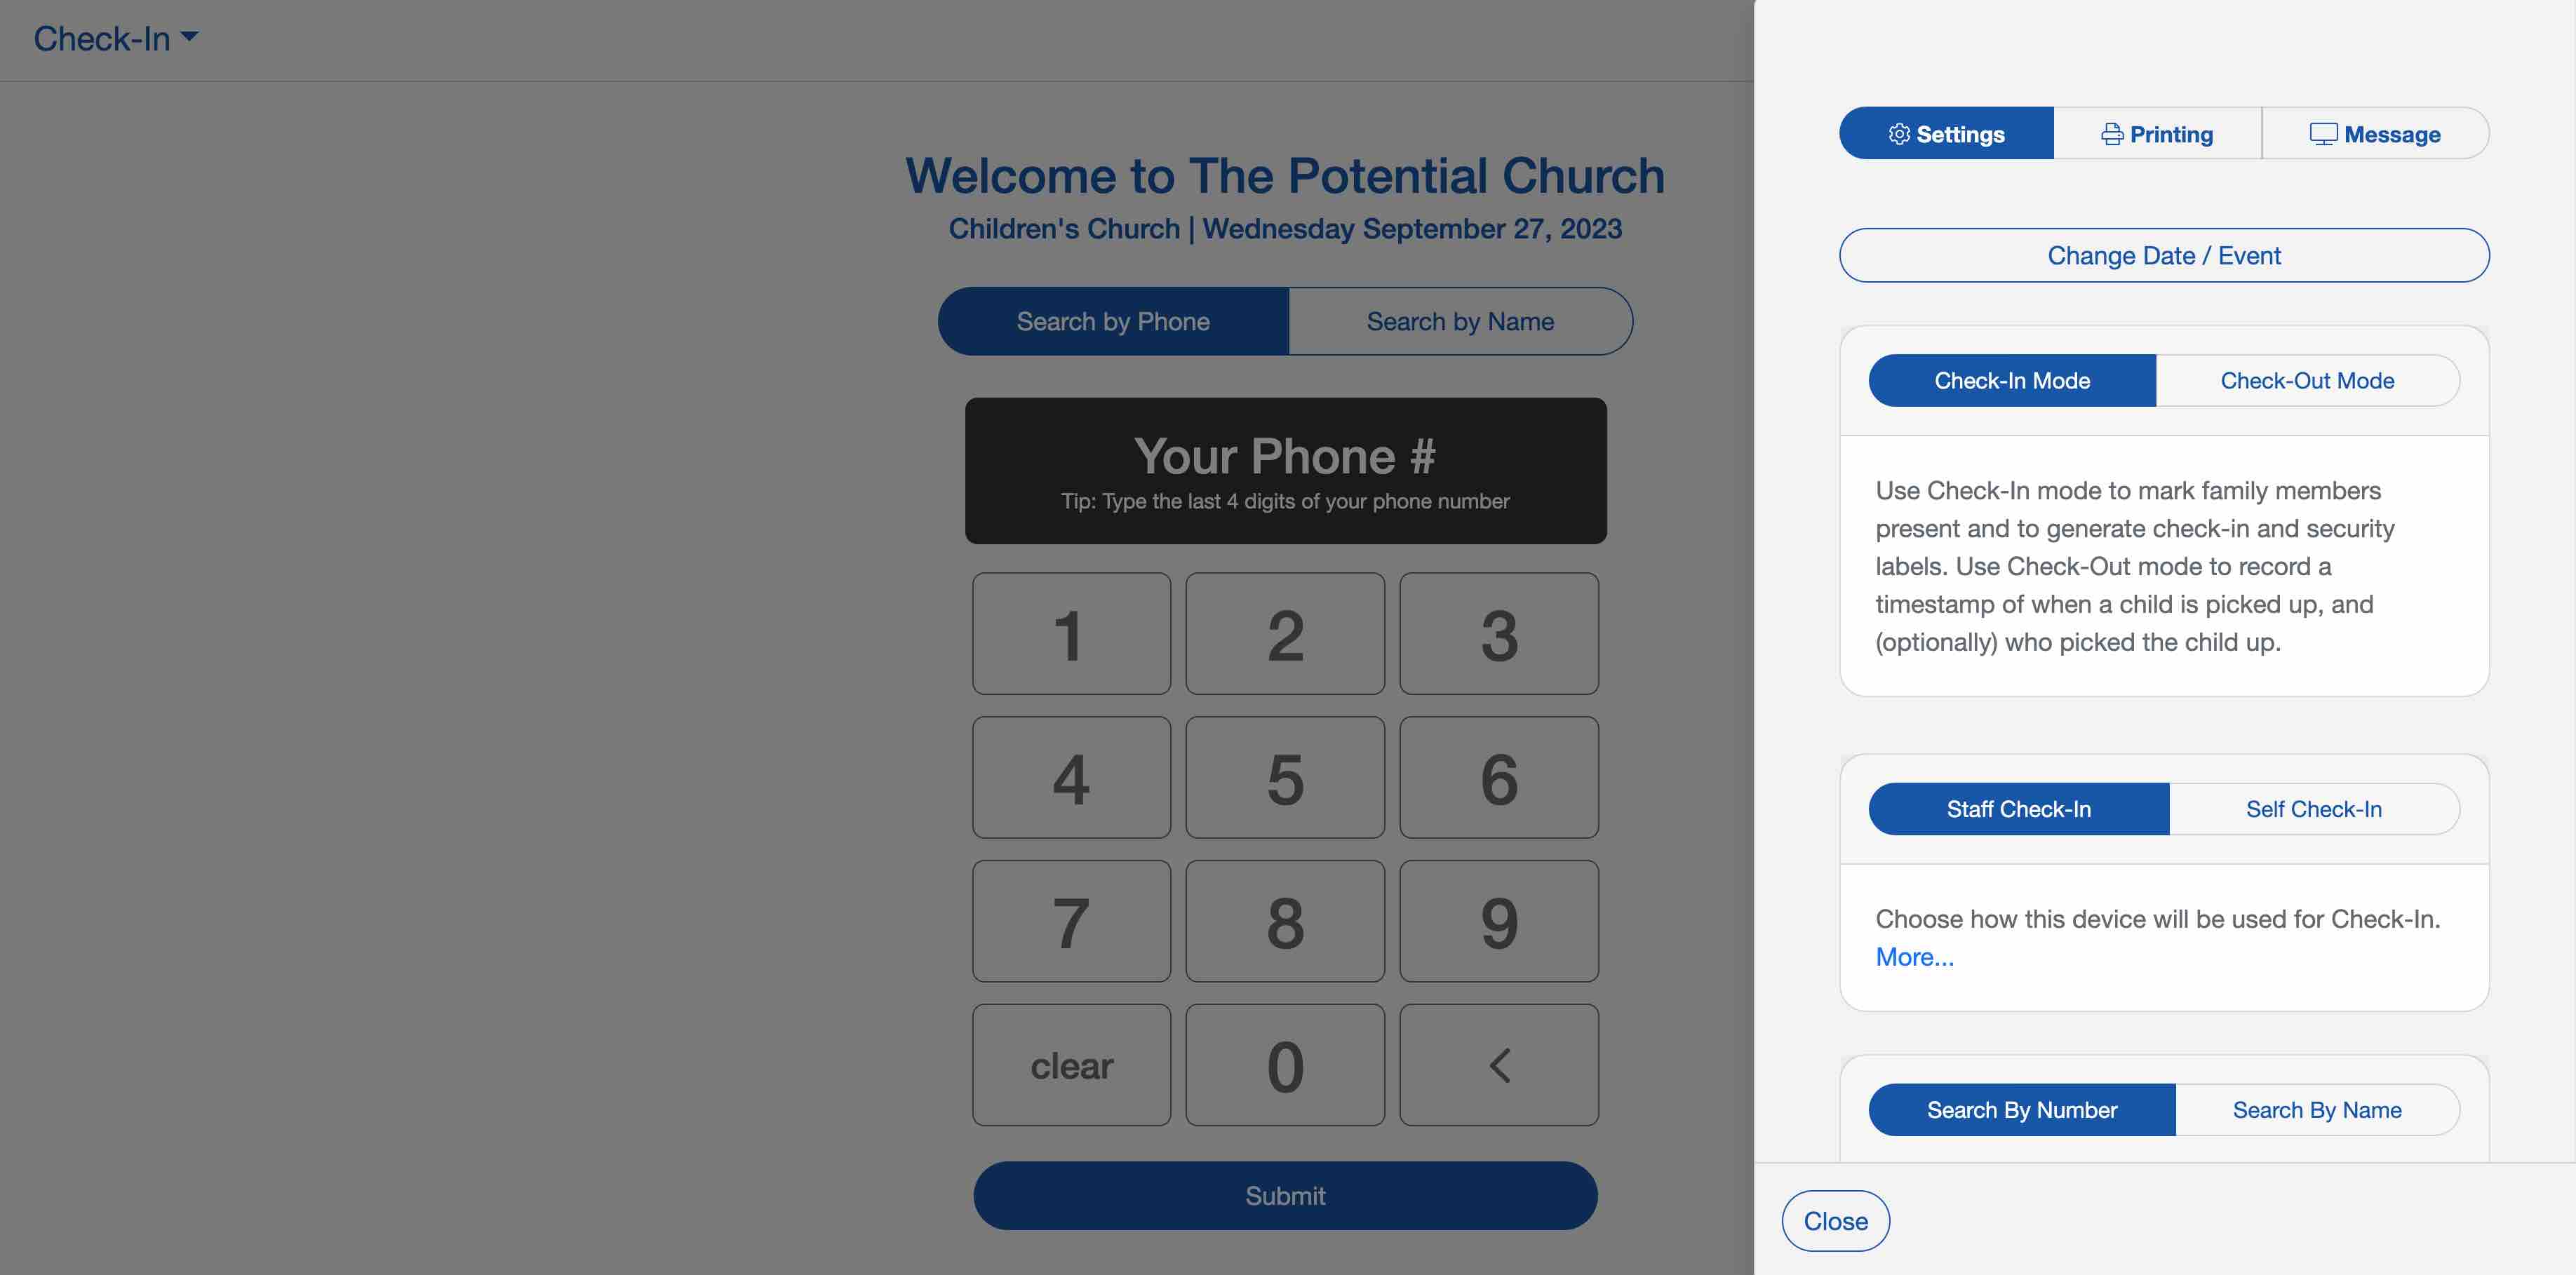
You will then have the option to view/change your general settings, print settings, and kiosk (welcome) message.
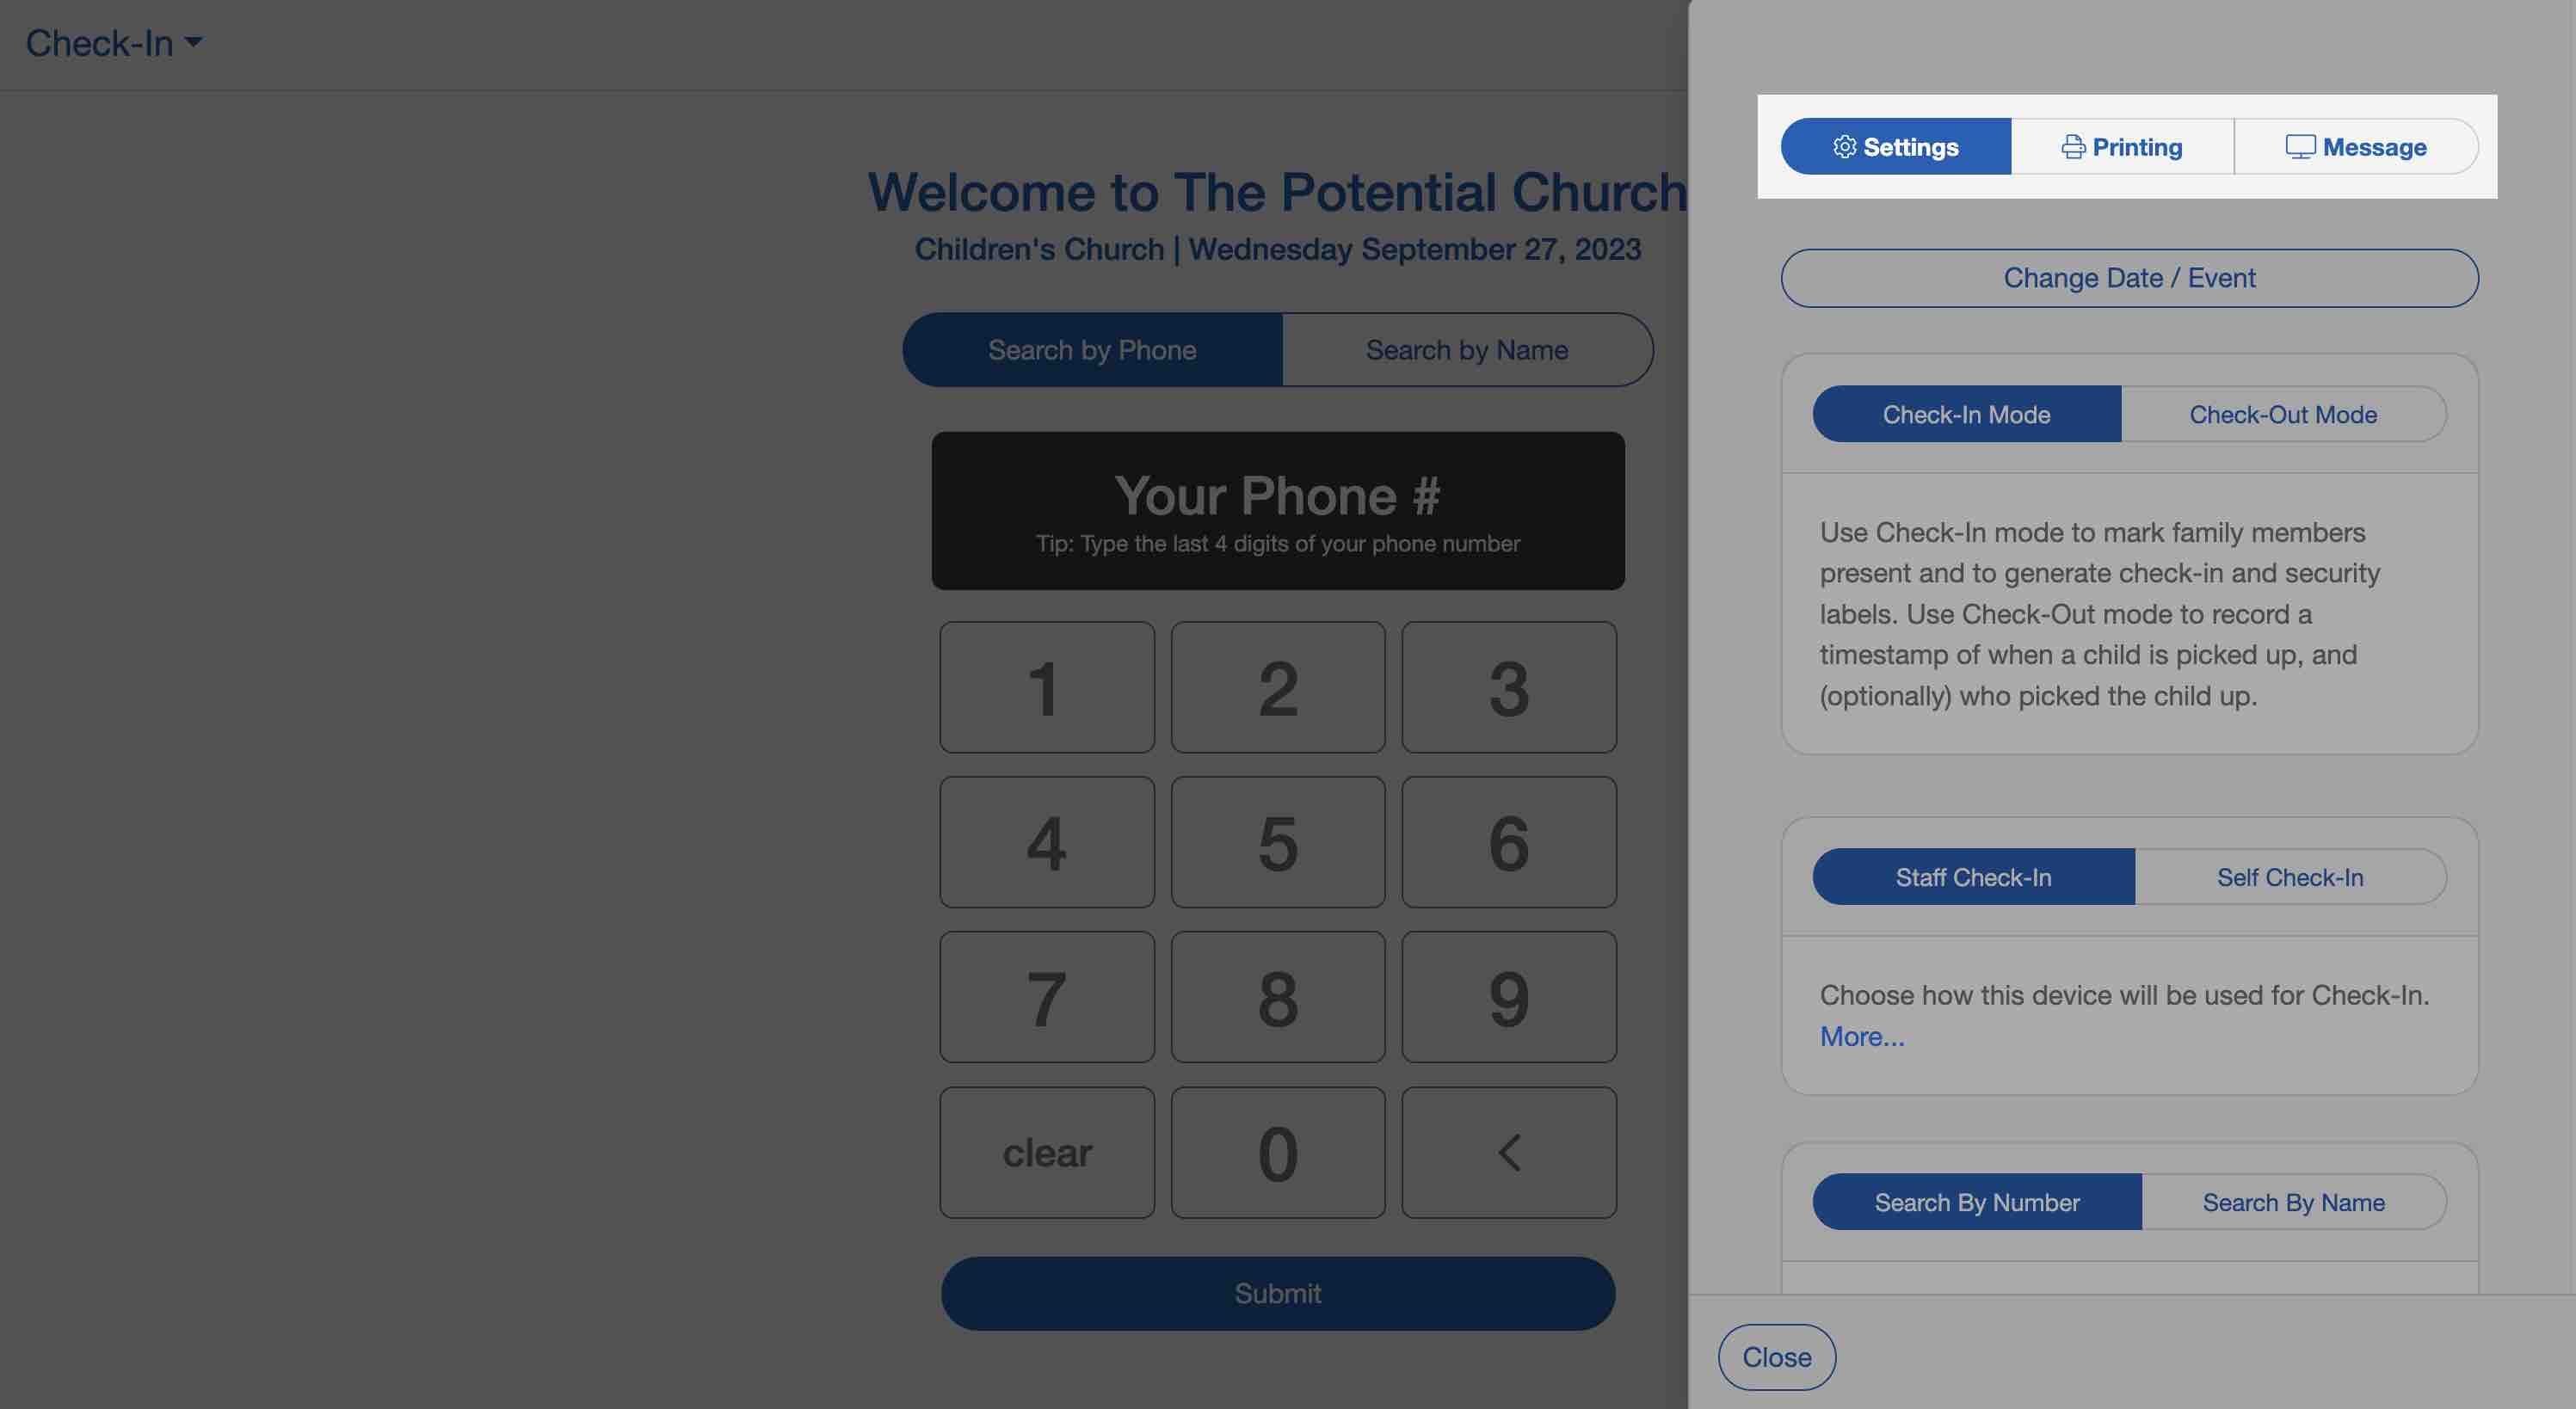
General Settings
In the General Settings tab, you can:
- Change the Date/Event currently selected
- Toggle between Check-In and Check-Out Mode
- Toggle between Staff or Self Check-In
- Set the Default Search to Phone Number or Name
Print Settings
Under print settings, you have the option to enable or disable label printing. You can also choose whether or not to include family security codes on labels and whether or not you want the system to create a family pick-up label when printing labels.
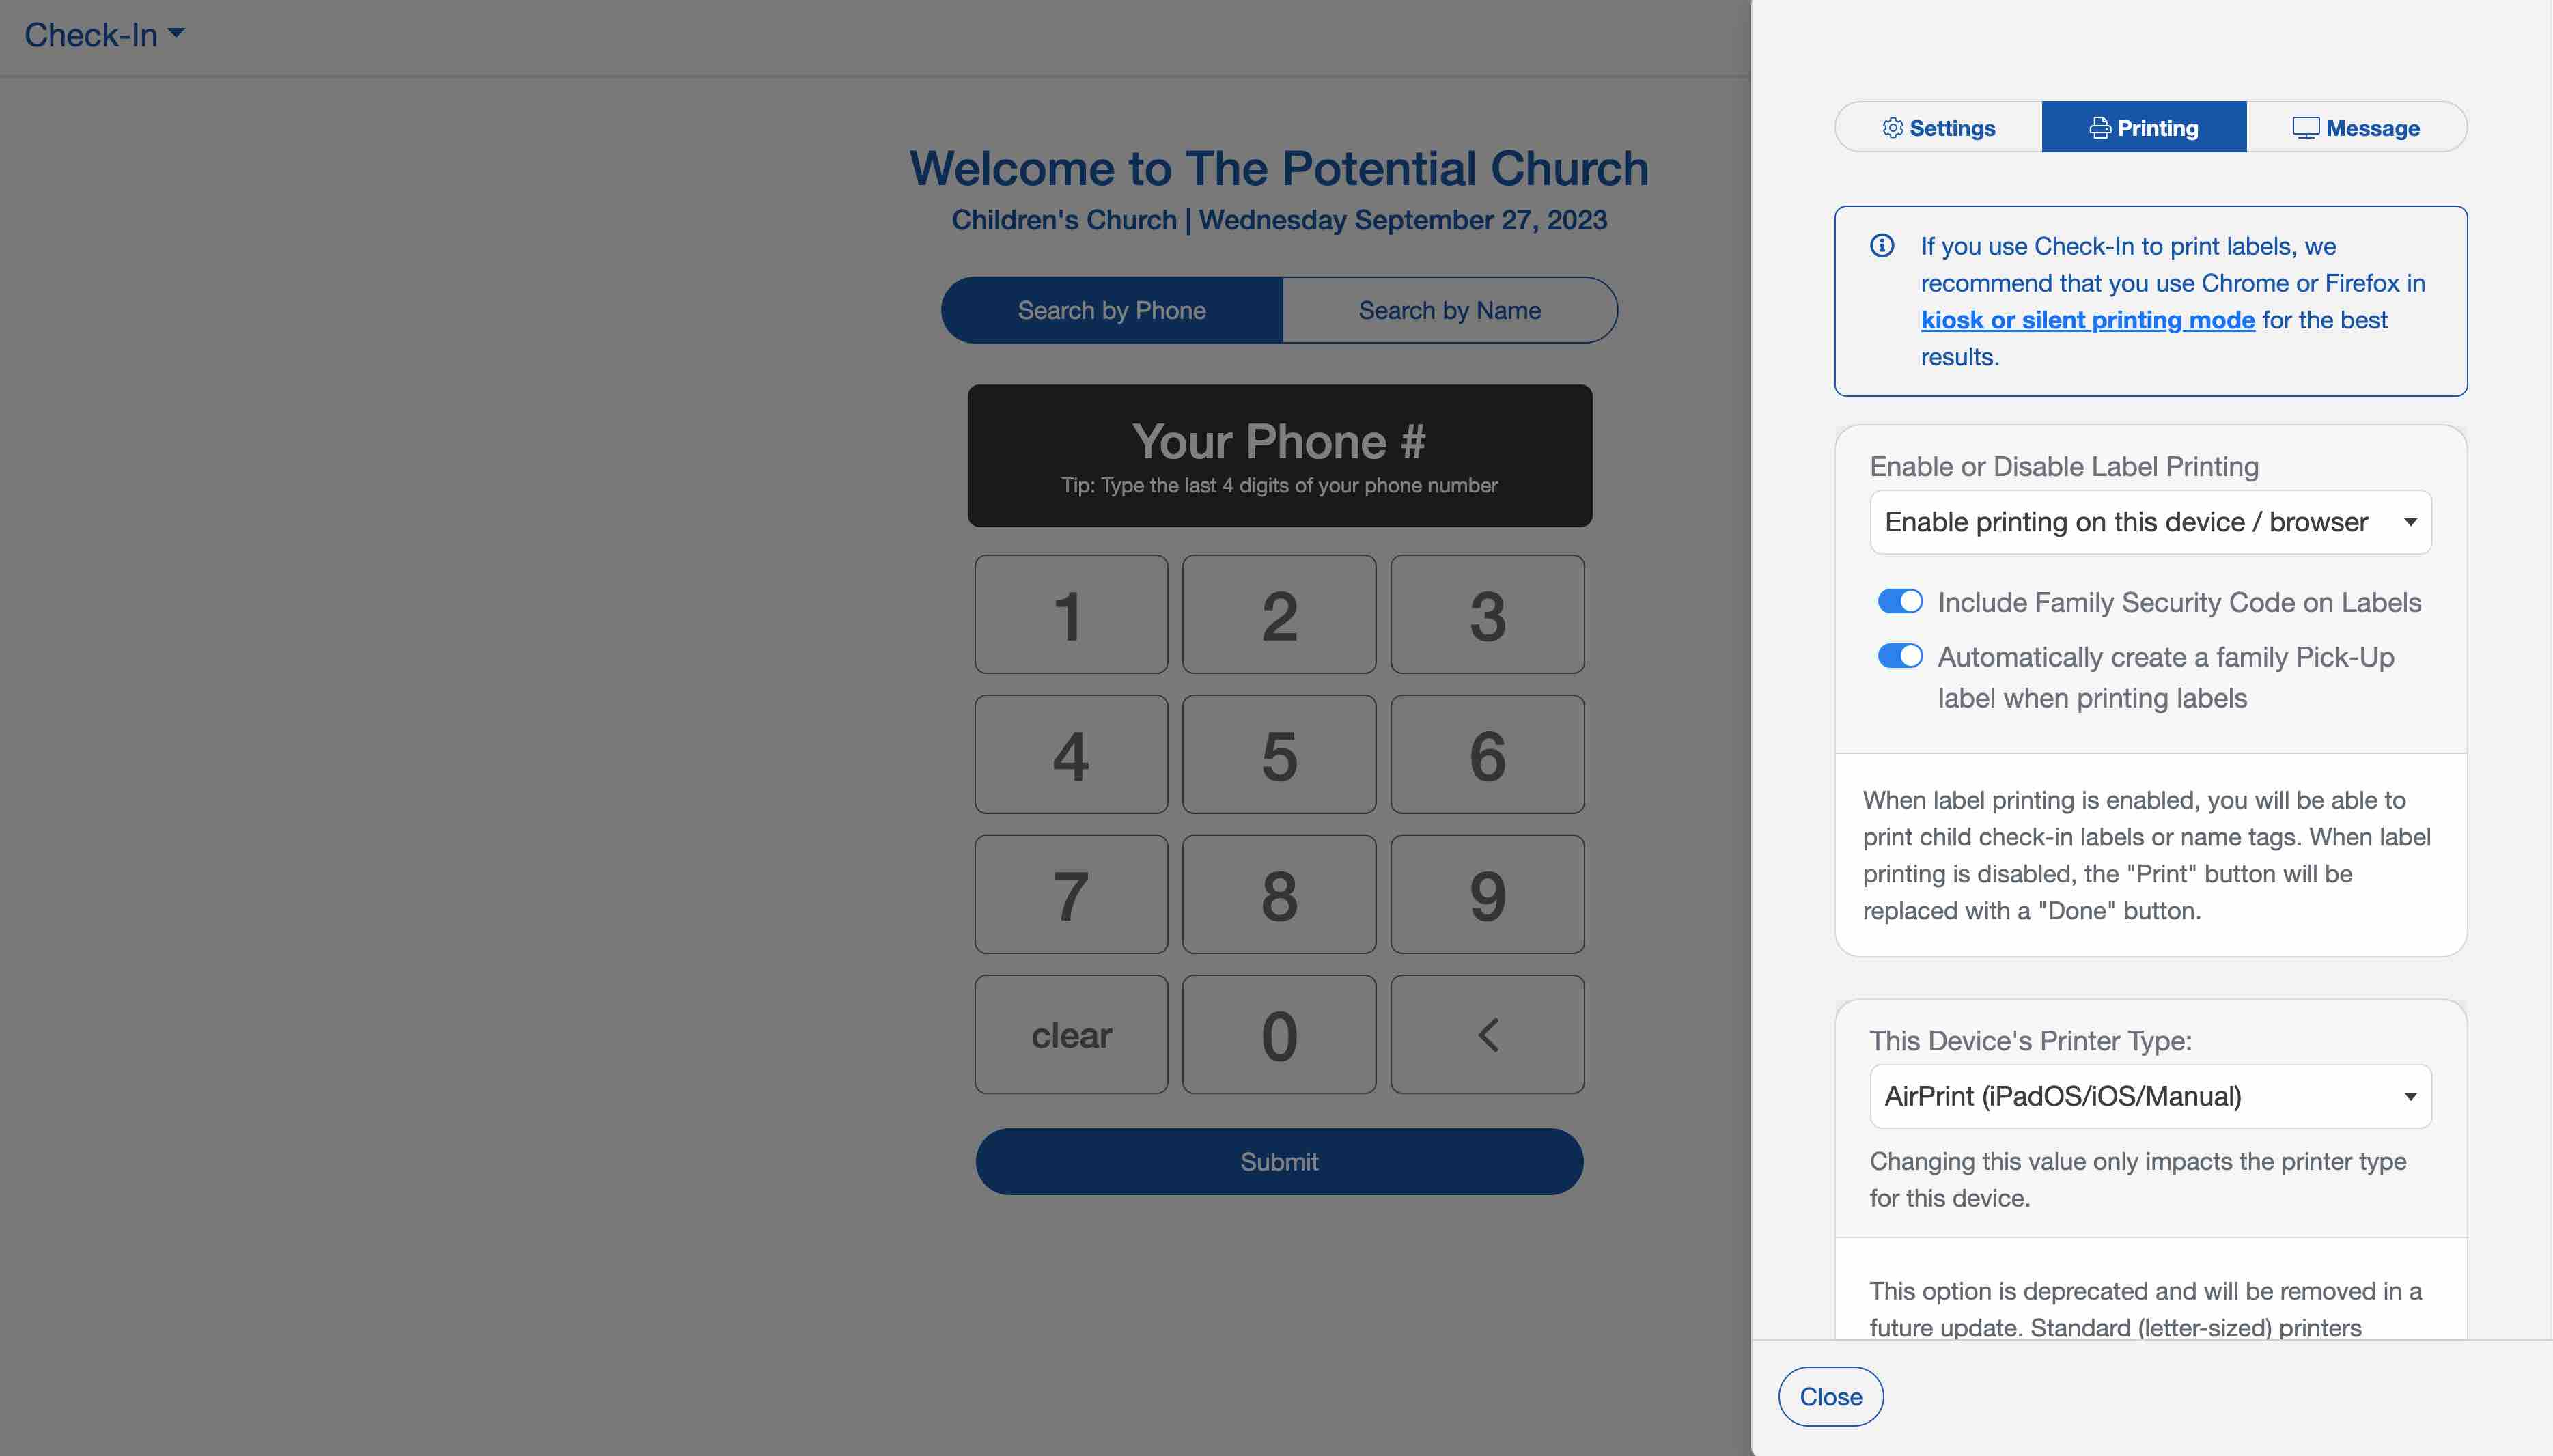
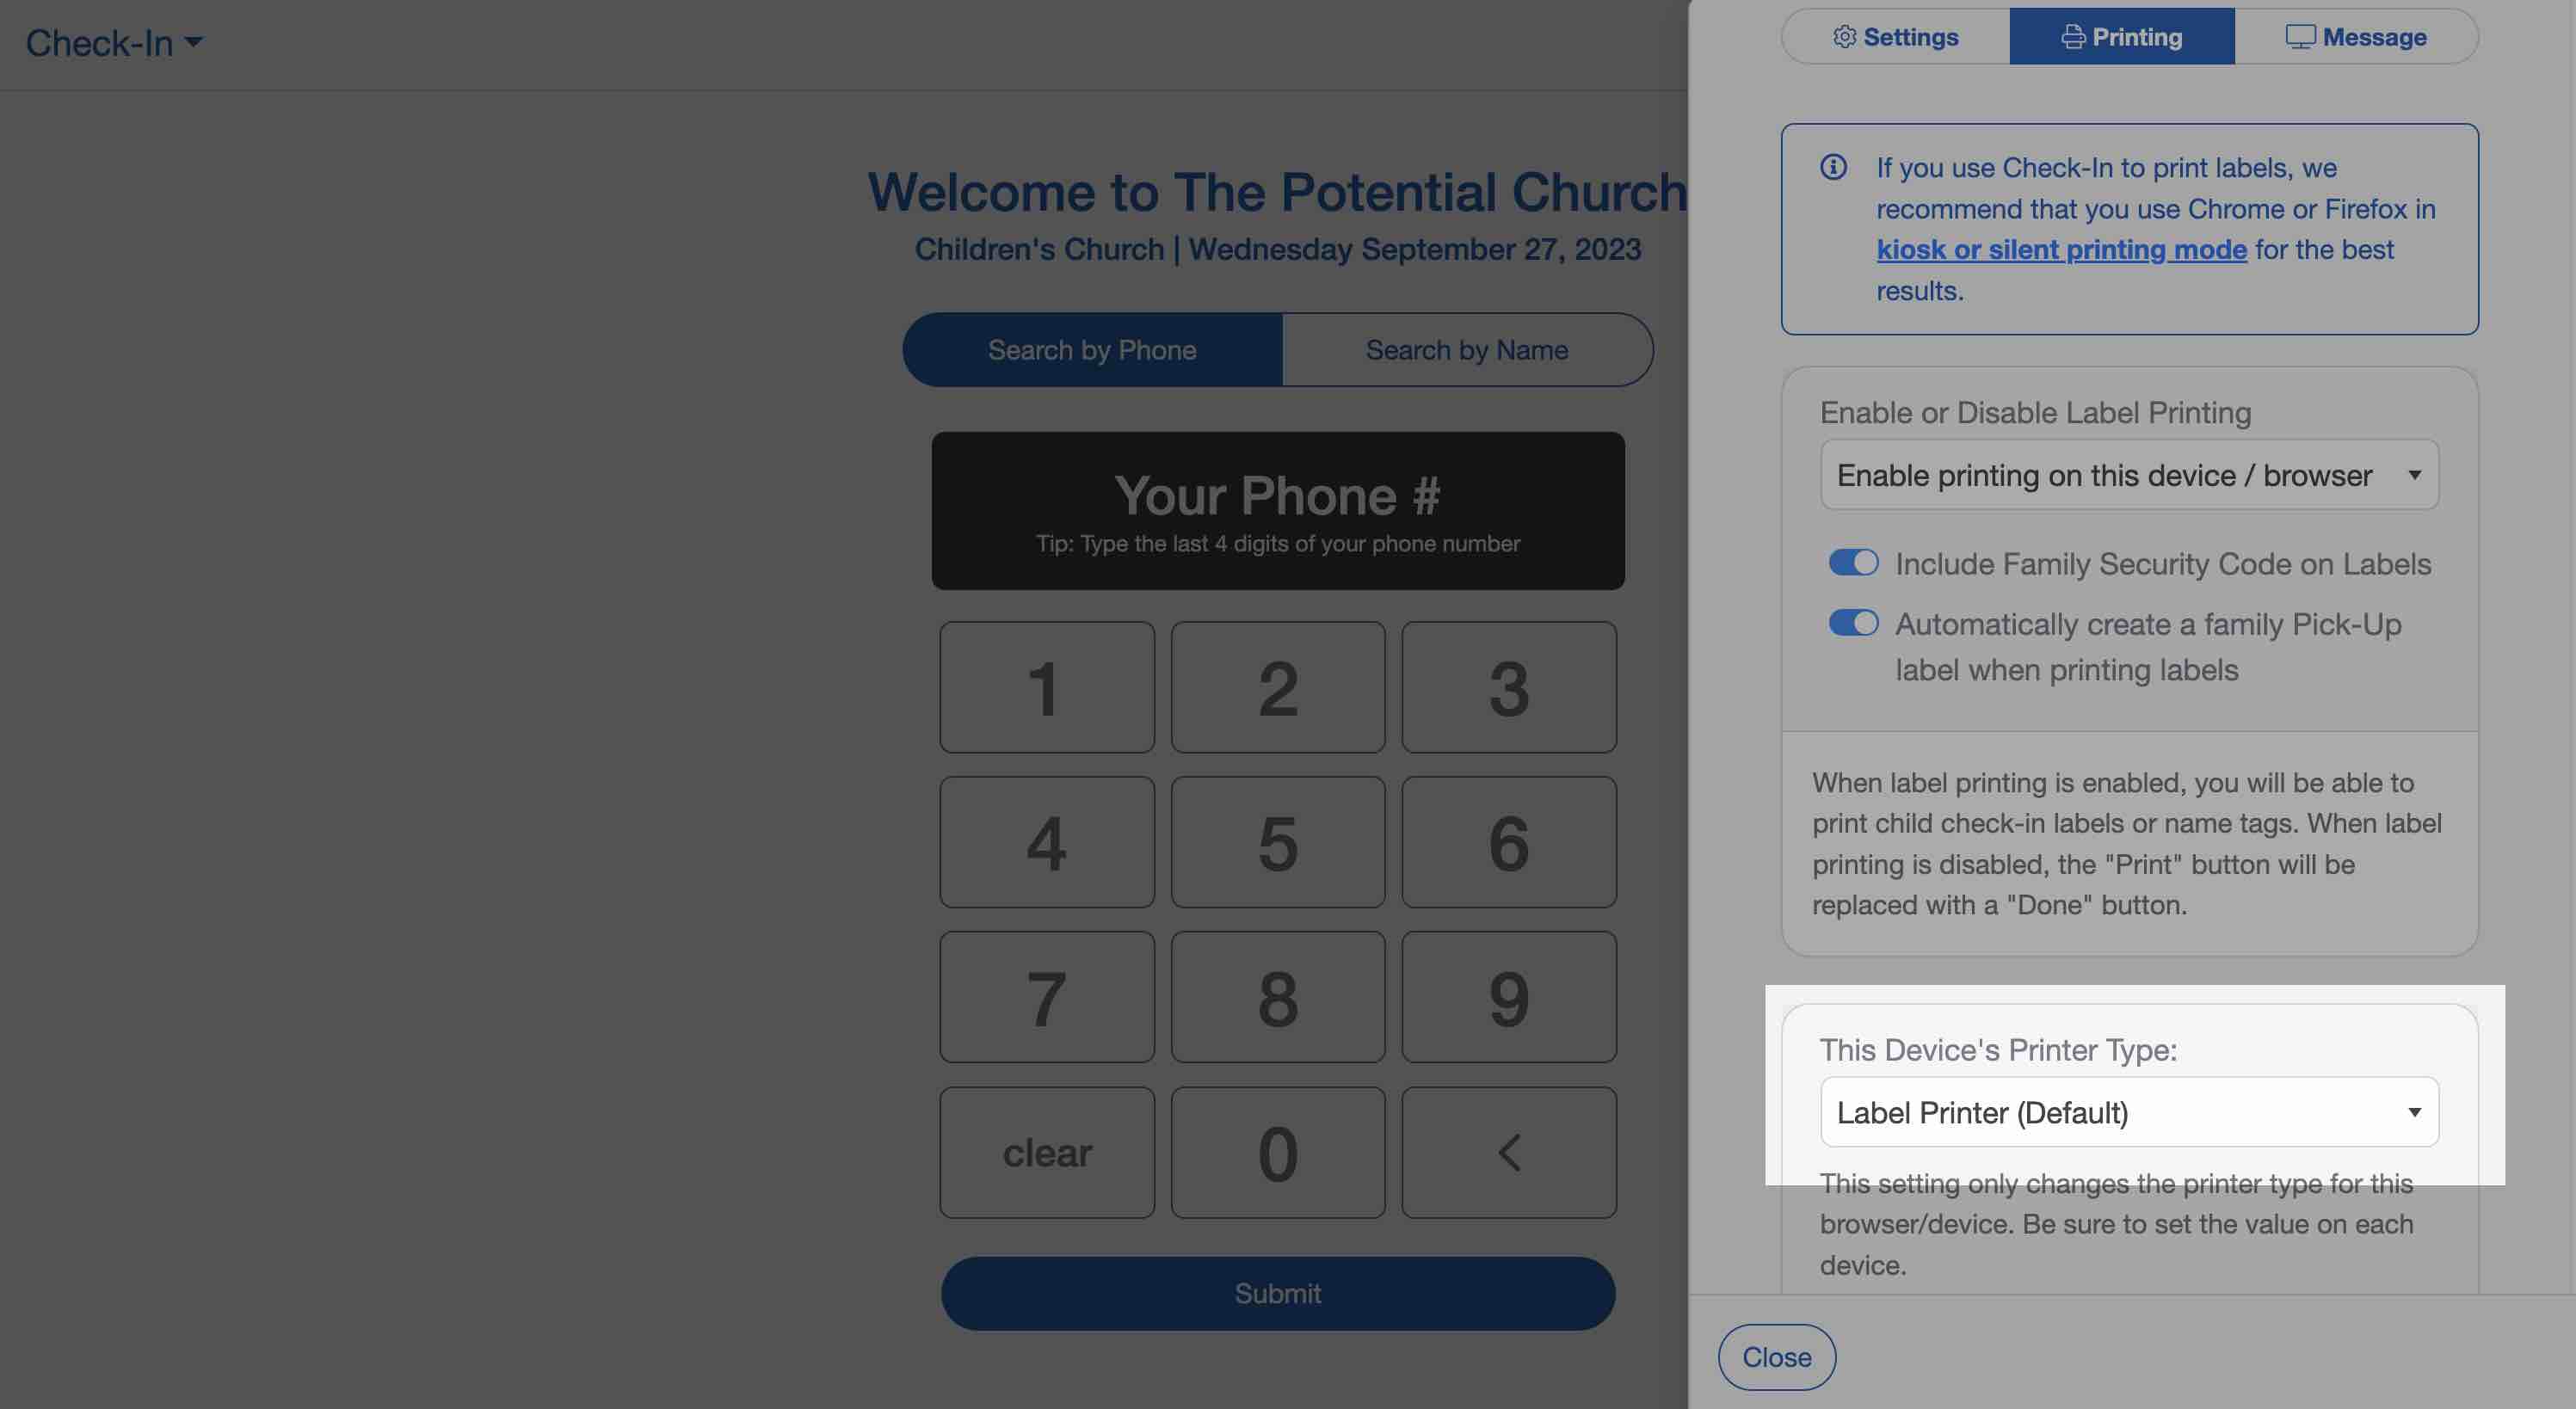
The "Device's Printer Type" must be properly configured. If you are using a PC or Mac connected directly to a label printer, select "Label Printer". AirPrint is only compatible with iPad devices.
When you are initially setting up your printer, we recommend disabling your refresh time for the station to give you ample time for printer configuration.
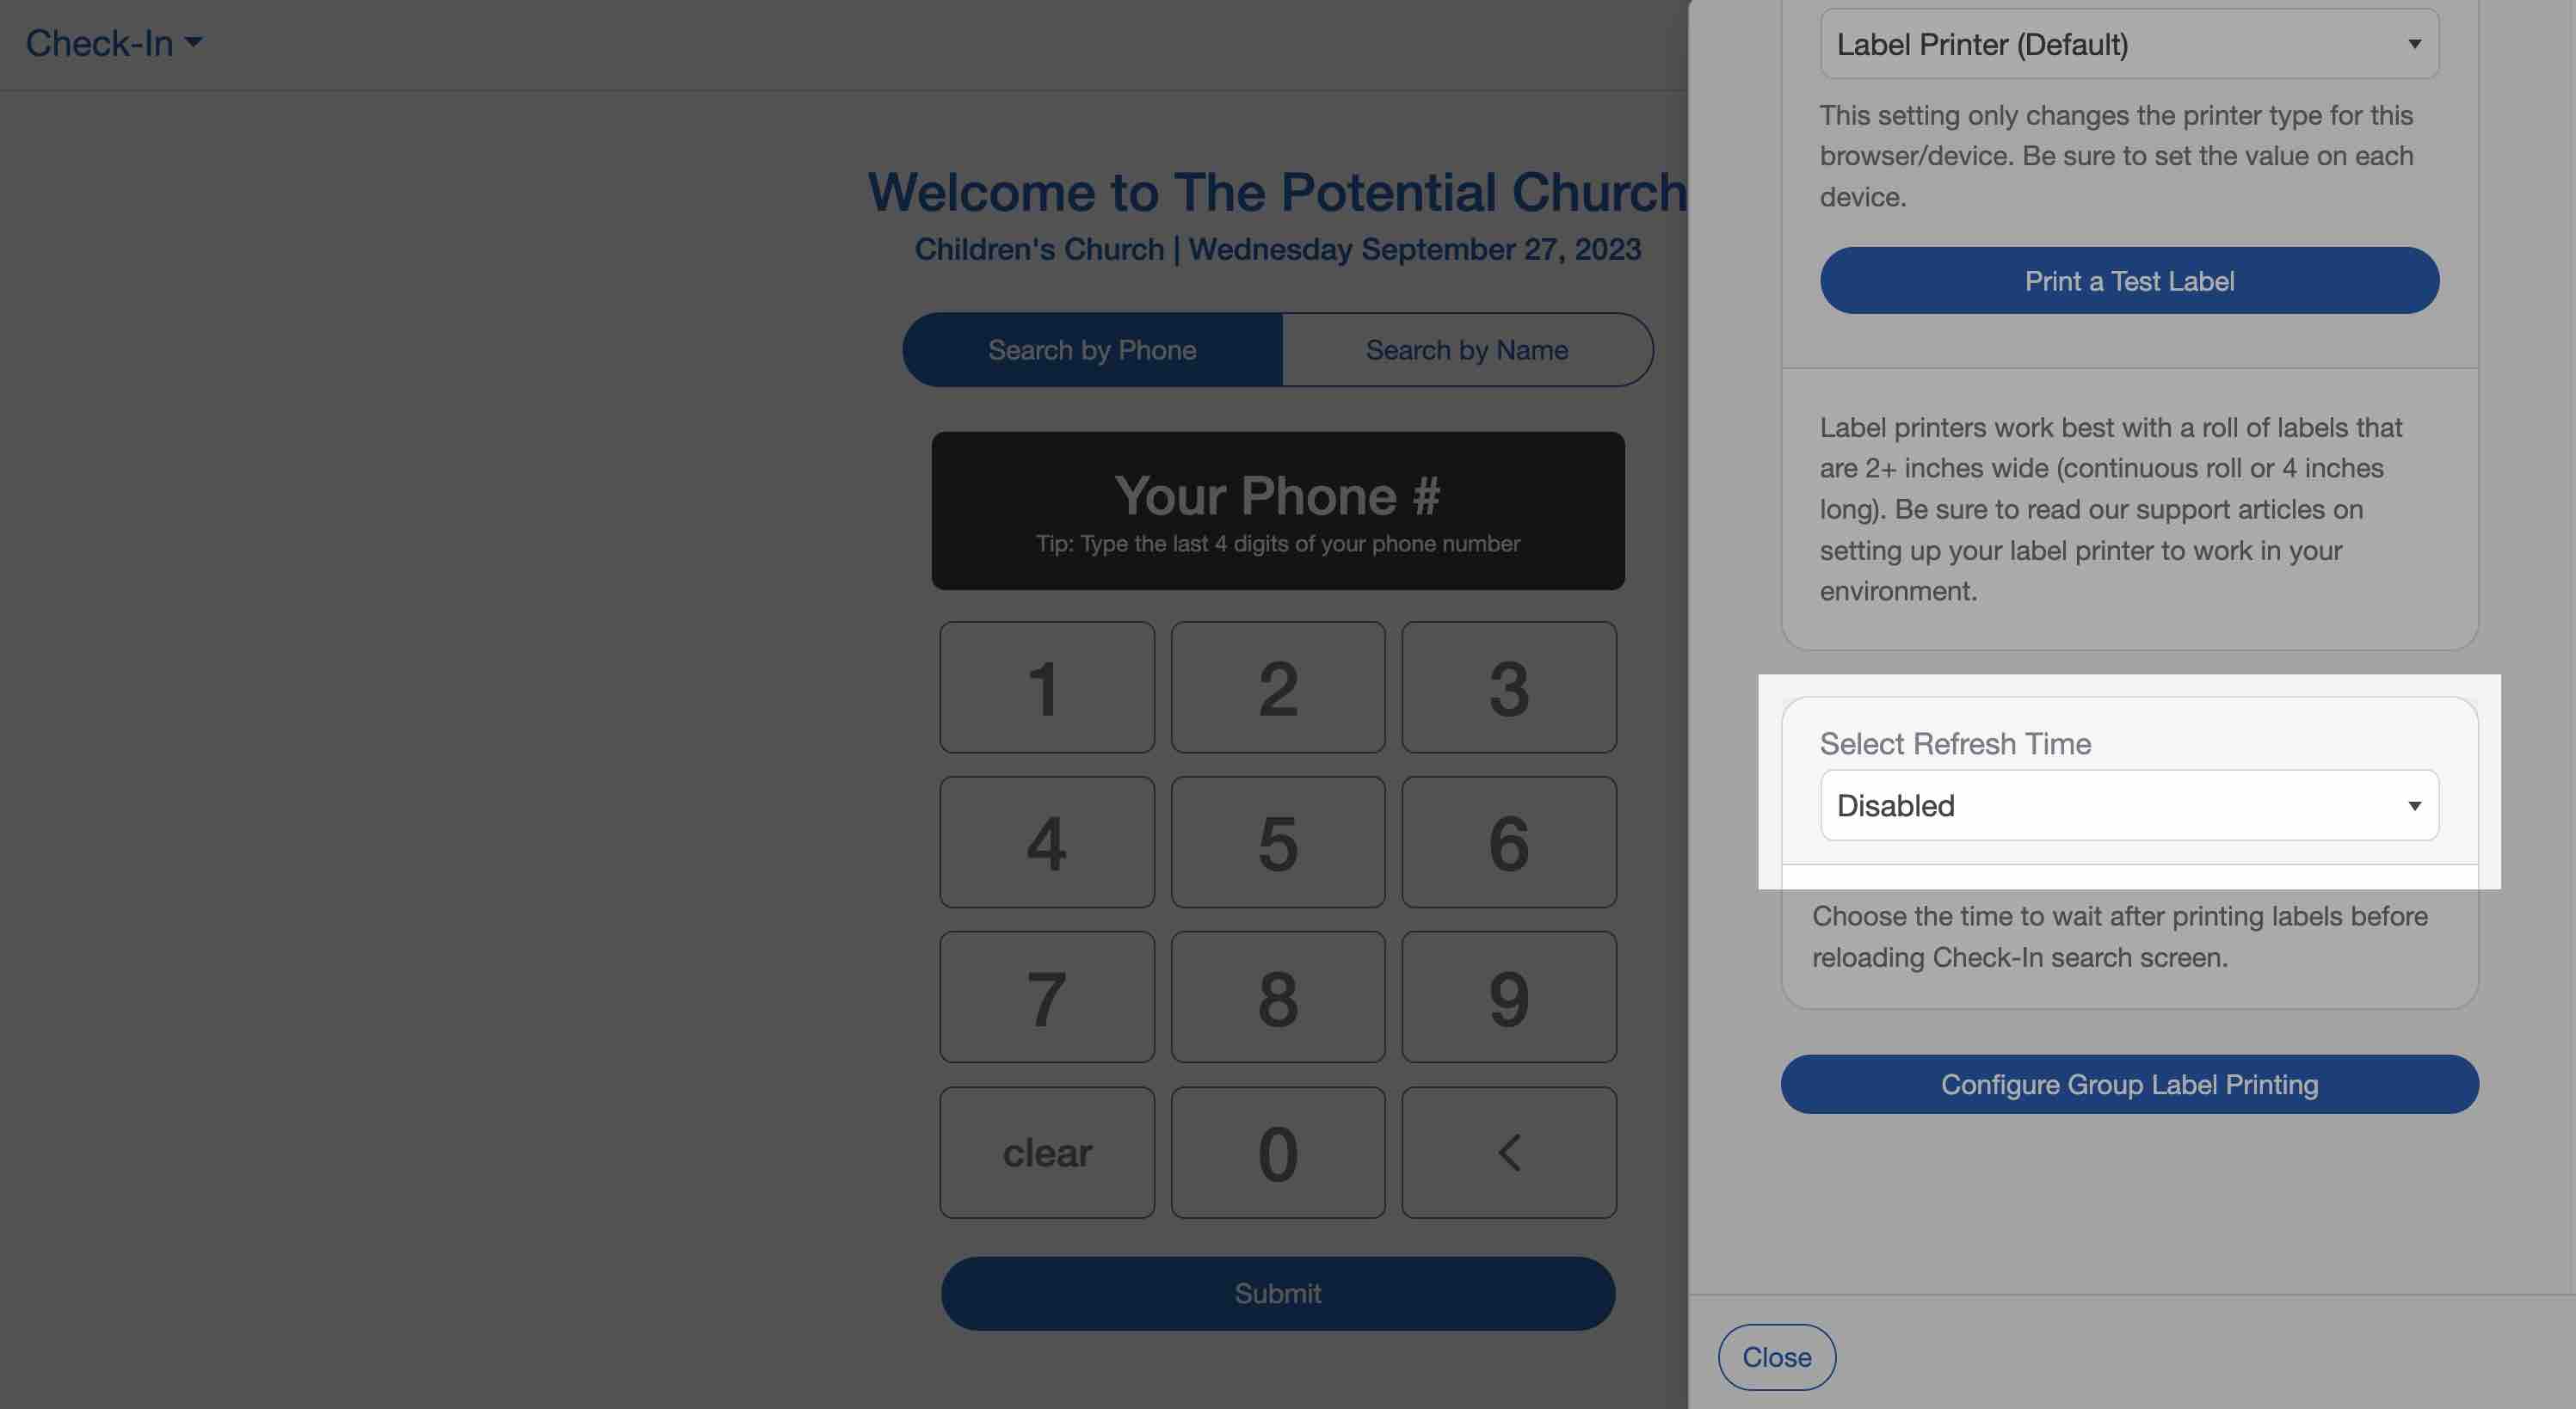
Need help configuring a label printer? See our Label Printer Setup article.
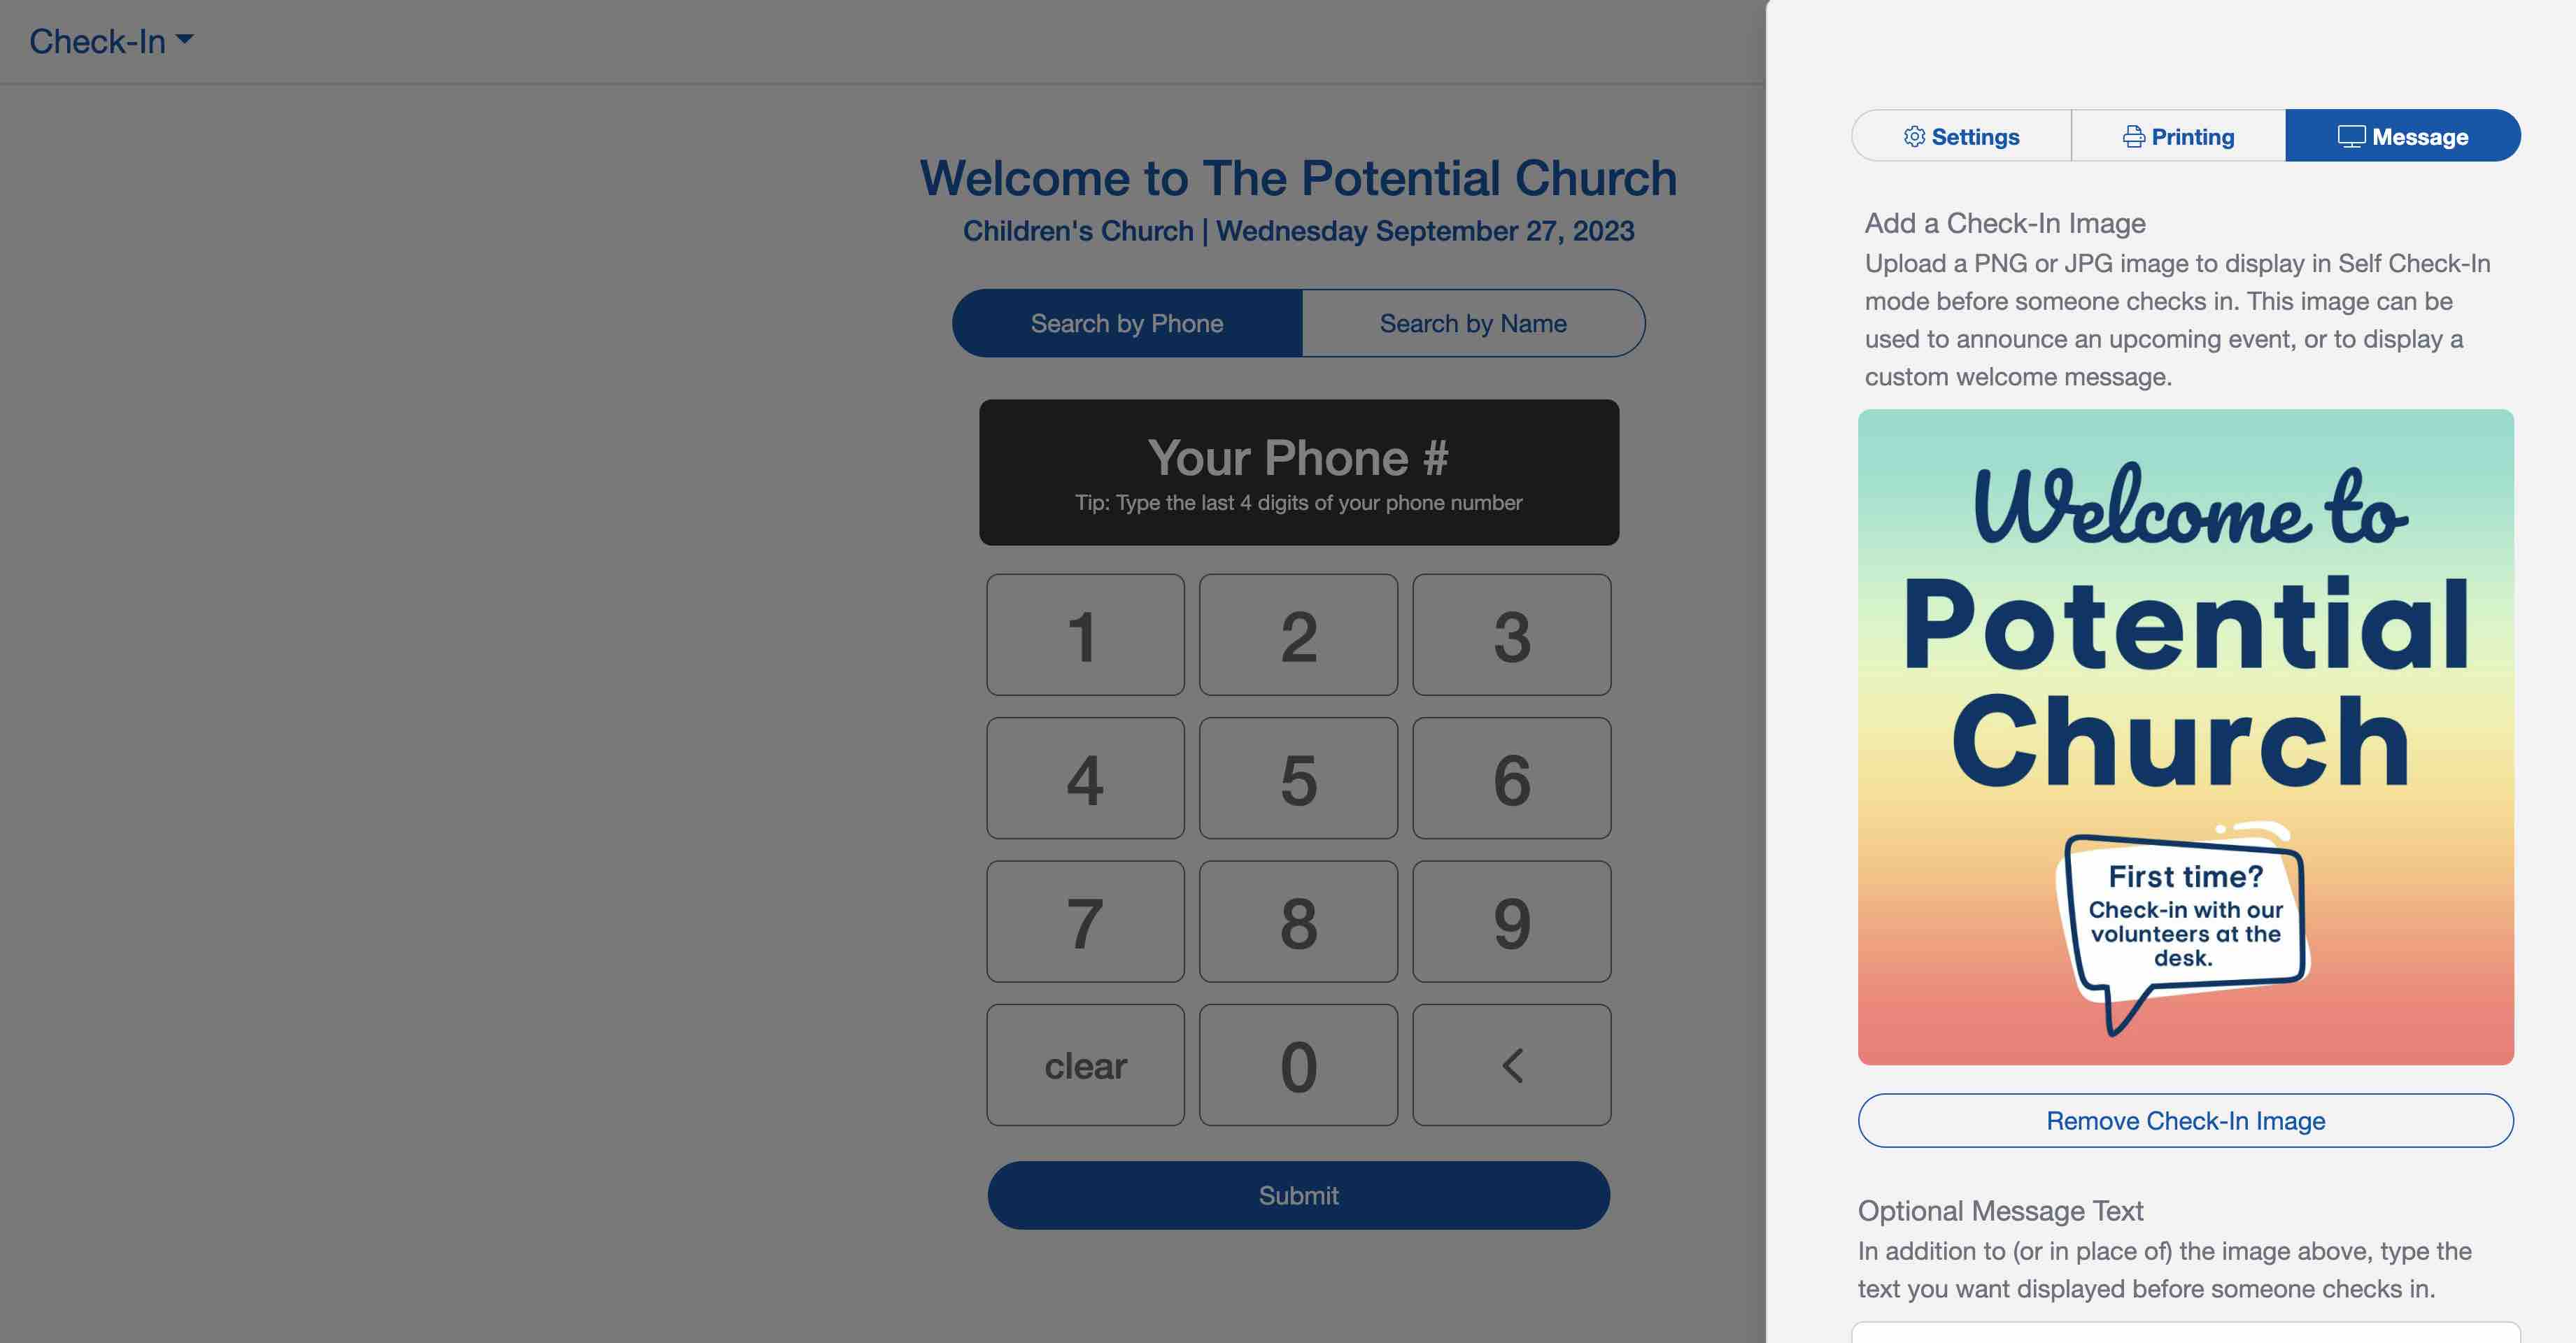
Kiosk Message
With the Kiosk Message, you have the option to attach a custom image or insert a message that can be displayed on self-stations. The image/message will be displayed until the individual selects the "Continue to Check-In" button.