Getting Started with Check-In
ChurchTrac features a complete church check-in system for your children's ministry, available on our iPad Check-In app and a computer. You can check in an entire family, generate check-in labels, security (pick-up) labels, and nametags while marking family members present for an event.
- What Do I Need to Use Check-In?
- Using Groups With Check-In
- Ways to Check-In
- Recommended Setup
- Label Printer Setup
What Do I Need to Use Check-In?
To use Check-In, you'll need an iPad (paired with our Check-In App) or a computer, a compatible label printer, and a stable internet connection.

Compatible iPads
IPads running iOS17 or higher.
Recommended models: iPad (10th generation), iPad Air (5th generation), iPad Pro (4th generation and newer), Not Recommended- iPad Mini (7th generation).Compatible Computers
PCs running Windows 10 or higher or Macs running macOS 11 or higher.
Compatible Label Printers
Check-In works with most Brother Label Printers.
Compatible Web Browsers
- For iPads, use our iPad Check-In app.
- For PC's, use Google Chrome Browser.
- For Macs, use Mozilla Firefox.
Using Groups With Check-In
To ensure a smooth check-in process, it's essential to create and assign Groups to each individual—whether they’re children or adults—before the event. We recommend doing this ahead of time in the People Screen to save time and avoid delays during check-in.

Ways to Check-In
You can choose between two ways to Check-In: the iPad app or 'Check-In mode' on a PC or Mac.
IPad Check-In App (This is the best way to do Check-In)
Versatility: iPads can be easily set up at multiple locations and stations, offering flexibility in your check-in process.
- Cost-Effective: iPads are more affordable than computers and easier to replace if needed, making them a budget-friendly option.
- User-Friendly: The touchscreen interface is perfect for self-check-in stations, providing a smooth and intuitive experience for users. Learn more about Using the IPad Check-In App ›
"Check-In Mode" via a PC or Mac
Expanded Functionality: A computer provides greater flexibility, allowing you to access more information and features beyond just check-in.
- Stability: For churches with unreliable Wi-Fi, a computer with a hardwired printer connection offers a more stable and dependable check-in process. Learn more about Using Check-In on a Computer ›
Recommended Setup
To get the best user experience from Check-In, we have 3 recommended setups to ensure your check-ins run smoothly.
1. Check-In With iPad + Check-In App
If you're using an iPad paired with our iPad Check-In App, we recommend downloading the app from the app store and using Air Print to connect to your label printer. The Check-In app is perfect for churches that use self-check-in stations or need to handle multiple staff check-in locations simultaneously.

2. Check-In With Windows
If you are using a Windows PC for Check-In, we recommend using a PC laptop or desktop that is directly connected to your label printer via USB or Ethernet. A PC is best suited for staff check-in stations where it may be necessary to update further information beyond just the initial check-in.

When using a PC for self check-in stations, use Google Chrome Browser in Kiosk Mode. This will give users the best experience as it will hide print prompts.
3. Check-In With Mac
If you are using a Mac for Check-In, we recommend using a Mac laptop or desktop that is directly connected to your label printer via USB or Ethernet.
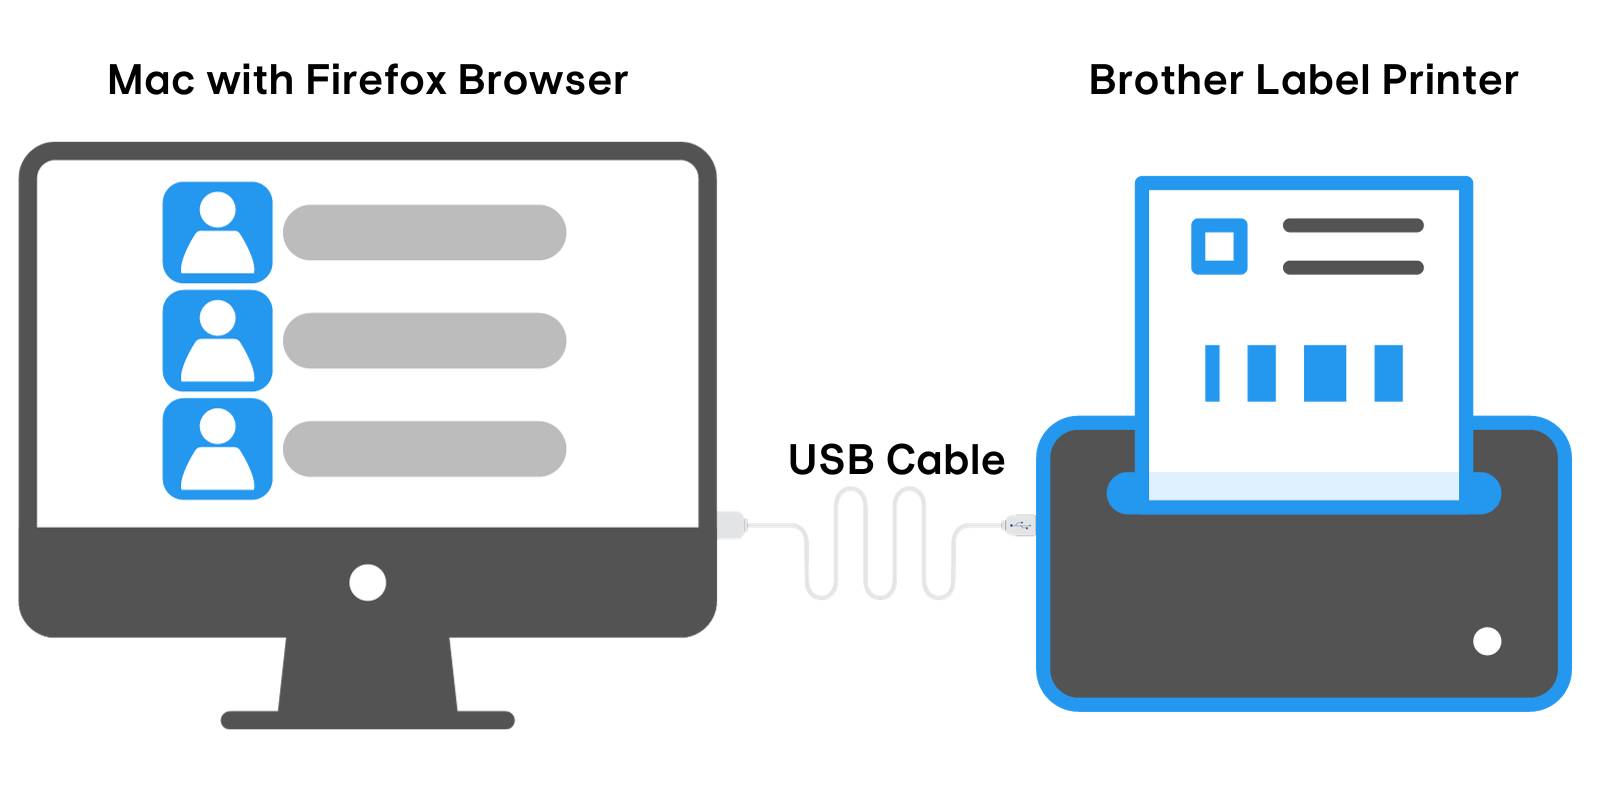
When using a Mac, use Mozilla Firefox with Silent/Background Printing enabled. This will give users the best experience as it will hide print prompts.
Label Printer Setup
You will need to configure your label printer. The Check-In feature in ChurchTrac is compatible with most Brother QL series printers. Learn more about Label Printer Setup ›