How to Build a Church Website
This guide walks you through building your church website with Church Connect.
You'll start by choosing your branding and domain, then create a new Church Connect site using one of our professionally designed website templates. From there, you'll personalize the template with your church's content, colors, and images until it's ready to share.
Even if you've never built a website before, we'll guide you through each step.
Before You Begin
Before you start building your website, it's helpful to gather a few items. Don't worry if you don't have everything yet, you can always come back and update your site later.
Recommended Checklist
- Church logo
- Brand colors
- Photos of your church or ministry
- Service times
- Contact information
- Social media links
- Livestream link
- Online giving link
- A short mission statement or welcome message
- List of core beliefs
- List of ministries and descriptions
- List of staff and photos
Step 1: Choose Your Branding
If your church doesn't have established branding yet, here are a few free resources to help you get started:
Color Palette
The first step in creating a church brand for your website is to choose your church's brand colors. If you're not familiar with color theory, Coolors is a great tool that will help you pair colors together and create a color palette for your church.
Brand Fonts
Which fonts you choose will depend on your church's character and who you want to bring into your church. Modern, bold typefaces are popular. But if your church has a long history, a formal serif font will help connect your brand to the past. Fontjoy is an excellent resource to help you choose fonts. The program makes it easy to pair complementary fonts together.
Church Logo
Once your colors and fonts are established, it's time to design a logo. Canva has thousands of church logos to choose from that you can fully customize. You can choose a logo, then change the colors and fonts to match your branding, making it as unique as your church.
Want to learn more about Canva tools and templates? Learn more about Canva for Churches ›
Step 2: Set Up Your Domain
The first time you open Church Connect, you'll be prompted to choose a unique Church Connect keyword. This keyword creates your free ChurchTrac subdomain and serves as the foundation for your Church Connect website.
Use Your Free ChurchTrac Subdomain
Every ChurchTrac account includes a free churchtrac.com subdomain that you can begin using immediately. Many churches use this while building their website or even as their permanent website address.
Connect Your Own Domain (Recommended)
If your church already owns a domain name (such as yourchurch.org), you can connect it to your Church Connect website for a more professional appearance.
Don't already have your own domain? Learn more about Getting Started With Domains ›
Step 3: Create Your Church Connect Site
Once you've chosen your Church Connect keyword and set up your domain, you're ready to create your first Church Connect site.
You can create multiple Church Connect sites, so you can redesign your website or experiment with new ideas while your current site remains live. When you're ready, simply make your new site active.
Every new site starts with either a professionally designed template or a clone of an existing site, giving you a solid foundation instead of a blank page.
Navigate to Connect Settings → Connect Sites, then click Add a New Site to create your first site.
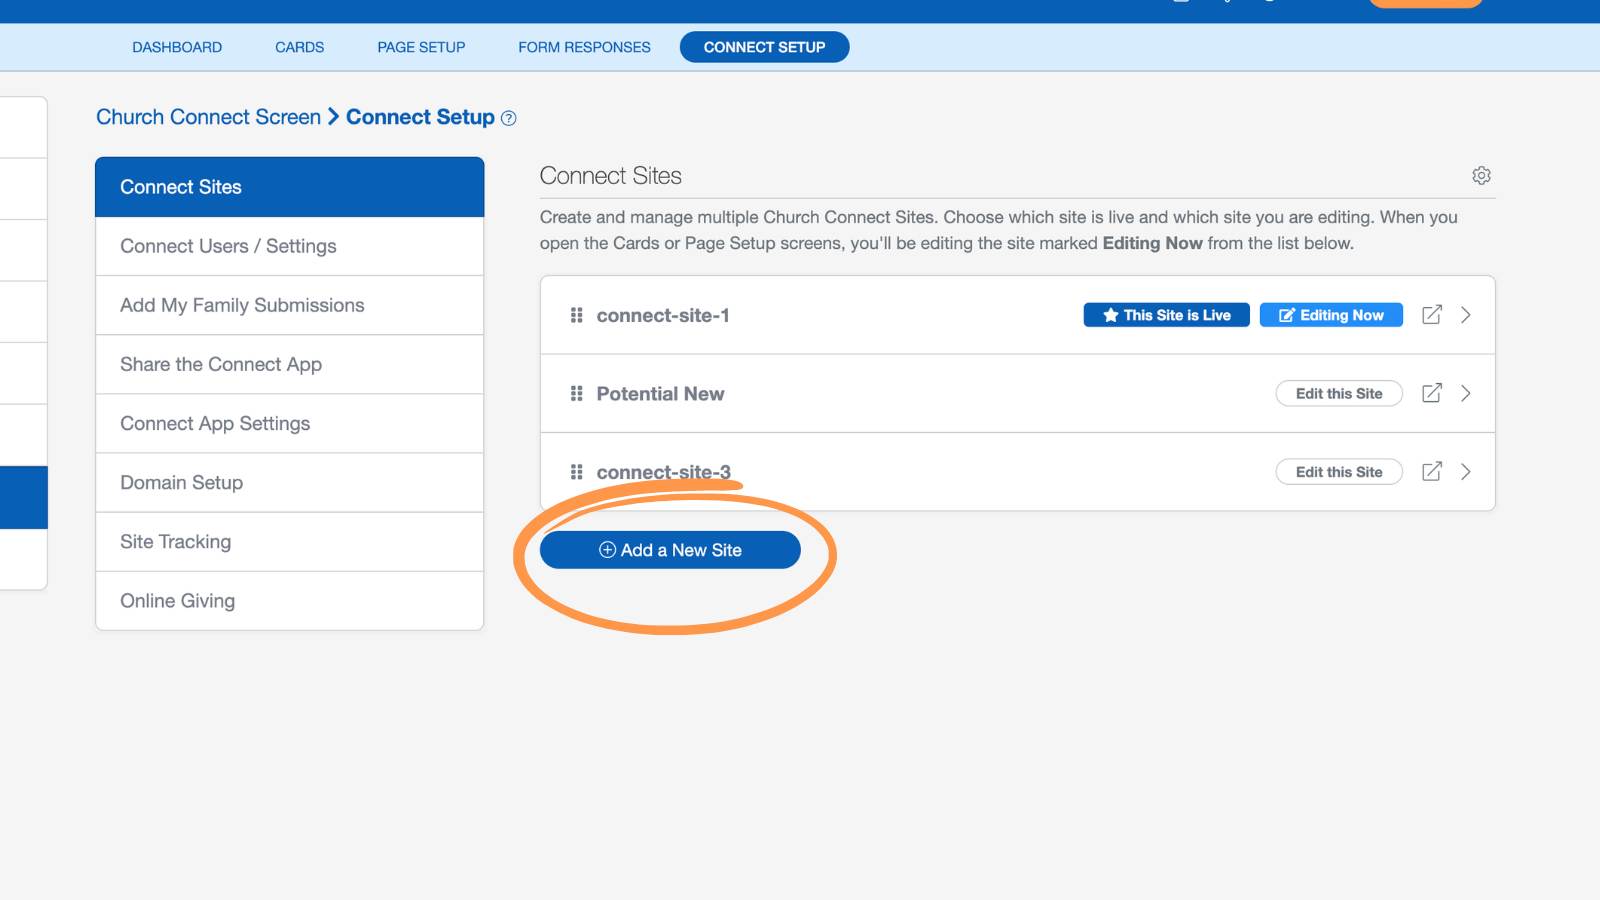
After selecting Add a New Site, you'll have two options:
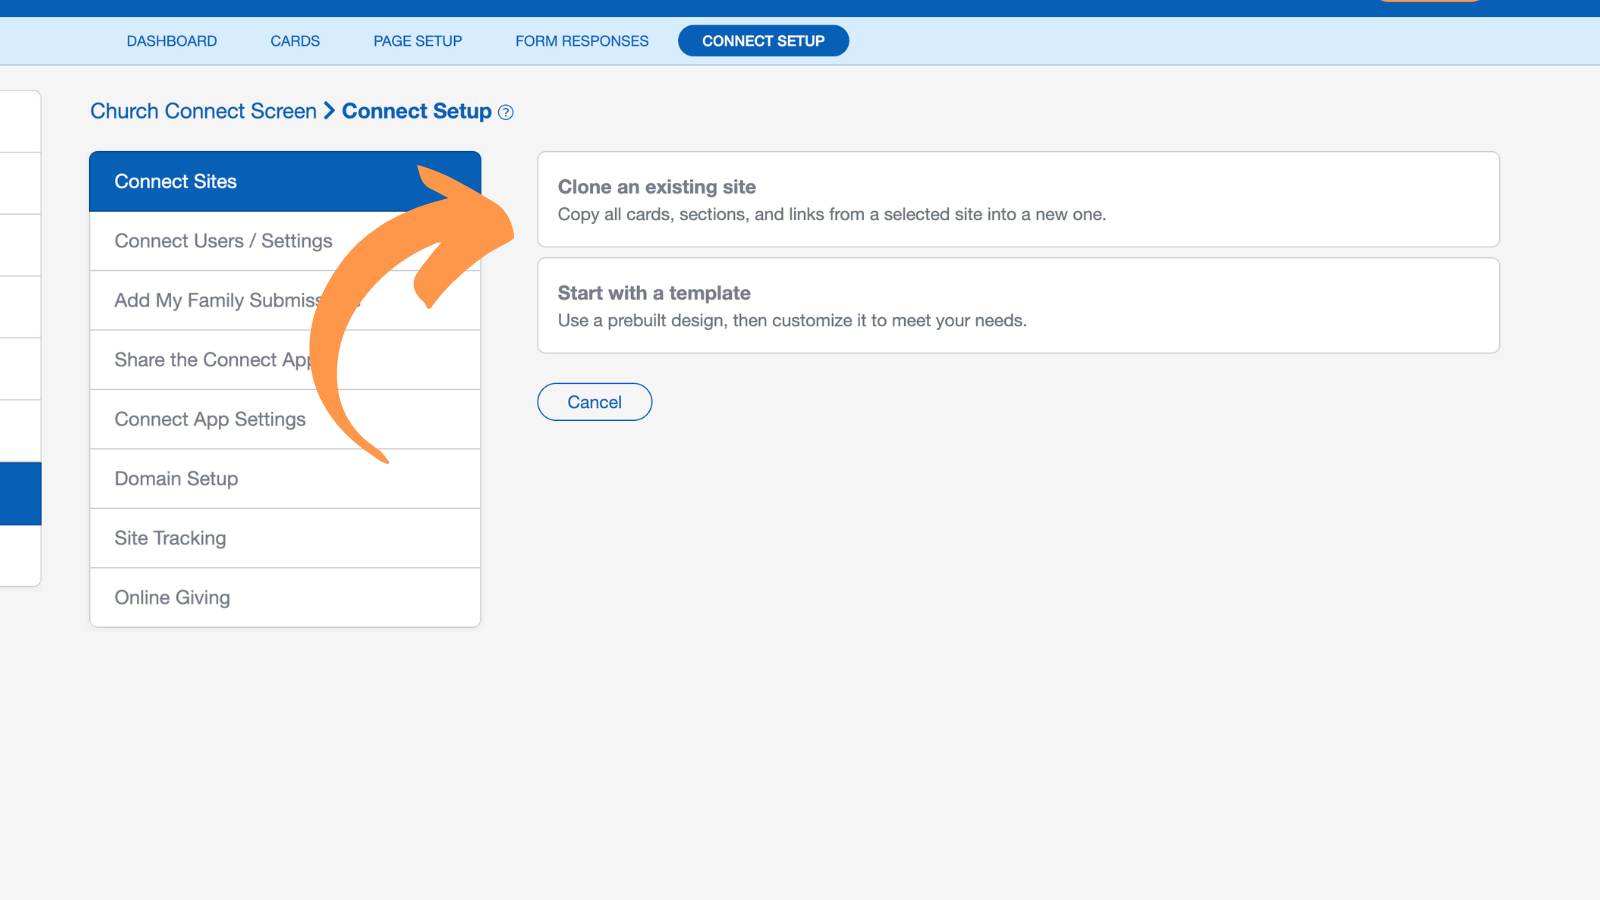
1. Start with a Template (Recommended)
Choose Start with a Template to begin with one of ChurchTrac's professionally designed website templates. Templates provide a polished starting point that you can fully customize with your church's branding, content, and ministries.
2. Clone an Existing Site
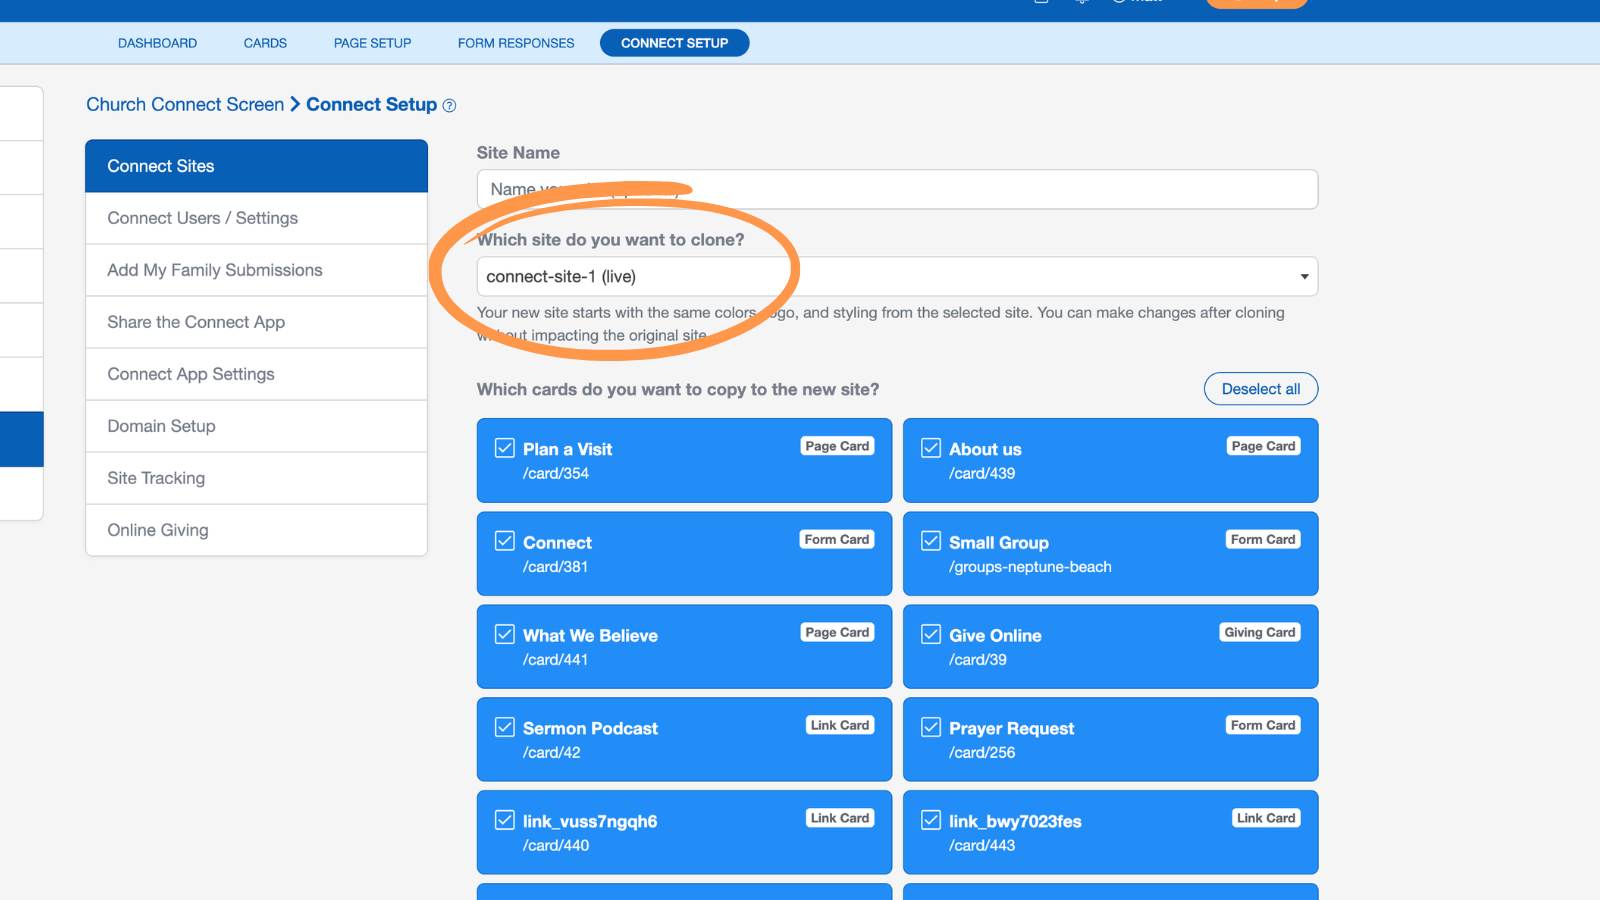
If you've already built a Church Connect website, choose Clone an Existing Site to create a copy of it. This copies all of your cards, pages, sections, and navigation links into a new site, making it easy to experiment with a redesign or create a seasonal version without affecting your live website.
Choose a Website Template
Next, browse the available website templates and select the one that best fits your church's style and ministry. Each template includes a professionally designed homepage, navigation menu, cards, and page layouts that you can fully customize.
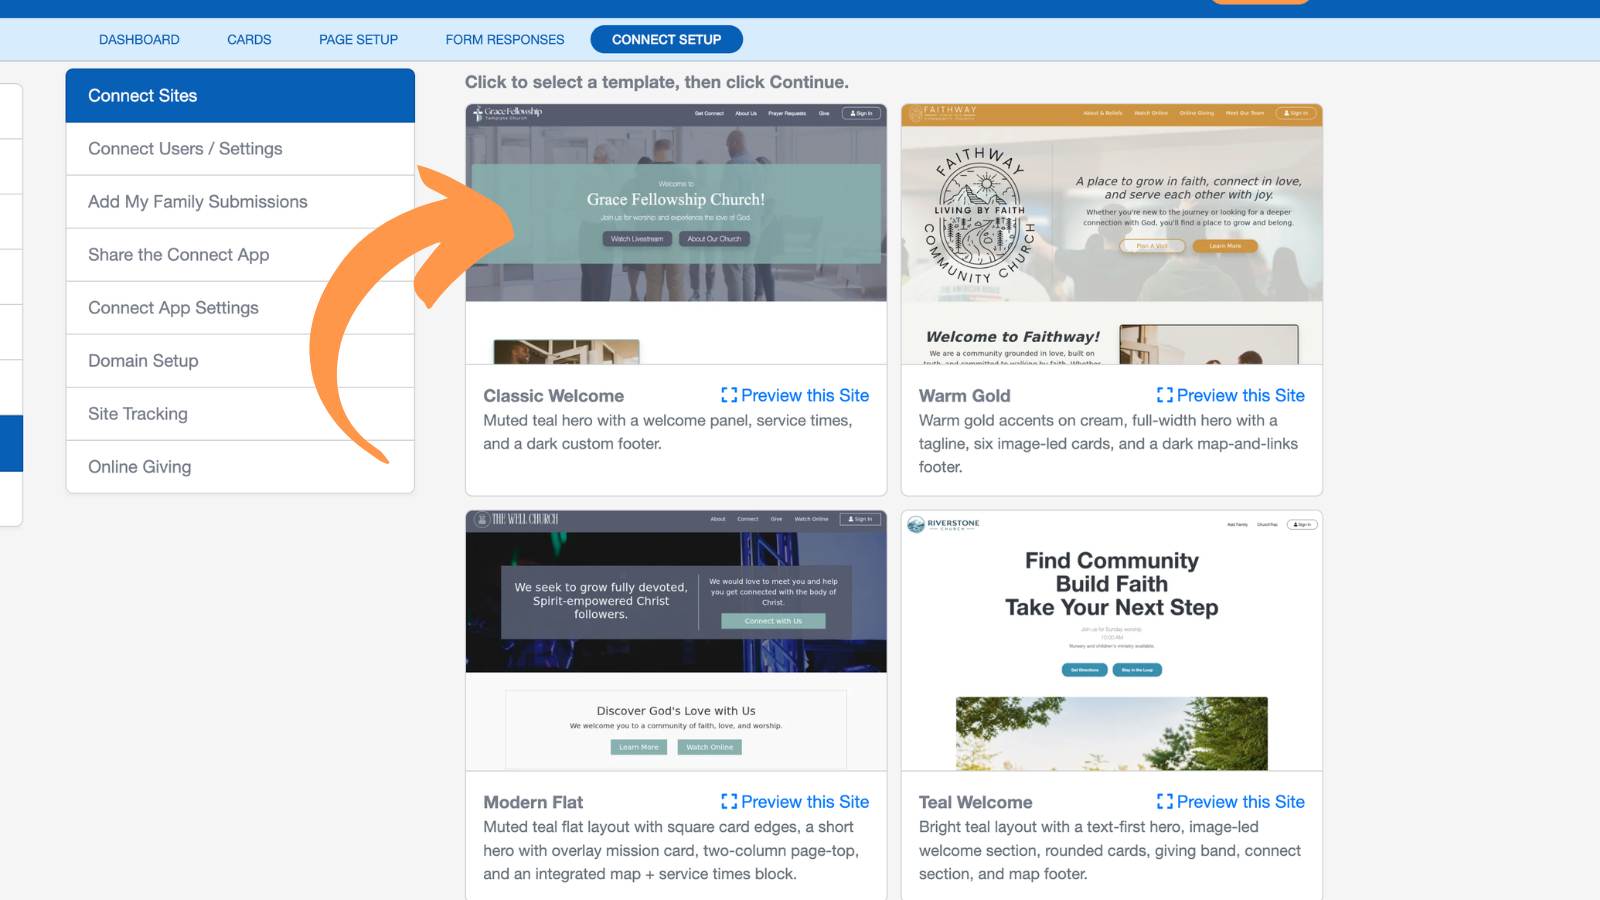
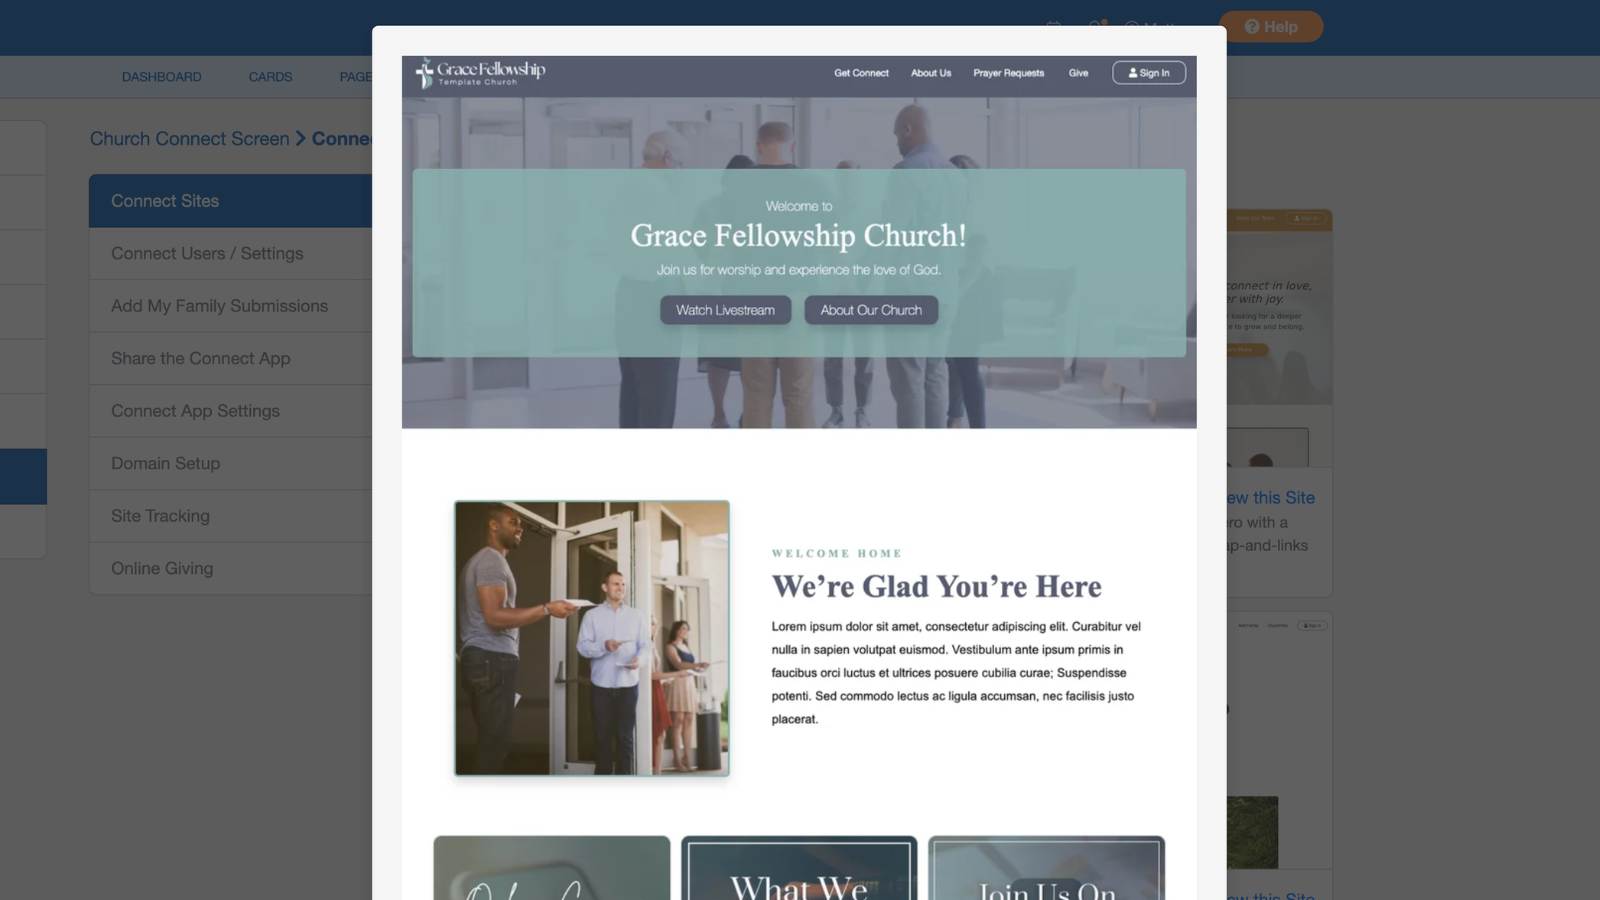
To learn more about a template before selecting it, click Preview this Site to see a live preview of the design.
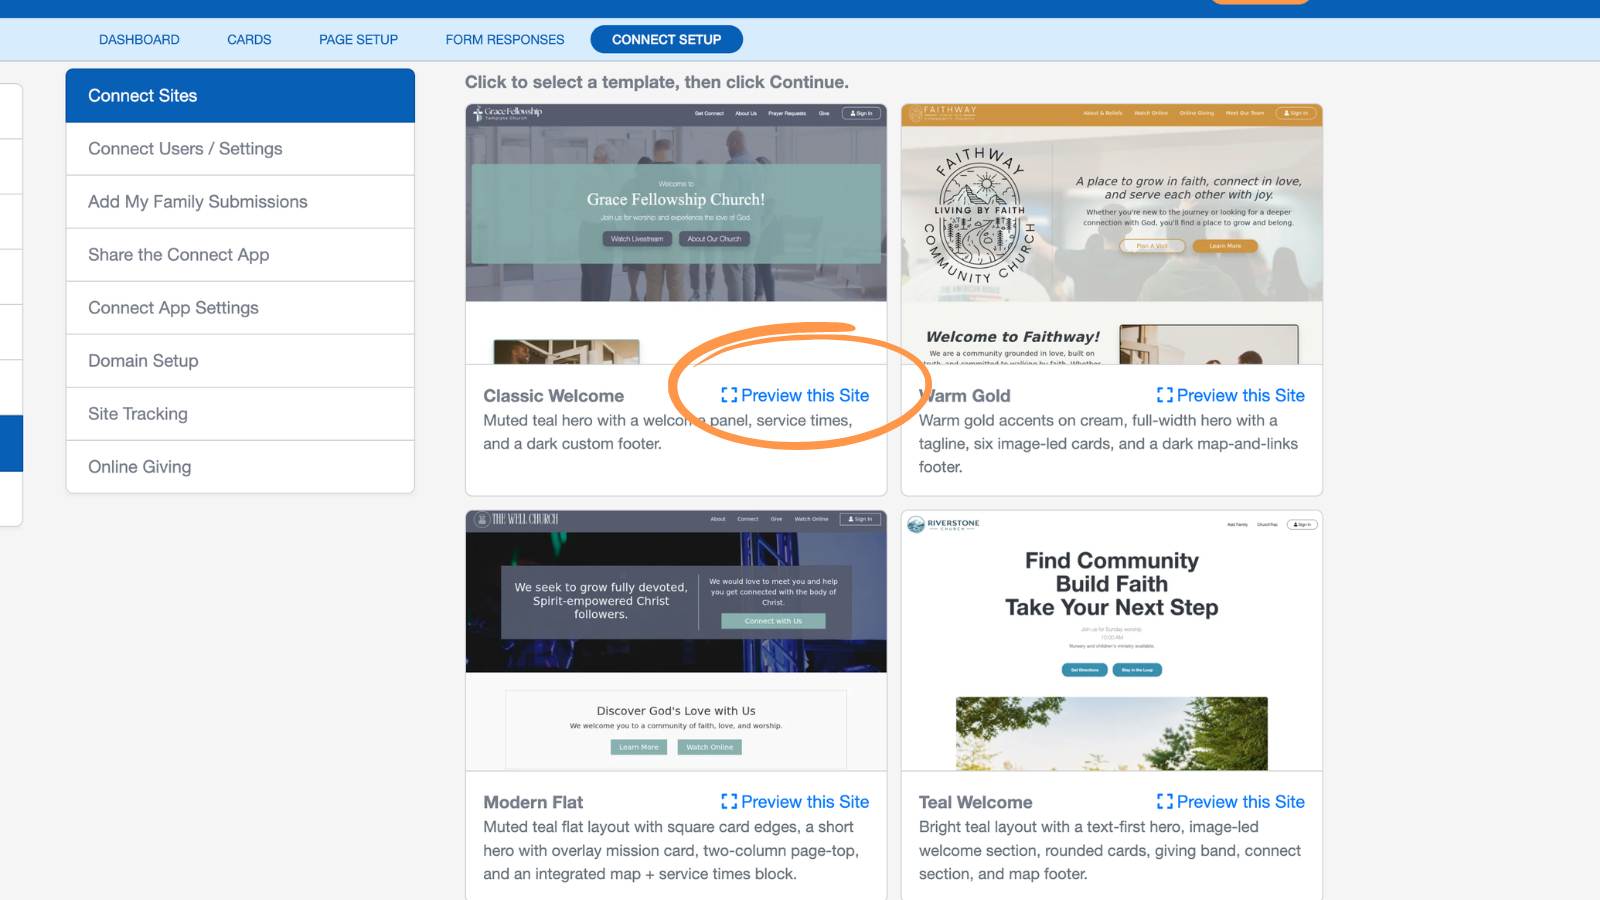
Once you've found a template you like, select it and click Continue.
Pro Tip: Don't worry about choosing the "perfect" template. Every template is fully customizable, so you can change colors, fonts, images, page layouts, and content at any time.
Customize Your Starter Content
After selecting a template, you'll have the option to add a collection of starter Cards and Pages.
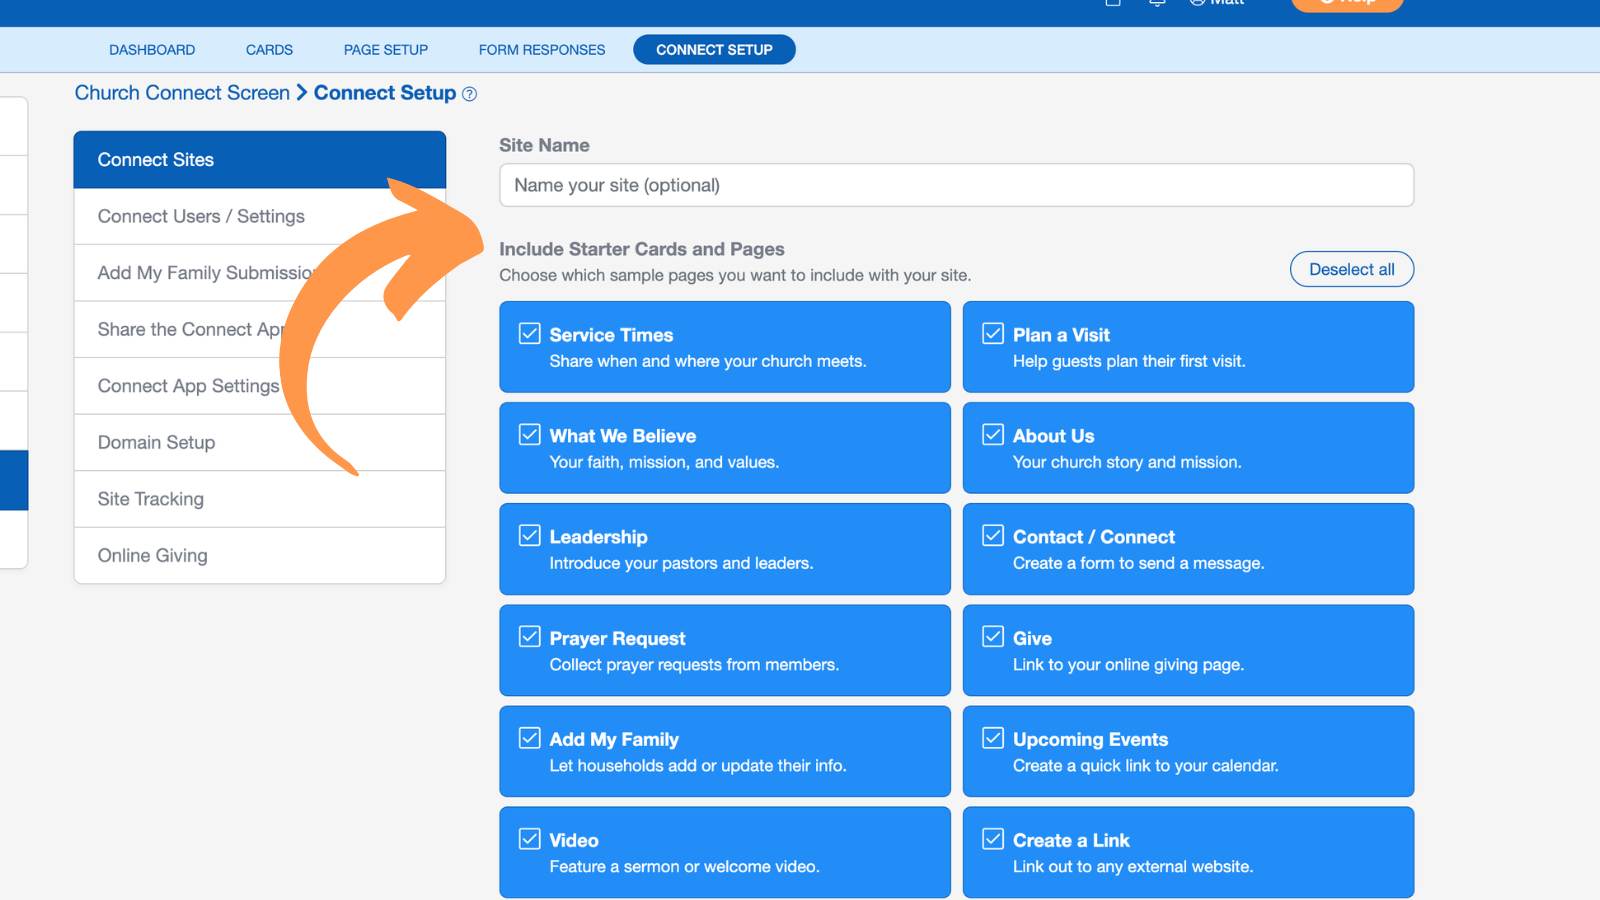
These prebuilt pages cover many of the essentials most churches include on their websites, such as:
- Service Times
- Plan a Visit
- About Us
- What We Believe
- Leadership
- Contact / Connect
- Prayer Requests
- Upcoming Events
- Add My Family
- Video
- External Links
Every starter page is fully customizable, so you can edit, remove, or add pages at any time.
By default, all starter pages are selected. You can leave them selected, deselect any you don't need, or click Deselect All if you'd prefer to build your website from scratch.
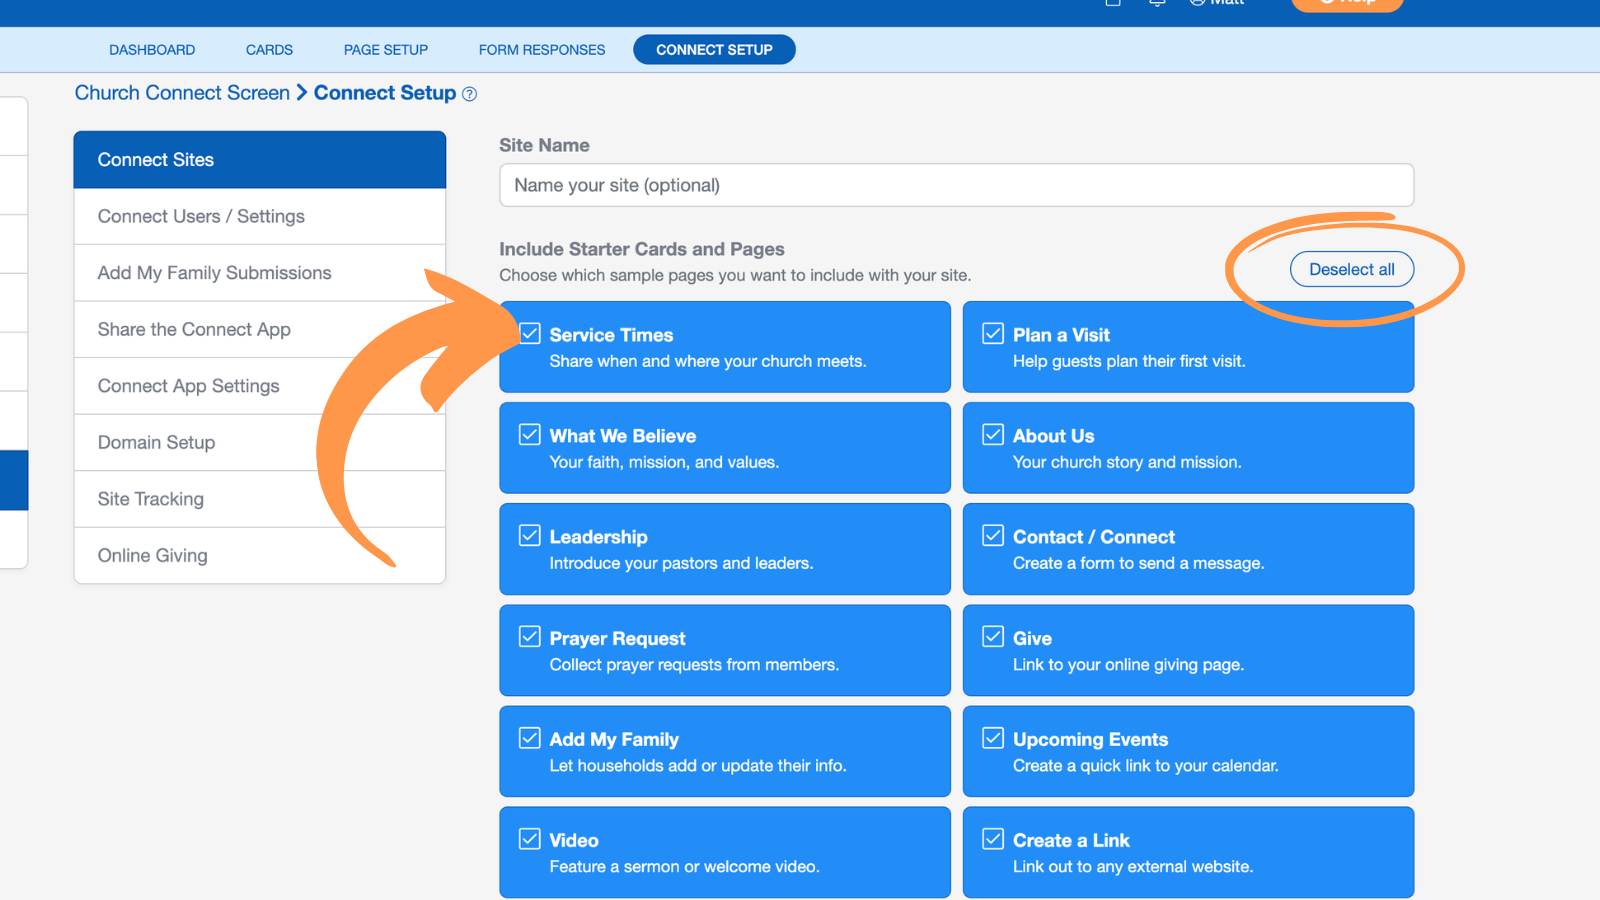
You can also enter an optional Site Name to help identify your website if you plan to create multiple Church Connect sites.
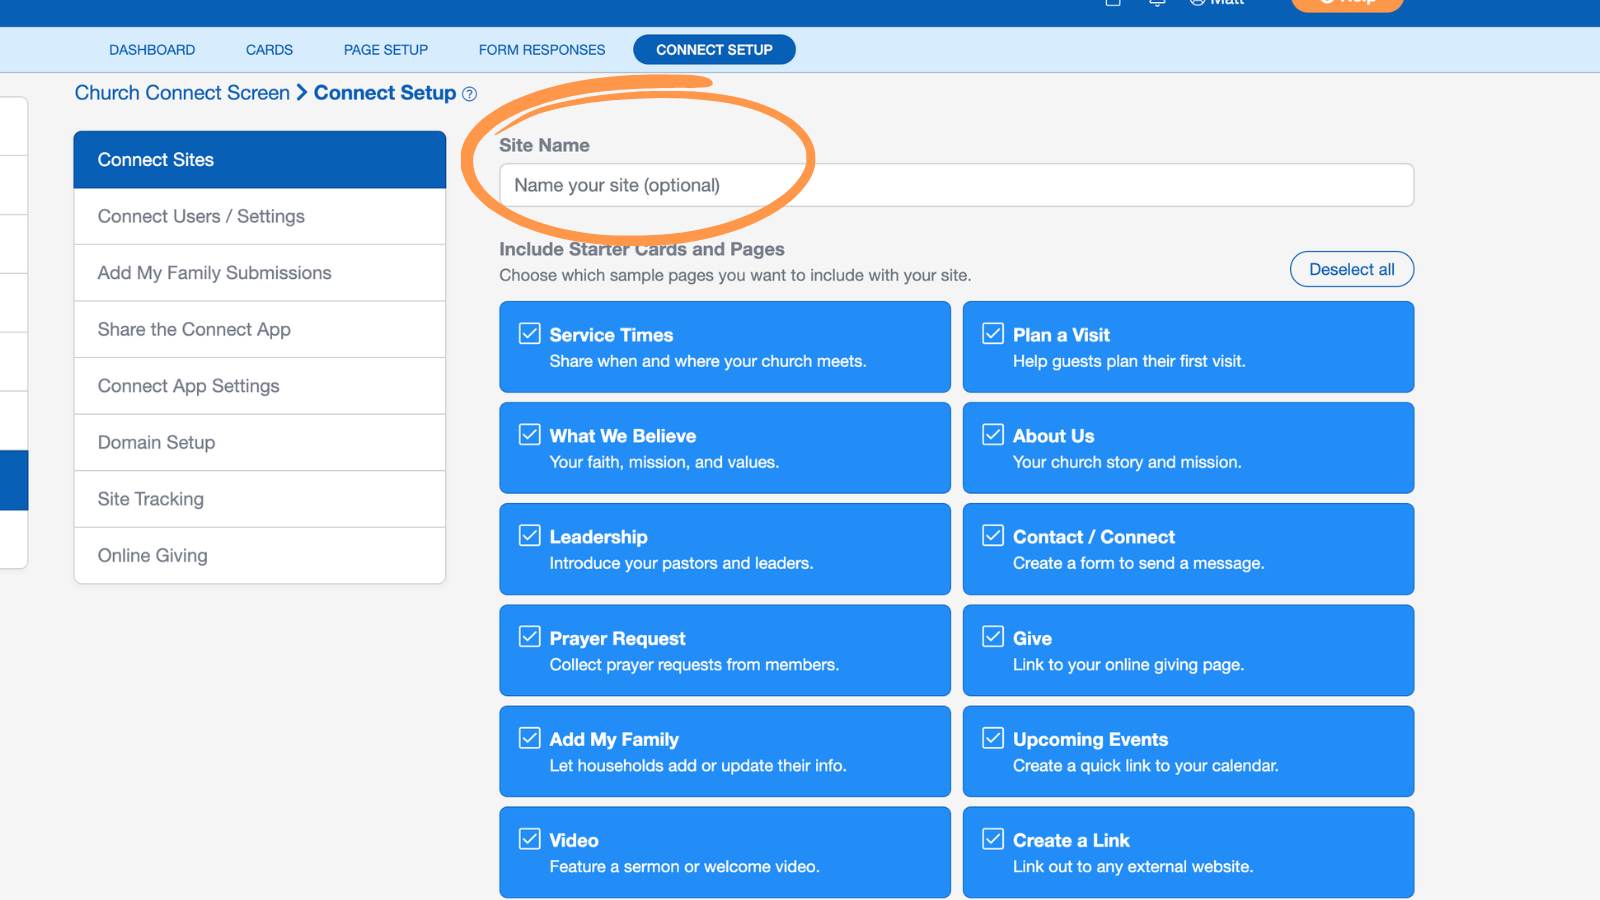
When you're ready, click Continue to move to the final setup step.
Personalize Your Website
Before your website is created, you can customize a few basic settings to make the template feel more like your church.
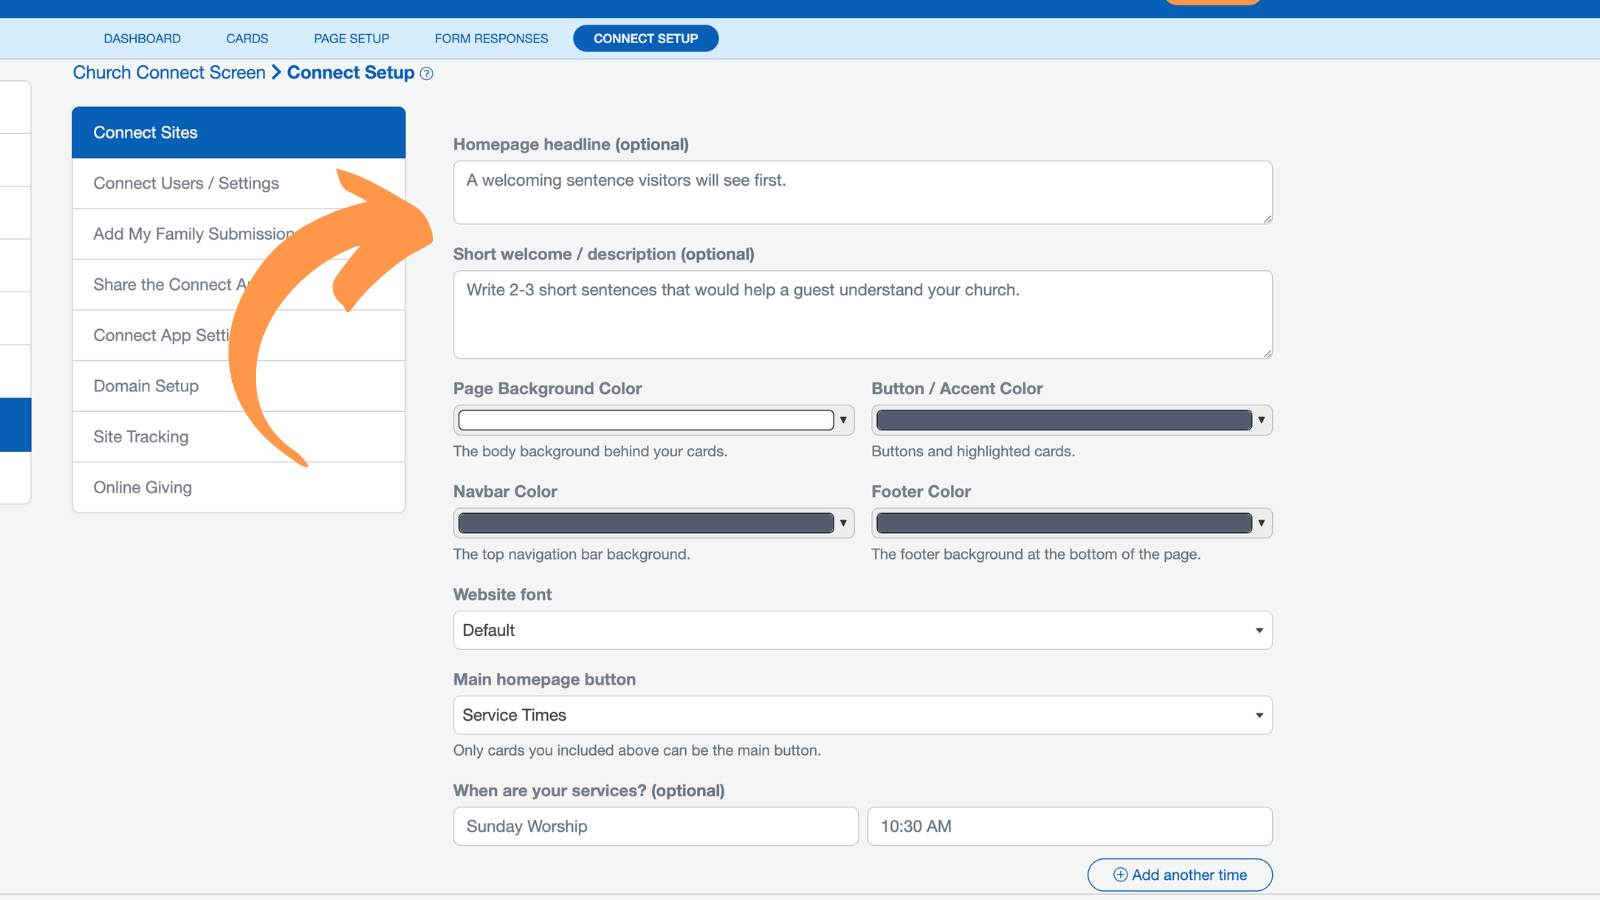
Here, you can:
- Enter a homepage headline and short welcome message for first-time visitors.
- Choose your website's background, accent, navigation bar, and footer colors to match your church's branding.
- Select a website font.
- Choose which starter page should be featured as the main homepage button.
- Add your church's service times, which can automatically be displayed throughout the template.
Don't worry if you're not sure about every option yet. All of these settings can be updated later from the Page Setup tab.
When you're finished, click Create Site to generate your new Church Connect website.
Make It Your Own
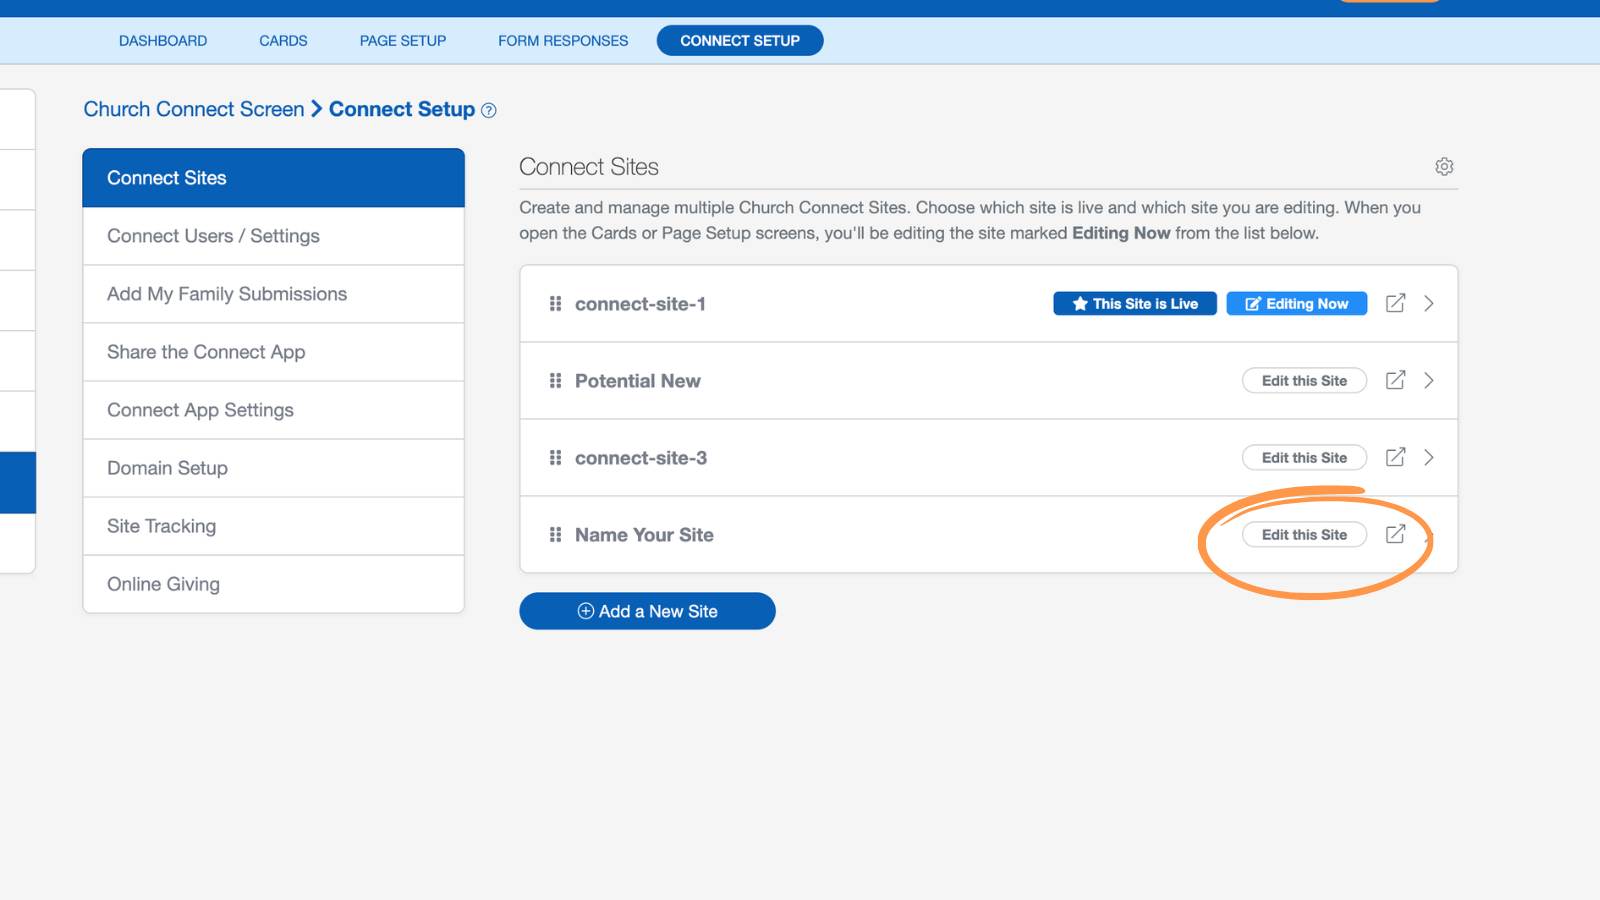
After you click Create Site, you'll be taken back to the Connect Sites list.
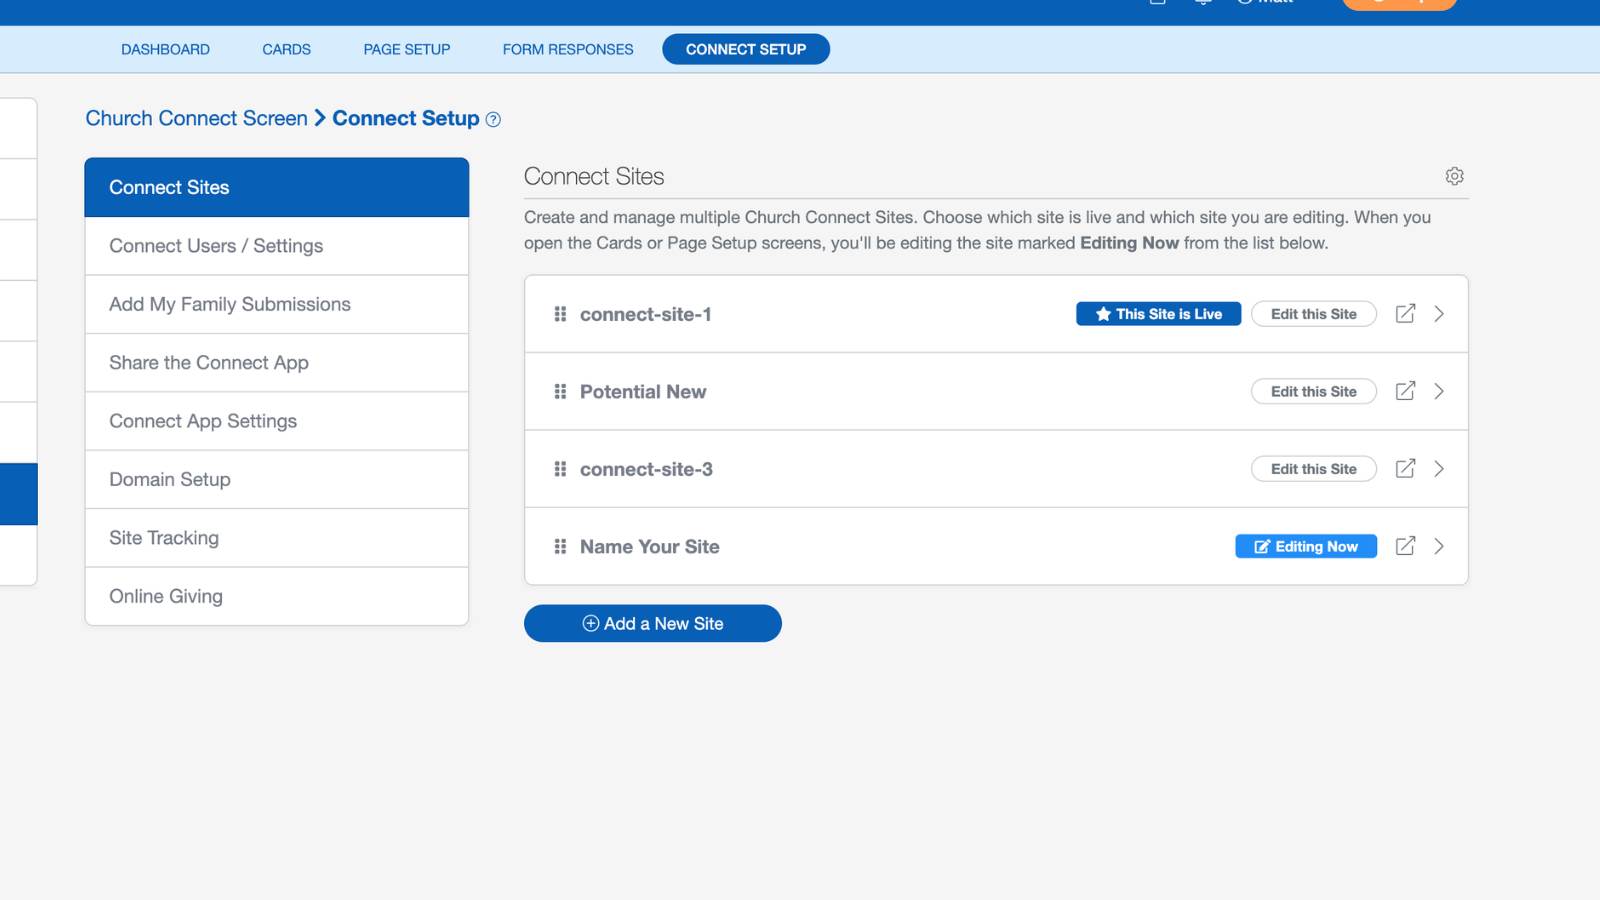
Click the site name to open its side panel, where you can manage your site settings, card options, or add custom CSS.
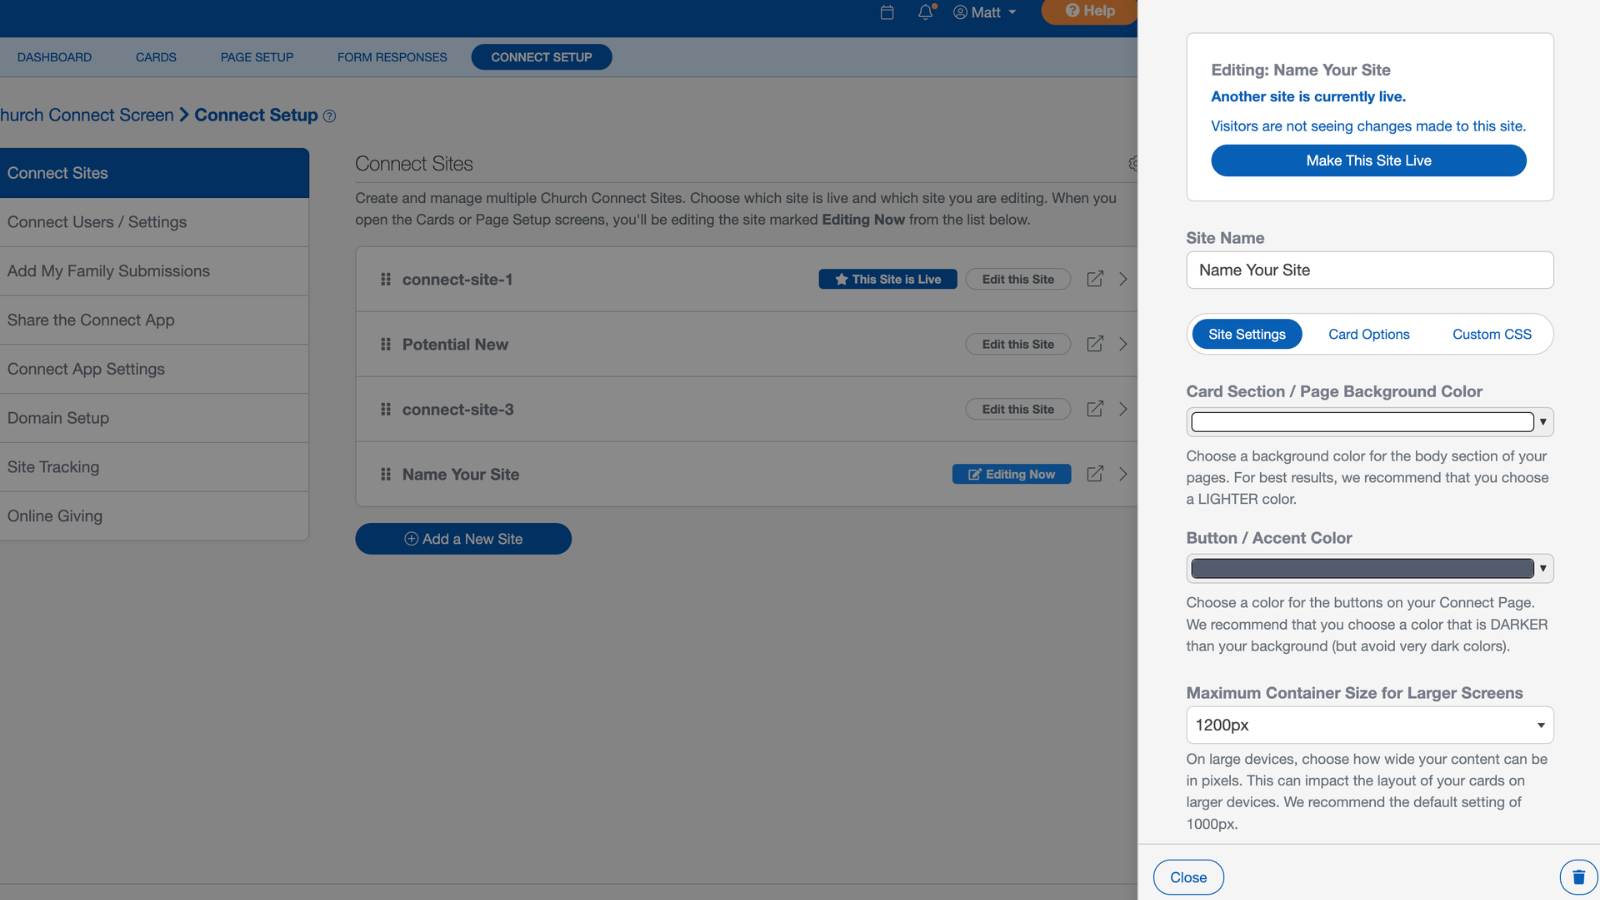
Then click Edit This Site to open your website in the Page Setup editor.
Your template already includes:
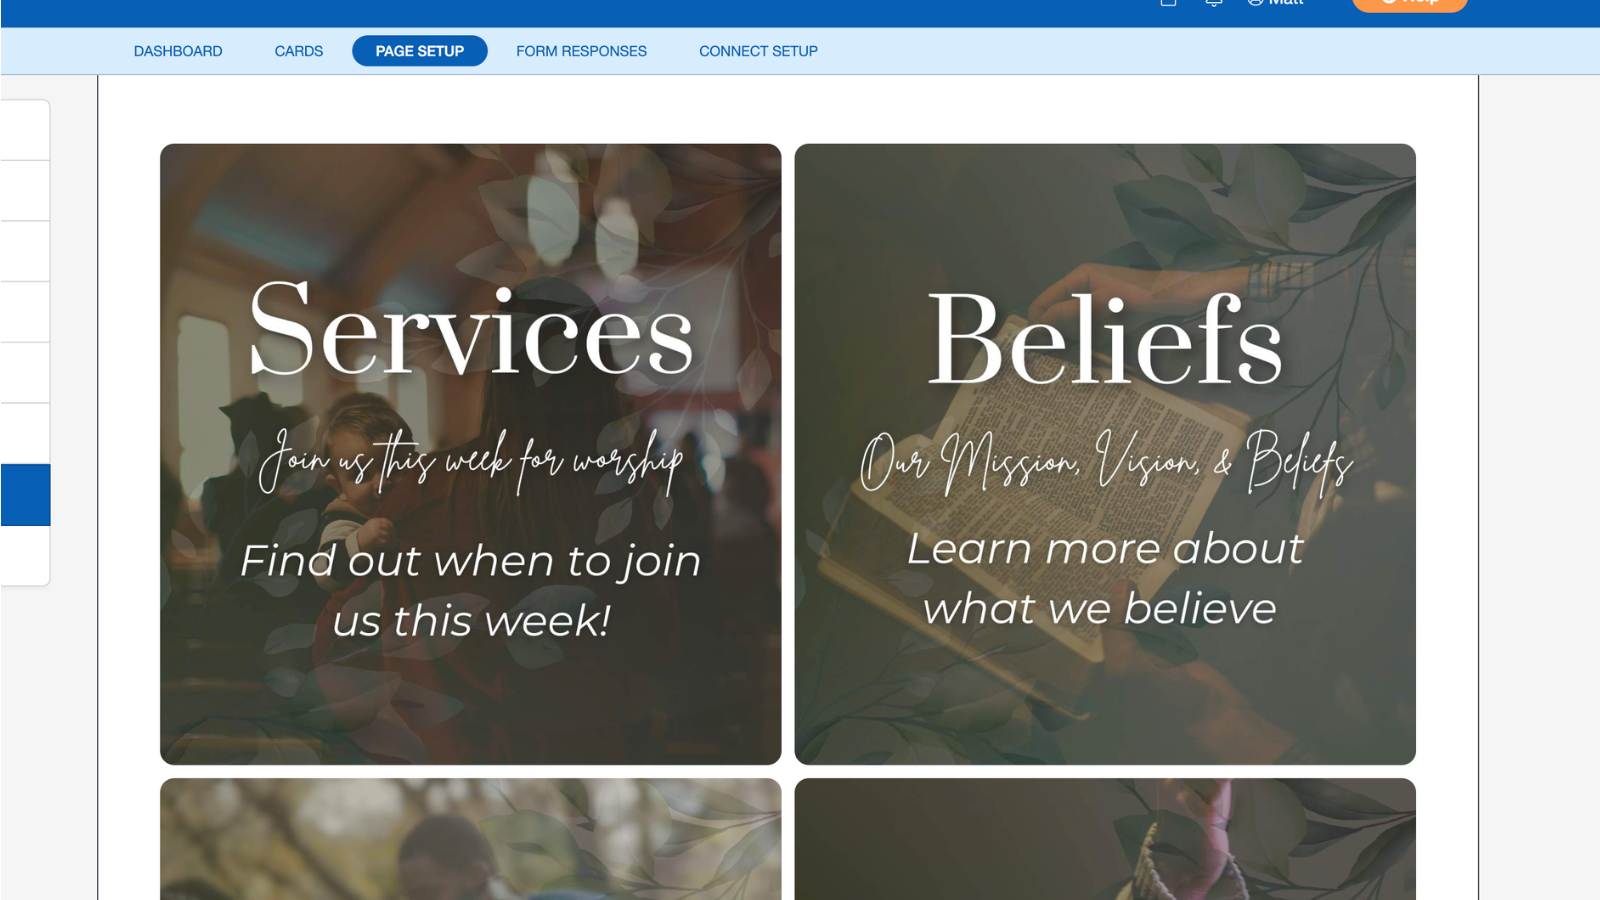
A professionally designed homepage...
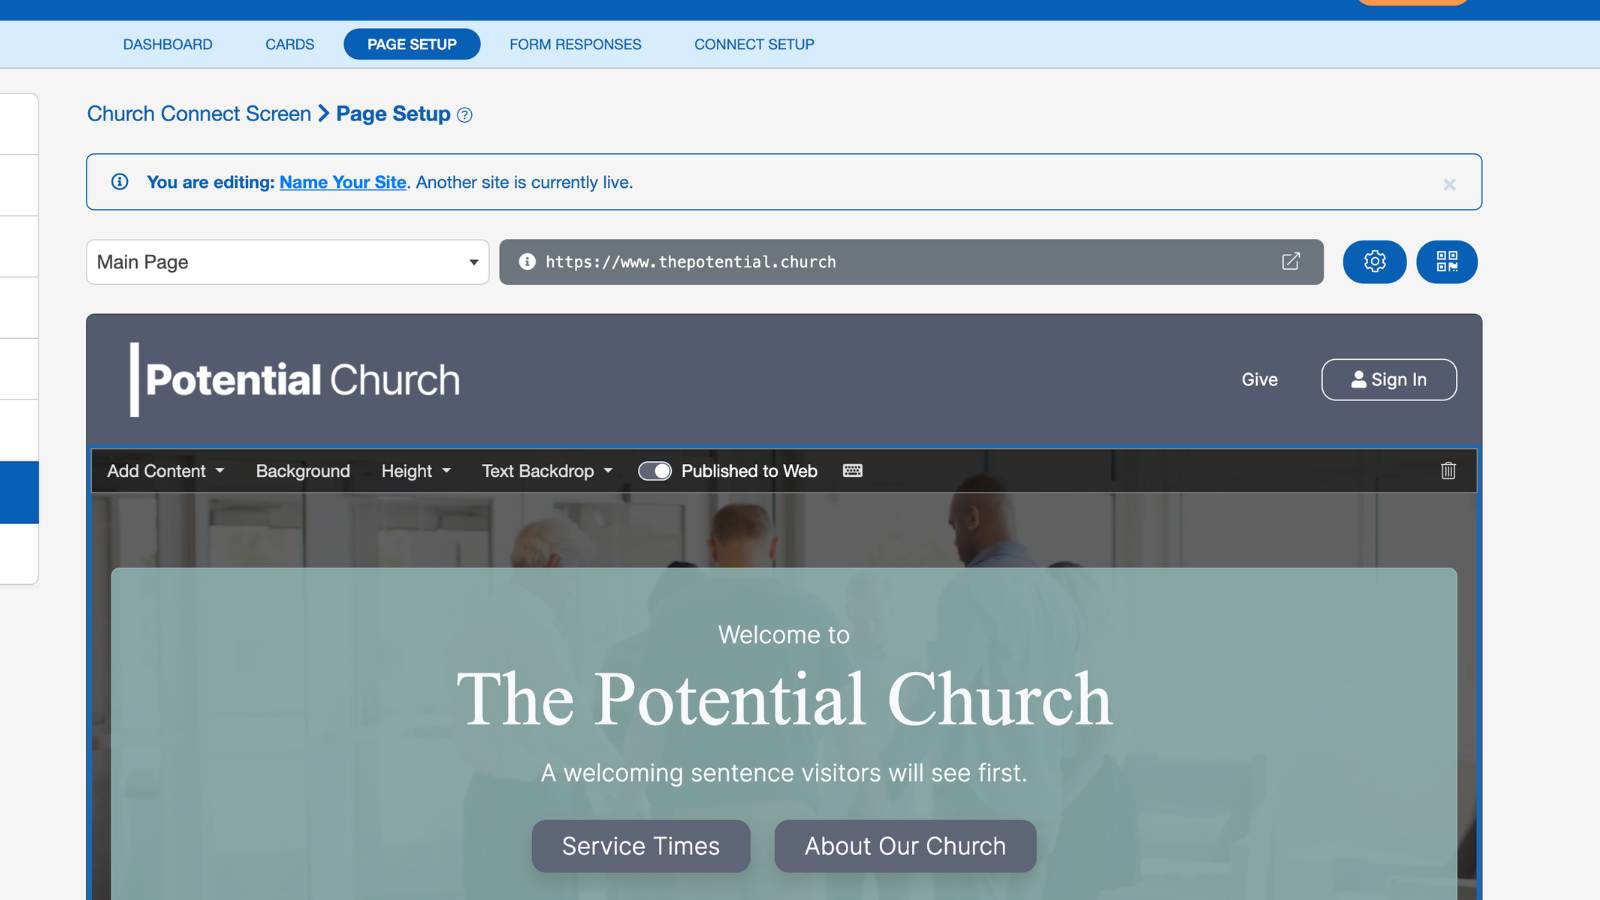
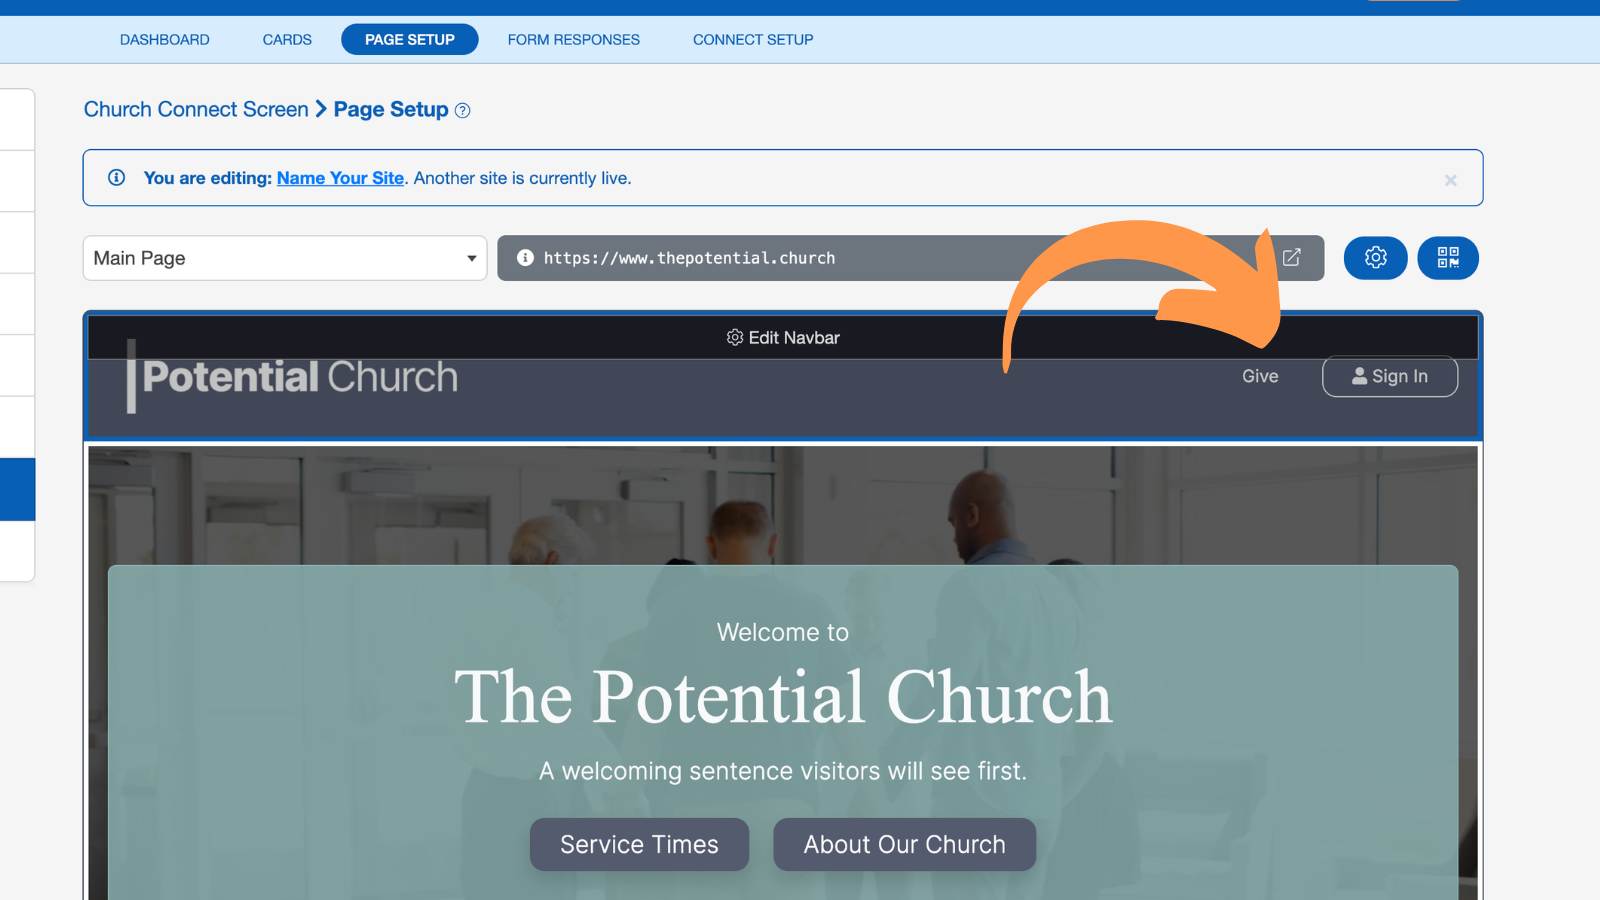
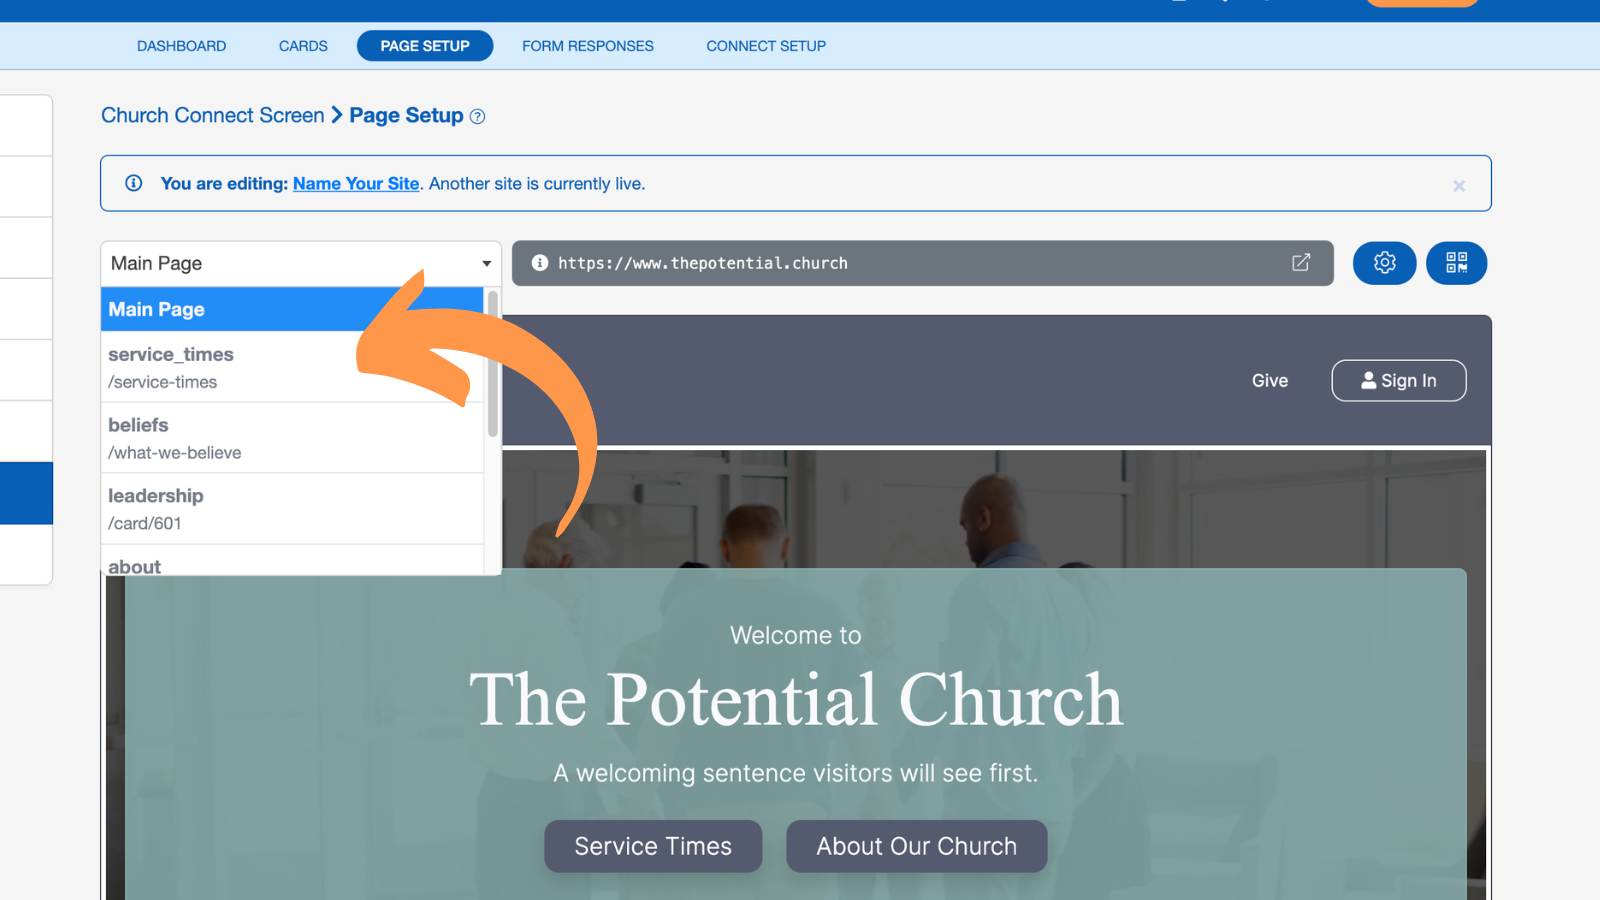
A navigation menu...
Starter pages...
Connect Cards...
Your website is now ready for the finishing touches. Replace the starter content with information about your church, update the images and colors, and make the template your own.
Ready to continue? Learn more about customizing your website in the Page Setup guide ›
Step 4: Get Feedback
Share your site with a select group of members. Ask them to give feedback on the branding, how easy the site and app are to use, and if they have any ideas to make it better.
You may be surprised by the feedback you get!
Step 5: Share It
Once you have finalized your site, it's time to share it with the world!
We recommend sharing it in the following ways:
- Announce the new site to the congregation a few weeks before launch to let them know it's coming
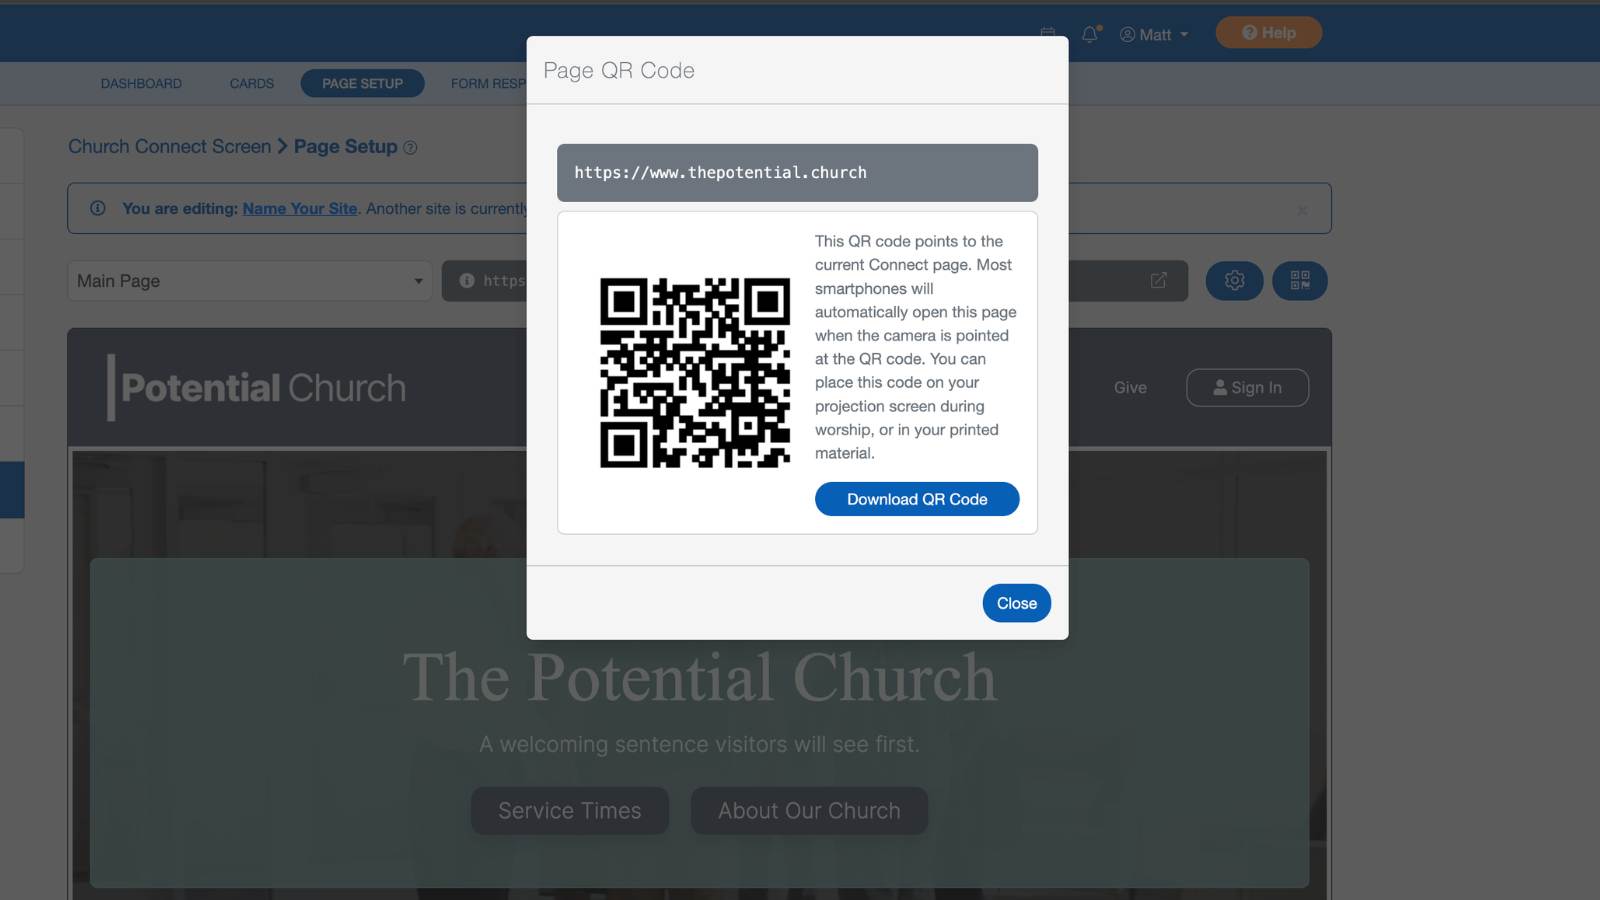
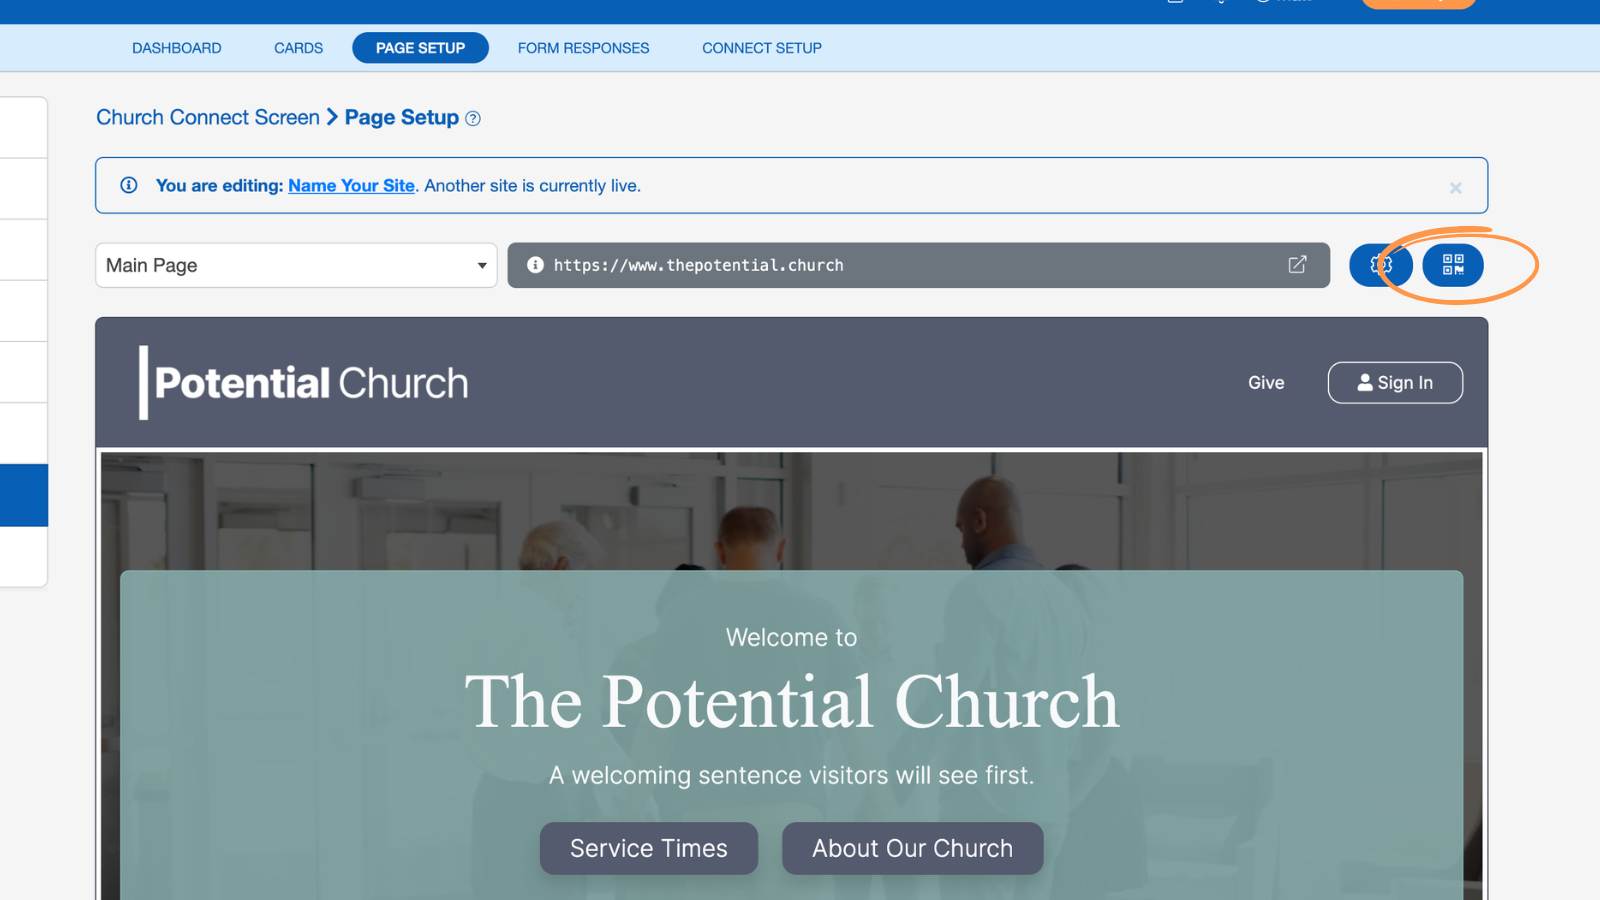
- Display the QR code in the sanctuary and announce the new site on launch day
- Train volunteers on how to download the app and create a Connect account so they can assist other members
- Text or email the URL to your congregation after service on launch day
- Share the URL on social media and add it to the Bio or About section of every social media account you have