Accounting Reports
One of the most important parts of managing church finances is running reports. Below is an overview of the Accounting Reports in ChurchTrac.
- Accessing Reports
- Running a Report
- Report Options
- Printing and Exporting
- Other Places to Find Reports
- Popular Accounting Reports
Accessing Reports
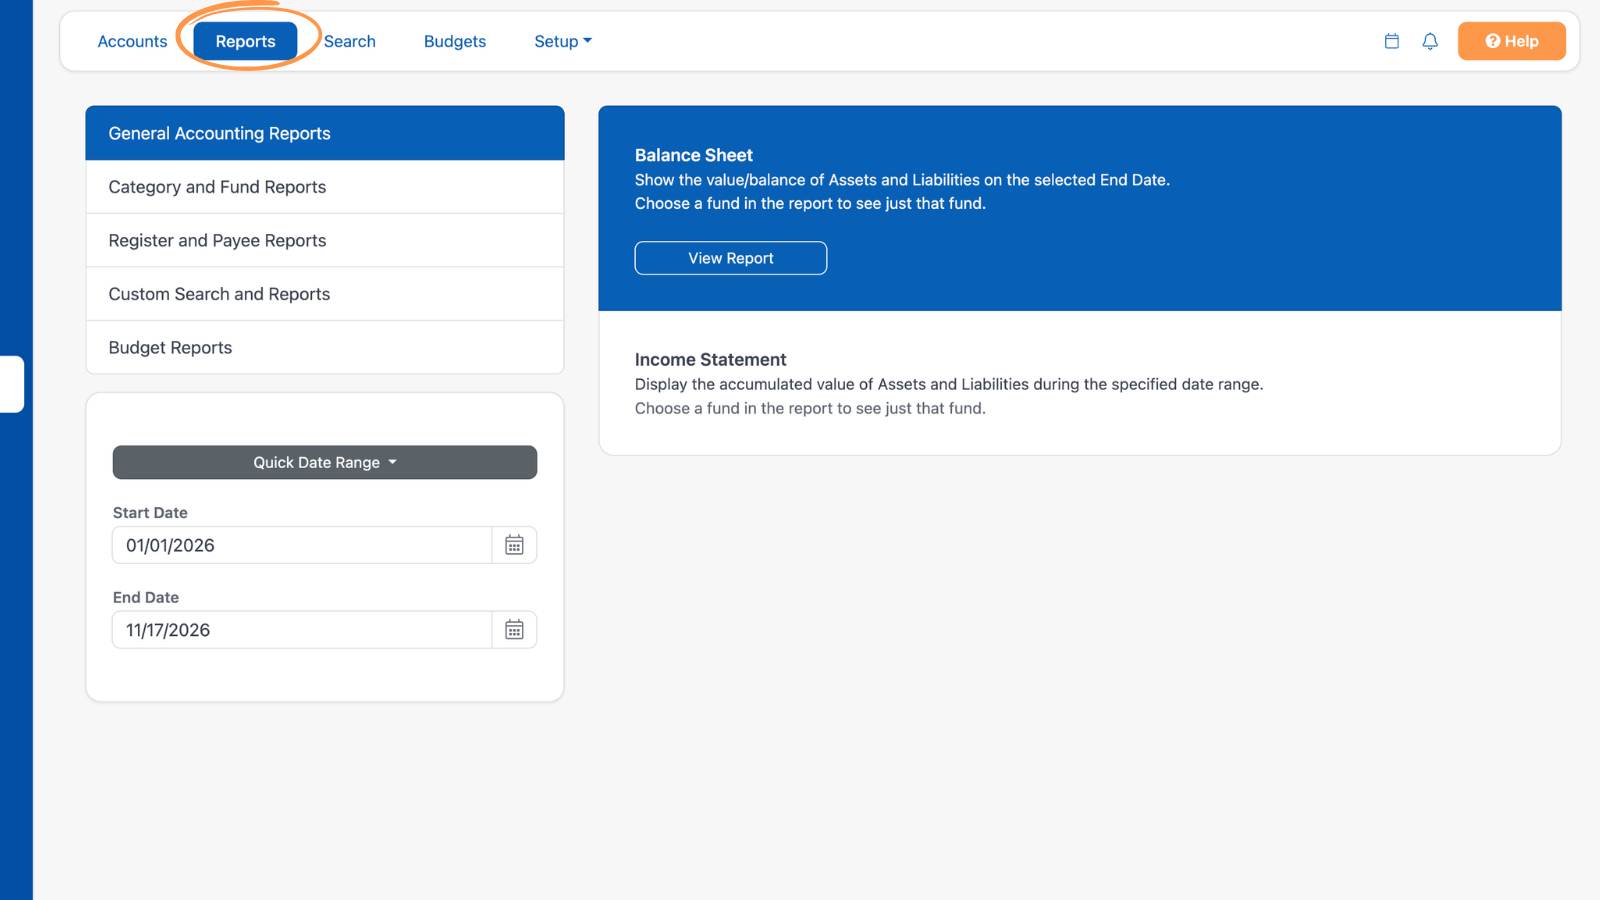
To find your reports, go to the Accounting screen and select the Reports tab. Reports are grouped into five sections on the left:
- General Accounting Reports: the Balance Sheet, Income Statement, Fund Sheet, and Fund Statement.
- Category and Fund Reports: reports organized by your Categories and Funds.
- Register and Payee Reports: reports on your account registers and payees.
- Custom Search and Reports: reports built from your saved searches on the Search tab.
- Budget Reports: reports for your church budgets, including Budget vs. Actual.
Running a Report
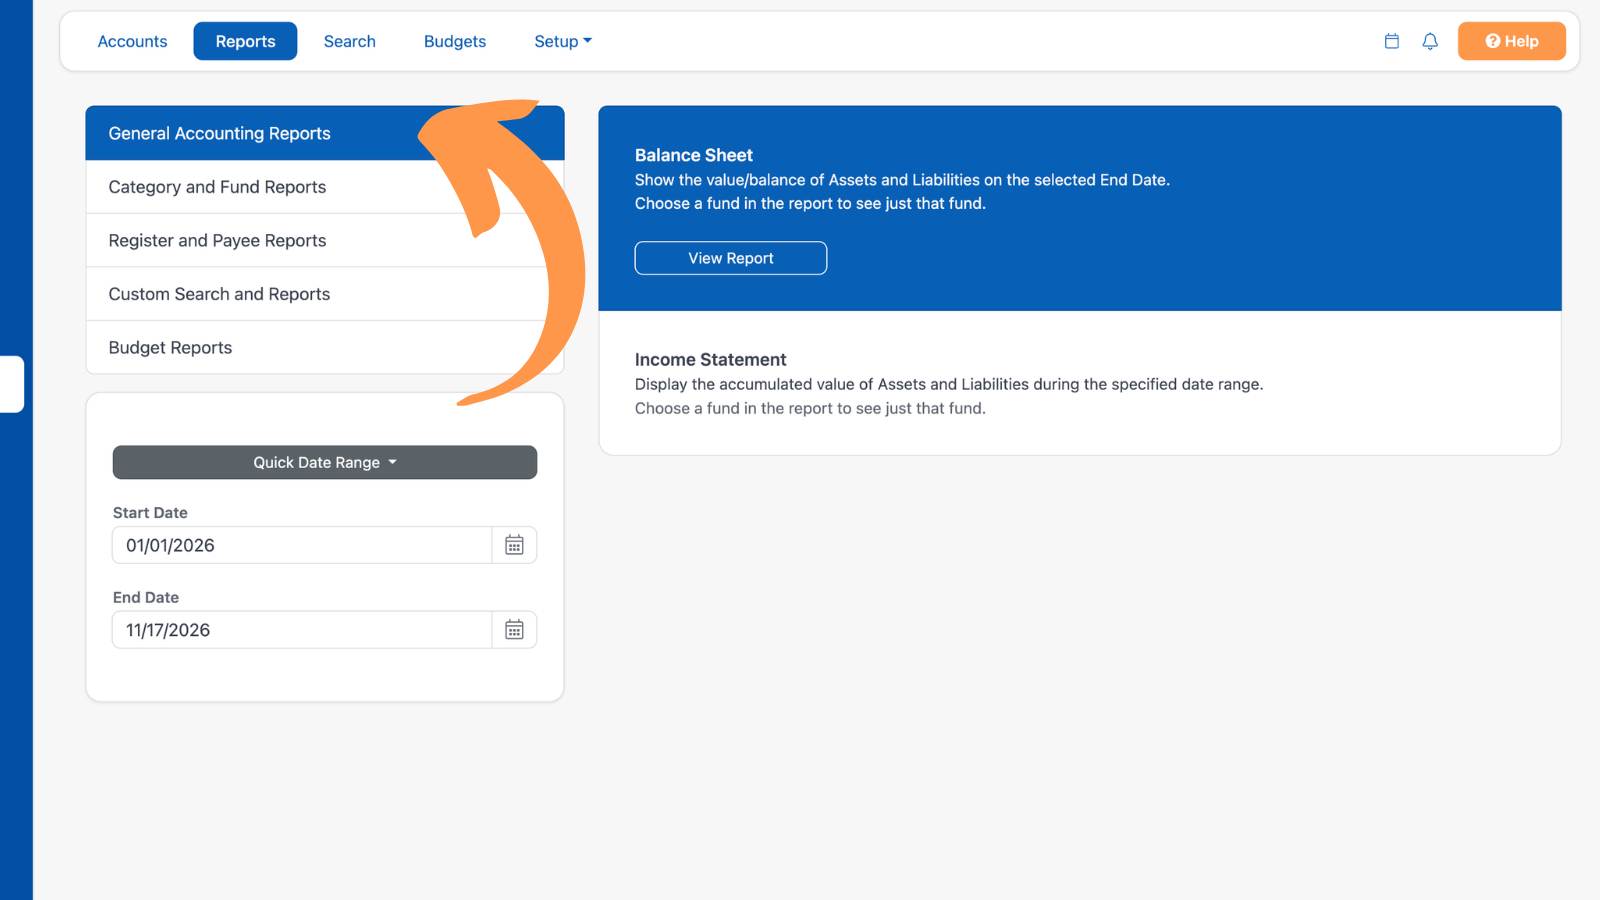
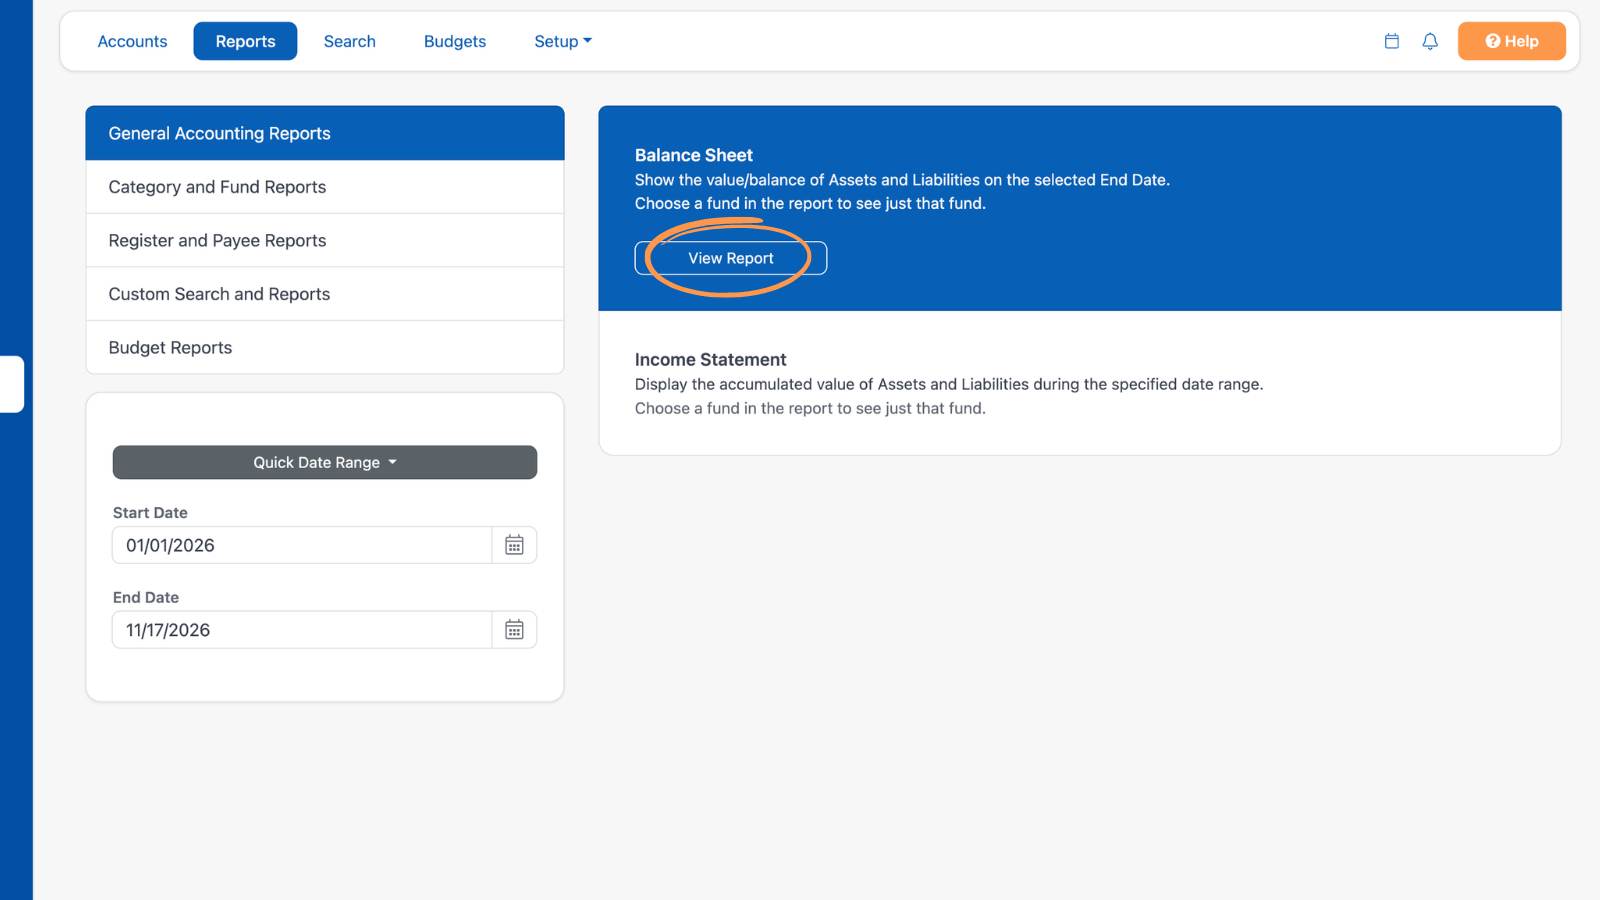
Step 1: Select the section that contains the report you need.
Step 2: Set the date range. Enter a Start Date and End Date, or choose an option from Quick Date Range (such as This Month, Last Quarter, or Year to Date)
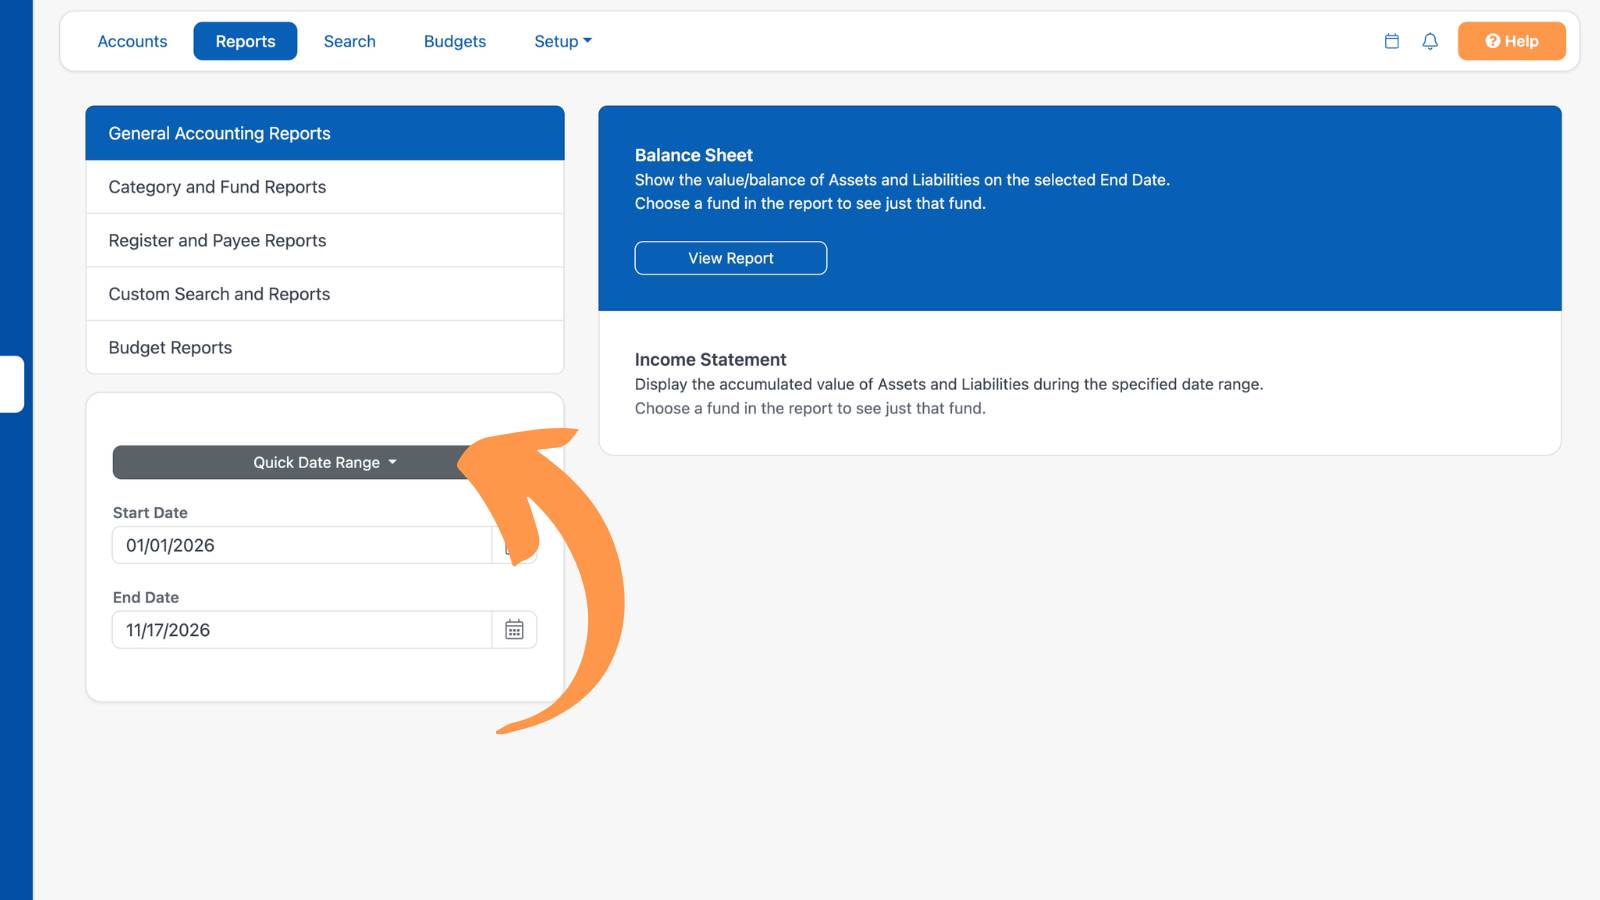
Note: Some reports, like the Balance Sheet and Fund Sheet, show balances as of the End Date only.
Step 3: Select the report, then select View Report.
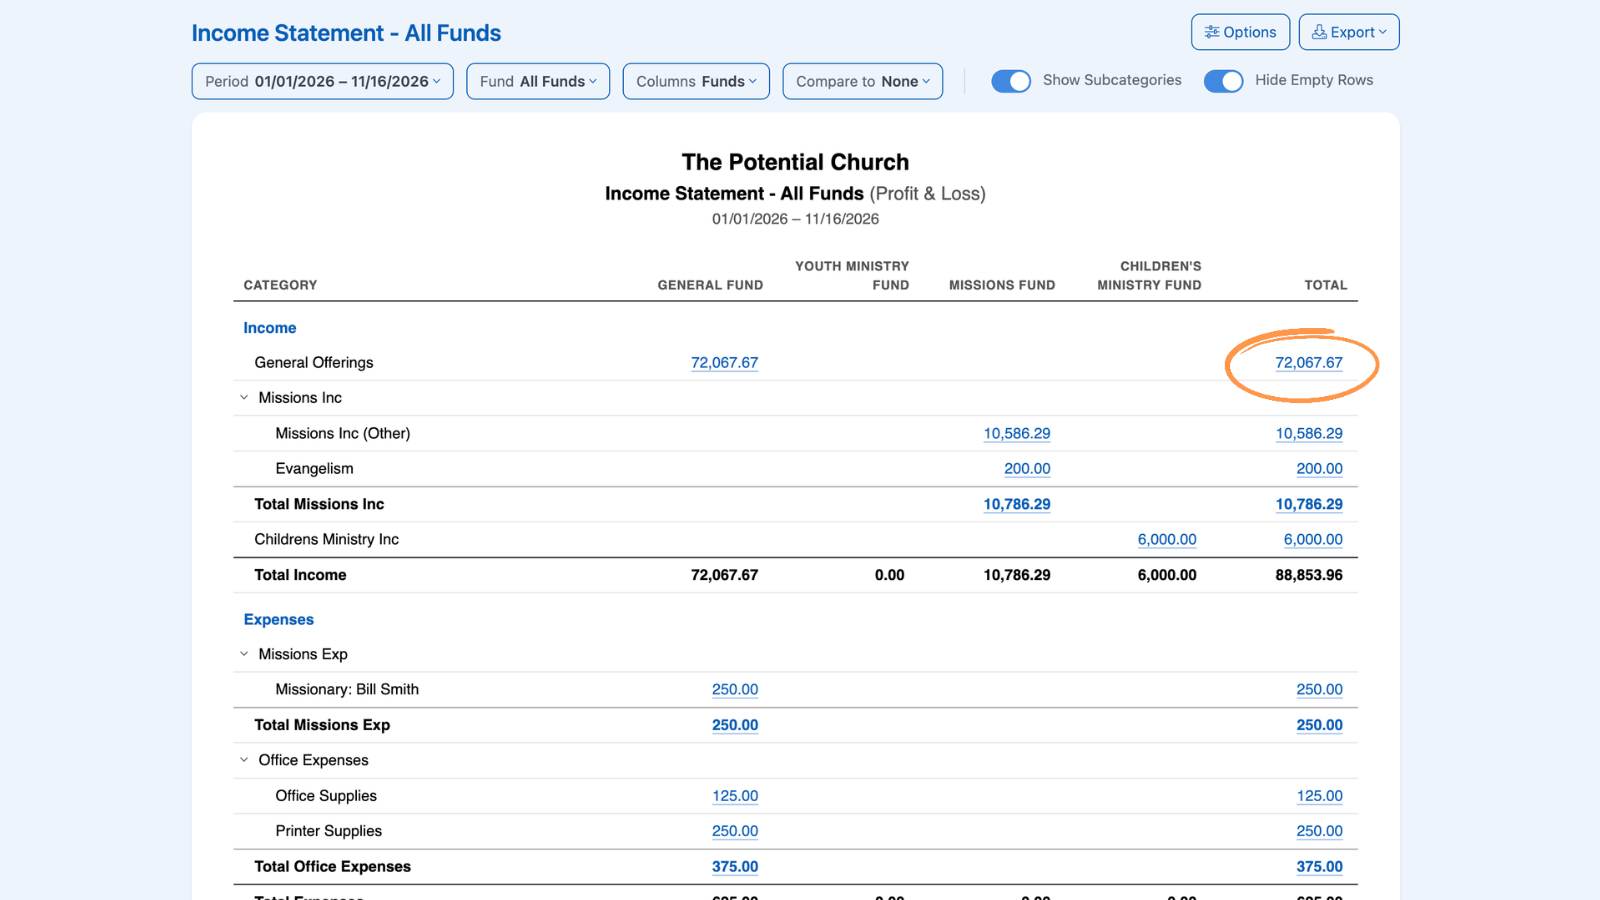
When viewing a report, amounts shown in blue are clickable.
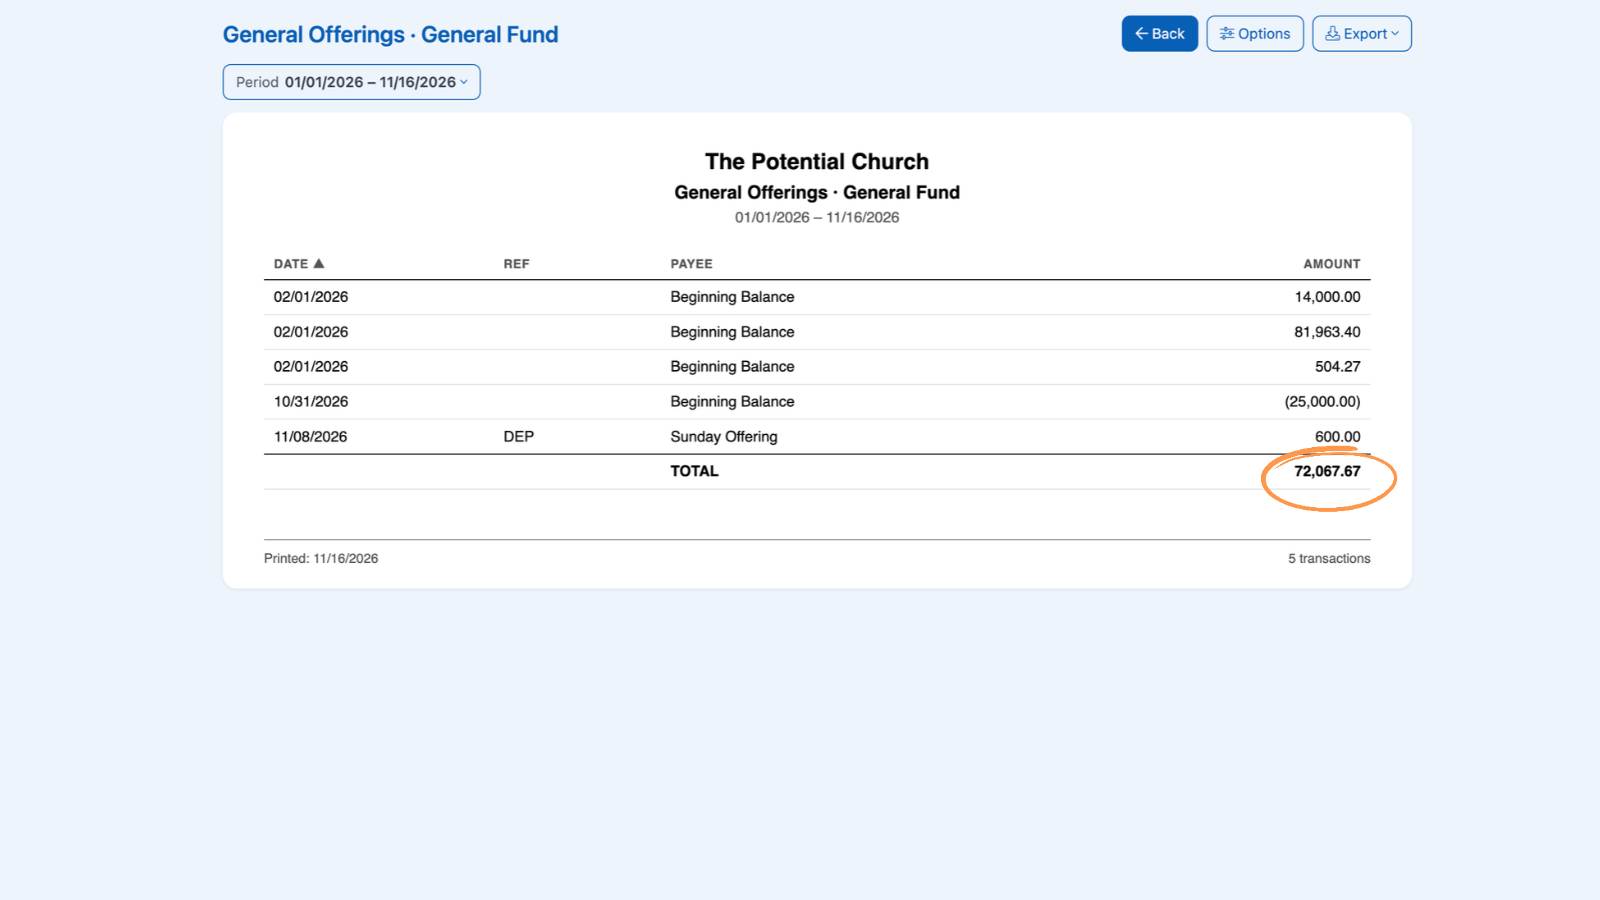
Select any amount to see the individual transactions included in that total.
Report Options
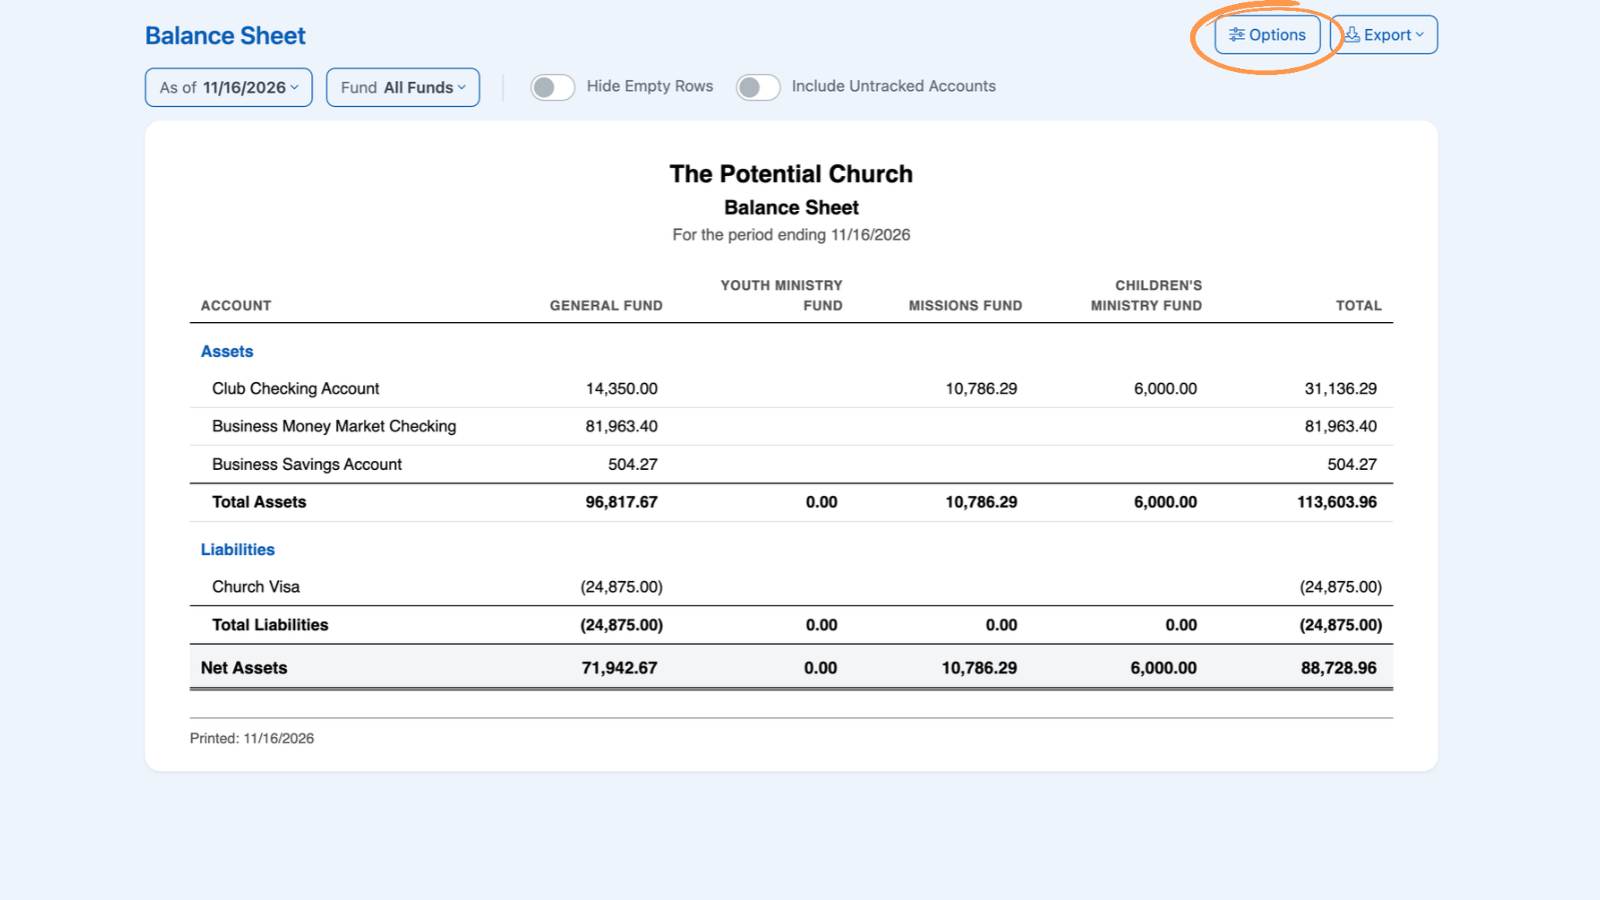
To customize how a report looks, select Options in the top-right corner of the report.
You can change:
- Report Title: the heading shown on the report.
- Row Size: Normal or Condensed.
- Font Size: Small, Normal, Large, or X-Large.
- Include Inactive Accounts (Balance Sheet) or Include Inactive Categories (Income Statement)
- Show Logo: add your church logo to the top of the report.
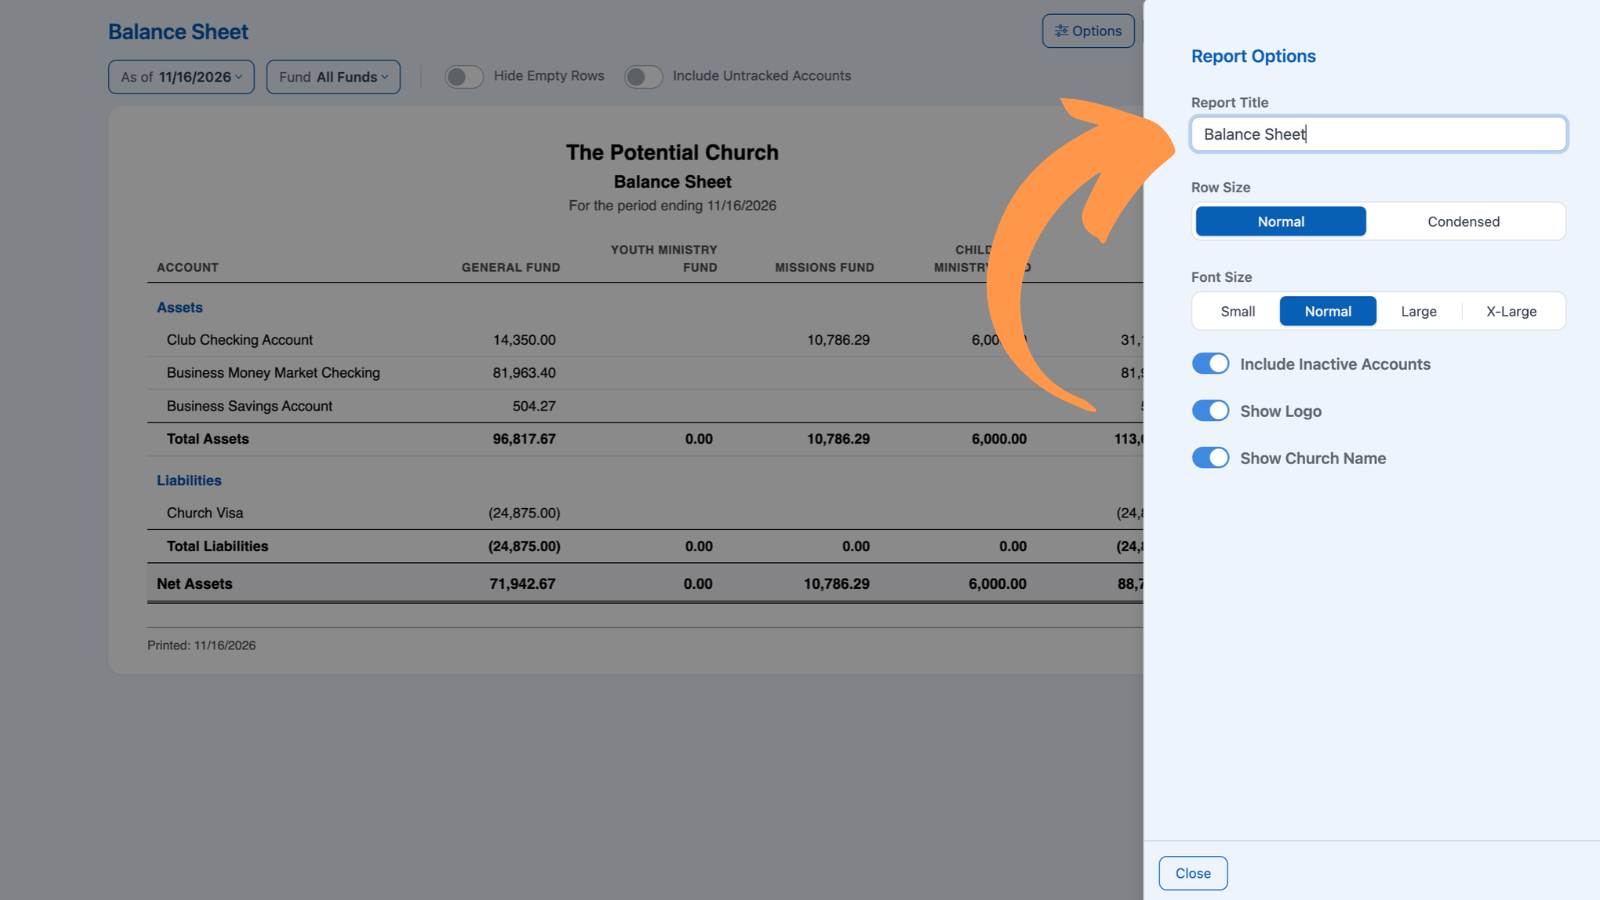
Select Close to return to your report.
Printing and Exporting
Select Export in the top-right corner of the report.
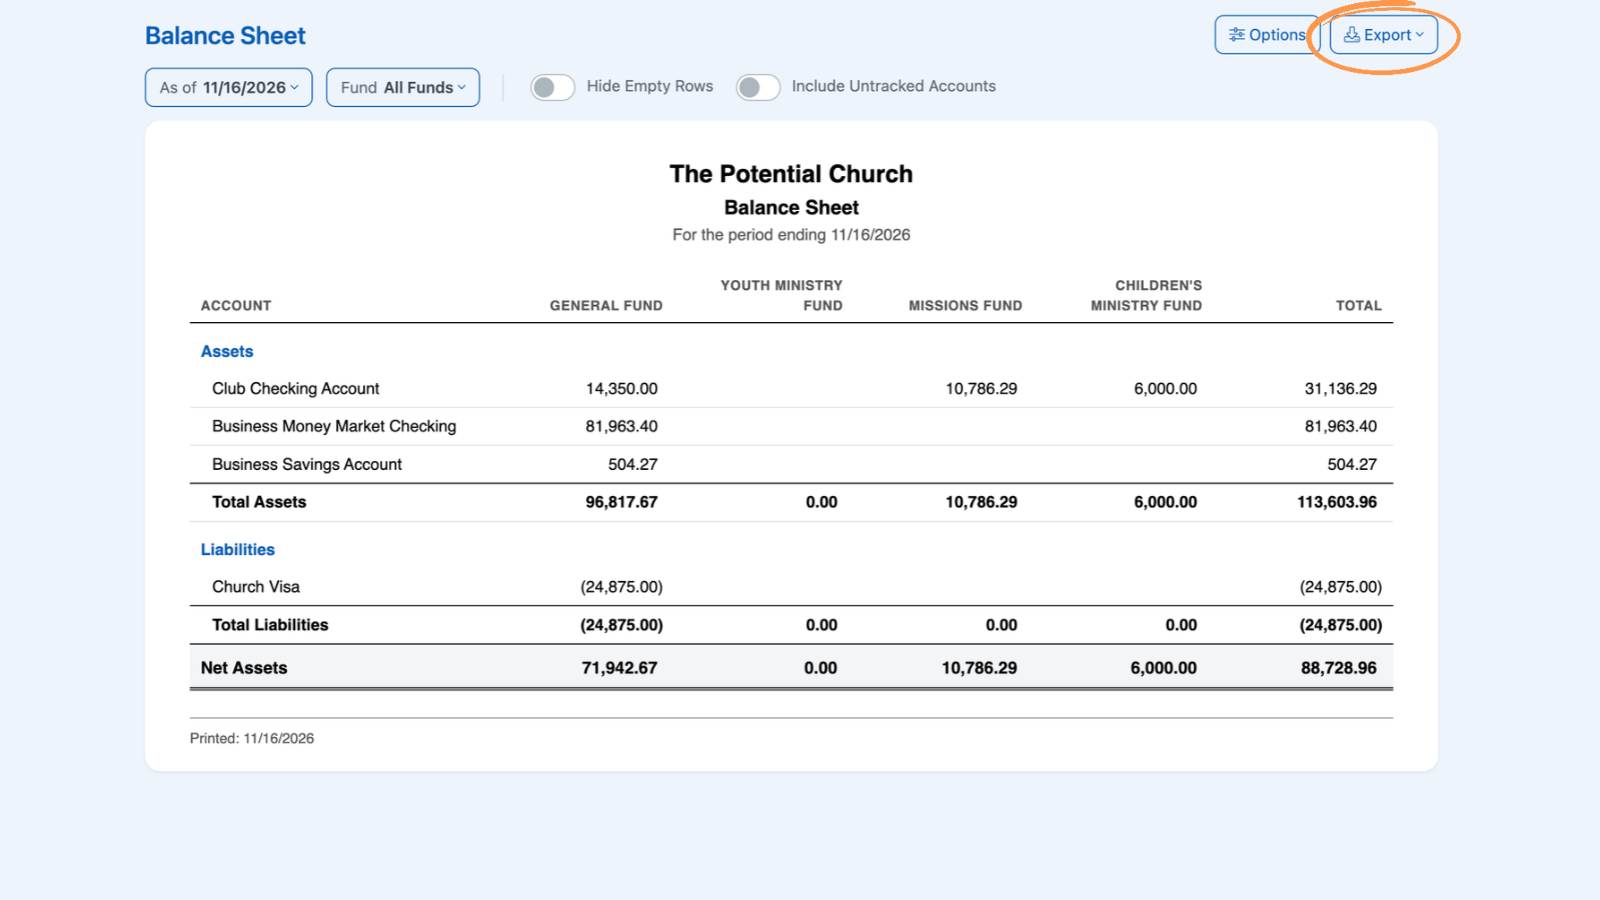
Then choose:
- Print or Save as PDF: print the report or save it as a PDF.
- Excel: download an Excel spreadsheet.
- CSV: download a CSV file you can open in Excel or Google Sheets.
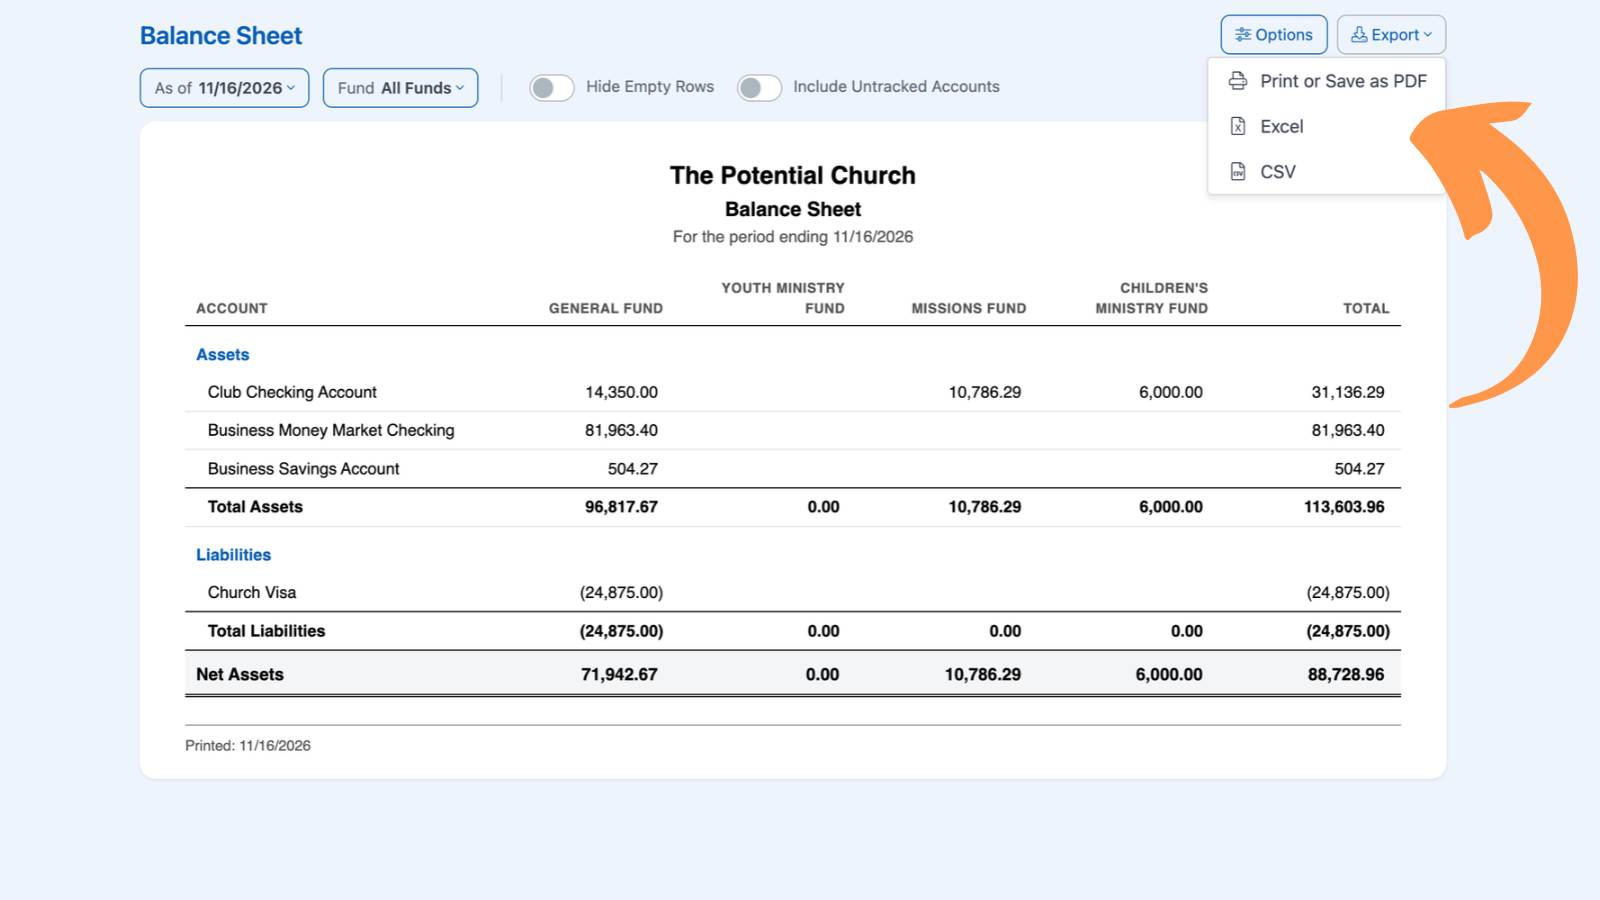
Exports include the filters and options you've set on the report.
Other Places to Find Reports
You can also run reports from these screens:
- Search: build a one-time or saved transaction report from the criteria you choose.
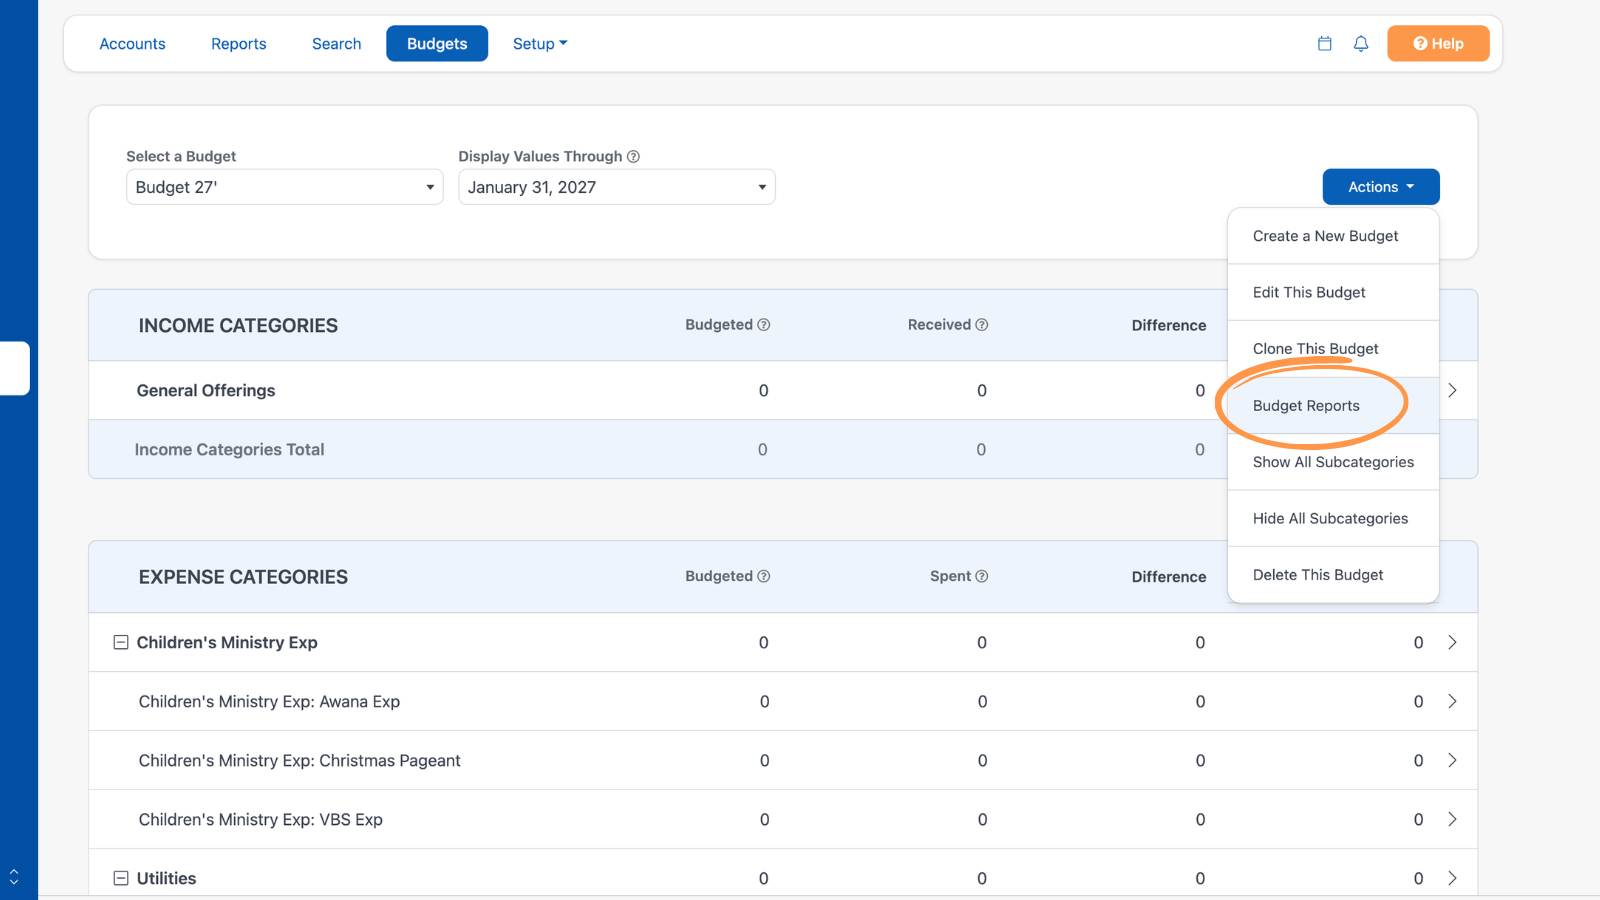
- Budgets: choose a budget, select Actions, then Budget Reports. Available reports include Simple Yearly Budget, Budget vs. Actual, Monthly Budget Analysis, and Budget Comparison.
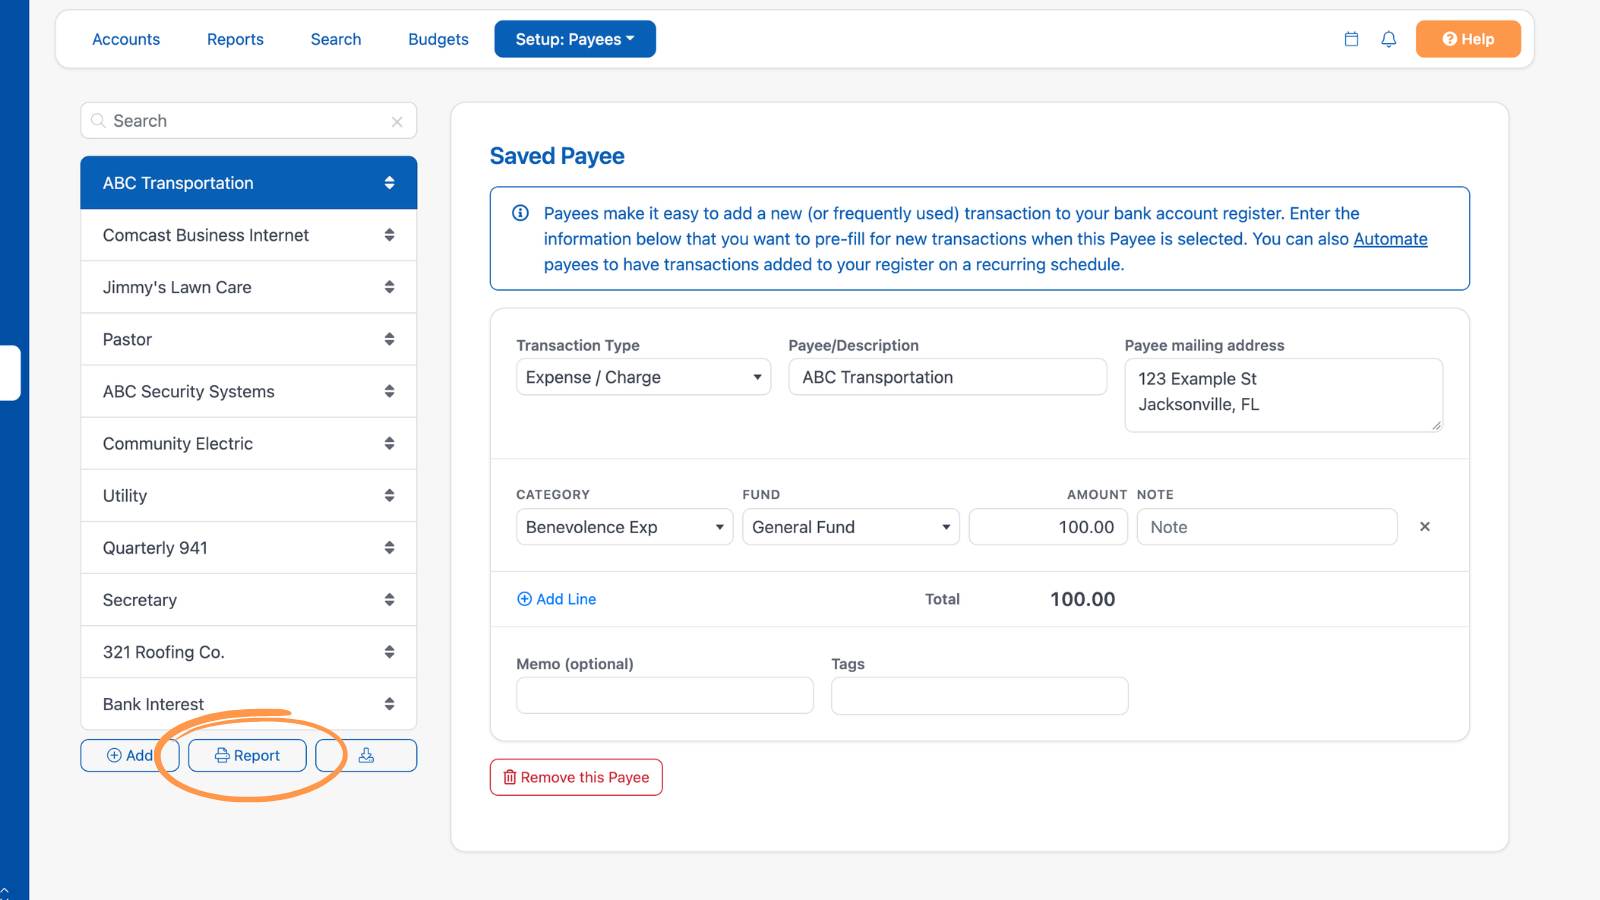
- Payees: go to Setup, then Payees. Select Report for a list of Payees, or the download button to export it.
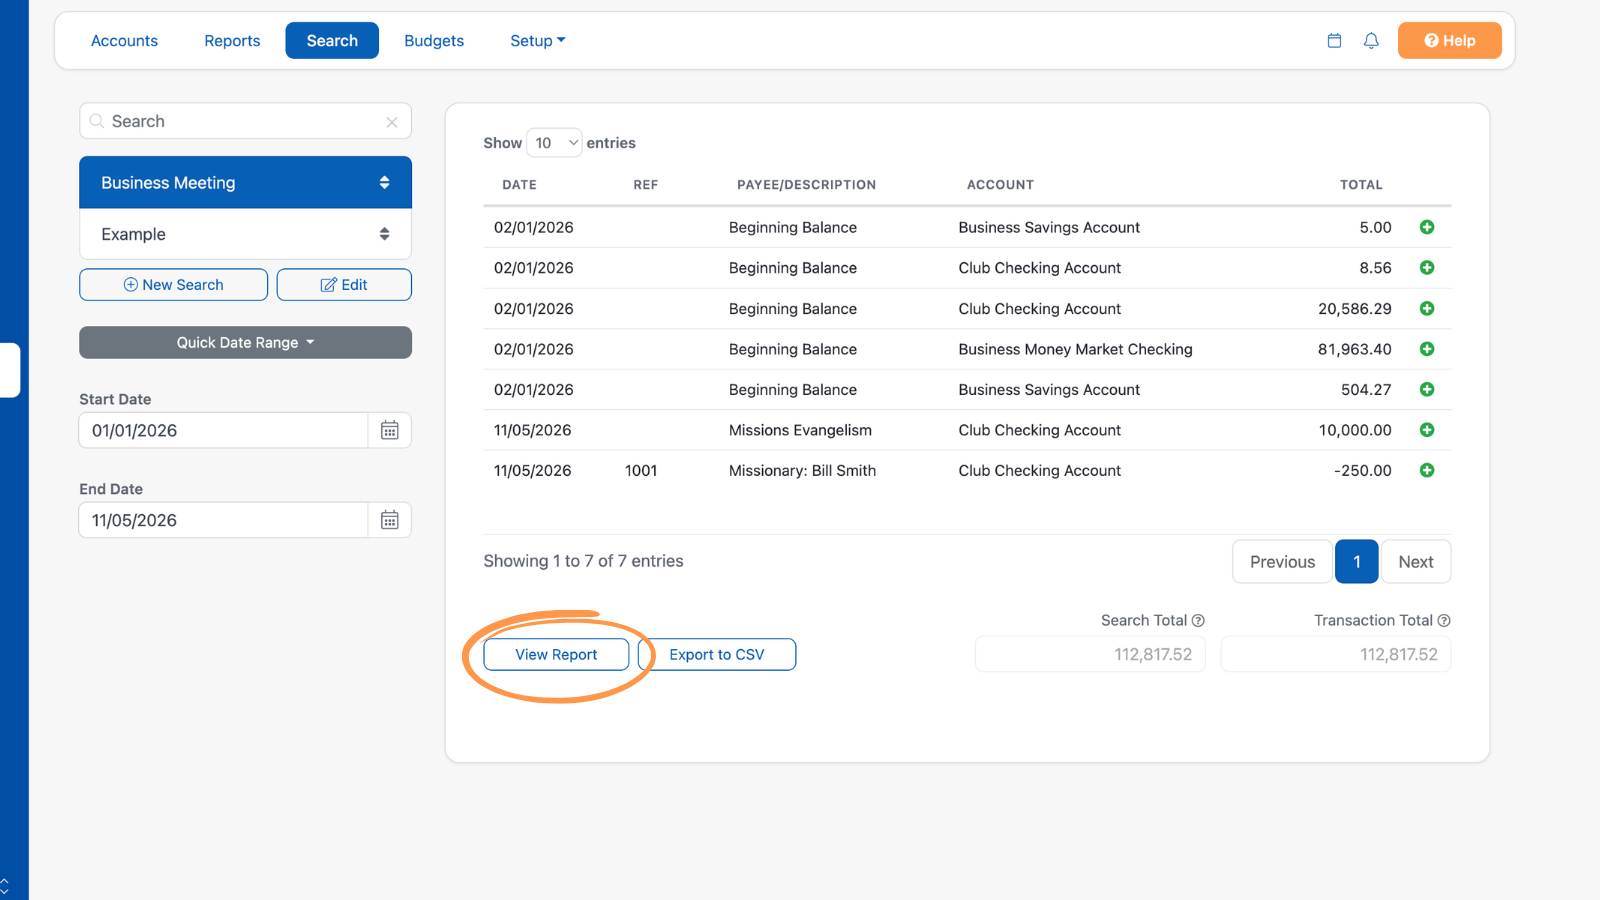
Search
From the Accounting screen, select the Search tab. Here you can generate a report of transactions that meet specific criteria of your choosing. Learn more about Accounting Search ›
Budgets
From the Accounting screen, select the Budgets tab and choose your desired budget. Then, select Actions. This will give you access to church budget reports, including Simple Yearly Budget, Budget vs. Actual, Monthly Budget Analysis, and Budget Comparison. You can also find these under Budget Reports on the Reports tab. Learn more about Budgets ›
Payees
From the Accounting screen, select Setup, then Payees. Here you can generate a Payee Report or download a CSV for exporting. Learn more about Payees ›
Popular Accounting Reports
The most popular accounting reports in ChurchTrac are the Balance Sheet, Income Statement, and Budget vs. Actual.
Balance Sheet
The Balance Sheet lists your Accounts as Assets and Liabilities, with a column for each Fund. It shows balances as of the selected date. It includes every transaction since each account's Beginning Balance, so there is no Start Date option.
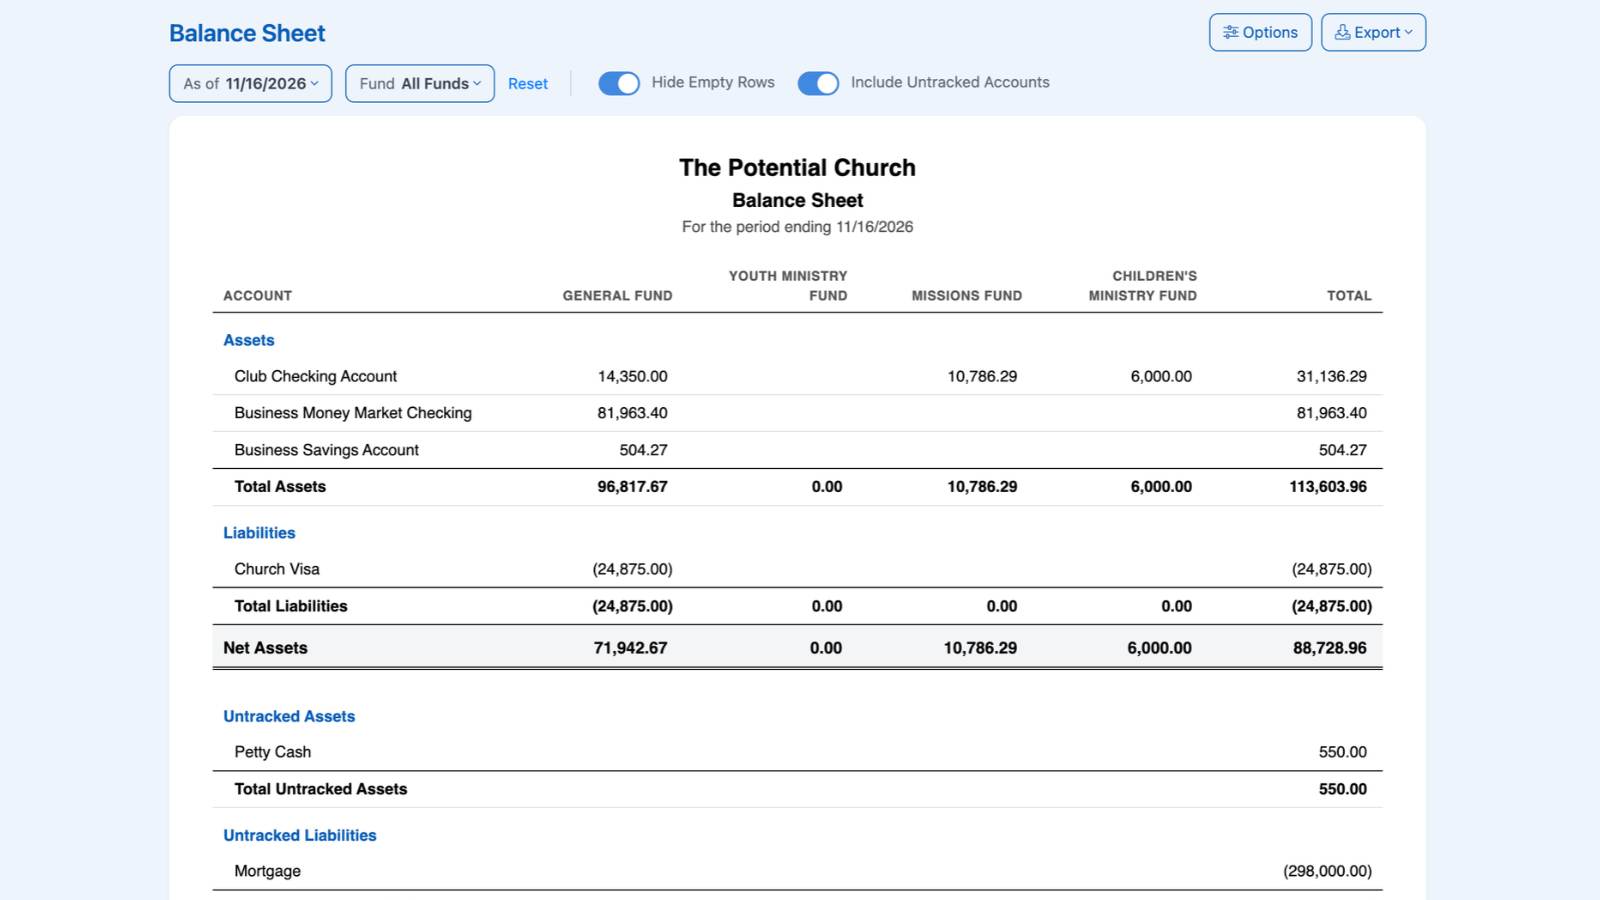
Balance Sheet Filters:
- As of: the date the balances are calculated through.
- Fund: show all funds or only the funds you choose.
- Hide Empty Rows: hides accounts with no balance.
- Include Untracked Accounts: adds your untracked accounts (such as a mortgage or petty cash) below Net Assets, in separate "Untracked Assets" and "Untracked Liabilities" sections.
Income Statement
The Income Statement summarizes your Income and Expense Categories for the period you choose. The Net Position row at the bottom is your total income minus total expenses for that period.
Note: The Income Statement is also known as a Profit & Loss (P&L) Statement. Churches typically call it an Income Statement to reflect a focus on stewardship rather than profit, but the report is the same.
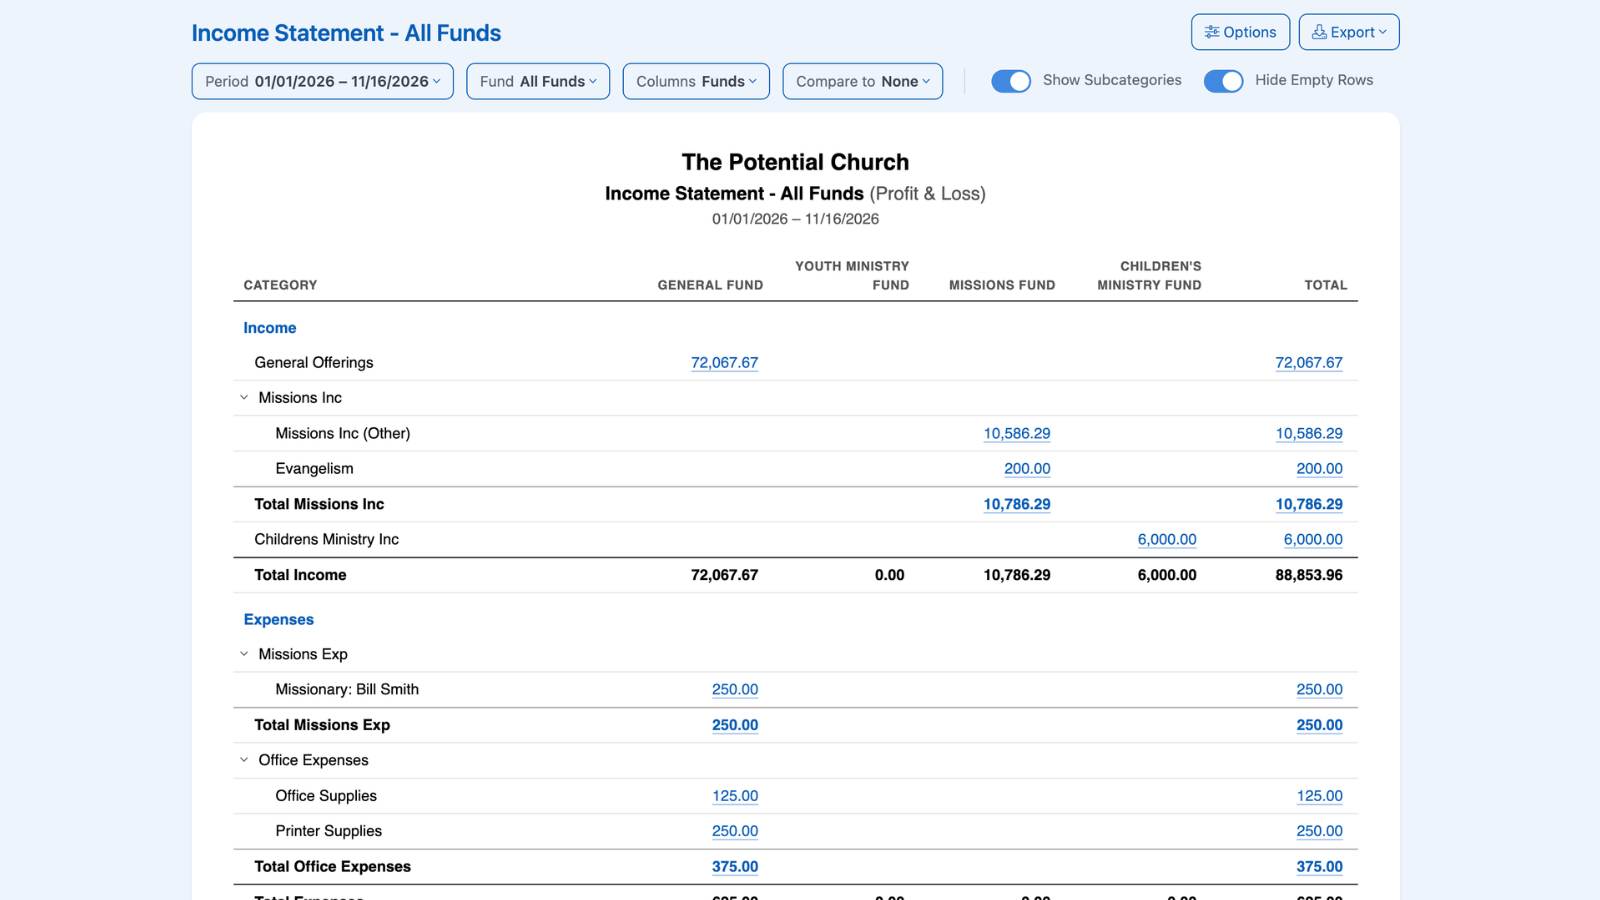
Income Statement Filters:
- Period: enter a custom date range and select "Apply", or choose a quick range such as Today, This Week, Last 30 Days, or This Month.
- Fund: check one or more funds, then select "Apply". Choose All Funds to include everything.
- Columns: show a column for each "Fund", or switch to "Months" to see income and expenses month by month.
- Compare to: compare against the Previous period or the Same period last year.
- Show Subcategories: show or hide subcategory rows. You can also collapse a single parent category with the arrow beside its name.
- Hide Empty Rows: hides categories with no activity in the period.
Budget Vs. Actual
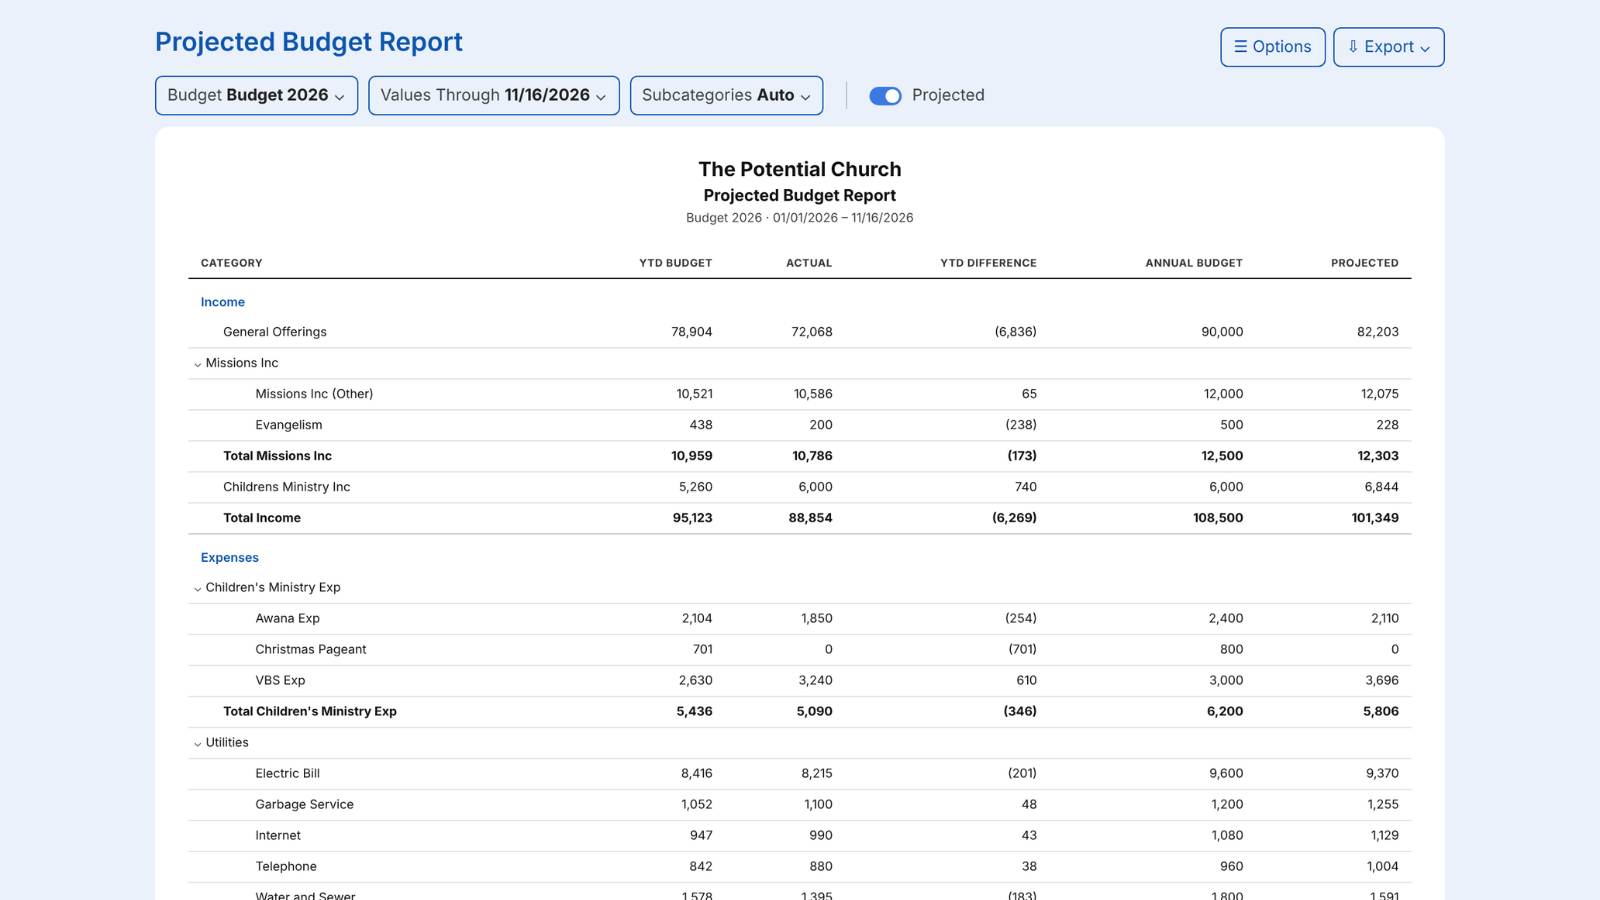
Shows the amount spent or received compared to the budgeted amount. This report also gives you the option to display a projected amount based on historical trends. This report is only found in the Budgets tab. Learn more about Budgets in ChurchTrac ›
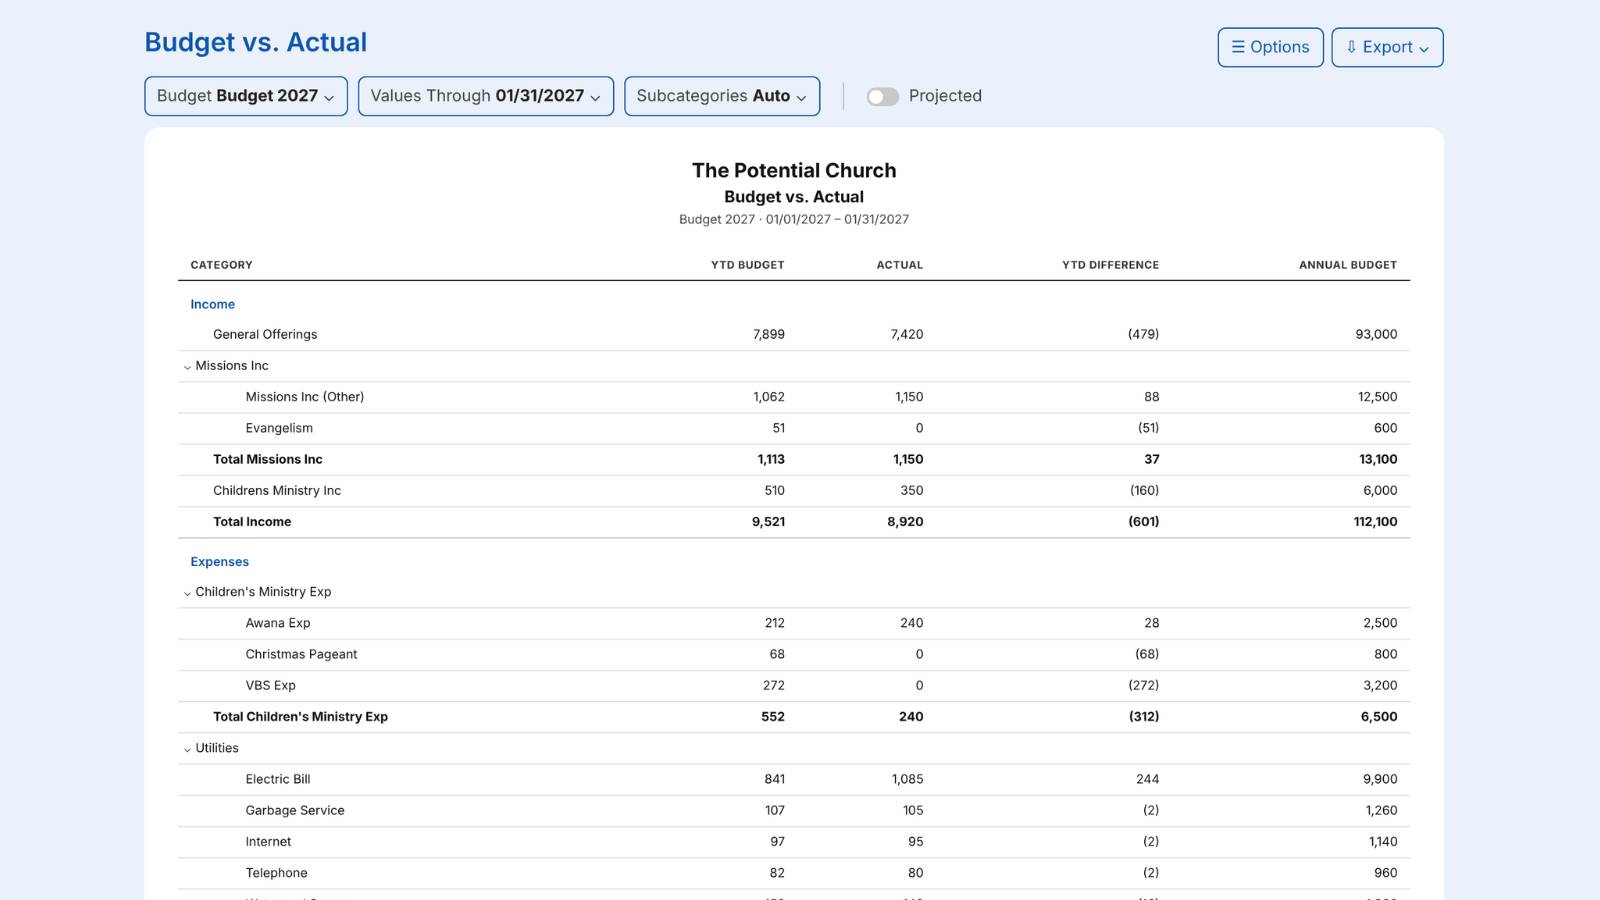
Budget Vs. Actual Filters:
- Budget: choose which budget to report on.
- Values Through: the date the YTD Budget, Actual, and YTD Difference columns are calculated through.
- Subcategories: choose Auto, Show All, or Hide All to control how subcategories are displayed.
- Projected: turn on to add a Projected column that estimates year-end amounts based on historical trends. With this on, the report title changes to Projected Budget Report.