Admin Settings
The Settings and Automations Screen is where you will find general various features, settings, and customization options that apply to the software. These options and settings are only available to ChurchTrac Users that are Administrators.
- Your Church Info
- Account & Payment Info
- Screen Options
- Add Name Settings
- Report Settings
- Bulk Email Settings
- Voice and SMS Settings
- Background Check Setup
- Regional Settings
- Dashboard Setup
- Deleted Records
Your Church Info
If you have not already done so, update your church info with your church's phone number and address.
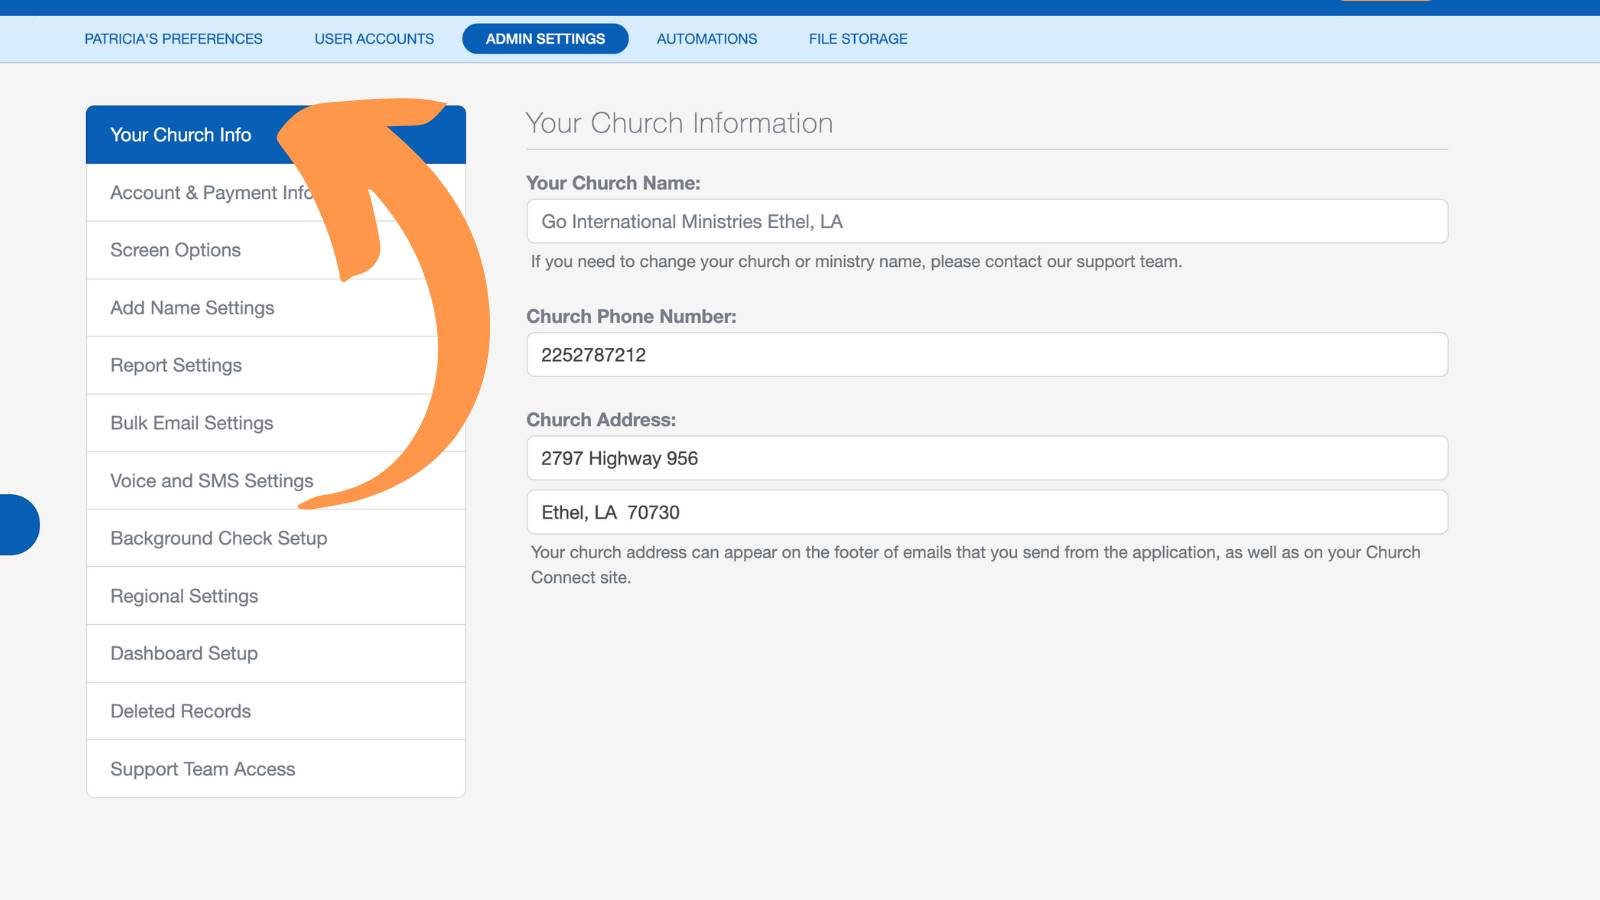
The information listed in this section will be visible on your church's Church Connect Page, as well as multiple church financial reports.
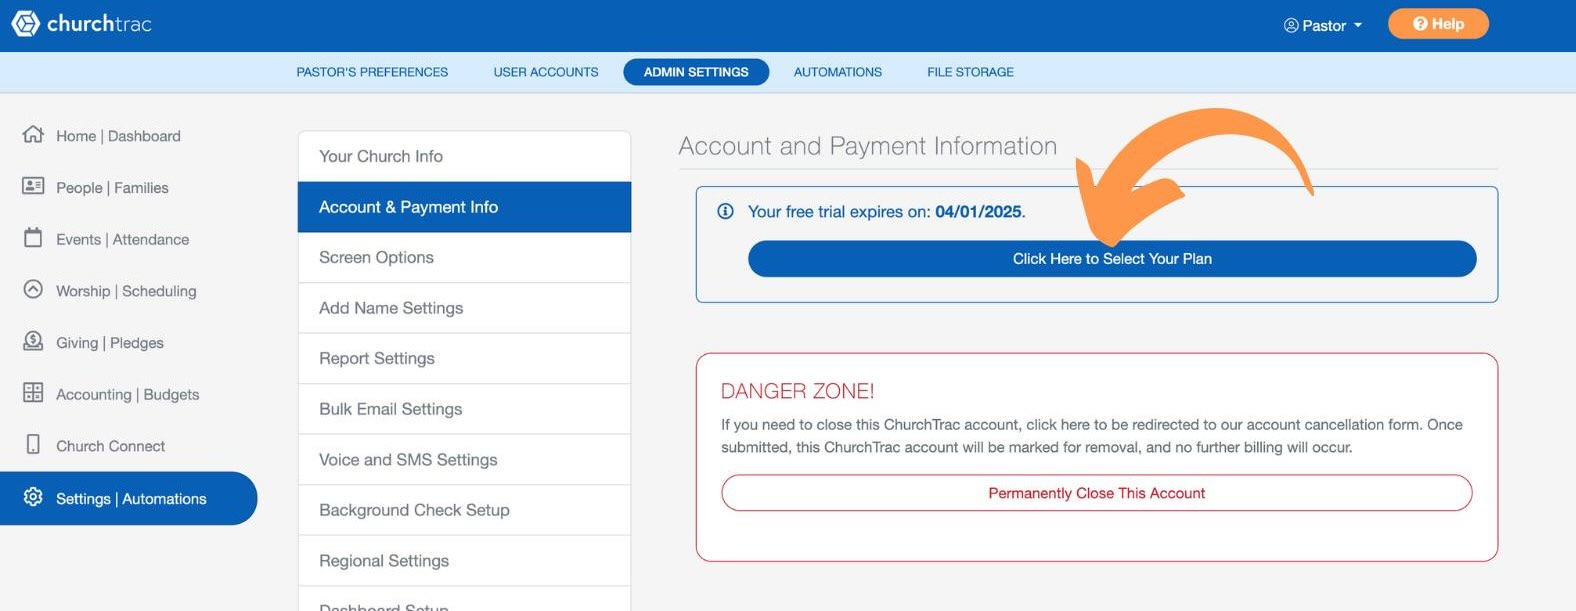
Account & Payment Info
If you are currently in your 30-day trial and ready to purchase, proceed in selecting your ChurchTrac plan and entering in your payment information. This section is where you can also update your payment information on an existing plan.
If you are approaching the end of your payment cycle, or if your Free Trial is about to end, you will see the below alert appear in the bottom-right corner of your screen:
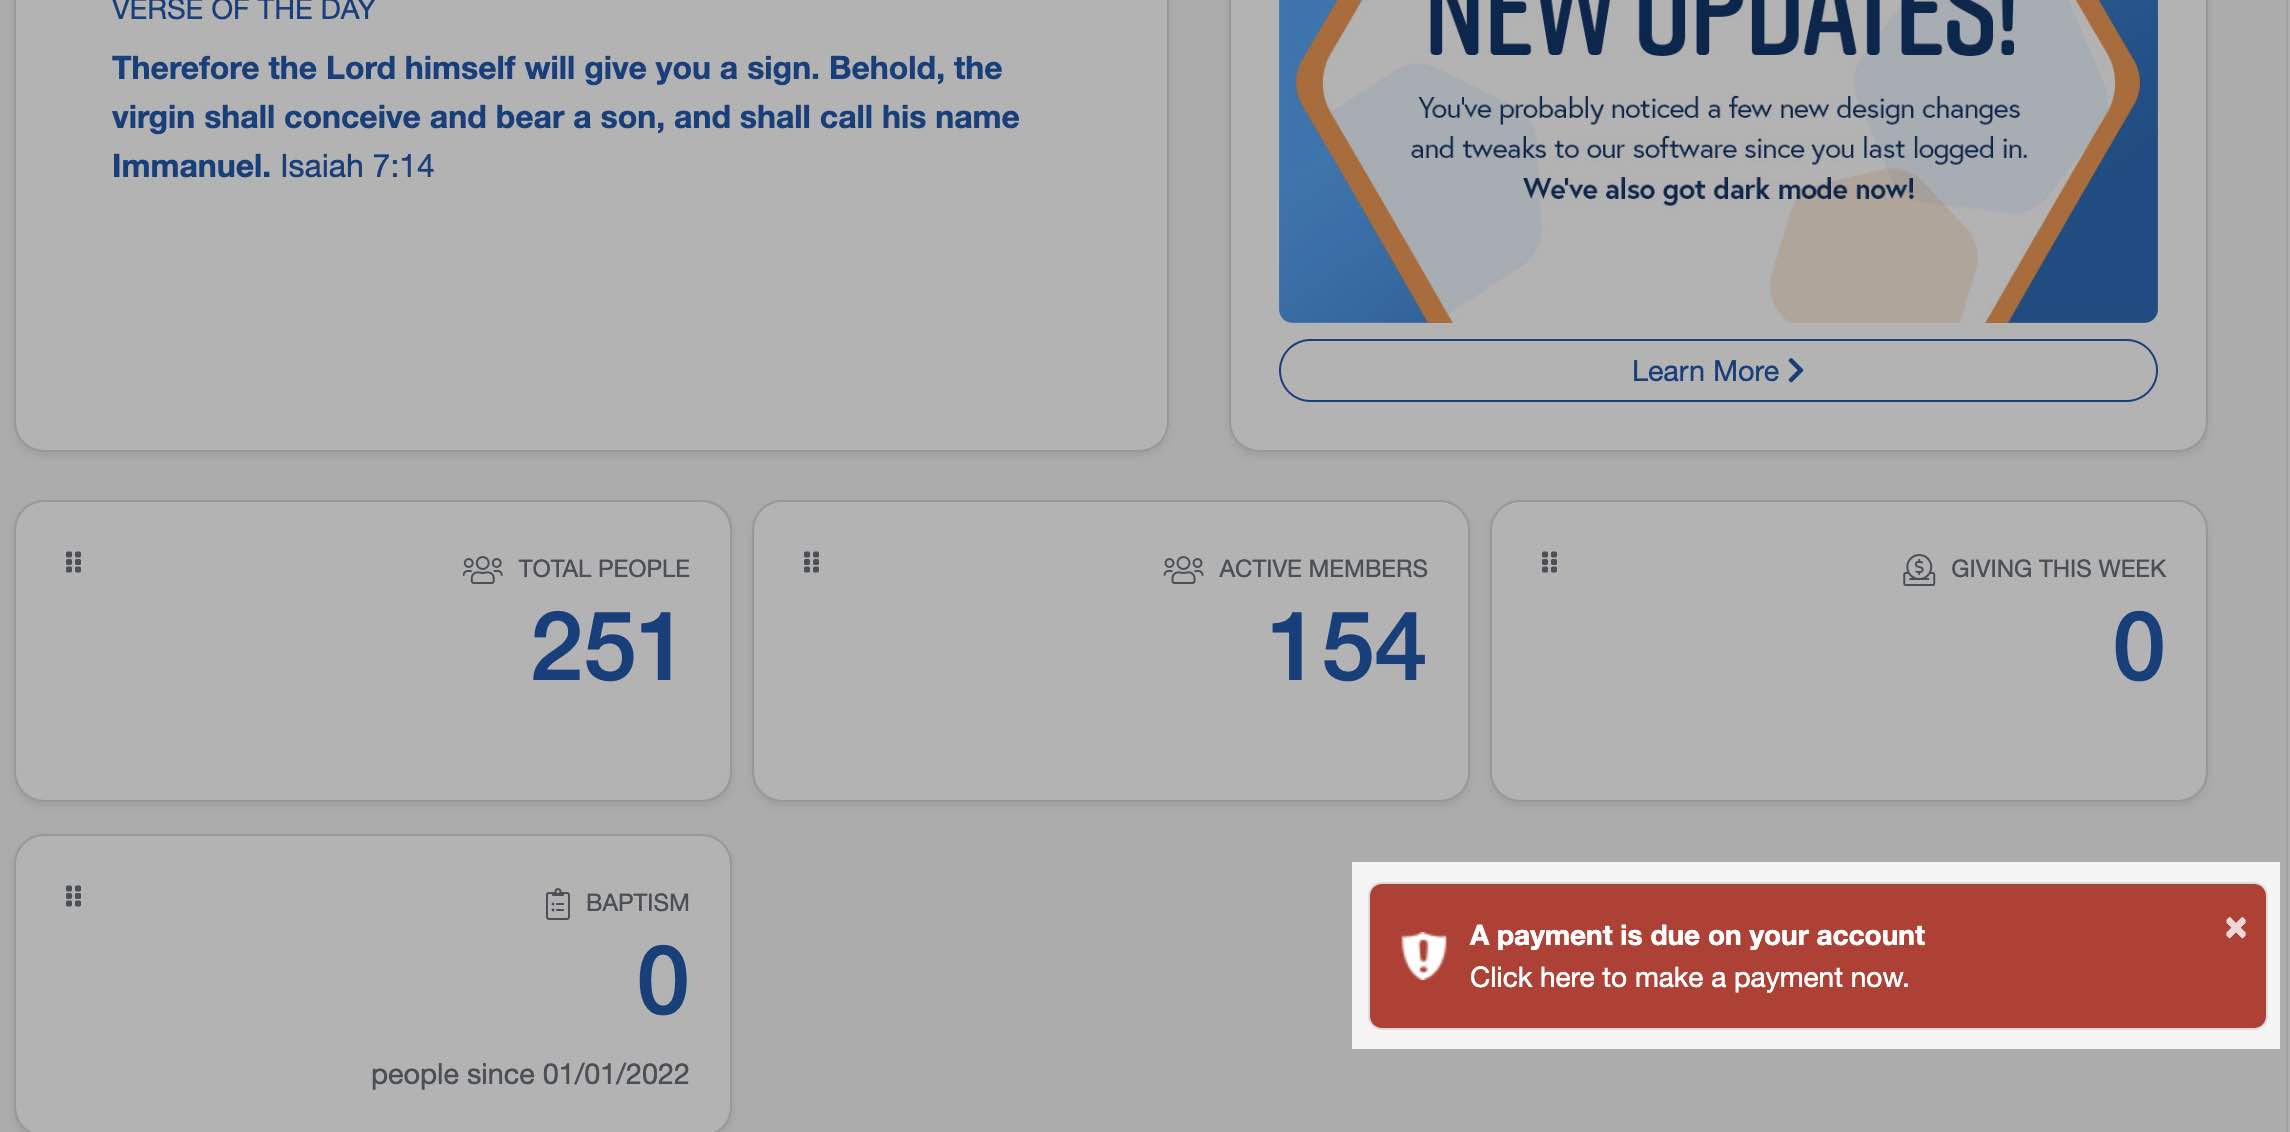
Selecting this alert takes you directly to a page where you will select a payment plan and enter your payment information.
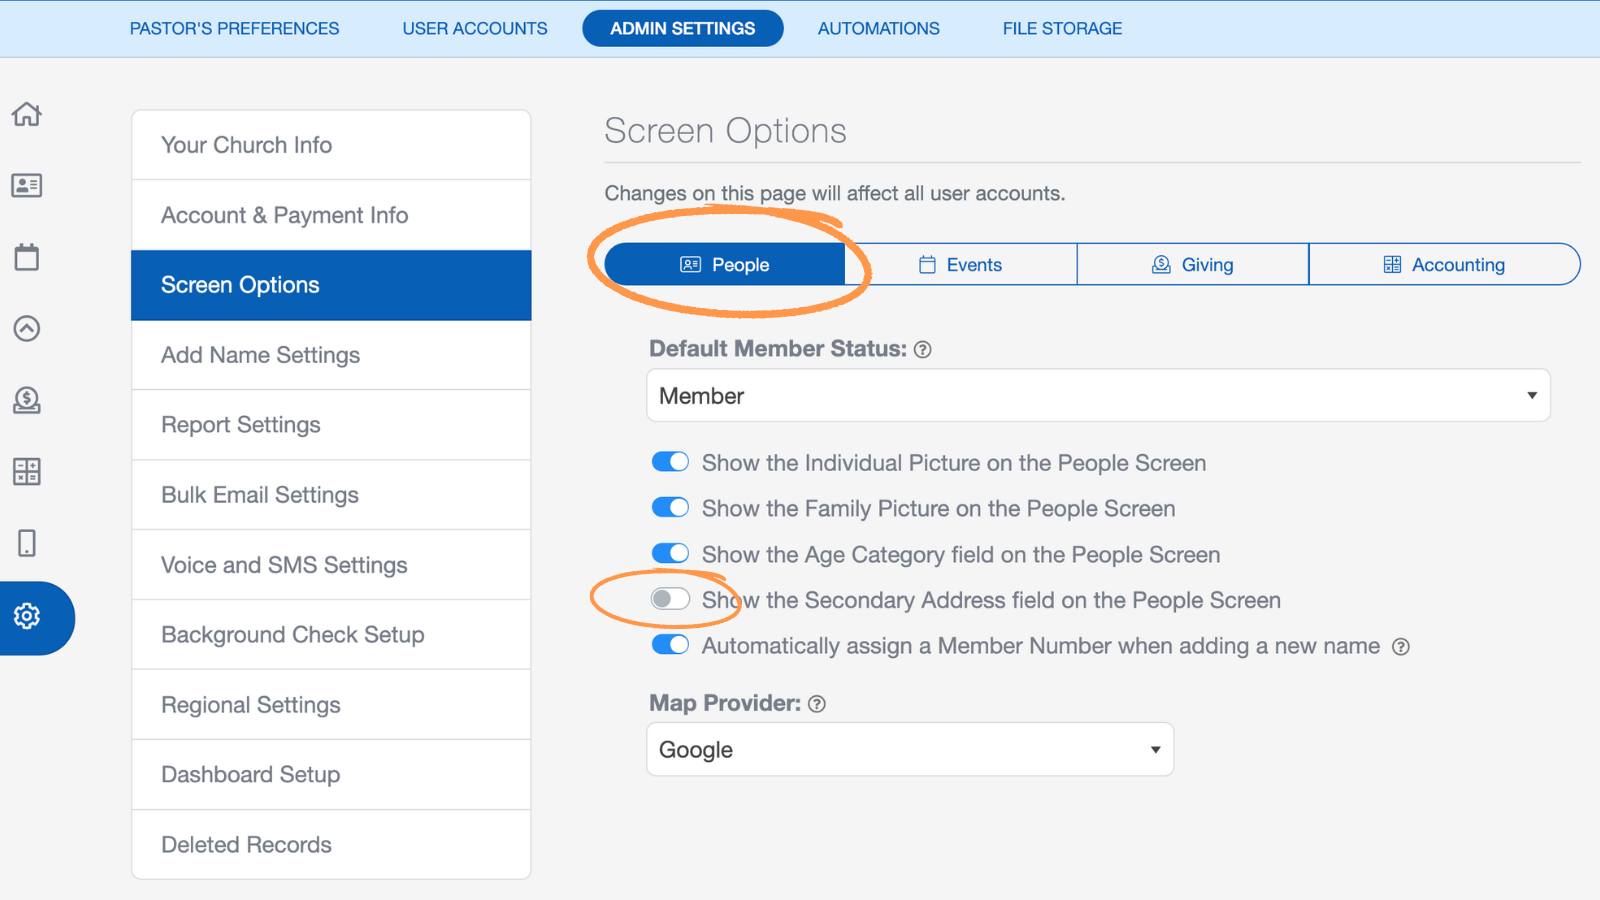
Screen Options
Many of the "Screens" in ChurchTrac offer various options of customization and the ability to toggle certain features on or off. These options affect ALL user accounts.
Add Name Settings
You can choose which fields to be displayed when adding a name. These options are available when selecting the ellipses button (the button with 3 dots). When adding names, you can toggle between adding an individual/family or organization as well.
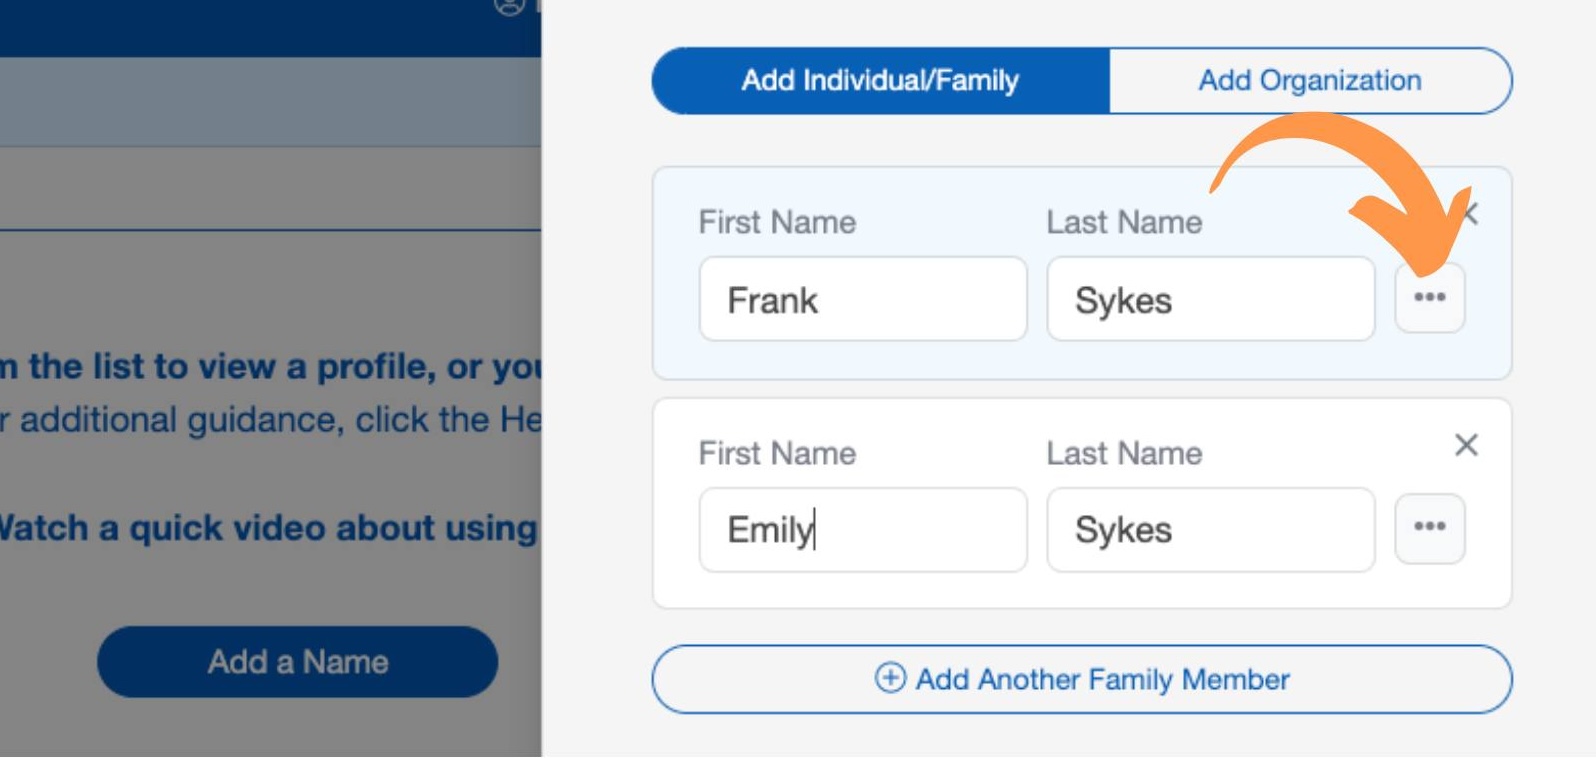
When adding names into ChurchTrac, you have the option of having ChurchTrac auto-generate a family name or you can input a family name manually.
Report Settings
Use these settings for adjusting the paper size and font of all reports in ChurchTrac. Included in this section are additional settings/options for the Contribution Statement (AKA Giving Statement).
Bulk Email Settings
ChurchTrac provides you with multiple sending options for sending mass emails to your church. See our Email Options and Settings article to learn more.
Voice & SMS Settings
You can send mass SMS messages and voice messages directly from ChurchTrac to your congregation.
With our Enhanced Messaging features, you'll have your own dedicated toll-free number for your church, be able to have two-way conversations, record voice messages, and setup automatic keyword replies. Before you can send SMS messages, your church must be verified first. This helps ensure message deliverability and compliance.
When you attempt to send a text message from the Messaging screen without Enhanced Messaging enabled, you’ll be prompted to "Enable Enhanced Messaging." Selecting this prompt will take you to "Admin Settings → Voice & SMS Settings," where you can start SMS verification.

Start SMS Verification
From the Voice & SMS Settings screen, select "Start SMS Verification" to begin the setup process.

Complete the Verification Form
The verification form is completed in four steps.
Step 1: Enter Organization Details
Provide your church’s official information as it appears on legal or registration documents, including your church organization or legal name, DBA (if applicable), business registration type (EIN or Canadian Business ID), and business registration number.

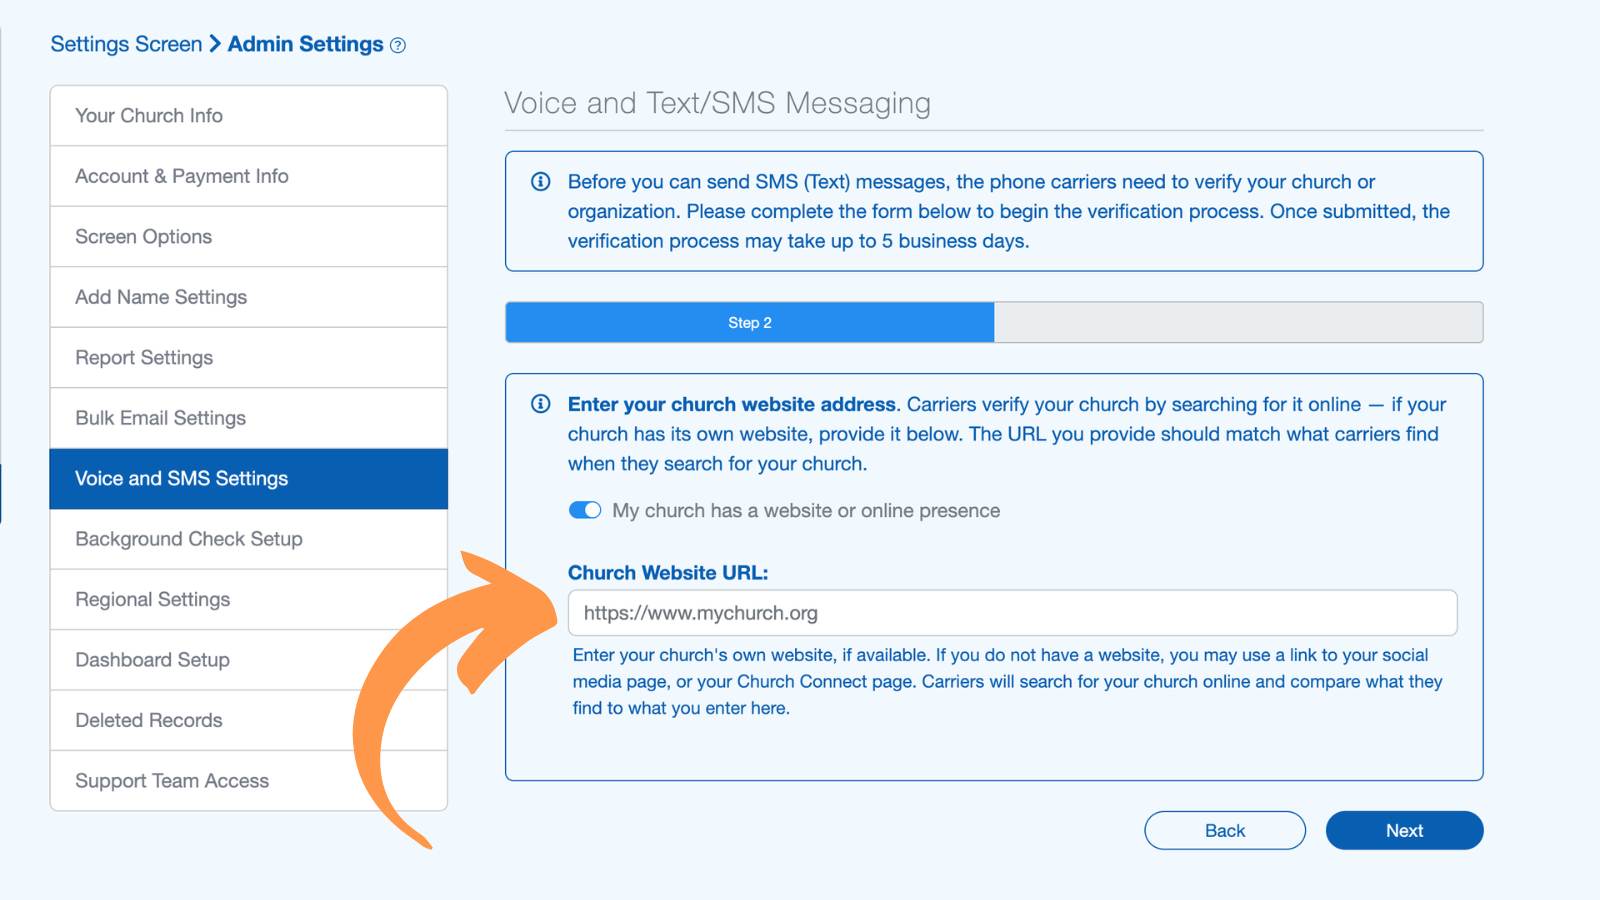
Step 2: Enter Church Website
Carriers verify your church by searching for it online. In this step, enter your church website address.
Toggle “My church has a website or online presence” to enter your church website URL details.
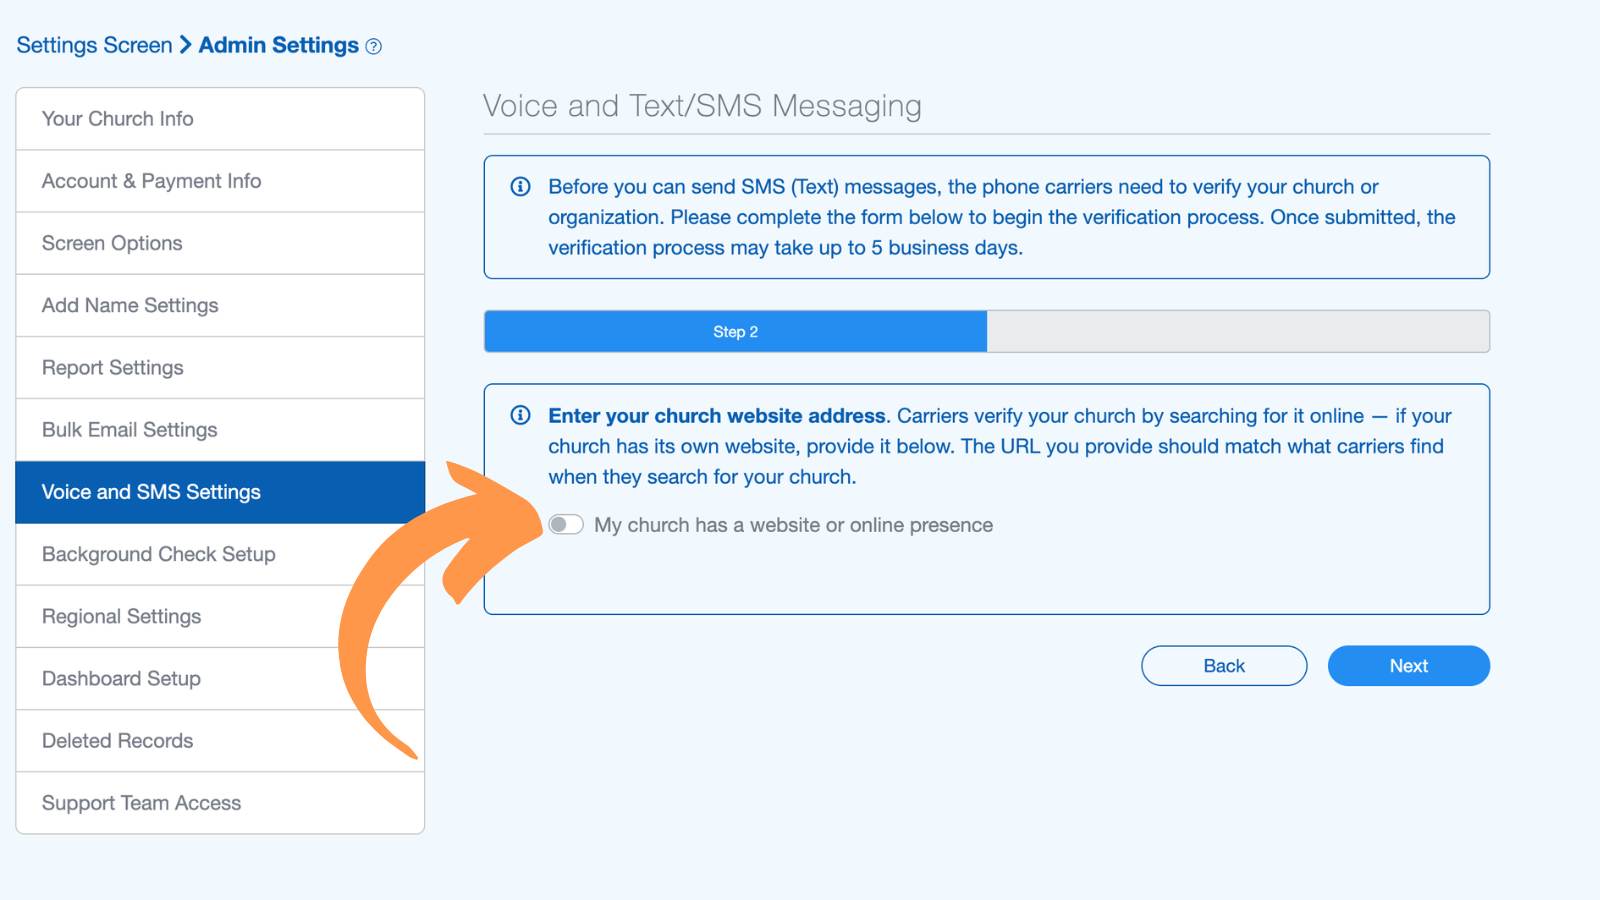
If your church has its own website, the URL you provide should match what carriers find when they search for your church. If you do not have a website, you may use a link to your social media page or your church connect page instead.
Be sure that whatever source you use matches your church’s information on your active EIN, including your church name, church address, church phone number, and email.
Note: If you are using Church Connect, your site should show clear activity and be mostly set up. This includes having a published header, footer, and at least a few Connect Cards, such as About Us or Contact Us, to name some. Learn more about Setting Up Your Website ->
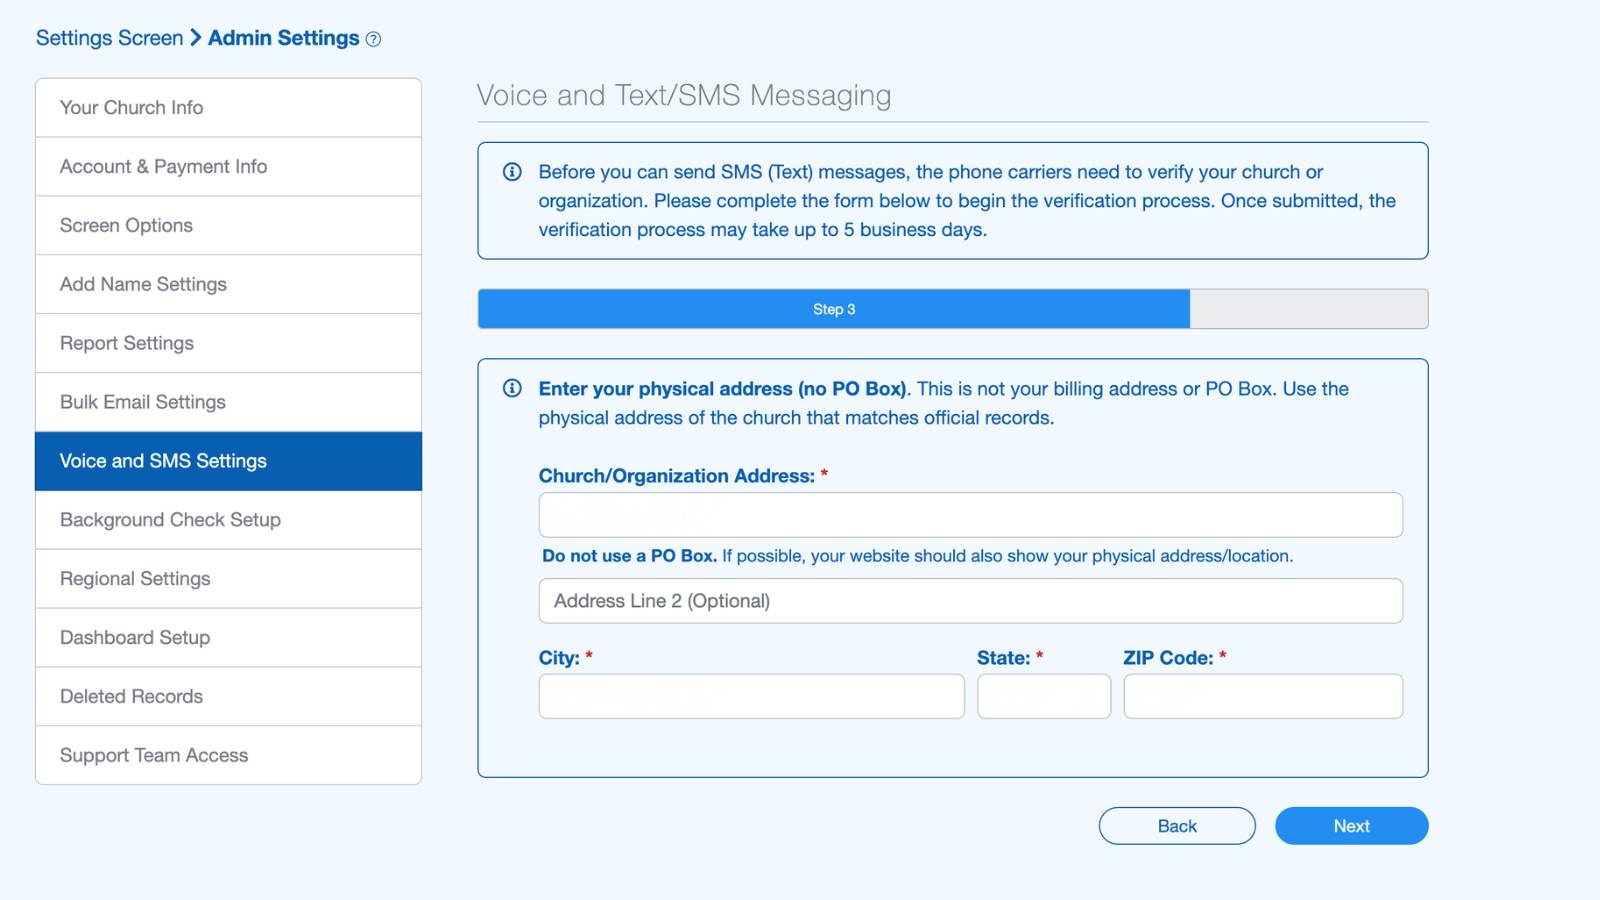
Step 3: Enter Physical Address (No PO Box)
Enter the physical address for your church or organization, including street address, city, state or province, and ZIP or postal code.
Do not use a PO Box. Use the official street address of your church as it appears on registration or legal documents.
Step 4: Enter Contact Information
Provide the primary contact information for the person responsible for messaging on this account, including first name, last name, contact email address, and contact phone number.
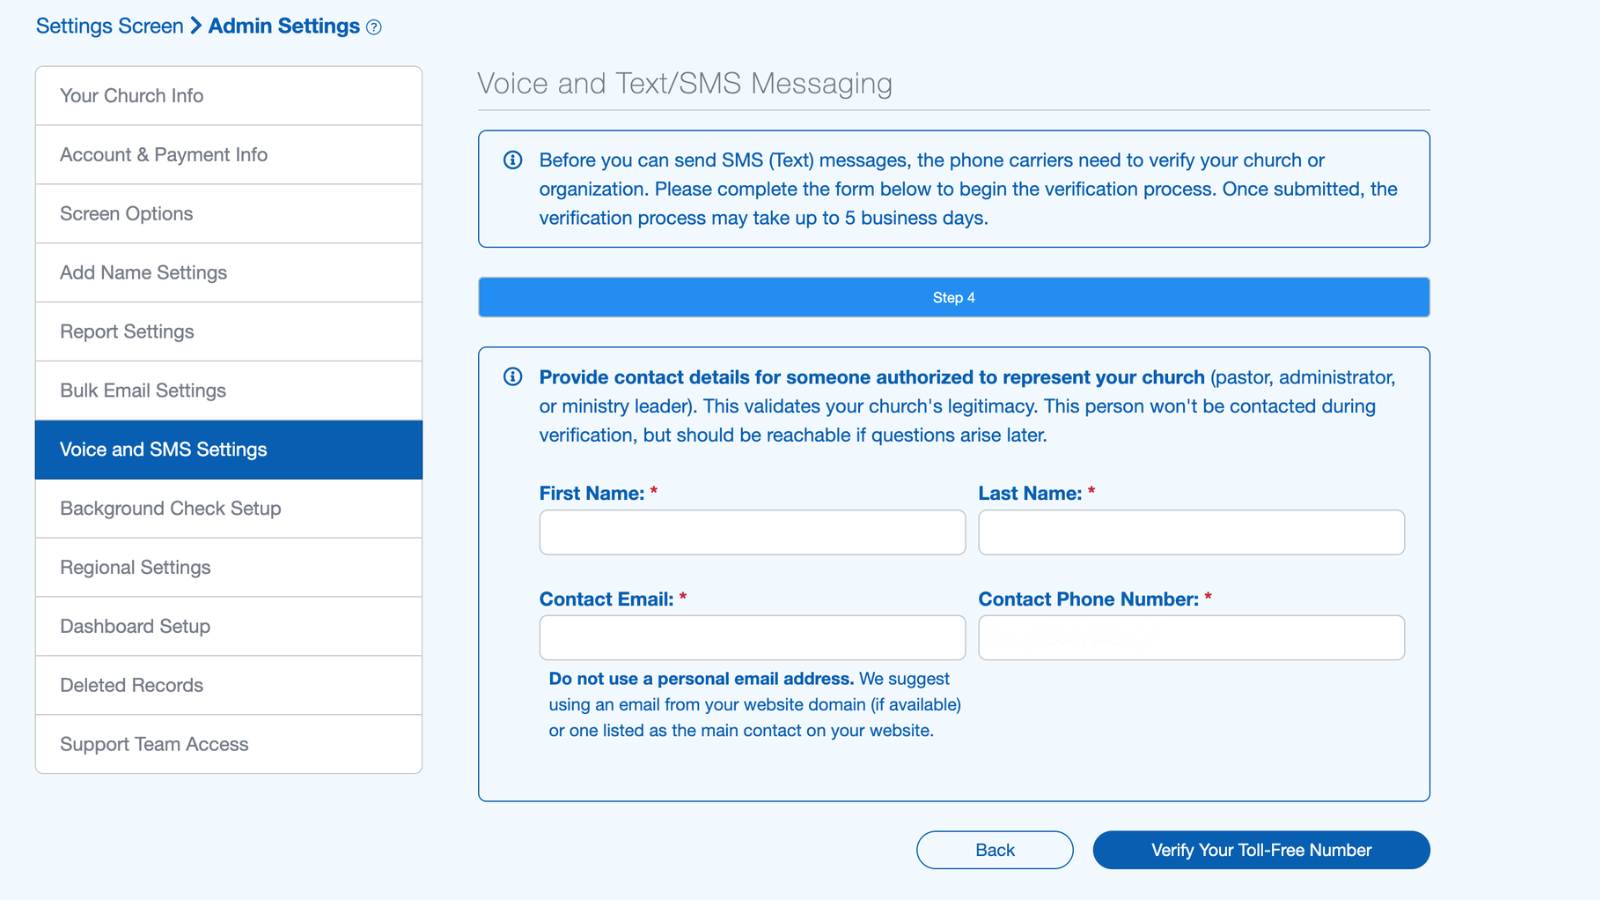
Verify Your Toll-Free Number
After completing all four steps of the form, select "Verify Your Toll-Free Number" to submit your information for review.
SMS verification typically takes up to 3-5 business days to complete. You can check back on the Messaging screen to view your verification status.
Once your account has been verified, you’ll be able to begin sending SMS messages immediately.

Background Check Setup
You can order church background checks and training using our 3rd party integration with MinistrySafe. View our Church Background Checks article to get started.
Regional Settings
When you initially create your ChurchTrac account, the software will attempt to use the correct time and date format for your location/region. Verify that your regional settings match your location/region.
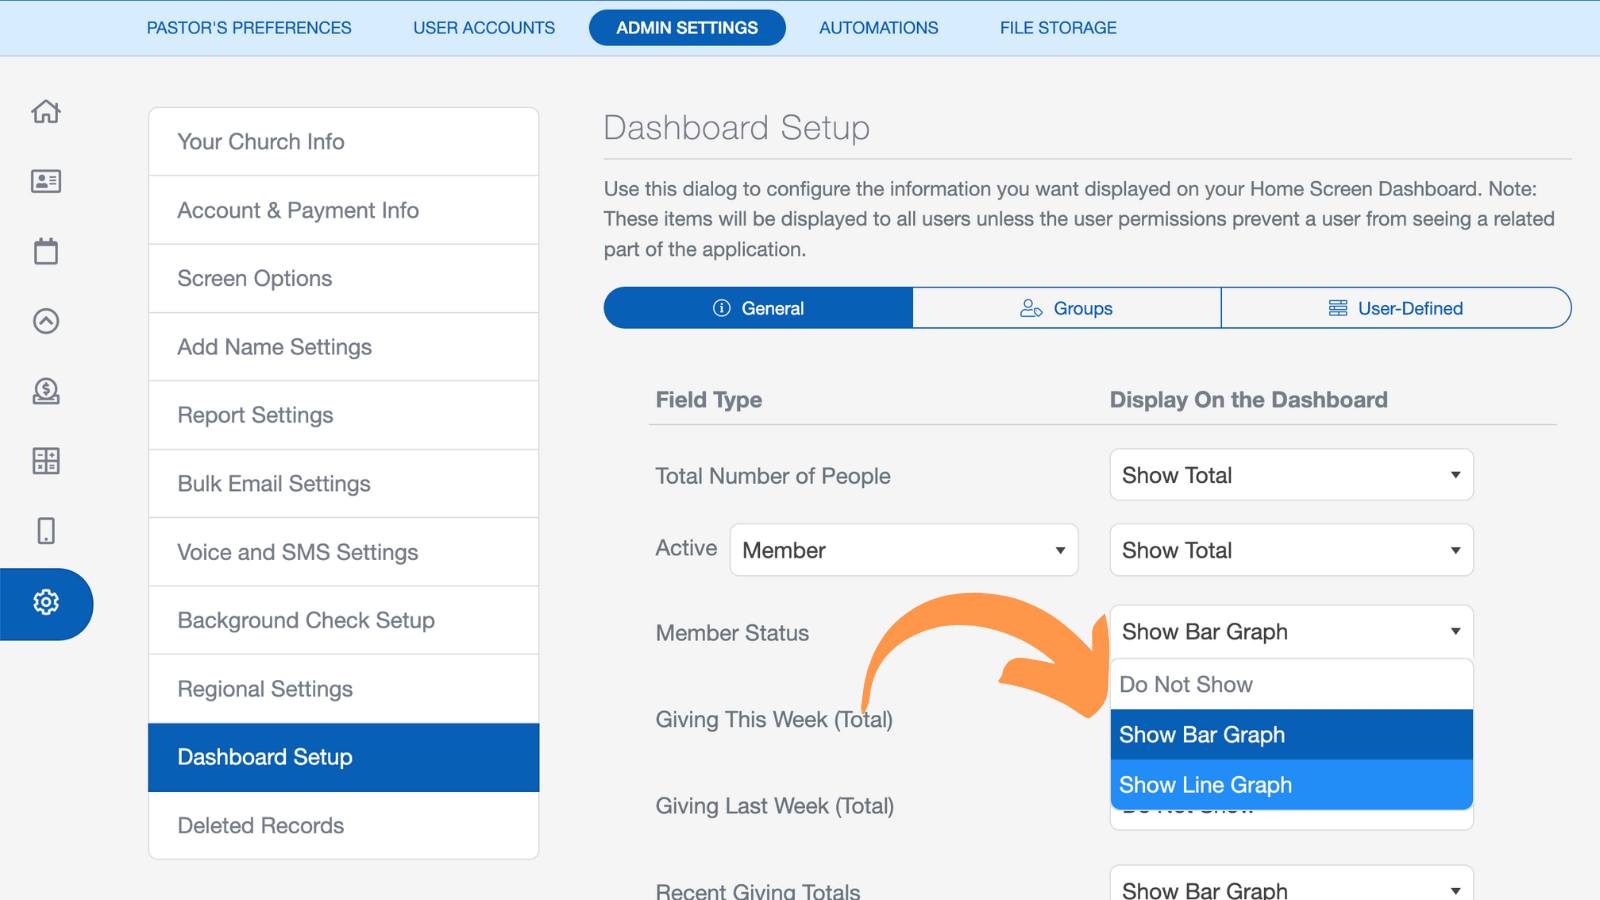
Dashboard Setup
The Dashboard on your Home Screen can be configured to display various information and key church metrics. Some of these include Total Number of People, Giving Totals, Attendance from a previous week, and even specific Group or User-Defined Field datapoint.
Deleted Records
Need to restore a record you deleted? ChurchTrac gives you the ability to restore deleted records such as people, giving transactions, Connect Cards, and other various records stored within the software.