Setting Up Accounting
If you are new to ChurchTrac or have chosen to use our additional Accounting tool, your Accounting/Budgets screen will need to be set up. Below is a step-by-step guide on how to set up ChurchTrac's Accounting Software.
- Before You Begin
- Create Funds
- Create & Assign Categories
- Add Accounts
- Edit the Beginning Balance
- Submit An Accounting Review Ticket
- Next Steps
- Pro Tips
Before You Begin
ChurchTrac is a Single-Entry Accounting System that uses a Cash-based or Fund-based accounting. This tool must be set up and used accordingly. If you are switching from a Double-Entry program like Quickbooks or Aplos, the setup will be different from what you may be used to. Learn more about Double-Entry vs Single-Entry Accounting ›
What You Need
Bank/financial statement: You will need the most recent bank or financial statement for the account(s) you are adding to the ChurchTrac Accounting feature.
Funds: You will need to know or have a list of all your organization's Funds or designated balances of money. It will also help to know how much money is supposed to be in each of these funds.
Income & Expenses: You will need to know or have a list of all your organization's income and expense categories.
Step. 1 Create Funds

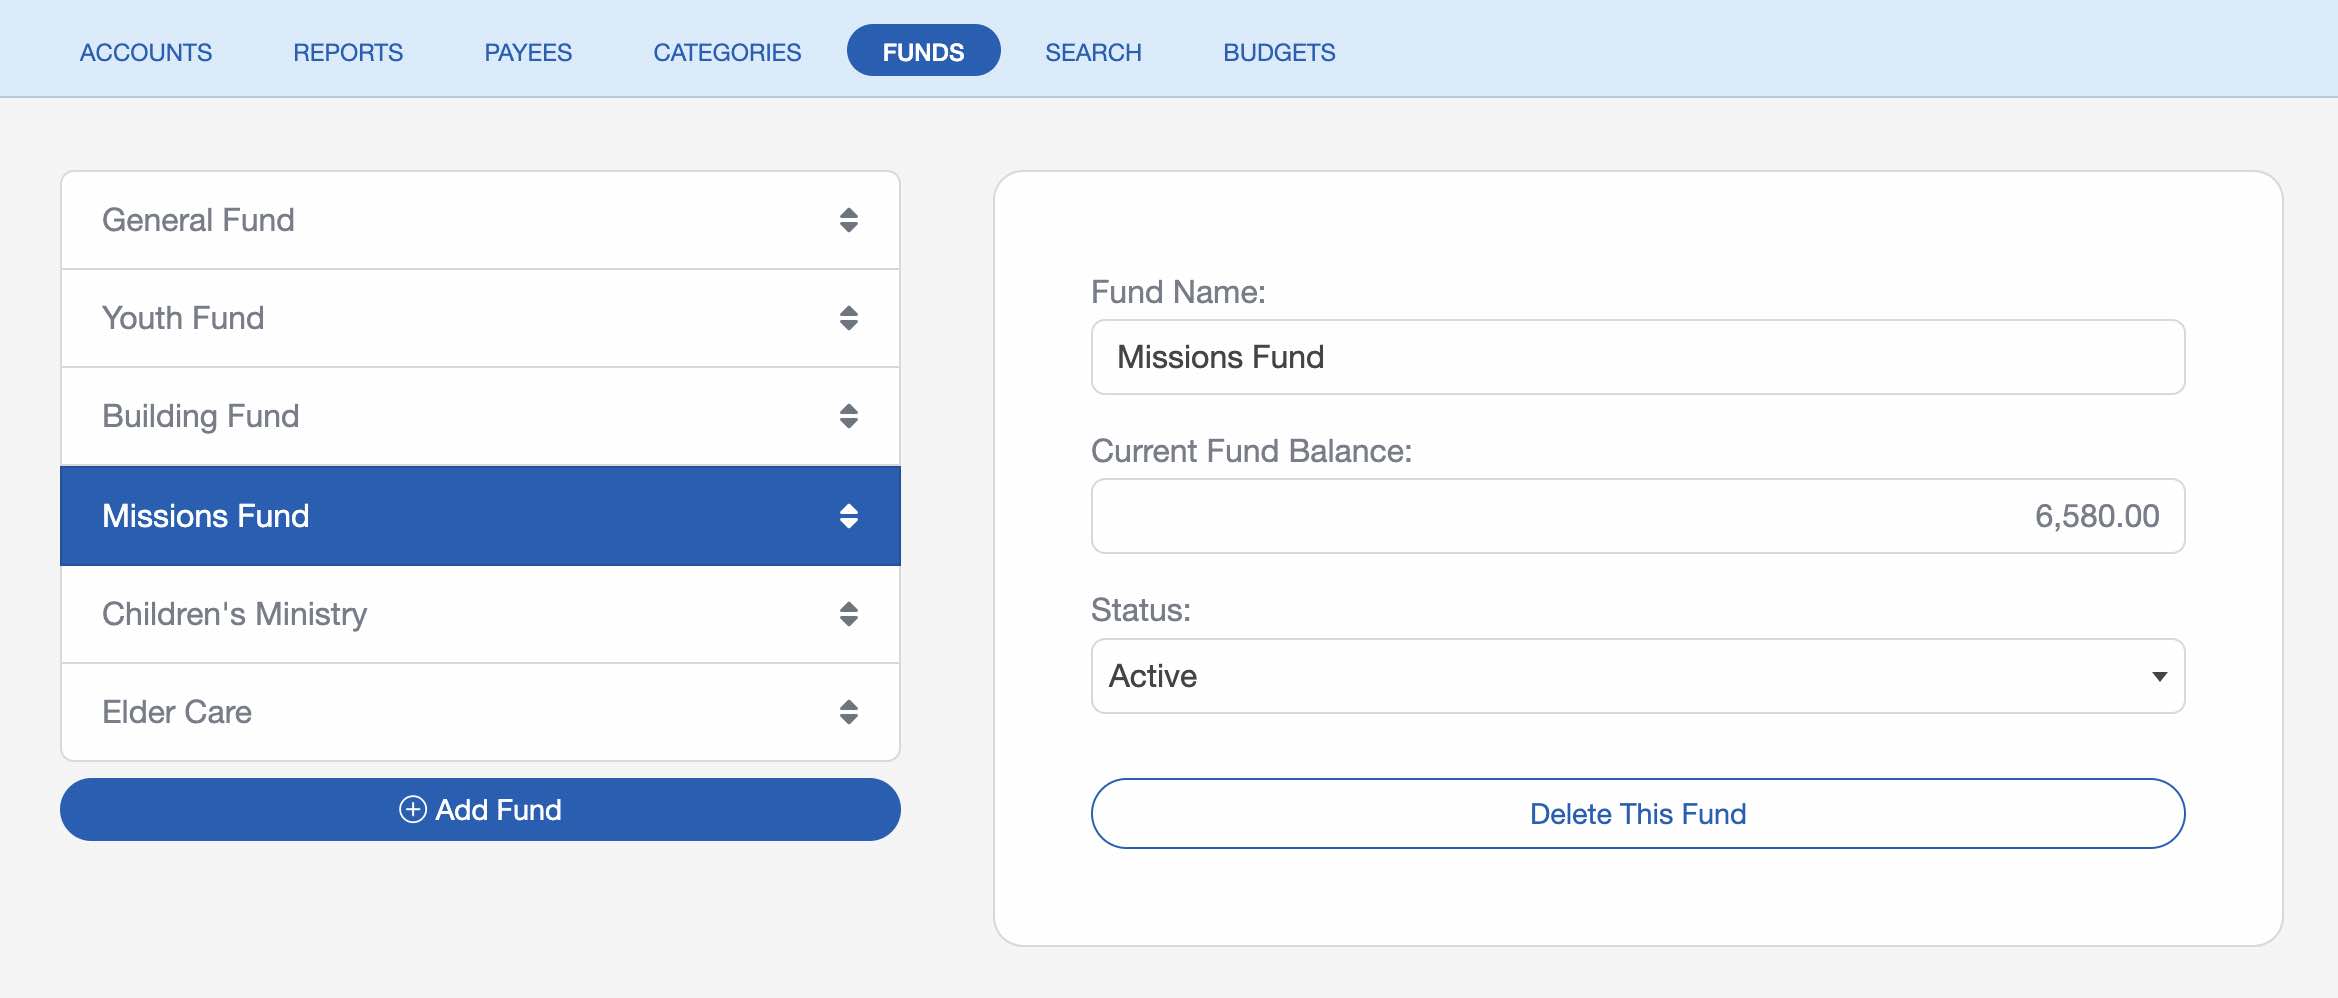
Select the "Funds" tab at the top of the Accounting Screen. The General Fund is already created for you. To add more funds, select the "Add Fund" button.
Your "Current Fund Balance" will be zero. That's okay. Your balance will change in steps 3 & 4 of this process.
Once you have added all of your organization's funds, you will next add your income and expense categories. Learn more about Funds ›
Adding more than 8 funds? Please reach out to our support team to ensure you are setting up your accounting correctly. You will receive a reply within roughly 1 business hour.
Step 2. Create & Assign Categories

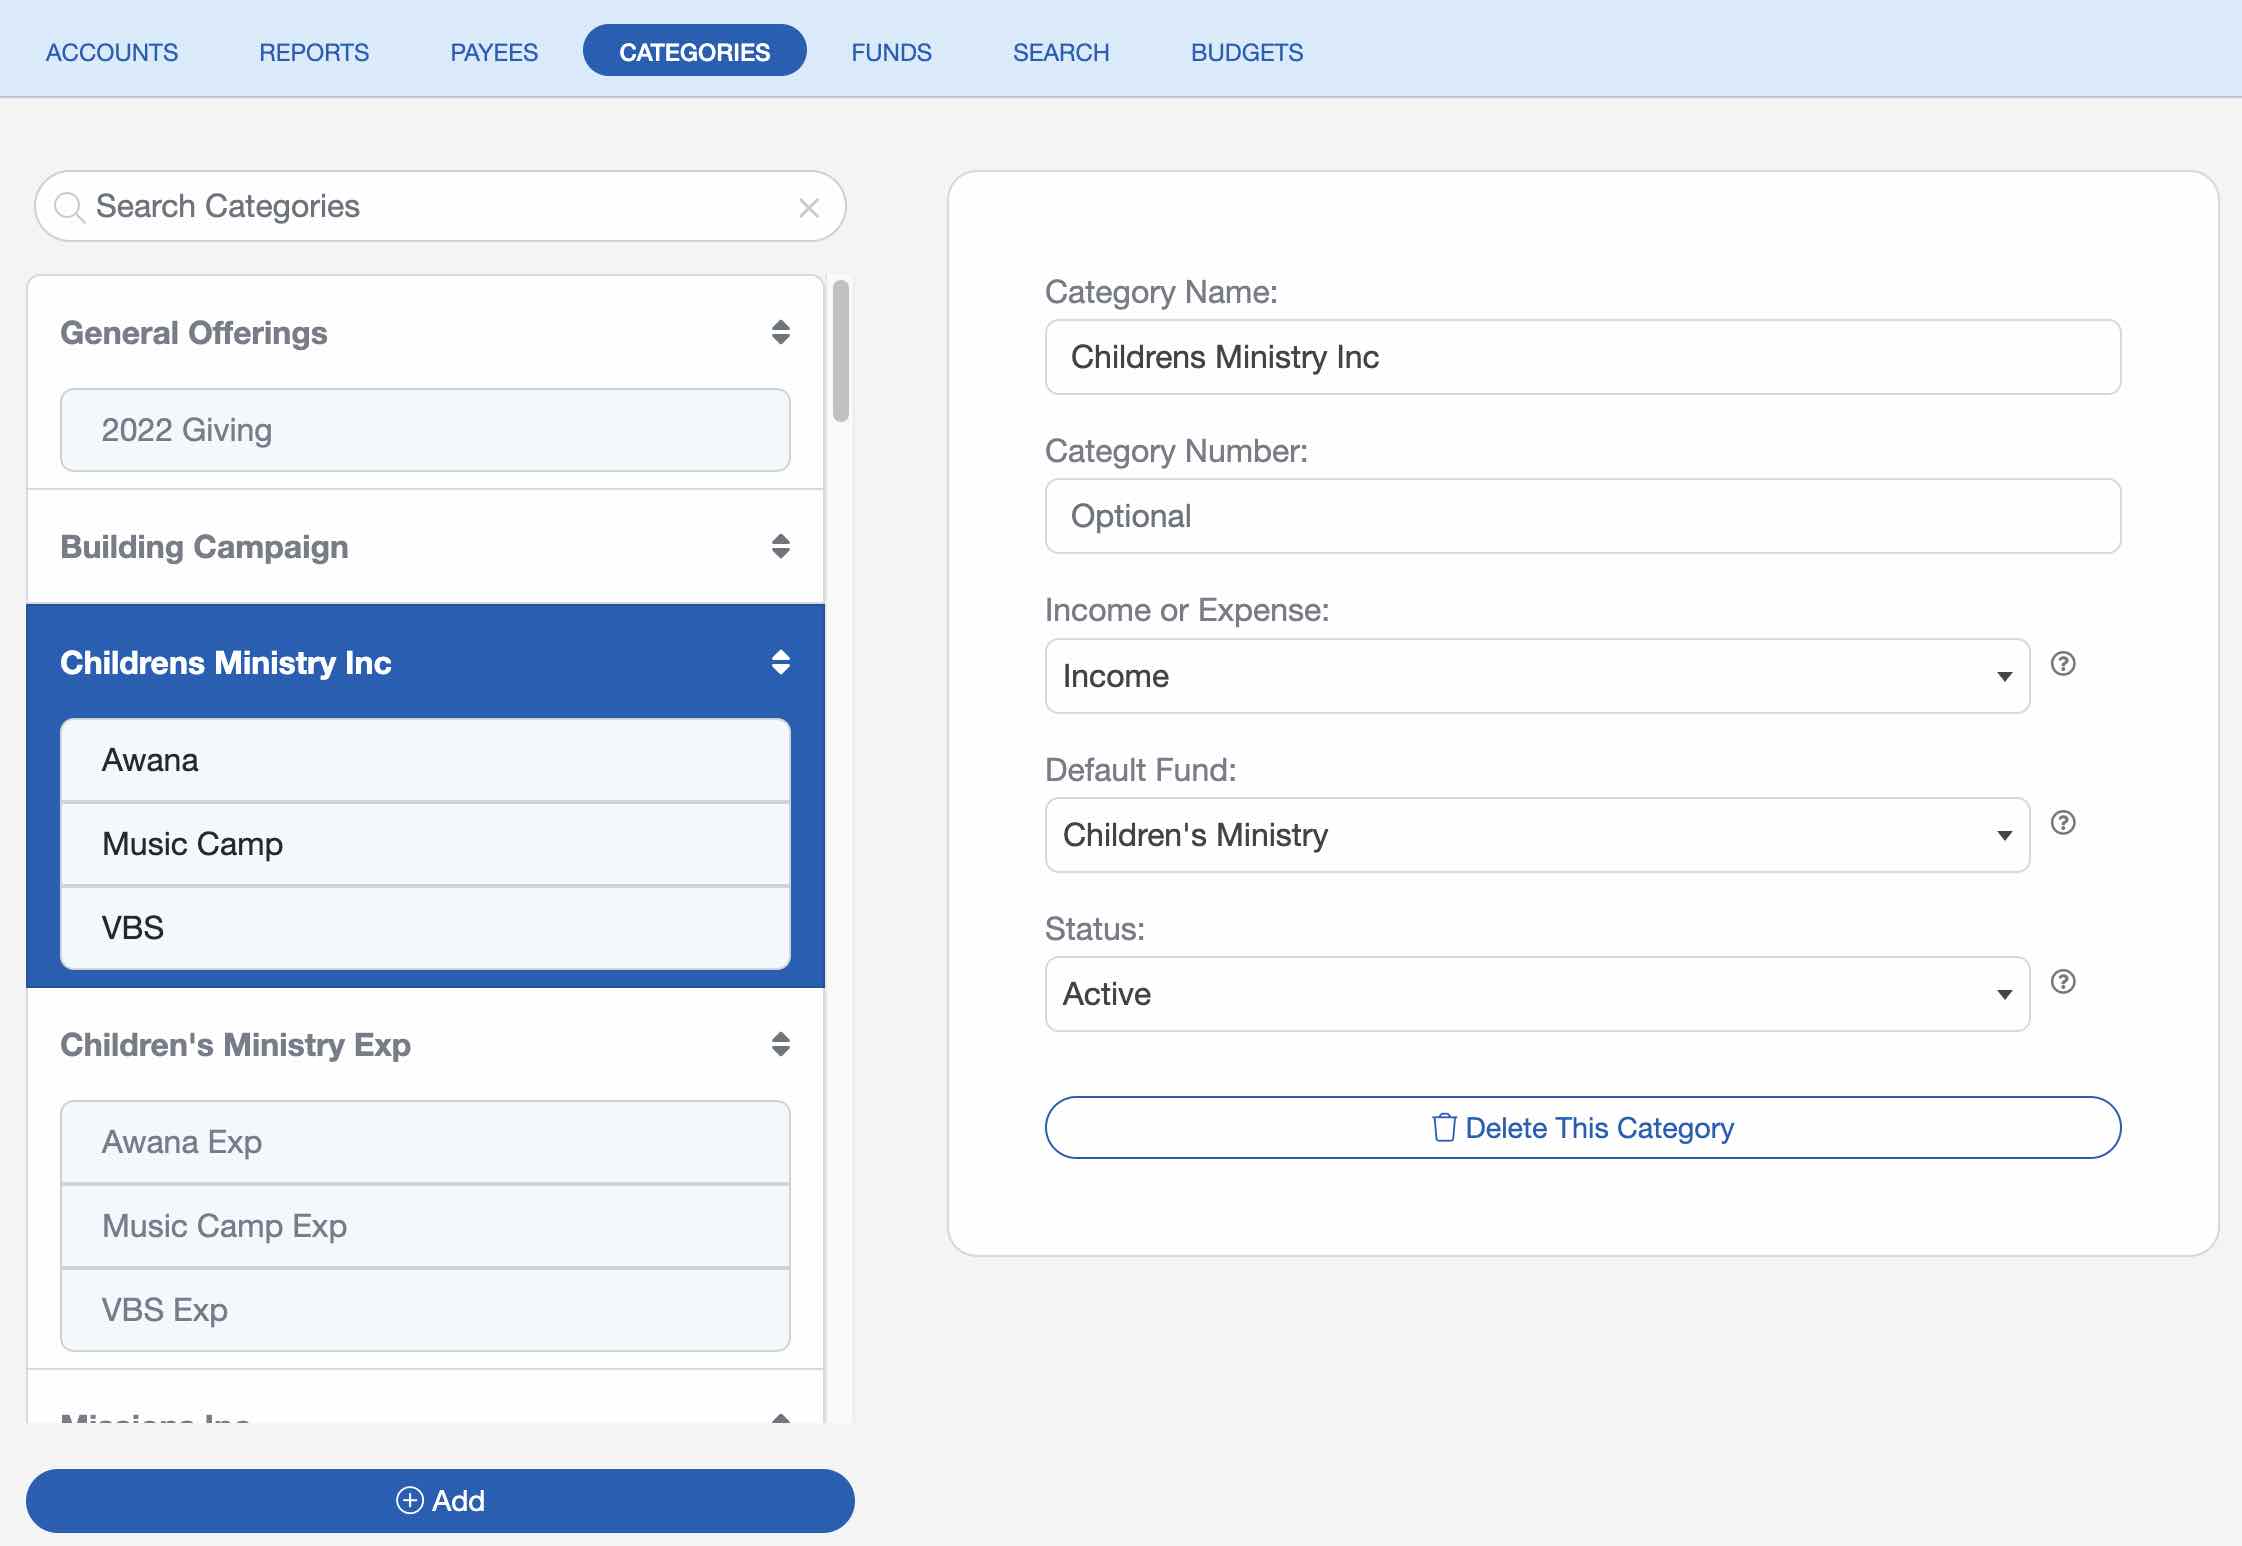
After listing your Funds, select the "Categories" tab at the top of the Accounting Screen. The General Offering category is already created for you. To add more categories, select the "Add" button.
You must also assign each category to a Fund in the "Default Fund" field. This step is crucial. Without doing this, you will not be able to track how money is deposited into or spent from your designated Funds.
Once you have added all of your organization's categories, you will next add your accounts.
If you're switching from another bookkeeping software that uses a "chart of accounts", you will convert many of those over to Categories in ChurchTrac. Learn more about Categories ›
Step 3. Add Accounts
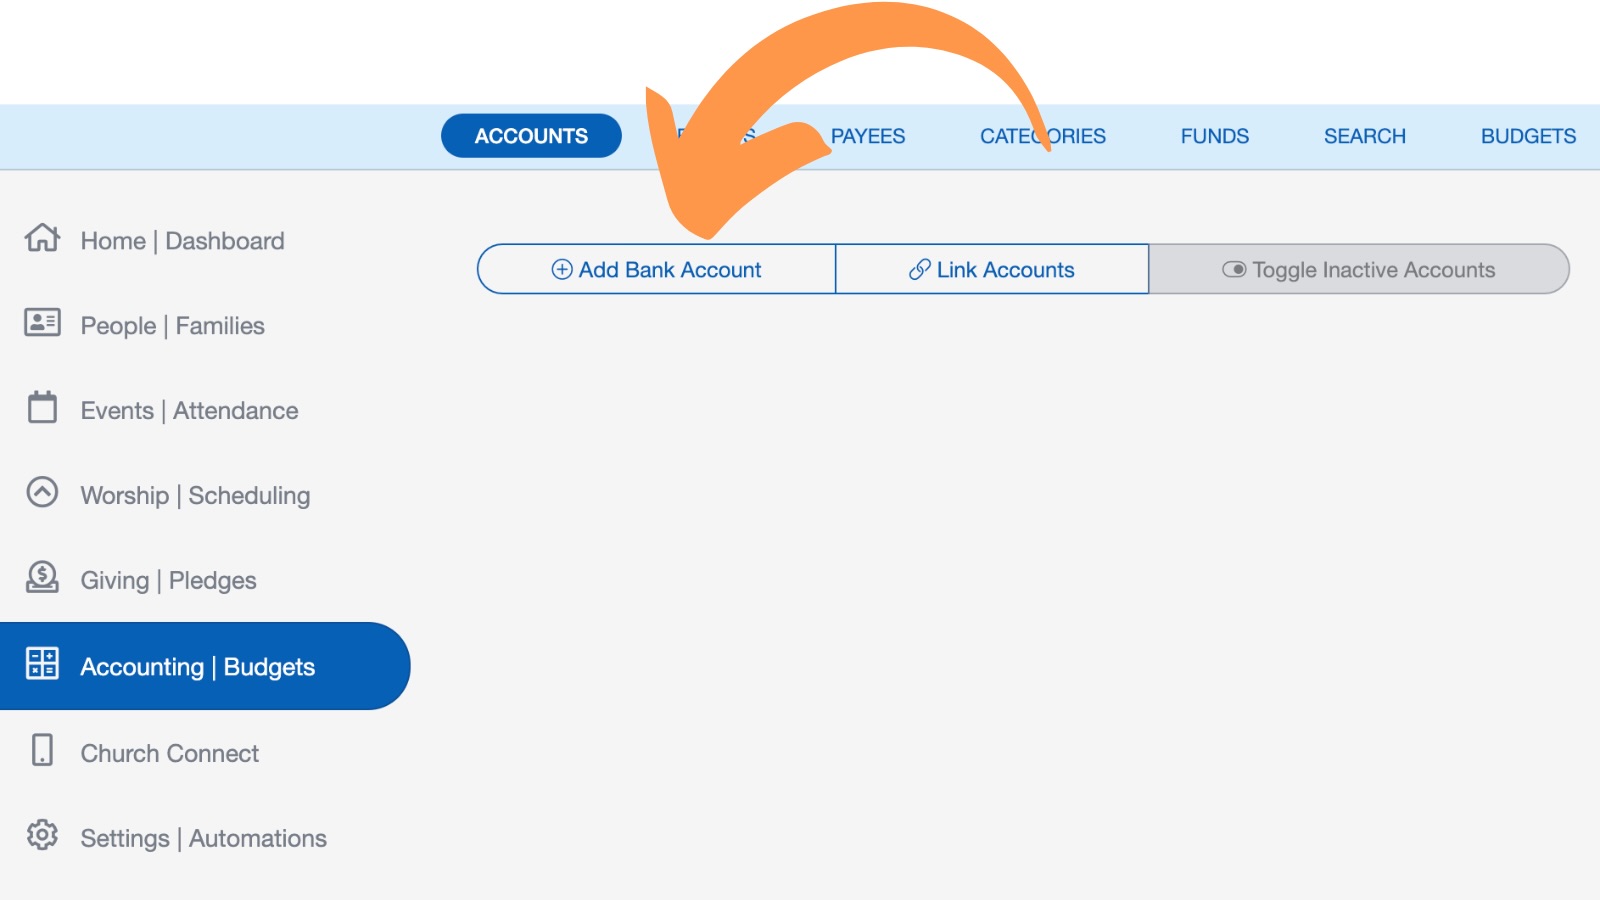
After verifying all of your Funds and Categories are properly listed, select the "Accounts" tab at the top of the Accounting Screen. To add your first account, choose the "Add a New Bank Account" button.

Using your bank or financial statement, enter the required information in each field of the flyout window.
Accounts are not category or fund specific. Though you are only selecting one category and one fund as you enter your beginning balance, you will be able to apply the money in the account to multiple categories and funds in Step 4.
If your church has only one Fund, you're done! But if you need to divide your church's money between multiple Funds, move on to Step 4. Learn more about Accounts ›
Step 4. Edit The Beginning Balance
Once you have added your account(s) to the ChurchTrac Accounting screen, the final step is to divide the beginning balance across multiple Funds. This ensures that your Funds have the proper balance.
To do this, select the account in the Accounts tab of the Accounting screen. Then, select the Beginning Balance transaction, and choose the "Edit" button in the toolbar below.

To divide the money in the beginning balance into multiple Funds, select the "Add Line" button. In the new line, select a Category and Fund you want to apply some of this balance. Whatever amount you enter in this line must be subtracted from the first line.

How to Handle Outstanding Checks When Setting Up Accounting
When you first set up your accounting, you may have checks that were written before your beginning date but have not yet cleared the bank. These are called outstanding checks, and they should still be accounted for so your records match the bank.
Be sure to enter each outstanding check using the date the check was written, not the date it clears the bank. This allows your account balance to accurately reflect funds that have already been committed, even though the bank has not processed them yet.
Example: If you paid your lawn service at the end of January, but the check wasn’t deposited or cleared until February, the check should still be entered with a January date. This keeps your January balance accurate and prevents your February expenses from being overstated.
Step 5. Submit An Accounting Review Ticket
Once you have finished the setup process for your church accounting, create a support ticket with our team for an accounting review. Our team will review your account to make sure that you have setup your accounting properly in ChurchTrac.
Next Steps: Adding Your Transactions Into the Register
Once you've completed the initial set up process for your church accounting and our team has reviewed it, you can begin entering your transactions into the register using one of these three options.
Pro Tips
Attach your monthly bank statement in a journal entry every month so you have quick access to it from within the program.
This will make reconciling so much easier. Your future self will thank you!
Watch the Pro Tip video to learn how.
In Step 1, we recommend adding very few Funds. The fewer funds, the simpler your church bookkeeping will be. If you have Funds numbering in the double digits, there is a good chance you could consolidate or eliminate several.
If you're switching from another accounting software that uses a chart of accounts, your chart of accounts will become categories in ChurchTrac. You will likely have many Categories in ChurchTrac.
Accounts in ChurchTrac are reserved for an actual account from a financial institution (Checking, Savings, Credit Card, Etc...)
Always look over your Funds and Accounts to make sure they reflect the balances in your financial paperwork for your ministry.
Taking a few minutes to have our team review your accounting setup could possibly save you hours of frustration if your church accounting is setup incorrectly.