Getting Started With Giving
The Giving Screen is where you track all donations to your church. You can also create pledge campaigns and create an online giving portal for your members.
- Navigating the Giving Screen
- Giving Screen Setup
- Adding & Editing Contributions
- Reports
- Pledges
- Categories
- Online Giving
Navigating the Giving Screen
The Giving screen is where you record donations, generate contribution statements, manage online giving, and track pledges. Select one of the tabs from the top of the toolbar to access these features.

Actions Button
The "Actions" button in the Giving screen allows you to import donations, lock batches, and view batch reports. Select a batch on the Contributions screen, then select the "Actions" button to choose which action to perform with that batch.

Giving Screen Setup
If you are using the Giving screen for the first time, we recommend you do the following first:
Step 1: Add Your People
When recording a donation, the program requires you to select or add a person to assign the donation to. Adding your people ahead of time makes this process faster.
Step 2: Create Categories
When recording a donation, the program requires you to select a Category. This labels the donation according to the donor's intention.
Create a category for every donation opportunity for your ministry. For example, you can create categories for love offerings, missionaries, in-kind donations, etc.
Step 3: Setup Online Giving
If you will be using the Online Giving feature in ChurchTrac, set that up now. The process is simple and takes less than 30 minutes.
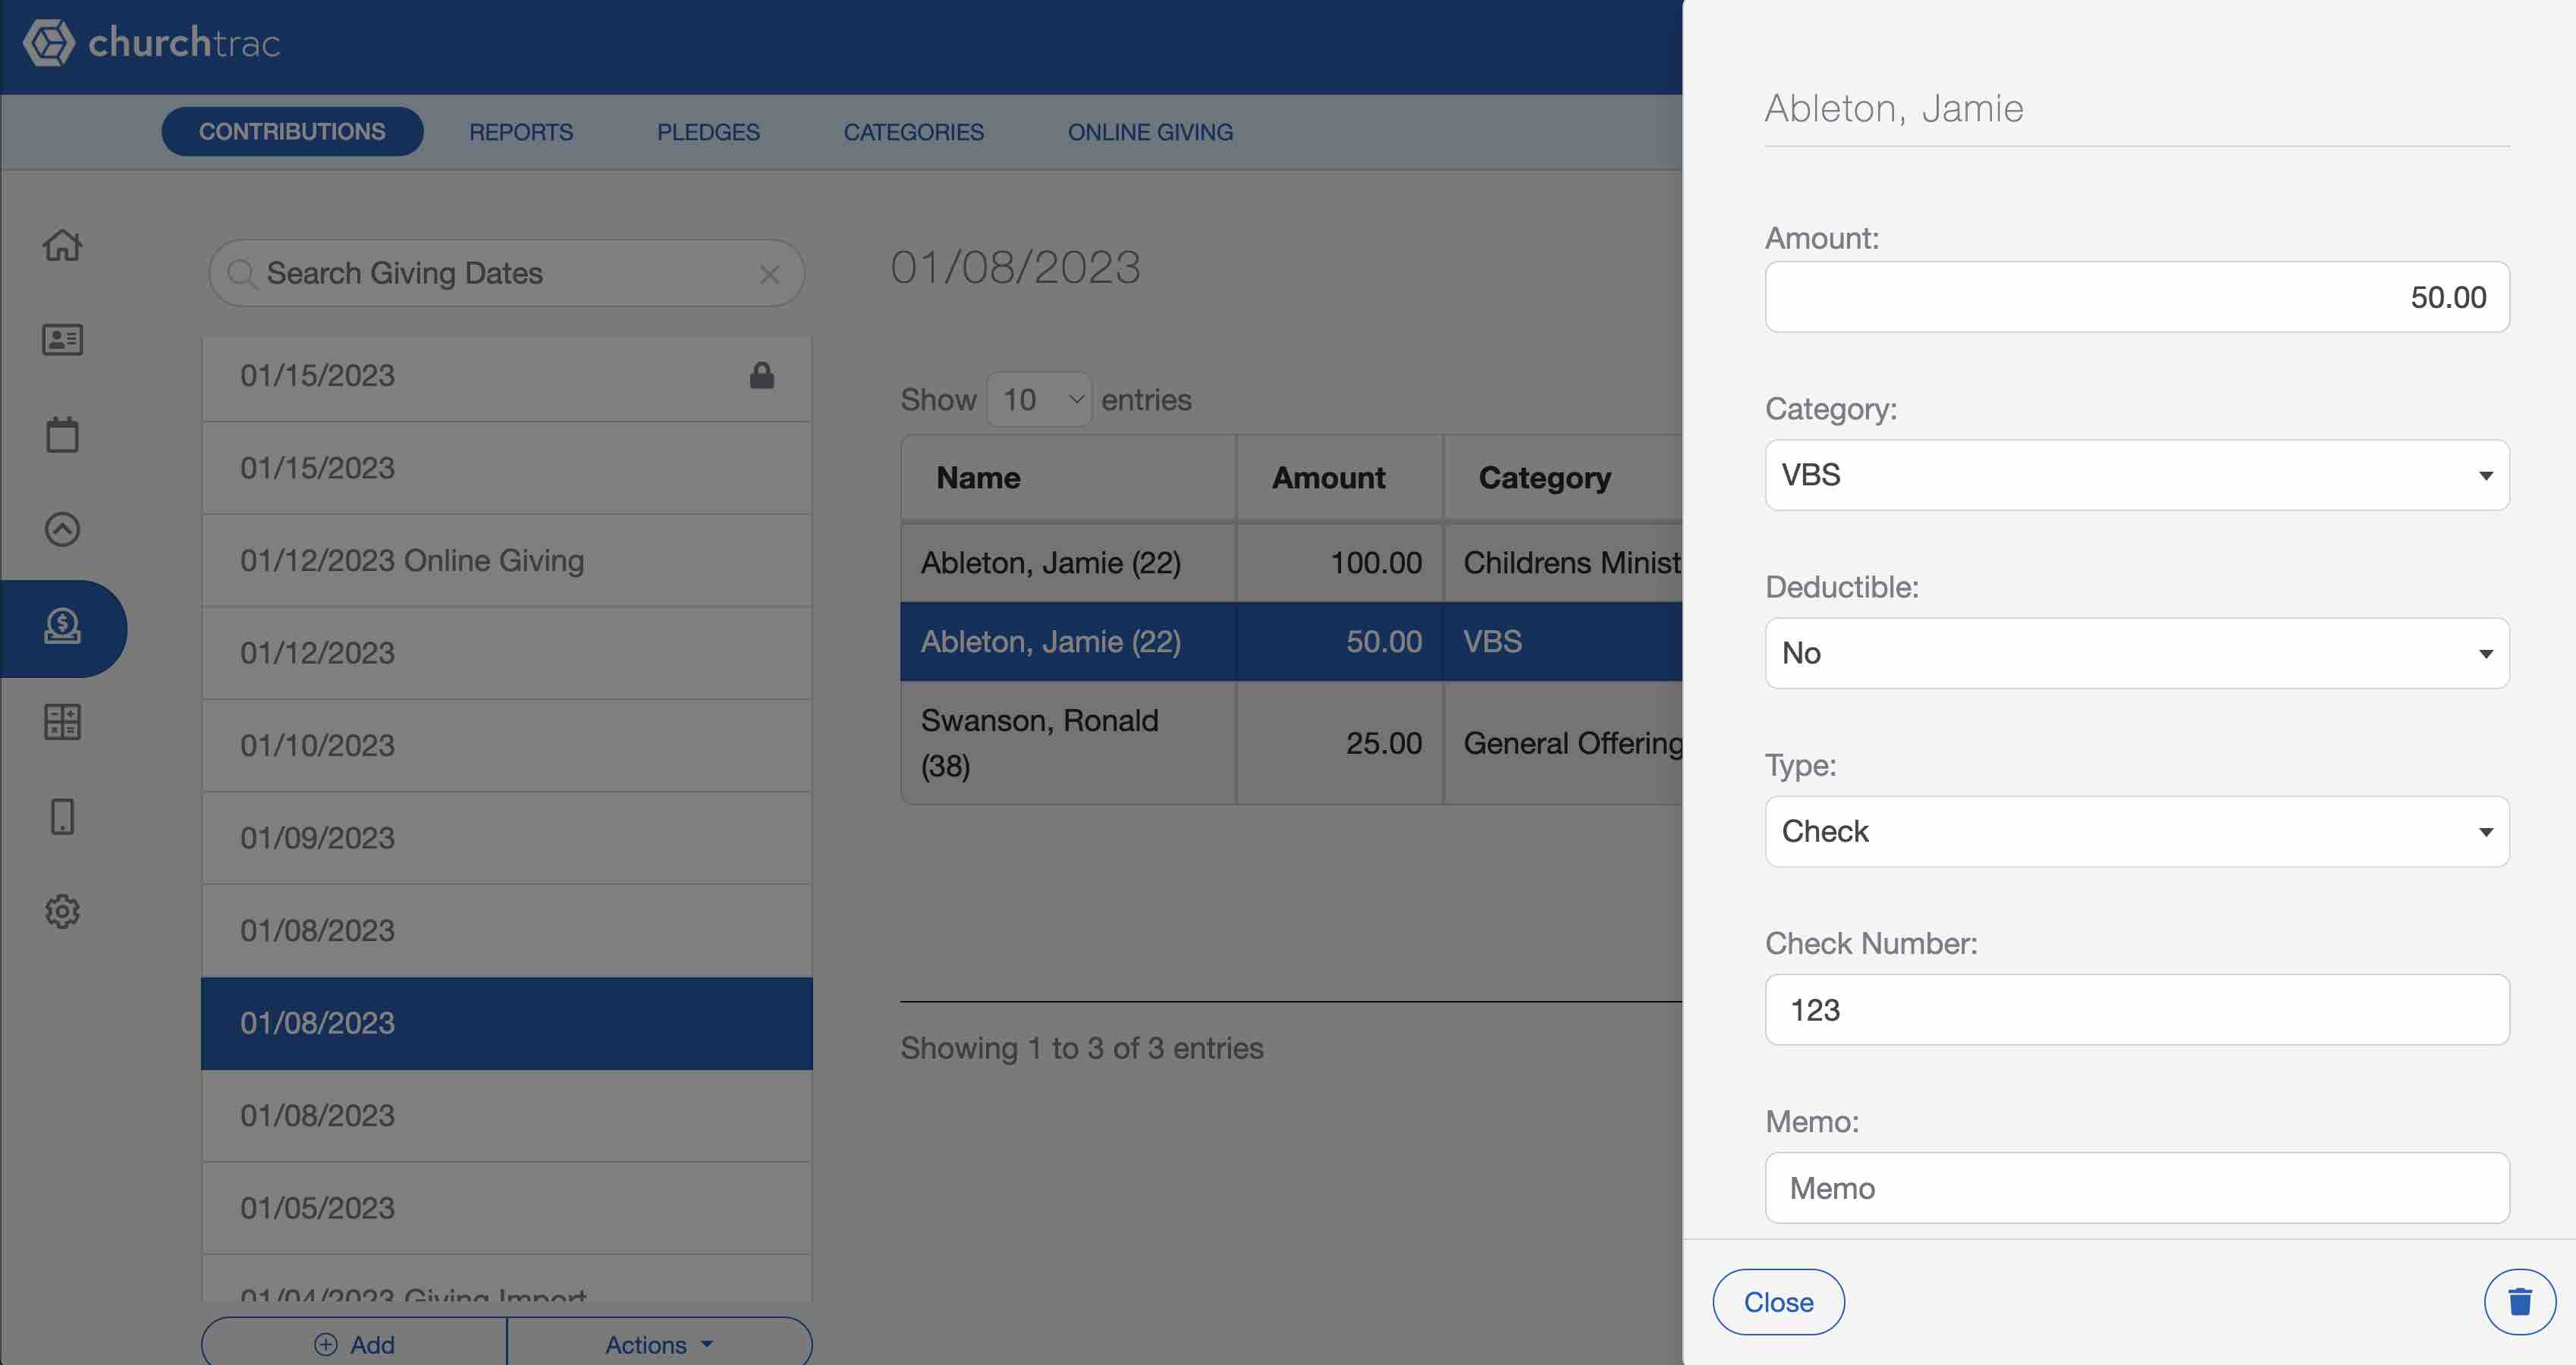
Adding & Editing Contributions
Select the "Add" button. A calendar will appear. Choose the new giving date and select "Add Date."

Once the date has been created or selected, select the "Add Contributions" button on the right side of the screen.

Enter the donor's name or envelope number into the "Name" field. Then highlight and select the name you wish to add. For names to show up in this field, they must already be entered on the People Screen.

Enter the amount, select a category for the contribution, and indicate whether or not the contribution is tax-deductible. You also have the option of entering a note in the memo field.
Recording Multiple Donations
To record multiple donations for a donor, select the (+) button to the right of the memo field.

Recording Online Donations & Fees
When entering Online Giving transactions from a 3rd party provider such as Tithely or Paypal, always record the FULL amount donated by the donor. Do not subtract any fees associated with online giving; enter the total donation as it was given to ensure accurate records. If you attempt to subtract online giving fees within the Giving Screen, your reports will not be correct.
If you are using ChurchTrac Accounting, create an Online Giving Fee expense category to track your online giving fees.
Unmatched Online Donations
Sometimes you may see this prompt when there are online donations that have not yet been matched. This happens when someone makes a donation but their name has not been added to your database. The system will notify you, and you will need to add the donor’s name so the donation can be properly matched. Click the prompt to manually complete the match.

Recording Cash & In-Kind Donations
Each contribution must be assigned to an individual. When you have a contribution from an anonymous donor, it must be assigned to an individual when entering the donation on the contribution screen. Check out the Entering Cash Donations article to learn more.
In the U.S., the IRS rules state that the donor determines the value of a non-cash contribution. Read the Recording In-Kind Donations to learn how to record these donations to remain compliant.
Editing & Deleting Contributions
Select the giving batch, then select the donation that needs editing. The edit flyout menu will then appear. To delete a contribution, select the Delete button. If the donation was incorrectly assigned to a different person, delete the contribution and re-enter it under the new name.
Reports
The Reports tab is where you will find the contribution statements and several other reports you can use to oversee your ministry's giving data.
Select a date range at the top of the screen, then select which report to run. You can generate most Giving reports in either PDF or CSV file format.

Pledges
The Pledges tab is a tool that lets you track fundraising campaigns and monitor your progress toward your goal. You can record who is participating in the pledge campaign, how much they have pledged to give, and how much they have donated toward their pledged amount.

Categories
Use the Categories tab to create giving categories to label your donations.
Categories allow you to label donations according to the donor's intention. You can customize the categories in the Categories tab.

Online Giving
ChurchTrac Online Giving lets your donors give online, set up recurring donations, and cover the fees. This feature will simplify donation tracking and make it easier for your members to support your ministry.
