Brother 810W Printer Setup - Windows
The following instructions will assist you in setting up the Brother QL-810W printer driver for your Windows computer to use with the Family Check-In feature in ChurchTrac.
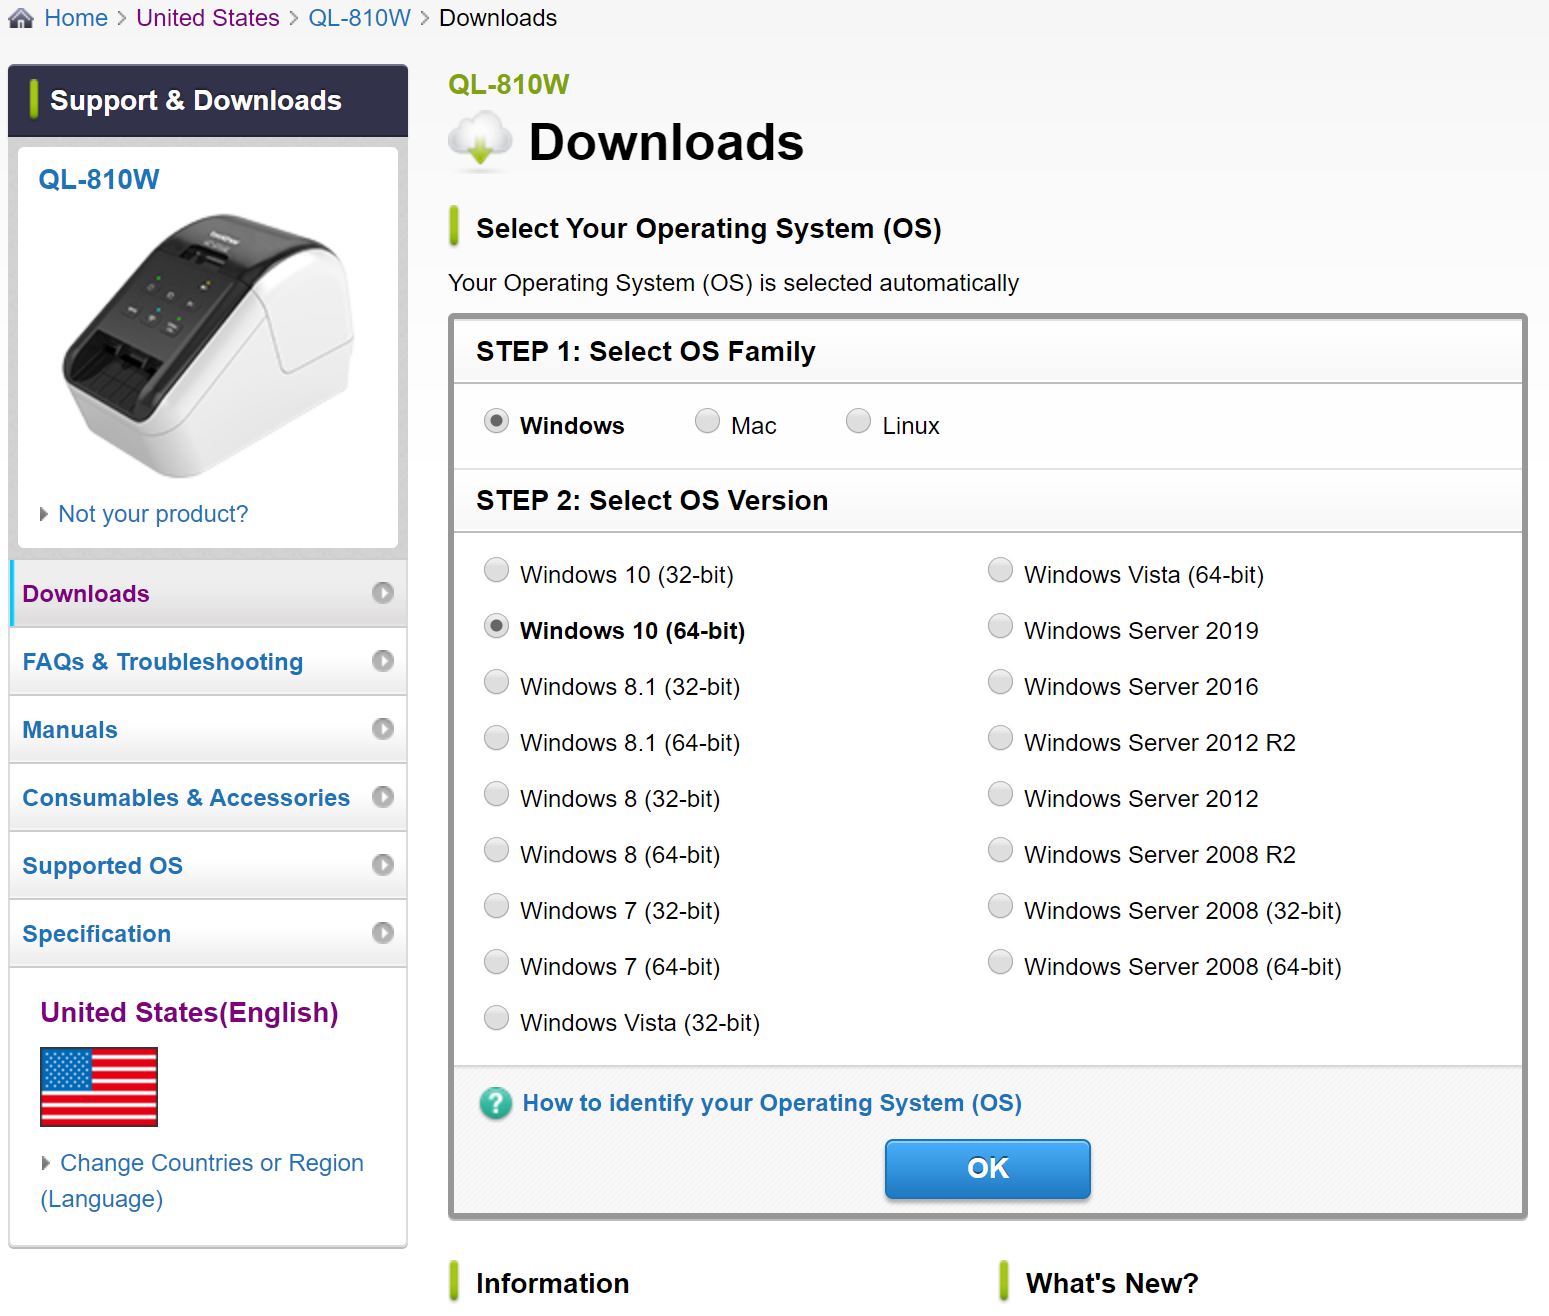
Please use the link below to download your specific printer driver:
Brother 810W DriverStep 1
The device you are using will automatically be recognized and you will be prompted to download the correct driver for your device. On the next screen, choose the Printer Driver installation.
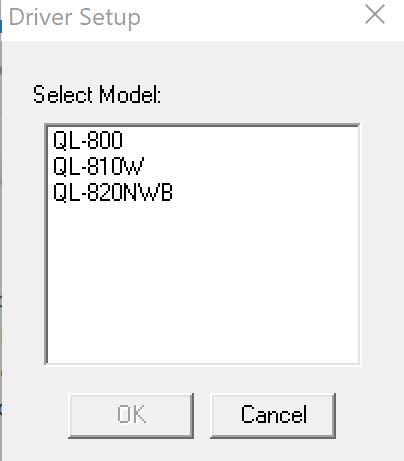
Step 2
Before the installation starts, you will want to make sure the wi-fi is activated on the printer. Do this by pressing the () button until it lights up blue. After that, choose the QL-810W from the list of devices to install.
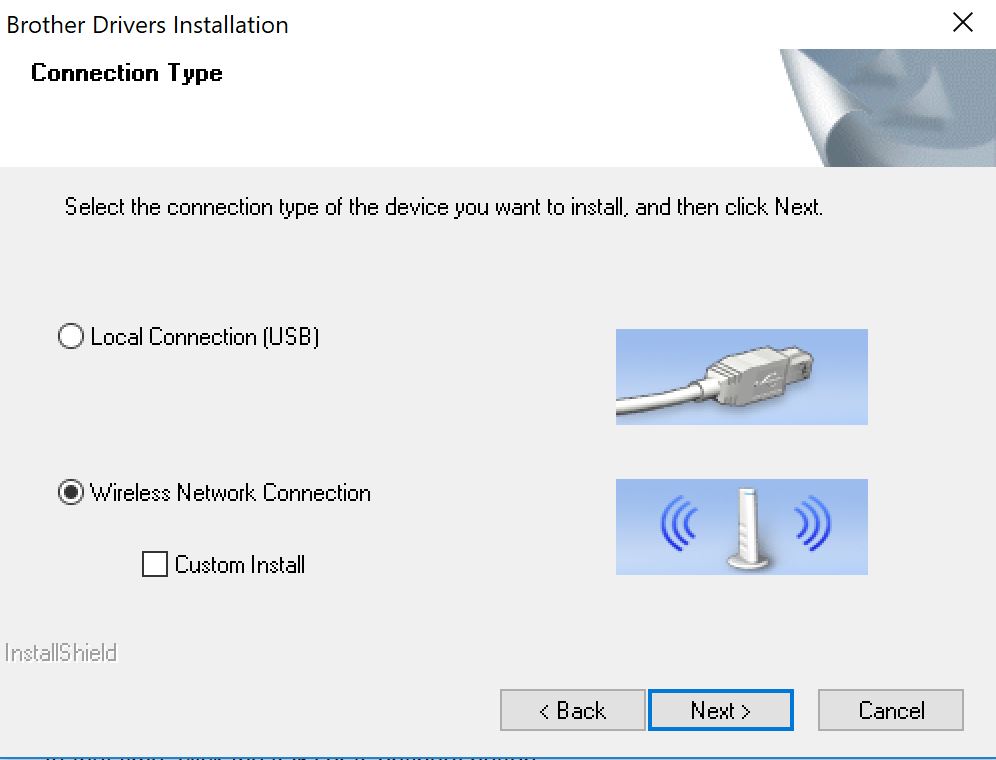
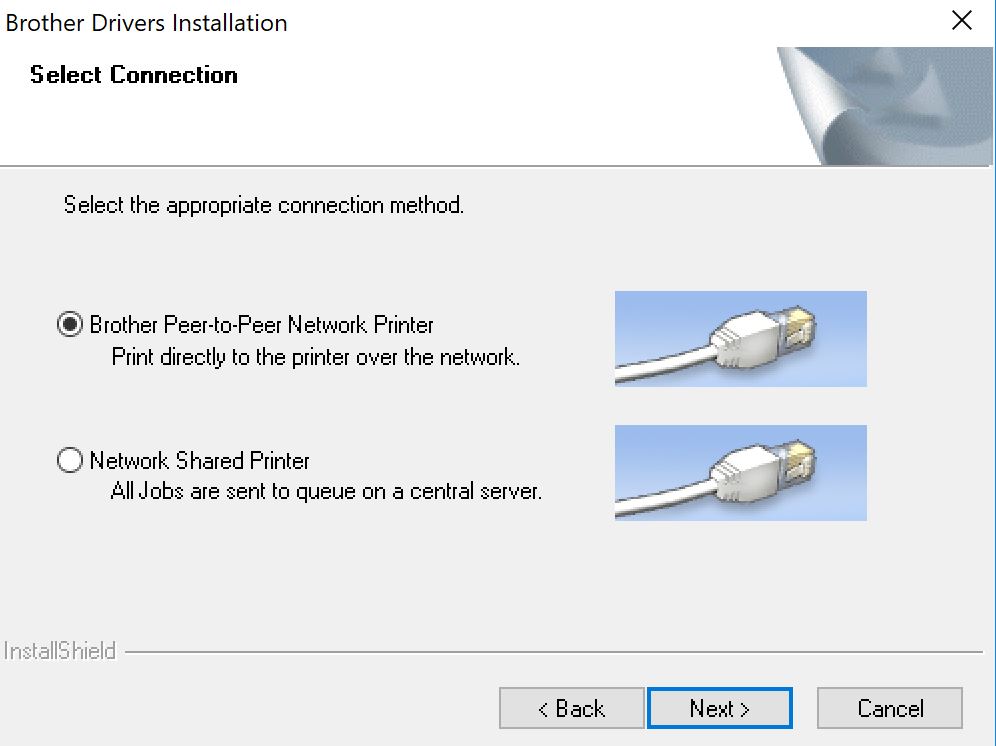
Step 3
You will then want to choose the Wireless Network Connection with Peer-to-Peer to install the printer to work wirelessly.
Step 4
Choose the printer from the list of local devices available, and this will be the last step for installing the printer onto the network and your device.

Step 5
Now that the printer has been added to your computer, you will need to navigate to the Brother Printing Preferences screen from the Windows Settings section.
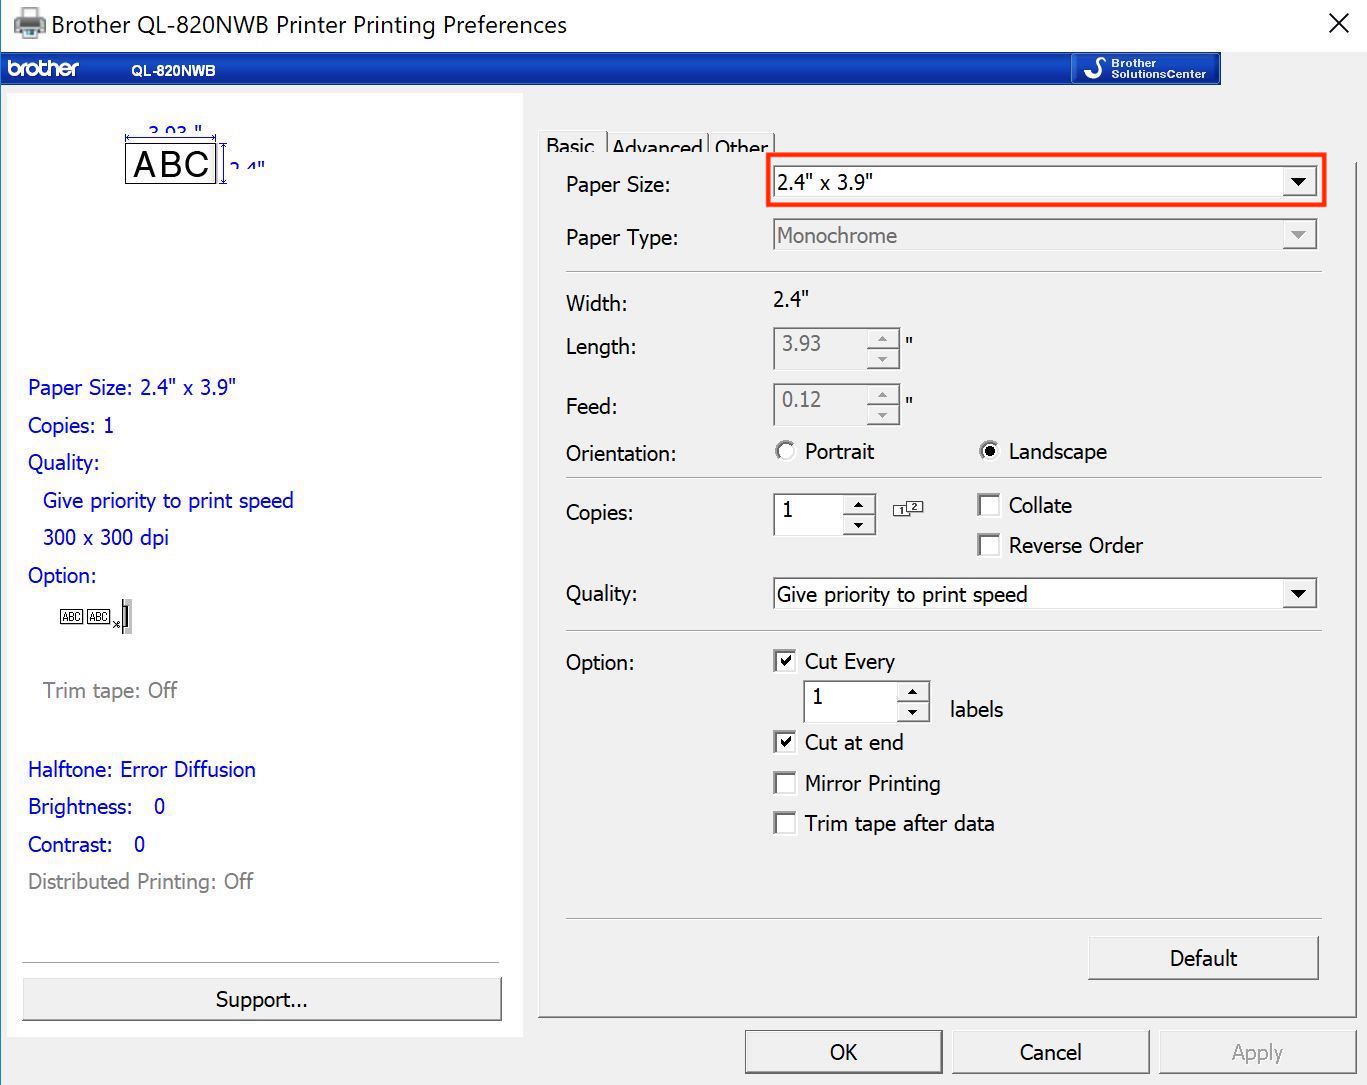
Choose the correct paper size(either 2.4" or 2.4"x3.9" depending upon your label roll) and click 'Apply'.
Once your printer has been added with the steps above, you are all set to go with printing your labels. Please refer to our Using Check-in article for how to get started!