ChurchTrac Logo
 Help Topics / Questions / How do I create a screen shot?

How do I create a screen shot?

Taking a Screenshot on a Mac

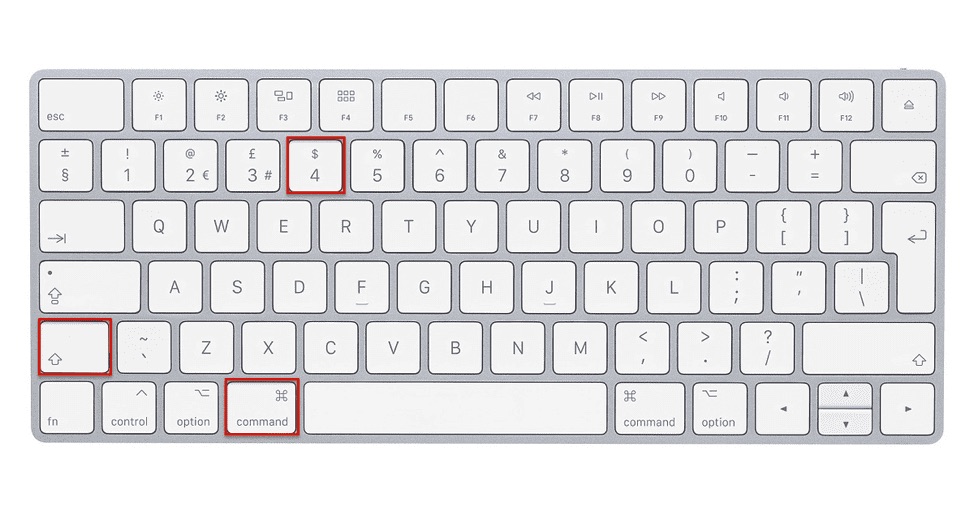
To take a screenshot on a Mac, press [Shift + Command + 4]. This screenshot will appear on your desktop. From there you can attach it to the support ticket.

Taking a Screenshot on a PC

To take a screenshot on a PC, press [Windows key + Print Screen key]. Your screen will briefly go dim to indicate that you've just taken a screenshot, and the screenshot will be saved to the Pictures > Screenshots folder. 

Taking a Screenshot on an iOS device with a home button

Press and hold the Sleep/Wake (on/off) button on the top of your iPad. Quickly click the Home button at the bottom of the screen. The screenshot will be saved to your Photos app on your iOS device.

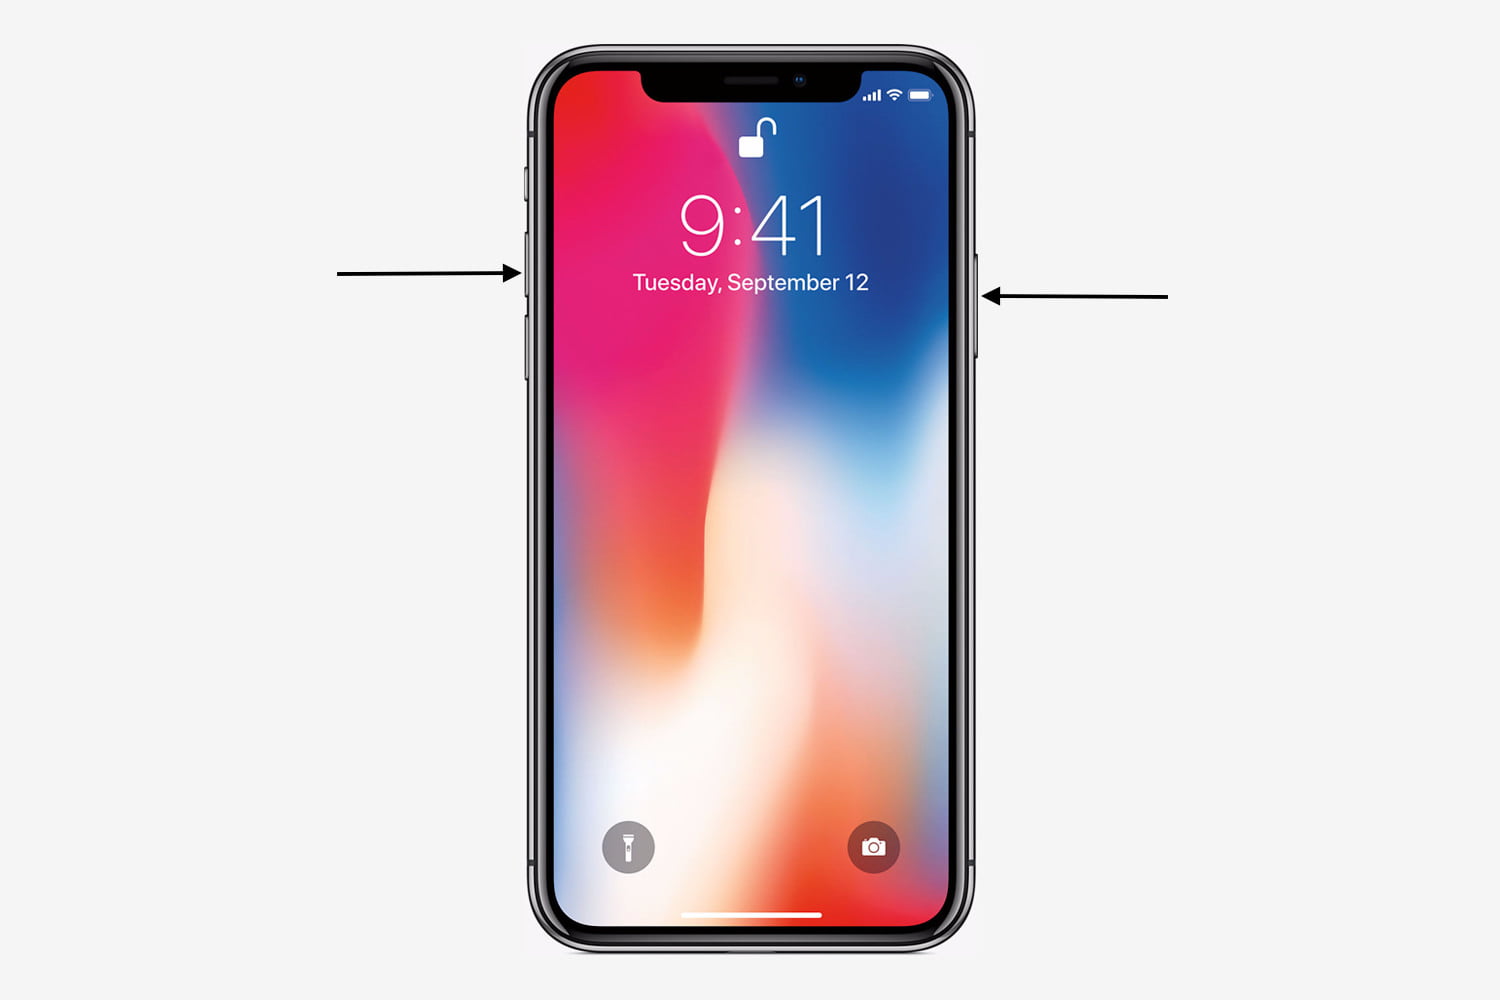
Taking a Screenshot on an iOS device without a home button

Press the Side button and the Volume up button at the same time. Quickly release both buttons. The screenshot will be saved to your Photos app on your iOS device . 

ChurchTrac Logo

Your All-In-One Church Software.

Facebook Twitter Youtube Vimeo

Products & Features

Donations and Online Giving Church Website Builder Church App Builder People & Messaging Events & Attendance Child Check-In Church Automations Church Accounting Worship and Scheduling Custom Built Websites Accounting Service Security & Integrations

How We Compare

ChurchTrac vs Planning Center ChurchTrac vs Tithe.ly ChurchTrac vs Realm ChurchTrac vs Breeze ChurchTrac vs QuickBooks See all comparisons

Software Solutions

For Church Plants For Small Churches For Mid-Size Churches

Company

About ChurchTrac Terms of Service Privacy Policy

Quick Links

Login to Your Account ChurchTrac Pricing Start a Trial Getting Started Join a Live Demo Contact Us | Tech Support

Recent Posts

  • How The One Big Beautiful Bill Act Impacts Charitable Giving
  • Released: ChurchTrac Worship App
  • Worship & Scheduling Updates 2026
  • Upbeat Easter Worship Songs [2026]
  • Top 20 Good Friday Songs and Hymns for Worship
  • View more blog posts...