Using Meta Pixel on Your Domain
The Meta Pixel is a piece of code churches can add to their website to track visitor activity, measure online outreach effectiveness, and retarget potential attendees with Facebook ads. This guide walks you through setting up the Meta Pixel and linking it to Church Connect.
Initial Setup
To begin using the Meta Pixel, you'll first need to create it within your Meta Business Suite. For a comprehensive walkthrough on creating and setting up your Meta Pixel, please refer to Meta's official guide. Learn more ›
Finding Your Meta Pixel
To find your Meta Pixel ID, start by logging into your Meta Business Manager account. Once you're in, navigate to the Events Manager by selecting the menu icon in the top-left corner and selecting "Events Manager" from the dropdown.
Inside Events Manager, you'll see a list of data sources. Select "Pixels" to view all the pixels associated with your account, then select the specific pixel you want to use.
Your Pixel ID—a unique 16-digit number—will be displayed on the main overview or details section of the selected pixel. If you need a visual guide, you can check out this video for step-by-step instructions.
Linking Your Church Connect
First, copy your Meta Pixel ID by following the steps above to locate it in Meta Business Manager. Once you find the 16-digit Pixel ID, copy it to your clipboard. Next, log into your ChurchTrac account and navigate to the Church Connect screen. Then select the Connect Setup tab -> Site Tracking.
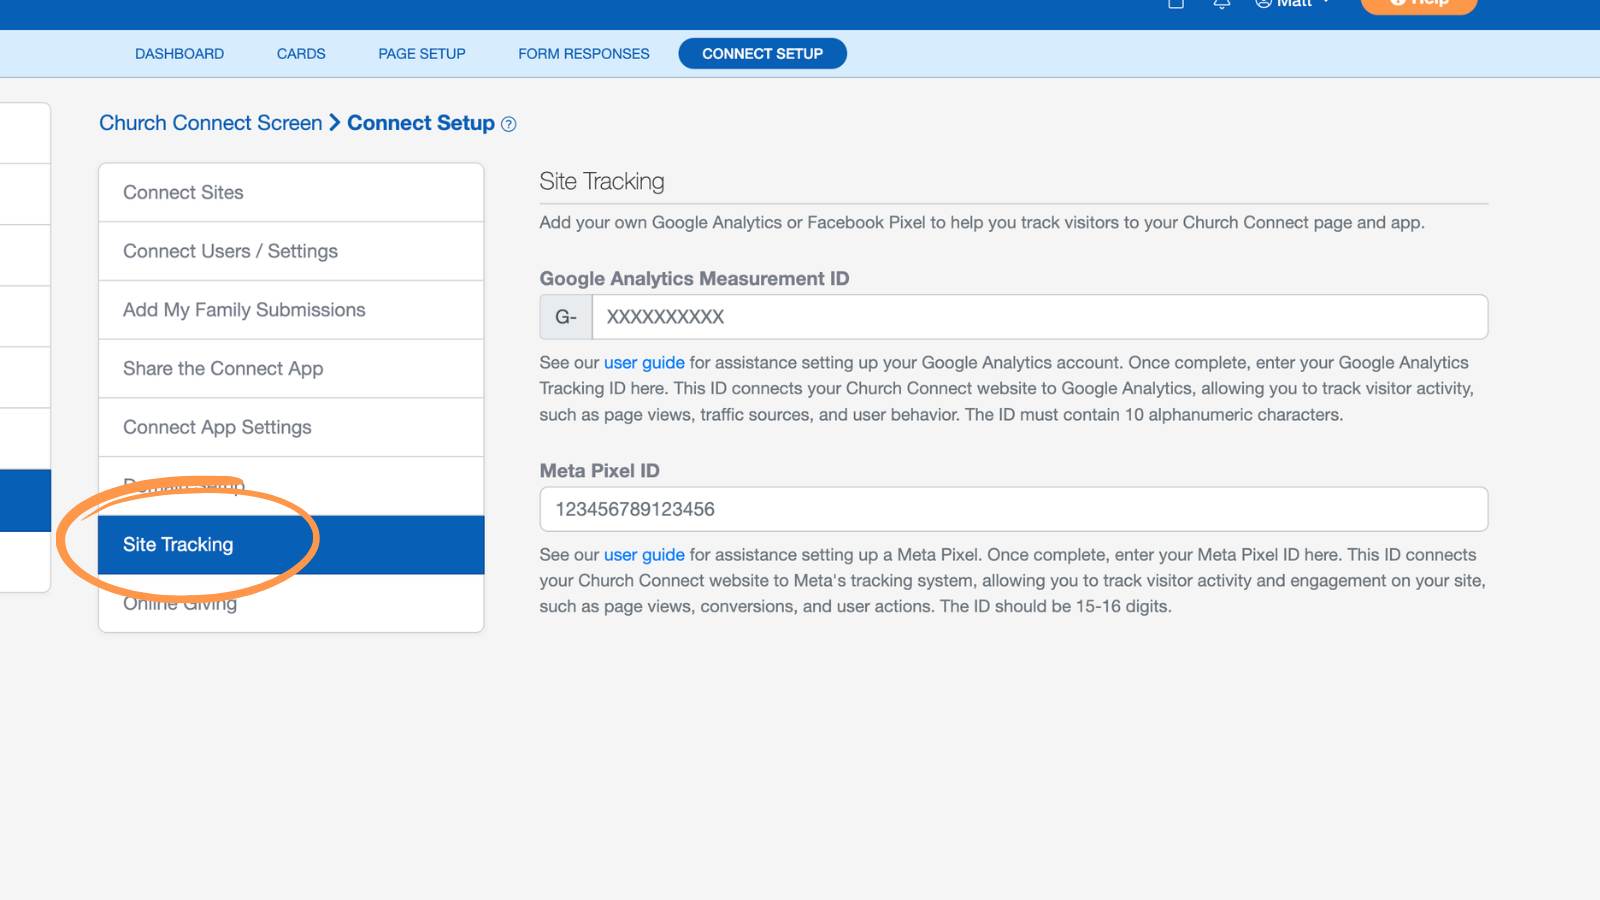
You'll see a field labeled Meta Pixel ID. Paste your copied Pixel ID into this field and select Save to apply the changes.
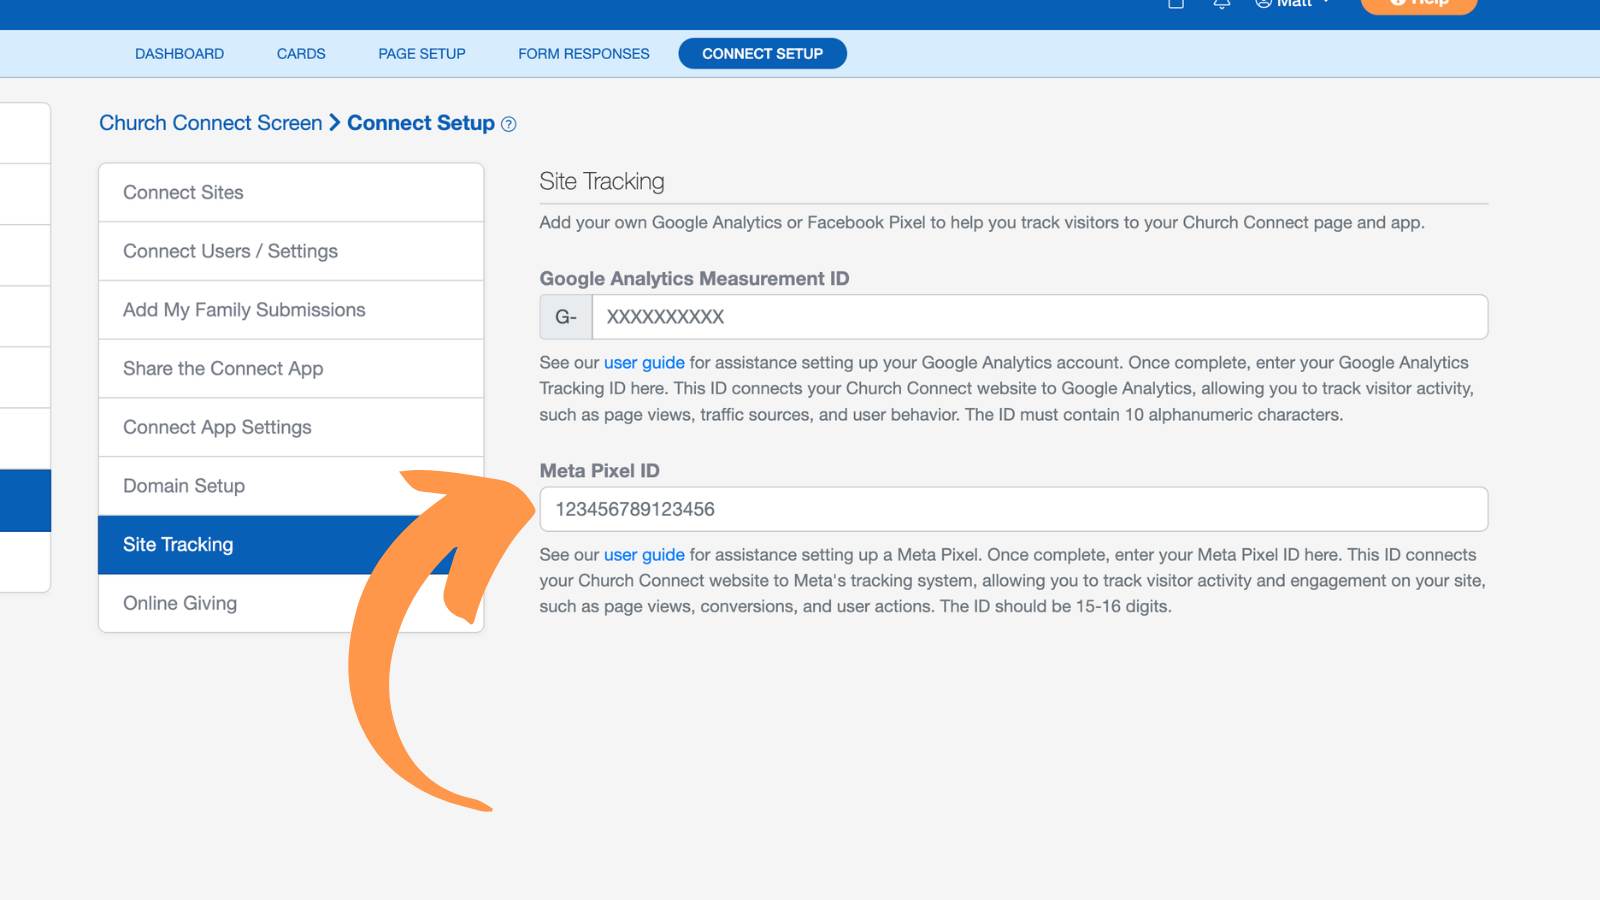
Once saved, your Meta Pixel will be active on your Church Connect site, allowing you to track visitor activity and engagement.