Getting Started With People
The People Screen is your church database where you keep track of all your people, including members, children, prospects, and visitors.
- Navigating the People Screen
- Initial Setup
- Adding/Editing Names
- Commonly Used Functions
- Messaging
- Reports
- Setup Tab
- Pro Tips
Navigating the People Screen
Use the toolbar menus to access the main features of the People screen, including People (your database), Messaging, Reports, and Setup.

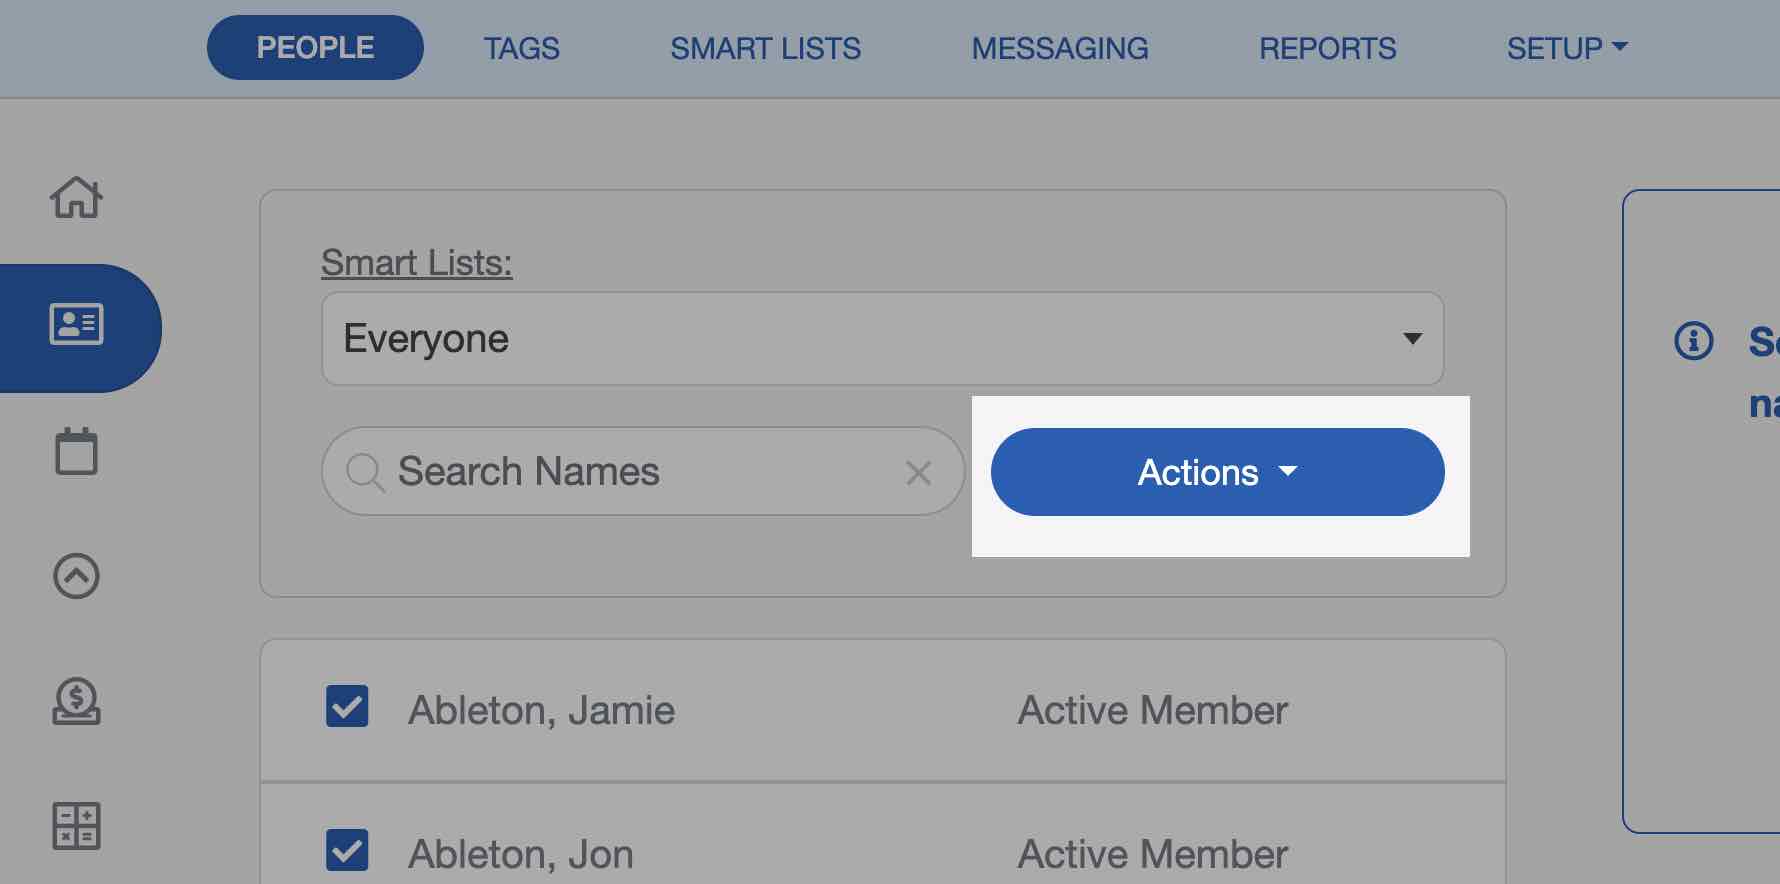
Actions Button
The "Actions" button in the People screen allows you to Add Names/Families, setup Automations, view Archived Names, Merge Names, Check All/Uncheck All, access your Add My Family QR code/setup, send a SMS Message to checked names, and Bulk Edit checked names. Notice the checkbox to the left of each individual's name. You can manually check the names you would like to work with, or you can select a Smart List of names or select "Check All" from the actions button to select all.
Initial Setup
Follow these recommended steps to get your People screen set up before adding names and families.
Step 1: Edit Member Statuses
Select one of the example individuals in the People screen, then select the "Edit" button above their profile.
Scroll until you find the "Member Status" field, then select the "Edit List" button to the right.

In the slideout menu, make any changes to the terminology to reflect the nomenclature that your ministry uses to refer to its members. Learn more about Church Member Statuses ›
Step 2: Edit Age Categories
Select one of the example individuals in the People screen, then select the "Edit" button above their profile.
Scroll until you find the "Age Category" field, then select the "Edit List" button as shown:

Make any changes to the age groups to reflect how your ministry divides members by age. Learn more about Age Categories ›
Step 3: Create User-Defined Fields
Select the "Setup" tab at the top of the People screen, then choose the "User Defined Fields" option.

Select the "Add a New Field" button in the top-right corner to begin adding a custom field to your People database. You can add a field to everyone's individual section or Family section.

Create as many fields as you need. These can be baptism dates, wedding anniversaries, or any other information you want to keep track of for your members. Learn more about User-Defined Fields ›
Step 4: Create Smart Lists
Adding Smart Lists before adding names isn’t necessary, but it’s helpful to have your lists already in place. As names are added, the system will immediately sort those people into your lists. That way, your database is organized from the very beginning! Learn more about Smart Lists ›

Adding/Editing Names
After completing the initial setup steps above, it’s time to start building your People database by adding names and families.
You can add names manually, use the Add My Family feature, or have us import your people data for you if you're coming from another platform.
Adding an Individual
To add a single person, select "Add Names/Families" from the "Actions" menu or use the "Add a Name" button on the right side of the People screen.

From the slideout menu, enter the person’s information. The first and last name fields are required, but all other fields are optional.

You can enter additional details for the individual or family from the Add Name window by selecting the “...” button to the right of the New Name field. These details can also be added or updated later by editing the person’s profile on the People screen. Administrators can customize which fields appear in the Add Name window by navigating to: Settings Admin Settings Add Name Settings.

Each new individual automatically creates a new Family record. If you’re only adding one person (for example, a visitor or single adult), you can leave it as-is.

Adding a New Family
When adding multiple members from the same household, enter the head of household, as shown in the steps above, first.
Then, choose “Add Another Family Member” to include additional family member details before saving.

After saving, you’ll see both names listed as individual profiles, but visible within each other’s Family sections on the People screen.

Using an Existing Family
If the family already exists in your database, select “Use an Existing Family” from the Add Name window. This ensures that all members are properly grouped together under the same household record.

You can select the "Family" icon to view a quick snapshot of all family members.

You can also scroll down to the "Family" section within a member’s profile to see detailed information.

Editing a Profile
After a name has been added, you can update or add additional information at any time. Select the person's name from the People screen, then select the "Edit" button above their profile.

Next, choose "Edit Profile" to make your changes.

You can also upload an image of an individual or a family in your church database. When editing a profile, either click or drag and drop the image to upload.

Commonly Used Functions
Once your People database is established, there are a few things you will need to know to manage the database going forward.
Changing Family Assignments
There are some situations in which Family Assignments need to be changed. Examples include a new marriage, adoption, or divorce. Learn more about Changing Family Assignments ›
Archiving Names
Over time, you may need to clean up your database by removing profiles for people who are no longer active in your church. While you can delete names entirely, we recommend archiving instead. Archiving is ideal for keeping your records organized while still retaining important information for inactive members, deceased individuals, people who have moved away, or even one-time donors.
When you archive a person, their profile is removed from the main People screen but their information remains available for reports and contribution statements. Learn more about Archiving Names ›
Deleting Names
To permanently delete a member, open their profile, select the "Edit" button, and choose "Delete [Member's Name]."

Searching Names
You can search for a name, email address, or phone number in the Search box. Only the names that meet the criteria you've entered will be shown in the list.

Messaging
The Messaging tab is where you can send messages to your church. You can send emails, text messages, and even voice messages. You can also save form letters and export the emails you have on file in the People screen to a Mailchimp account. Learn more about Messaging Your Church ›

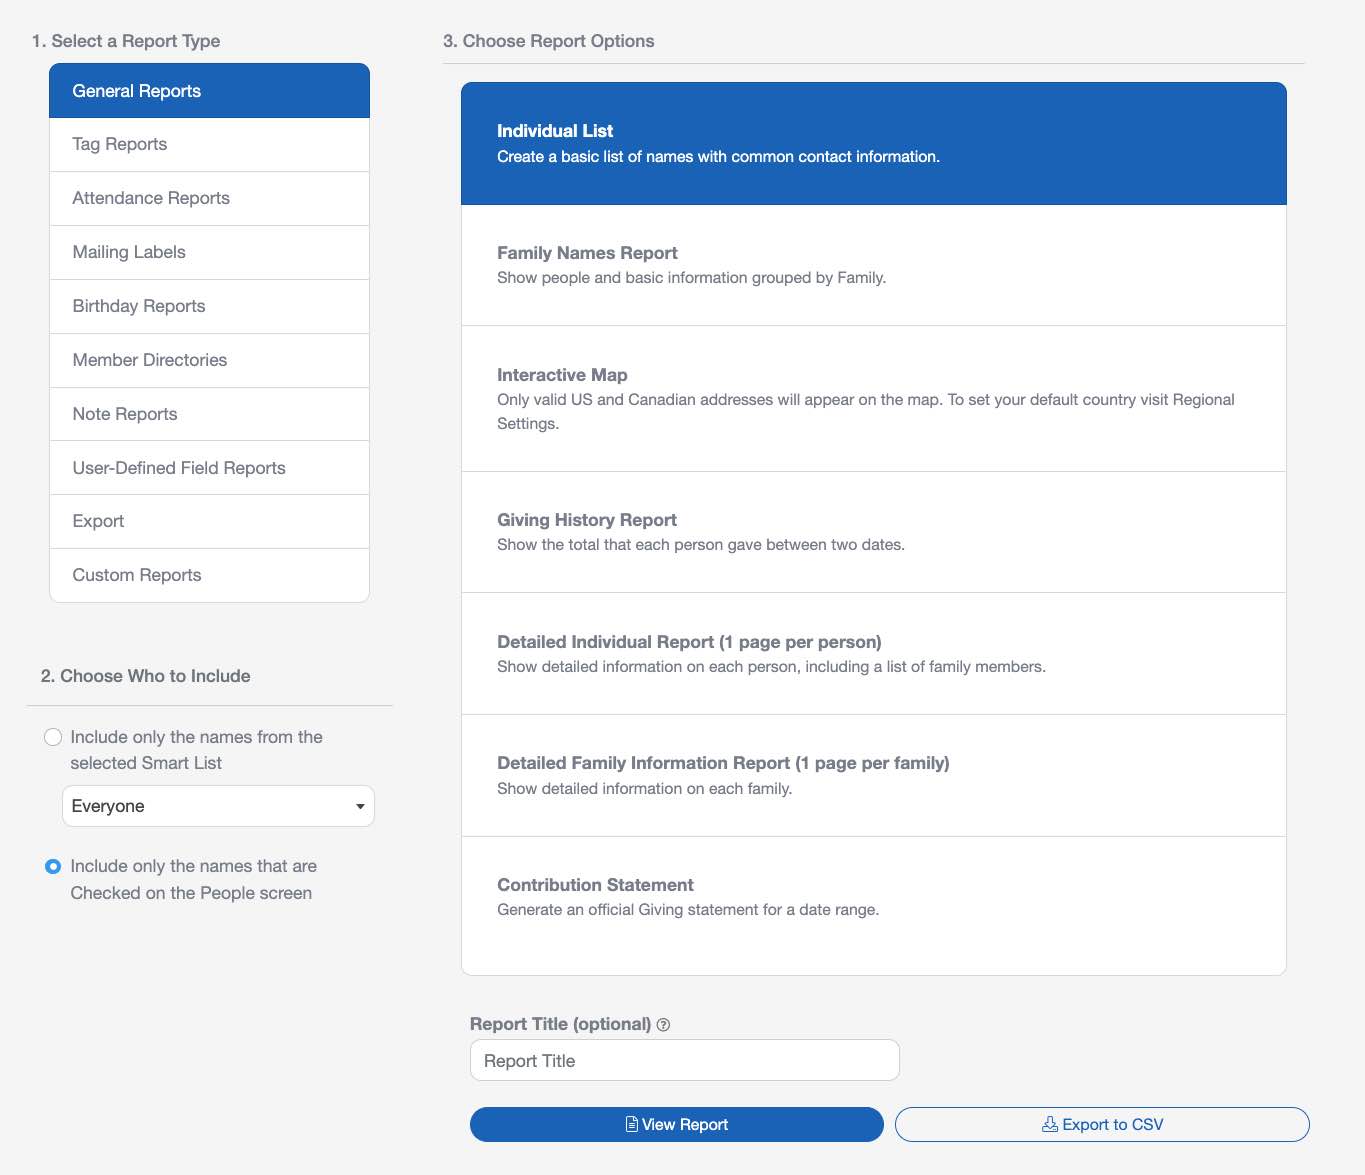
Reports
There are several reports pre-built into your ChurchTrac account. Click "Reports" on the People Screen toolbar to view the report options. Your People Screen reports will automatically include the names from the selected Smart List, or alternatively, the names that are checked on the People Screen. Learn more about People Reports ›
"Setup" Tab
In the "Setup" tab, you’ll find a dropdown menu with several options to help you manage and organize your church database. This is where you can access your Groups, Smart Lists, Custom Reports, User-Defined Fields, and Note Types.

Groups
Groups are collections of people organized around a common purpose. They can be actual groups, like classes or ministry teams, or they can function as virtual lists of people, like tags. Groups are also used for taking attendance, doing check-in, and scheduling teams. You should set up the groups that you use in your church, then begin assigning names to your groups. Learn more about Groups ›

Smart Lists
When you want to view a set of names that meet certain criteria or set of criteria, you will want to use a Smart List. You can create multiple Smarts Lists and reuse these lists over and over to quickly display names that match your predefined criteria. Learn more about Smart Lists ›
Custom Reports
The "Custom Reports" section allows you to create your own custom reports using the data stored in the People screen. You can design reports that include specific fields, filters, and sorting options to display only the information that matters most to your ministry. These reports can be printed, exported, or saved for future use. Learn more about Custom Reports ›

User-Defined Fields
The User Defined Fields tab is where you can create and edit custom fields to use in your People screen. You can create an unlimited number of these custom fields. You can add a user-defined field for individuals or for an entire family. Learn more about User-Defied Fields ›
Note Types
The "Note Types" section lets you customize the categories of notes that can be added to member profiles. This helps your team stay organized when logging pastoral visits, counseling sessions, volunteer follow-ups, or other types of interactions. Learn more about Note Types ›

Pro Tips
Bulk edit is your best friend. This feature lets you update fields and add group tags for multiple people at once. This option is found in the "Actions" button. Learn more about Bulk Edit ›
If you add User-Defined Fields before we import your people data into your account, those fields can be filled out during the import process.
To remove sample names from your database, navigate to Settings > Admin Settings > Your Church Info, then select the "Remove Sample Names" button.